Before the shrouds could go on, I first needed to bolt on the rear engine mount. With that in place, I could turn my attention to putting together the puzzle that is a Corvair’s engine shroud. When disassembling the 95 HP and Ringo’s previous engine, I’d carefully bagged all the fasteners that held on the sheetmetal pieces. Even so, last night I had to dig in my can of bolts to find two that would work for ones missing. My only mistake was to install the exhaust manifolds before the two front shrouds (the ones that have the hot air connections to the heater box. Fortunately, spinning off the six nuts wasn’t too much of a step backwards. I did, however, discover that the center rear shroud seems to be a LM specific part – two holes do not line up. I looked through my collection of stuff and came up empty. There’s got to be one somewhere, so I’ll search harder next time I’m out there.
With the shrouds in place, I then installed the alternator. All EMs came with a generator, rather than a lighter, more modern alternator. I’ve always wanted to do the generator to alternator swap on Lucy, but never got around to it. Ringo’s generator was working just fine on the previous installation, and I wouldn’t have chosen to do the swap now, but it just so happened the rear engine housing I cleaned up and installed was from the LM engine rather than Ringo’s EM setup. Fortunately, I’ve got the now-required LM wire harness and voltage regulator, so when the powertrain goes in, I’ll use Victoria’s car as my template for the revised wiring. I can always swap the adapter with one from an EM if I can’t get things to operate correctly. Lots of people have done the swap without issue, so I should be just fine.
Next to be bolted on was the idler pulley followed by the vacuum balance tube with new hoses on each end. After confirming with Ariel that she wanted to stay with the dual, pink EM air cleaner setup, I modified one of the brackets for the larger LM-only mounting bolts.
At that point, I went to attach the final piece of the shroud system – the fitting for the right front hot air shroud. Seeing it needed some gasket sealer, I decided that was reason enough to call it a night. It was, after all, past my bedtime.
Sorry about the lack of photos. I’d shut down the garage PC before remembering to upload any off the camera.

Thursday, July 28, 2011
Wednesday, July 27, 2011
Back From Vacation
After being out of town on vacation camping and breaking things on our pop-up trailer, I’ve had to use some precious car-time making the camper whole again. With those issues behind me, I was able to spend last evening automotively engrossed.
First, I answered Lucy’s call for attention by troubleshooting a turn signal/brake light issue. The problem was a cracked blinker switch housing which caused the sliding contact to hang up. Thankfully, just wrapping the housing with electrical tape brought everything back into alignment. While looking at this issue, I discovered the left front blinker bulb wasn’t blinking. A new bulb and all was legal again.
Next, I had to clean up the garage. With the frantic preparation for vacation, I had not done a good job putting tools back where they belonged.
Finally, I was able to get back to assembling Ringo’s new engine. I got the exhaust manifolds bolted in place, the oil pump greased, assembled, and a new cover with a single gasket installed. I then rolled the engine over on the stand and tried to turn the pump shaft. It wouldn’t budge. Now I knew why the Corvair Ranch included a second gasket in the kit. With that gasket stacked on the initial one, the shaft turned with a minimum of drag – just what I’d expect. Next on was the oil pressure switch followed by the blower and pulley. The latter of which caused me my next problem. EMs used smaller diameter bolts to hold the blower and pulley to their mounting flange than the LMs. I could not find a LM pulley in my collection of parts. Since I’d torn down at least one LM engine, I was quite frustrated with the turn of events. My solution was to drill out the holes in an EM pulley, but first I took one out to Victoria’s car to make sure there were no other differences between the two – specifically the height. From what I could tell, they are the same, so I opened up the four holes to 5/16ths and complete that portion of the assembly. The oil cooler was next up. I cleaned it in my solvent tank and then ensured all the air passages were open by sticking a zip-tie through all of them. After rinsing it out with water and blowing out the oil passages with air, I set it outside to let today’s sunshine evaporate any dampness left inside. The rest of the time in the garage was spent test fitting the sheetmetal shrouds that surround the engine. Ariel has cleaned and painted the pieces and it took a few minutes to figure out where everything went, but it’s all sitting in place just waiting for the oil cooler to be installed first.
The clean aluminum against the newly painted black sheetmetal looks really nice. I’ll shoot a few pictures this evening and try to get them posted.
Monday, July 18, 2011
A Busy Past Few Days
Last Thursday I finally got around to tackling Glinda’s dashboard problem. The issue was turning on the headlights caused the gas gage to immediately go below Empty and both blinkers to go on. While getting around to dealing with the issue, I happened to read a posting on the CorvairCenter Forum describing this exact scenario. The solution prescribed was to put in a new ground wire connecting the metal dash housing to ground, so that’s what I did, and everything functions properly again. Working under the dash of any car is a contortionistic chore, but by lying on my back on the seat, legs in the air, and my head resting on the gas pedal, I was able to complete the task.
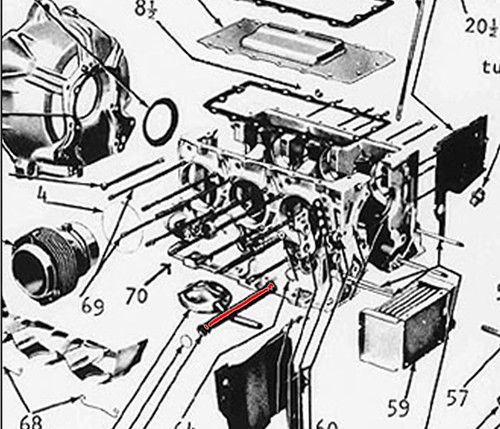
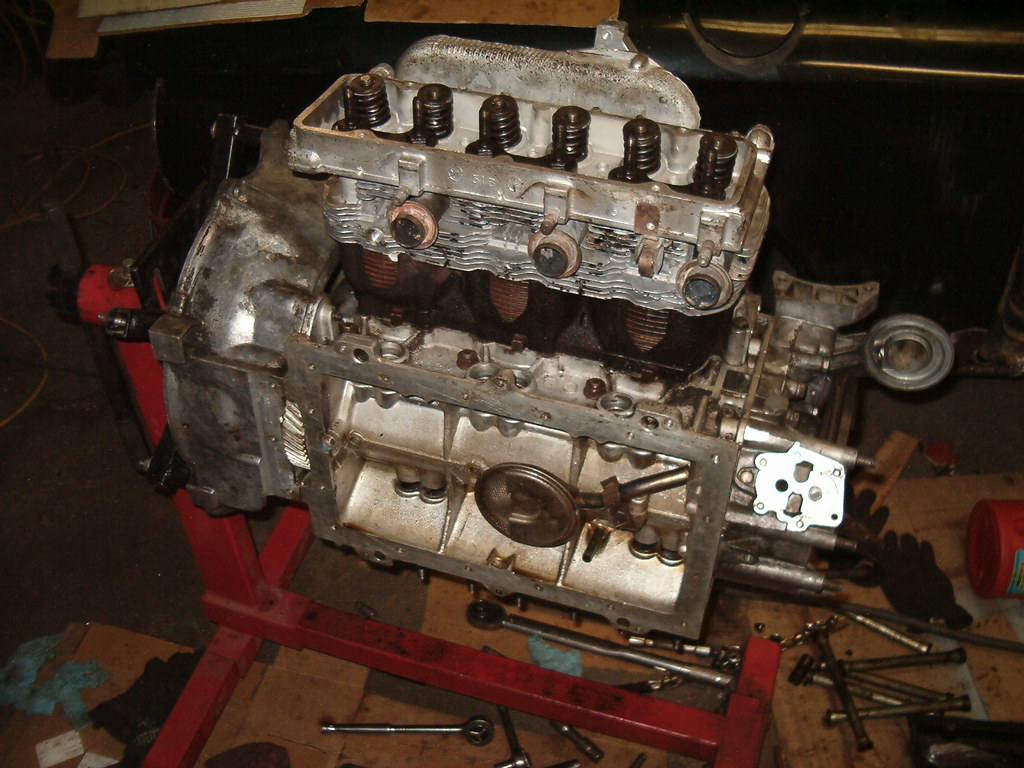
With that fun-and-games over, I moved back into the garage to bolt more bits to Ringo’s engine. I finished reassembling the second head and mounted it to the engine. It was at this point, I realized I’d jumped past an important step – I’d bolted the pushrod guides in place on the first head denying me the access needed to install the pushrod oil drain tubes (one of six parts per side highlighted in red below). Fortunately, I hadn’t torqued down the bolts on the second head, so I proceeded on that side. When the last nut was torqued, I spun the engine on the stand and, a pair at a time, removed the rocker arm studs and guides, installed the tubes, and reinstalled the guides and studs. Noone likes to do things twice, me included.
I didn’t get back out to the garage until Saturday afternoon, but I made good of those three plus hours. I bolted on the oil pan with the new gasket light coated on both sides with sealer. I followed the torquing instruction of the manual, but I’m not happy with the final results. The gasket looks quite squeezed with just the 85 in-lbs of torque. Oh well, fingers will be crossed when I pour in the oil. Next, I reassembled the lifters soaking each in 30 weight. Then, working one at a time, I squirted assembly lube on a cam lobe, slid in the still-oily lifter, dropped in a clean pushrod with each end having been dipped in assembly lube, captured the assembly with a clean and greased rocker arm and pivot ball held in place by the locking nut. After finishing the six on left side, I rotated the engine until I was sure it was at Top Dead Center with both #2 lifters off their cams (i.e. top of the compression stroke). That’s the position required to tighten some of the lock nuts to set the proper preload on the lifters. The procedure is to turn the nut until all the play is out of the push rod, then give the nut another three-quarters of a turn. Note there are differing opinions/instructions on how much more to turn the nut, but three-quarters is somewhere in the middle of all the recommendations. Next, on went the rocker cover with a new gasket. Then, I spun the engine on the stand and went through the same steps on the right side.
Seemed like a good place to stop, so I did. Only a few more items need to be bolted on before we’ll take the engine off the stand, set it on the ATV jack, and attach all the sheetmetal and the transaxle before lifting into the car. I’m getting close!
Wednesday, July 13, 2011
A Quick Update With Photos
The last couple evenings I’ve been able to work on the fleet. In addition to a brake job on the lovely Loriann’s daily-driver, both Lucy and Ringo got some of my attention.
Lucy got her overdue oil and filter change along with a good lube to her front suspension. I’ve been hearing a clank from her right front when I’ve driven her over potholes. With the front on jackstands, I wiggled her right front wheel and did feel some play in the steering but couldn’t tell where it was moving. Fortunately, the ball joints seem to be slop-free since vertical wiggling didn’t elicited no movement.
Ringo’s engine work continued with the second head being put back together, but not without first lapping the valves to their seats. Throughout the assembly of the valves, springs, and retainers I use copious amounts of assembly grease to ensure no undue wear at initial startup. One aside is I had to go hunting for the washers that protect the circular pockets in the heads where the springs sit. The hardened steel prevents the spring ends from digging into the soft aluminum. When the Corvair Ranch cleaned these heads, the original ones probably fell out and were lost. No biggie, since I had a couple heads already disassembled and ready to contribute the washers. Glad I remembered they were supposed to be there.
Following are some of the latest photos.

Monday, July 11, 2011
A Hard-Workin’ Weekend
House work and other vehicle issues prevented me from getting into the garage until yesterday afternoon, but I did make good use of the time afforded me. I got all the cylinders/pistons assembled to the block/crankshaft and one of the heads rebuilt and installed with nuts torqued. The head rebuild included lapping the valves to the seats, grinding the combustion chamber to remove the extra bump, and clearing the fin gaps of aluminum casting flash.
More vehicle issues to address caused me to know off before I got the other head. Hopefully tonight’s time in the garage will result in that getting done and some pictures taken. First, though, Lucy desperately needs an oil and filter change and a lube job.
More vehicle issues to address caused me to know off before I got the other head. Hopefully tonight’s time in the garage will result in that getting done and some pictures taken. First, though, Lucy desperately needs an oil and filter change and a lube job.
Thursday, July 7, 2011
Engine Assembly Continues
Well, it was one of those two steps forward, one step back things. Actually, it was more than two steps, so I’ll call the evening a success. I got the rod bearing clearances confirmed – good-to-go. I checked the gaps on the piston rings – within spec - and filed the edges down at the gap for the compression rings. I installed all the rings in the piston grooves. I cleaned the oil cooler adapter and assembled it to the block with a new gasket. Using my ring compressor, I slid the number two piston into the oiled bore of its mating cylinder. Now comes my one step back. After oiling the rod bearing surfaces, I installed the piston/cylinder set into the engine and torqued the cap bolts to spec. As I stepped back to admire my progress, I said a bad word when it hit me I’d forgot to put the cylinder gasket in place. With that revelation, it was time to knock for dinner. Errands afterward kept me from spending any more time in the garage that evening.
While all this has been going on, Ariel has been cleaning shrouds in the driveway – a hot, nasty job, but it is her car.
While all this has been going on, Ariel has been cleaning shrouds in the driveway – a hot, nasty job, but it is her car.
Wednesday, July 6, 2011
More Ringo Progress
First of all, here are some photos I finally got around to downloading off the camera.
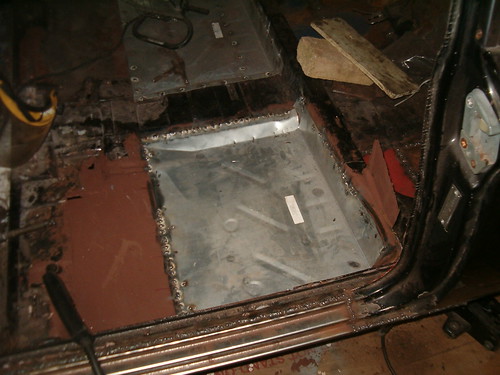
Last panel of the floor installed.
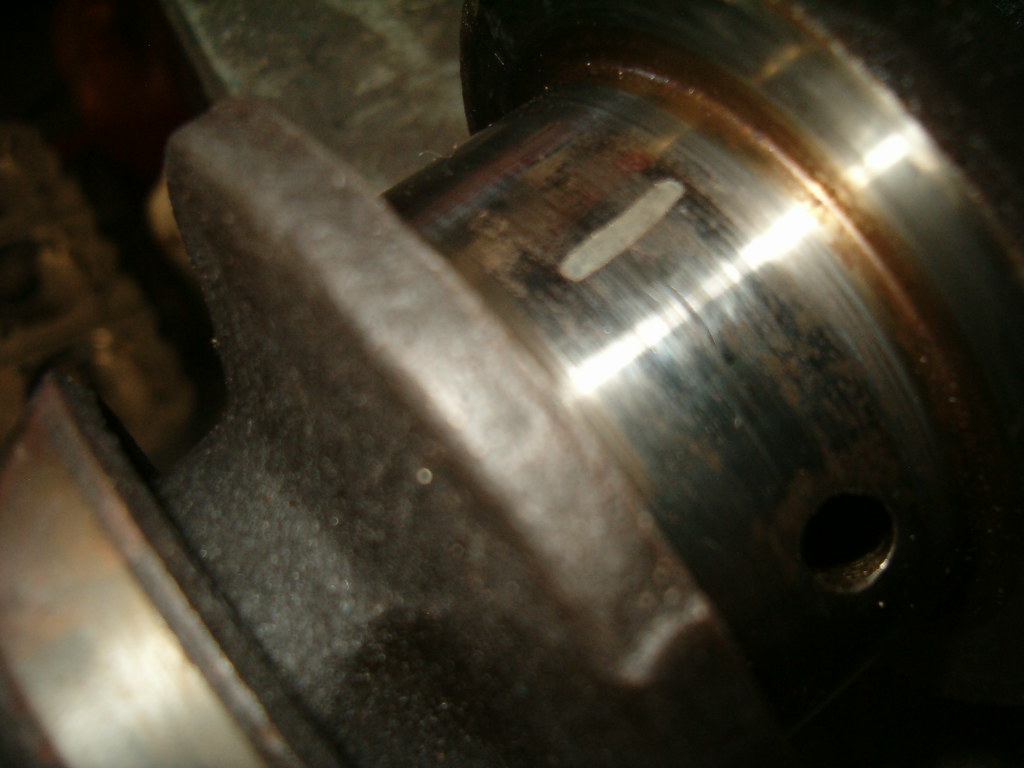
Plastigaged crank journal.

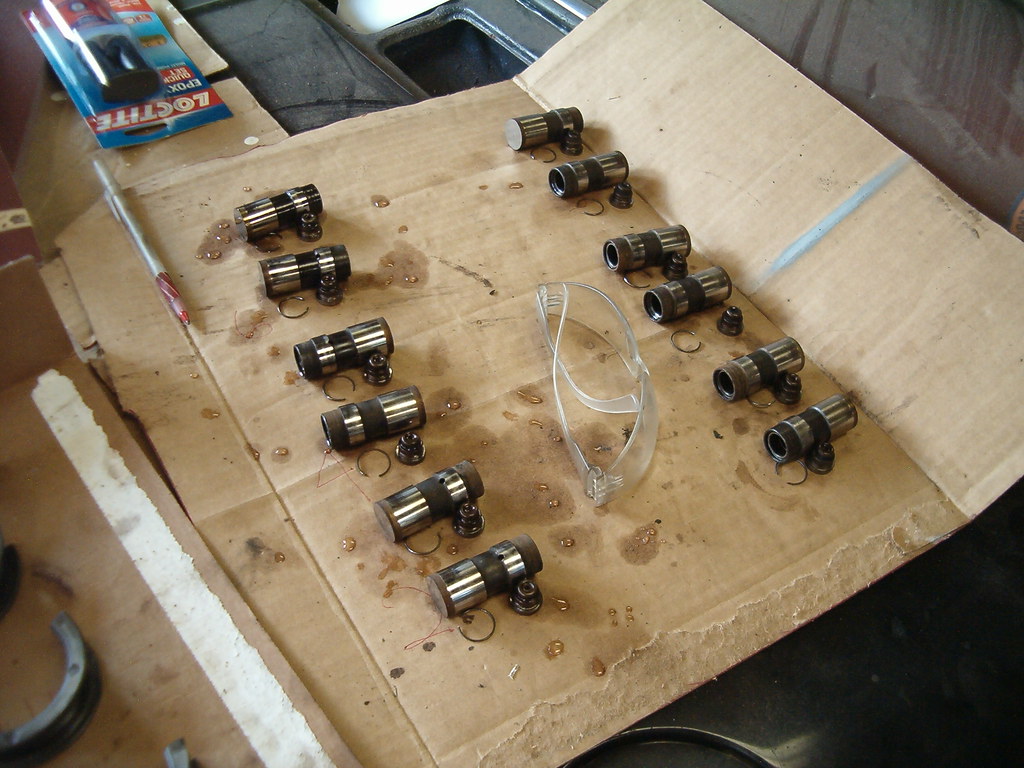
Lifter pieces all cleaned up.

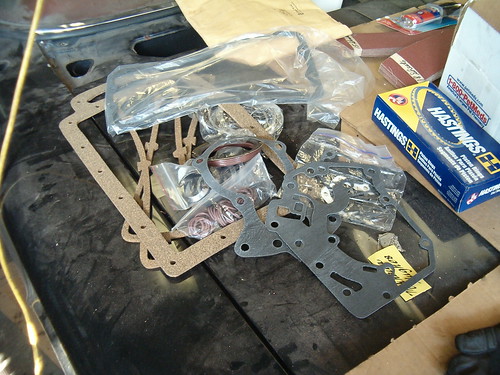
Gaskets, seals, and rings ready for installation.
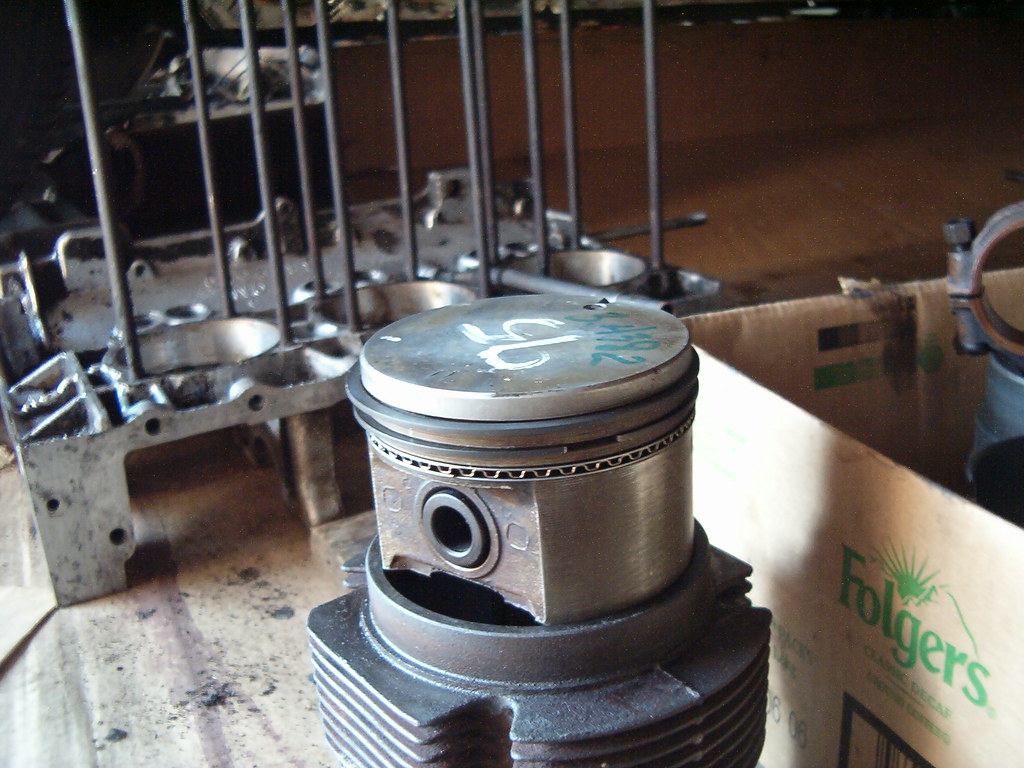
First piston with rings in place.

As soon as I got home from work yesterday, I changed into grungies and headed out to the driveway. The first task of the evening was cleaning the bellhousing I’d pulled off the shelf so it would be ready to install after I’d bolted the engine halves together. After much scraping, Purple Power spraying, brushing, and rinsing, it was clean enough for me.
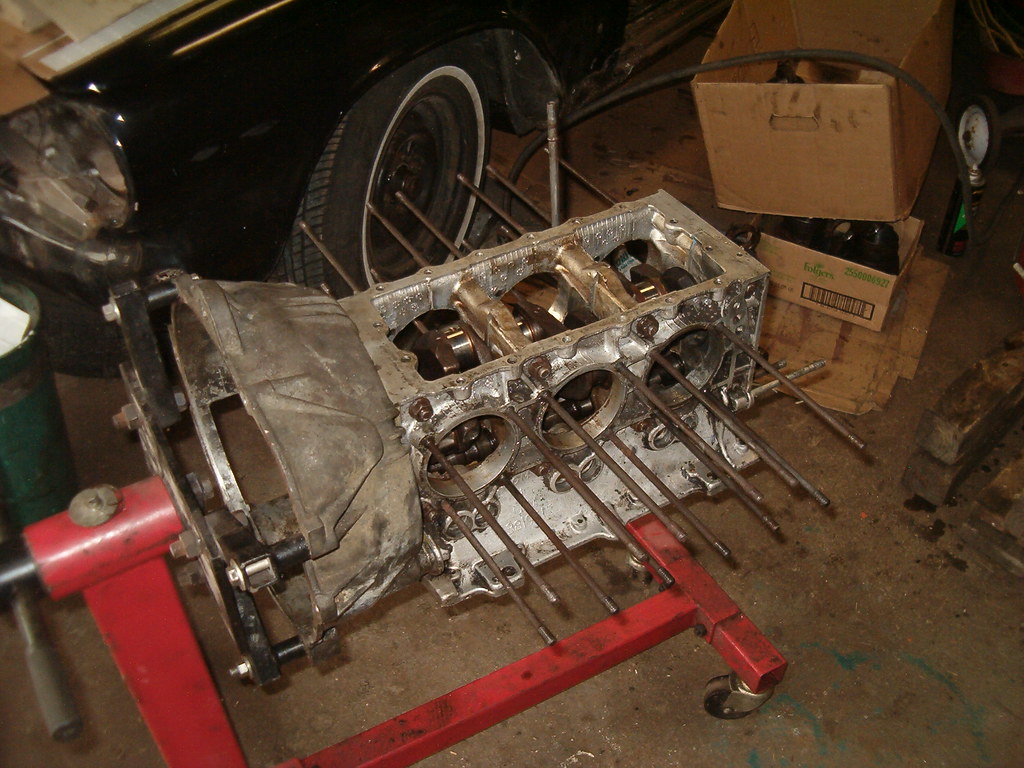
Inside the garage I installed the bearings into the block halves, oiled all the journals, and set up the right half so parting line face up. Next, I carefully set the crankshaft into place rotating the shaft so its key was at 12 o’clock following the manual’s directions on orientation. The cam went in next so its keyway pointed to 9 o’clock. With dabs of RTV on the outer corners of the joint, I set right half in place and lightly bolted it all together with the eight bolts and nuts. To facilitate torquing the nuts to their nominal fifty-five foot-pounds, I moved the assembly to sit in proper orientation atop some four-by-fours. Once I’d tightened everything following the manual’s prescribed pattern, I bolted on the bellhousing with its lightly greased new gasket and crank seal and tightened the attaching bolts to twenty-five foot-pounds. That allowed me to then attach the engine stand adapter to the face of the bellhousing. Ariel and I then lifted the assembly and slid the adapter’s tube end into the stand base. Next I greased the end of the oil pickup, slid it into the its hole, and retained it with its bolt properly torqued to spec.
The next piece to assemble is the rear housing, but first I need to reinstall the pieces that fit into it. At that point, it was getting late and time to quit for dinner.
Last panel of the floor installed.

Plastigaged crank journal.
Lifter pieces all cleaned up.
Gaskets, seals, and rings ready for installation.

First piston with rings in place.
As soon as I got home from work yesterday, I changed into grungies and headed out to the driveway. The first task of the evening was cleaning the bellhousing I’d pulled off the shelf so it would be ready to install after I’d bolted the engine halves together. After much scraping, Purple Power spraying, brushing, and rinsing, it was clean enough for me.
Inside the garage I installed the bearings into the block halves, oiled all the journals, and set up the right half so parting line face up. Next, I carefully set the crankshaft into place rotating the shaft so its key was at 12 o’clock following the manual’s directions on orientation. The cam went in next so its keyway pointed to 9 o’clock. With dabs of RTV on the outer corners of the joint, I set right half in place and lightly bolted it all together with the eight bolts and nuts. To facilitate torquing the nuts to their nominal fifty-five foot-pounds, I moved the assembly to sit in proper orientation atop some four-by-fours. Once I’d tightened everything following the manual’s prescribed pattern, I bolted on the bellhousing with its lightly greased new gasket and crank seal and tightened the attaching bolts to twenty-five foot-pounds. That allowed me to then attach the engine stand adapter to the face of the bellhousing. Ariel and I then lifted the assembly and slid the adapter’s tube end into the stand base. Next I greased the end of the oil pickup, slid it into the its hole, and retained it with its bolt properly torqued to spec.
The next piece to assemble is the rear housing, but first I need to reinstall the pieces that fit into it. At that point, it was getting late and time to quit for dinner.
Tuesday, July 5, 2011
A Long Weekend With Some Garage-Time
A long weekend usually means some quality garage time, and this three-day-er was true to form. Ringo’s engine was the focus of my efforts which really started the Thursday before when I made an appointment with a co-worker, Walter, to stop by his garage either Sunday or Monday to get his help and use his tools to hone Ringo’s cylinder walls. With Brianna and Nich in town until noon Monday, I decided to wait until after then to go over to Walter’s.
Saturday afternoon I made sure all the pertinent parts were as clean as possible for the honing work. I thoroughly brushed and cleaned all the fins on the cylinders and made sure each slid nicely into an engine block bore. I scoured the pistons and rods with Purple Power and rinsed them with water. Walter and I had discussed how we were to hold the cylinders in place while honing, and decided to use an engine block half. I figured out that, using long sockets dropped over the head studs, I could hold the cylinders in the bore, so I chased all the threads on the head studs and head nuts to ensure smooth assembly and disassembly. With the parts and pieces boxed up and ready to go to Walter’s, I finished scraping the vestiges of gasketing from the rear cover surfaces. With that tedious tasks complete, I called it a day.
Monday, after bidding farewell to Brianna and Nich, I loaded up the boxes and headed to Walter’s with a stop at a liquor store to purchase a case of Yuengling for Walter as a token of my appreciation. We jumped right into the task at hand with Walter measuring the diameter of each piston and cylinder so we knew how much we could take off the cylinder walls when honing. We matched the largest piston to the largest cylinder for all six and I clamped the first cylinder into the block half while Walter chucked his super-nice Sunnen honer into his monster half-inch drill. With a light coating of honing oil in place, he ran the honer up and down in the bore, adjusting the diameter of the honing stones with a practiced hand. When he felt like sufficient metal had been rubbed away, we wiped down the bore and measured the new diameter. We were shooting for roughly .003” clearance and it took a few more revolutions of the honer to get there with the first cylinder. The next five all went quite smoothly, and before I knew it, we were done, cleaned up, and swapping stories over cold beers.
Not wanting to keep him from his motorcycle building project any more than I already had, I said thank you again and headed home. Once there, I unloaded the parts and began assembly work. I first checked the rod to crank shaft bearing clearance and, once verified it was within spec, I installed the oil rings and spacer into the bottommost groove. Then I slid a lower compression ring (indicated by the small dot stamped onto it) into the cylinder bore and located it by using the piston to push it down until the middle ring groove of the piston was even with the top of the cylinder. With feeler gages, I checked gap between the ring’s ends before pulling it out and installing it in the middle groove of the piston. After doing the same procedure with the top compression ring, I set the set aside and moved onto the next one. I got two sets done before the dinner bell rang.
One other thing I squeezed into the afternoon’s events was to pull a GUP bellhousing off the shelf. The one that came with Ringo was considered a LM style and was difficult to get to. After confirming the cast-in part numbers matched, I set the bellhousing aside to be cleaned. My plan is to hold off assembling any more pistons until the crank and cam shafts are nestled in the bolted-together block halves and that whole assembly is mounted in the engine stand. The bellhousing is necessary since it’s what the engine stand arms bolt to. Hopefully, that’s tonight’s activity.
Subscribe to:
Posts (Atom)