Friday, May 29, 2015

What A Ride


It was just a few days ago I was on a high since I’d just learned about the Power Enrichment Needle and was convinced the lack thereof in Glinda’s carburetors was causing the super-rich running of the engine. Yesterday the mailman delivered an envelope from the Corvair Ranch containing two needles. As soon as I was home from work, I excitedly donned some grungies and raced out to the driveway. A few minutes later I was utterly deflated.

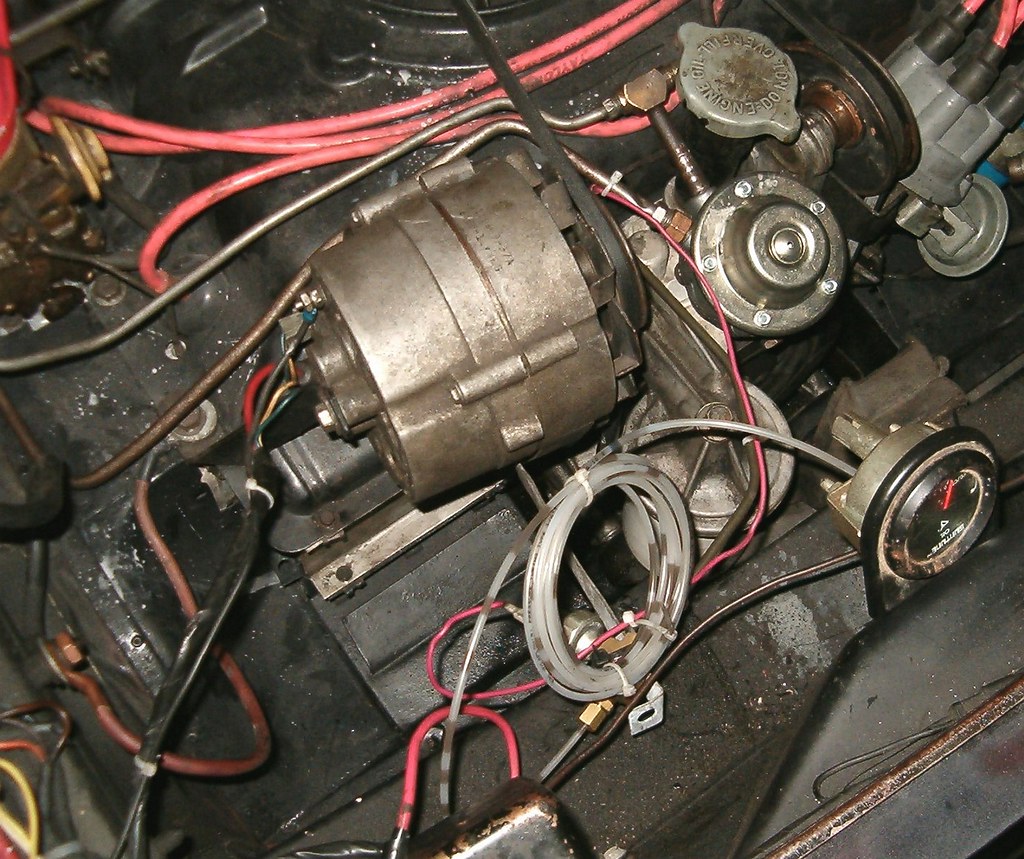
I’d removed the two screws and pulled off the venture cluster from the right carb only to discover the hole where I was to place an all-important needle was filled with JB Weld (see image above). A subsequent e-mail to carburetor guru informed me that: 1) filling that port is necessary to allow moving the jet, and 2) the needle only makes a difference at wide-open-throttle.

Oh well, it was fun while it lasted.

In digging around my stash of carb parts last weekend, I found a small envelope containing five carb jets. All are stamped with 51, so I’ll be swapping the 53s that are currently in Glinda for these smaller ones. I’ll also make sure the floats are set at the highest settings resulting in the lowest level of fuel in the bowls. A quick test drive and a subsequent inspection of a spark plug will tell me if I’m still running rich. If that doesn’t make any difference, the modified carbs will come off and Ringo’s pair will be installed, but I hope it doesn’t come to that.

I ended the evening by pulling out Glinda’s front bench seat and stock seatbelts and bolting in the racing seat and harness. Other than the carb issue, she’s ready to hit the track.

Tuesday, May 26, 2015

A Eureka Moment


Thanks to a Facebook contributor, it appears I now have the solution to Glinda’s poor running and horrible gas mileage.

A little background. Back when I sent the original '68 carburetors down to a carb guru to have the jets relocated for racing, he discovered that he could not modify them because of all the smog changes GM made. He, instead, traded me some '66 carb bases with the modifications. He sent them back to me without any of the interior parts since that was the way he’d received the ‘68s. I rebuilt the bases using the ’68 parts.

Sadly for me, there’s an important difference between the '65-’67 and the ’68s I’d disassembled. GM put a small needle valve in bottom of the carb base that I did not know about (not in earlier or later carbs). Without this valve, fuel runs too freely into the well that feeds the venture, thus the 14 MPG. Running way too rich had fouled the plugs with soot, explaining why, with the near-flooding, performance was so poor. A phone call to Jeff at the Corvair Ranch, and a couple GUP needles are on their way to me.

Prior to this discovery, I’d thought there had to be a leak in one of the fuel lines – probably the pressurized return line. That belief prompted me to put Glinda up in the air so I could remove the tunnel covers and inspect everything from the bottom-side. Everything was dry even with the engine running. While I was lying on the ground revving the engine, I could easily see the black smoke associated with an engine running rich. That’s what provoked me to take a video (click her to see, but turn down the volume), post it to Facebook, and seek the help of the Corvair community.

I also pulled the spark plugs and cleaned all the soot from them. Finally, I re-set the floats to ’66 carburetor spec values for level and drop. Once the needles are installed and the carbs are bolted back together, this engine should run like a top.

Another task I was able to get to yesterday were creating two extended J-bolts to retain the raised air cleaner. As shown below, I’ve been using zip-ties since adding the PVC spacers. Not anymore. The welder permanently joined two nuts so the stock J-bolt screws into one end and a 3 inch long piece of threaded rod goes into the other end. A nice benefit to this new setup is the J-bolt is now captured. I’ve lost at least one of the stock J-bolts after removing the air cleaner and placing it on the ground. Once loosened, the extended nut on one side and wing-nut on the other will keep the J-bolt permanently part of the air cleaner.

After cleaning the garage, I then took a few minutes to get out the buffer and see if anything could be done with Glinda’s oxidized paint. I tackled the passenger side of the hood figuring I had nothing to lose. After a few minutes of buffing, the pad had a green tint to it as it should. I then got out the Turtle Wax and applied it per the directions. The one side of the hood looks nicer, but there’s no way I’d say it’s shiny.

Monday, May 11, 2015

The Jury’s Out

Only had a couple hours during this last, very busy weekend to work on cars. Saturday morning I got Mikhaila out to the garage for some Scarlett-time before she had to go to work. We wanted to verify that Scarlett’s distributor and coil would play together and make sparks. First, we borrowed Ringo’s battery, hooked it up, and spun the engine to get the timing mark lined up with the 8 degree BTDC mark. We then checked to see if the distributor’s rotor was pointing to the #1 plug post. It wasn’t so we pulled the distributor out, twisted its shaft a few degrees, and then twisted the oil pump shaft the same amount, and poked the distributor back in place. After installing the new spark plug cables, Mikhaila hooked up the timing light. With the key on, I spun the distributor while she held the light’s trigger closed and watched for a light – nothing. At that point she had to leave, but I wasn’t ready to quit. I got out the feeler gauges and set the point gap to .016 inch. I twisted the distributor with the cap off and could see sparks each the points opened. When I was happy with the location of the distributor, I tightened the hold-clamp nut and turned off the key.

With a little time left before having to get ready for date night with the lovely Loriann, I grabbed tools and headed to the curb where Glinda was waiting to have the floats in her carbs adjusted. The last fill up showed she was only getting a little over 14 mpg, and that would not do for a daily-driver that demands high-octane. I pulled the cover off each cover and re-set each float to be parallel at needle closed position (about 1 1/4” measures) and 1 3/4” at full drop. With everything back together I took her for a spin around the neighborhood – still a nice throttle response. Hopefully, this will get her mileage back into the high-teens. I drove the truck this morning, but plan on putting the miles on Glinda during the rest of the week.

Friday, May 8, 2015

Glinda Update

I’ve been driving Glinda nearly every day this week. The clutch clunking is an on again off again thing. Some mornings it’s there with the first press of the pedal. Other times it only appears once the engine’s hot. It only seems to be there upon pulling away. I can’t feel it on the 1-2, 2-3, etc. shifts. Odd. Like I told the lovely Loriann, “I’m driving it until something breaks.” I had a friend recommend I buy a cheap boroscope from my favorite toy store (Harbor Freight) and watch the throwout bearing/pressure plate. I may do that if it gets worse.

While I can live with clutch clunking, I can’t afford to live with 12 miles to the gallon. That’s what I estimate she’s currently getting. I’m not driving pedal to the metal either. Just a few blasts through the gears to makes sure the stumbling is still gone, but, other than that, it’s relatively sedate driving. By the end of this weekend I will have increased each carb’s float height at least an 1/8th of an inch from where it’s at. This to make the carbs run leaner. I wanted to also replace the #53 jets with #50s, but a smarter person (the lovely Loriann) recommended I just do one change at a time and do the easier one first.

Other than that, the car seems to be behaving.

Monday, May 4, 2015

These are the Times that Try My Soul

Going backwards is not fun, but that’s what’s been happening. When last I blogged, Glinda was nearing roadworthiness, and by the end of Friday night I’d hooked up the rest of the underside linkages and hoses, and drove her down off the ramps. After a spin around the neighborhood, I was confident I’d fixed the two major issues of clunking/catching clutch and stumbling engine. I even went ahead and put the electronic ignition stuff back in before calling it a night.

Saturday morning Mikhaila and I spent a frustrating couple of hours testing, removing, rebuilding, and reinstalling Scarlett’s blinker switch assembly. While we were successful in our endeavor, it was a shame we spent all her garage time on one small task. Next on the list is bolting on the exhaust and starting up the engine. Maybe we’ll make that momentous milestone some evening this week rather than wait until the weekend.

After she went in the house, I crossed another item off the to-do list when I undid the oil gauge line at the back of the gauge, pushed the tiny ferrule back up the nylon tubing, cut off a half-inch from the end, and reattached the fitting to the gauge. After firing up and revving the engine, I was satisfied that I had a drip-less connection, so I cleaned the oil spot from front carpet. I then removed the non-functioning backup lights (the switch on the transmission was never hooked up), and replaced them with factory blank plates. These were only offered on ’65 Model 500s, but I somehow ended up with them.


One sad thing happened when I went to turn the car on that afternoon – the spring in the ignition switch broke. I now need to manually turn the key from the Start to the On position once the engine is running. Not a big deal, but it’s just one more thing that needs to be dealt with. Irr #1.

Sunday morning I had a very enjoyable windows-down drive to and from church, winding out Glinda’s 110 at each shift and loving the sound and performance. I could hear a slight exhaust leak, so, after changing into grungies, I backed her up onto the ramps again. With the engine still running, I slid under the engine and began tightening nuts on the exhaust pipe flanges. Just about the time I got rid of the leaks, the engine’s rpm increased and then, almost immediately, stopped. I got out and cranked the engine only to now discover the fuel pump wasn’t getting gas to the carbs. Irrr #2. I pushed the car off the ramps and primed the carbs directly with gas out of a can – no luck, still no gas being moved by the pump. A quick R&R with a GUP off the shelf and the engine was running again.

Irr #3 (and it’s a big one) occurred yesterday evening when I was driving the car home from a church event. The clunk/catch came back. When I got home, I told the lovely Loriann that I’m through. The level of frustration I felt after all those hours on working the drivetrain ended up being for naught was too much. I am NOT going through it again. I’ve decided I will drive the car as-is and if something breaks, at least I’ll then know what was causing the problem. If nothing breaks, I’ll learn to live with the clunk/catch. Oh yeah, here's a photo of the relocated oil pressure gauge setup.

Friday, May 1, 2015

Ticking Off The Little Things

Last night, as the rain stopped, I headed out to the driveway with plans to do some carburetor cleaning, but it turned into so much more.


After removing the air cleaner, I started with the right-side carb. The first issue I discovered was a missing clip on one of the linkages. Not sure how that happened – I suppose I could’ve left it off. I searched the surrounding area for the part, but came up empty. With all the linkages undone and fuel and vacuum lines removed, I undid the remaining screws and pulled off the carb top. Once the two screws holding the cluster in place were twisted out, I popped off the cluster and blew out all the passages with shop air. Just as I was about to return the cluster to its home, I noticed the shiny gray of the little main well insert (circled in red in the above drawing) was not visible through the hole in the gasket. I carefully pried back the gasket and, sure enough, no main well insert. Out of all the carburetors I’ve rebuilt I shouldn’t be forgetting parts. Wondering if I’d missed this part on the left carb, I immediately turned my attention to the left carb. With the cluster off, I found that at least I was consistent in my screw-up – no emulsion tube. Fortunately, my container of carb parts yielded two of the needed parts, so both clusters were reinstalled with all their parts intact this time.

Since one of the possible causes of high-rpm stumbling is a lack of fuel, I checked the float levels, both dropped and seated. Neither were to spec (1-1/16 seated and 1-15/16 dropped per the rebuild kit instructions), so I did a little bending of tangs until I achieved the desired measurements for both tops. I also noticed that one of the accelerator pumps was installed backwards (entering the inboard side of the actuator plate). While I’m not sure it really matters, I made it match the manual.


A few long minutes later the carburetors were all back together and the linkages and lines hooked up.


With time still left before bedtime, I moved on tackling another niggling issue – the placement of the oil pressure sender. When I’d made this modification a while back using the setup I’d created to check Ringo’s oil pressure (see above photo), I didn’t think it all the way through (shocking). The first time Glinda’s engine had a fan belt failure I was discovered it was necessary to undo the oil line from the T to slip the new belt into position - what a hassle. Since I’d already removed the whole thing from the engine prior to dropping the drivetrain, I straightened the brake line and put a new ninety degree turn in higher up. I screwed it back into the port on top of the oil filter housing (the place where GM had the original sender located) and put a few more bends in to route the line under the fanbelt and in front of the alternator (I know a picture’s worth a thousand words, so I’ll take one this weekend and post it). A few zip-ties later, and that project was complete.

Since I was on a roll, I continued working and re-mated all the electrical connections I’d disconnected prior to dropping the drivetrain. That included the wires to the alternator and the one going to the coil.

At that point it was nearing my bedtime, so I put away the tools, locked up the garage, and headed into the house.

With the upcoming NECC track day at New York’s Safety Track coming up in early June, I’ve added some items to the To-Do List that need to be completed before the car’s track-worthy. Take a look and wish me luck.