Friday, May 13, 2011

Cars We’ve Owned


This chart has most of the vehicles the lovely Loriann and I have possessed since I graduated college. The key below will help decipher the vehicle names.

CarYearType
GLC(1)19792-dr Hatchback
626(1)19844-dr Sedan
Skylark19652-dr Sedan
Lemans1965Convertible
Corvair(1)19622-dr Coupe
GLC(2)19792-door Hatchback
Grand Prix19772-door Coupe
626(2)19832-door Sedan
Celebrity1986Station Wagon
Catalina (1)1966Convertible
Catalina (2)19664-dr Hardtop
MPV1995Minivan
Suburban1994SUV
Corvair (2)19634-dr Sedan
Corvair (3)1964Convertible
MX-619962-dr Coupe
Corvair (4)19622-dr Coupe
Corvair (5)19612-dr Coupe
Corvair (6)19632-dr Coupe
PT Cruiser20024-dr Hatchback
Corvair (7)19662-dr Hardtop
Corvair (8)19682-dr Hardtop
Corvair (9)19652-dr Hardtop

The Fleet is Diminished Plus Some Good Stories


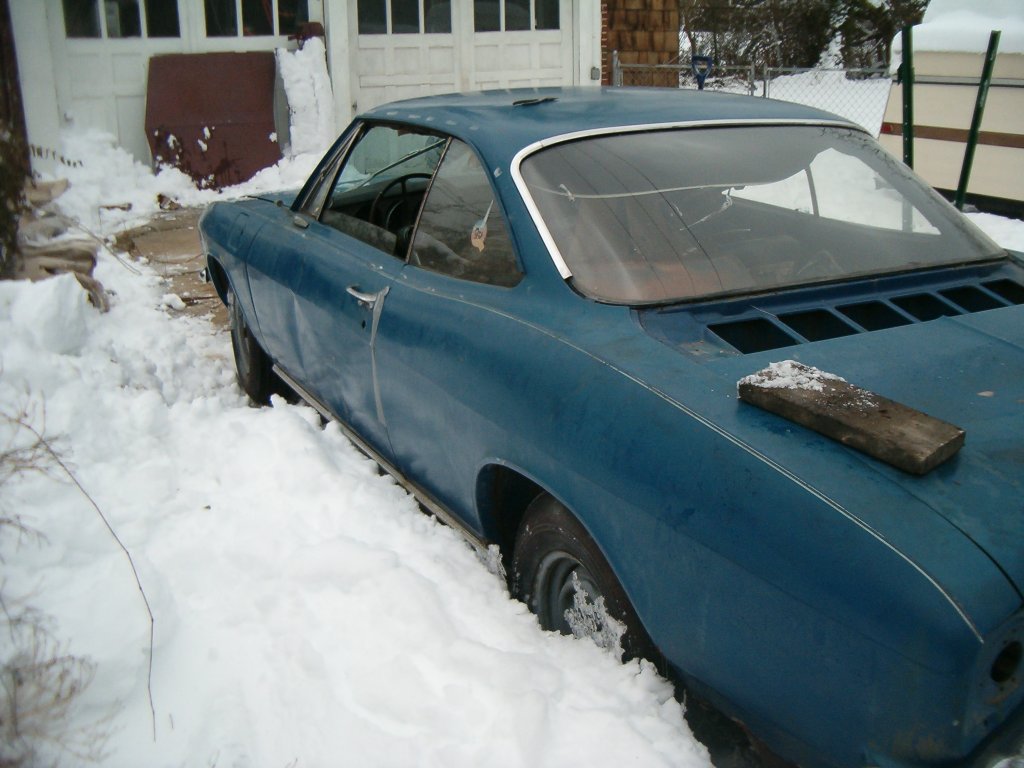
Yesterday, I made the decision to try and sell Betty. I put an ad in the local Craigslist - $250 for the car minus engine; another $50 for the hard parts to build an engine. I got a wide array of responses. I was surprised there was only one from an obvious thief whose red-flag phrases included, “I am quite comfortable with the condition of the item ... for you to hold it for me… I will be paying you by check ... I can have my assistant get the Money Order ready... I would like you to take the posting off from Craigslist today.”

Then, later yesterday evening, I got a phone call from a guy who stated he was just interested in the seats, but would buy the entire car for the asking price. I spent the rest of last night pulling out some boxes of stuff I had stored in Betty

This morning at 8 AM Lou backed his roll-up down the driveway. As he checked out the Betty’s seats he shared with me that he restores muscle cars, and currently has four VERY nice specimens under construction. After I showed him my ’65 LeMans, he told me he’s got a yard of about 60 vehicles including a ’65 LeMans convertible parts car with good, solid seat frames. So I may be giving him his money back when I finally get to restoring my Pontiac. With the conversing complete, he unrolled a couple hundreds and a fifty from a wad of bills, handed them to me, winched Betty up onto the platform, and drove away. That was way too easy.

With Betty gone, so goes my unreasonable dream of building a LM street/track car. Well, at least not any time in the foreseeable future. As I told Lou this morning, while we were admiring my LeMans, “after I finish with the ’61 in the garage, I’m gonna’ get this convertible on the road. “That’s the right choice,” he replied.

Since I was running later than usual, I entered the parking lot amongst a whole different group of employees. One of these drivers had not seen Betty before and had to follow me to my spot. As I got out of my car, he pulled up behind me and got out of his. “Great,” I thought, “this guy’s going to complain about my driving.” I didn’t remember cutting him off though, and when I saw the big smile on his face, I was relieved. He introduced himself and told me he grew up riding in the backseat of a car EXACTLY like mine. His mom had bought the car new in ’63 and drove it through his formidable years selling it in the mid-70s. He’d grown up in the Midwest and the salt stayed true to form rusting out the floors. Mark and his brother would tie plastic Army-men to the ends of strings, drop them through holes in the floors, and drag the tiny figures behind the car. They’d laugh as they watched them green men bounce wildly on the pavement. He went on to ask me if he could climb into the backseat, and of course I said yes. His first statement after squeezing in was, “I remember it being a lot larger.” At ten years-old, I would guess so. As we parted ways, he thanked me profusely for making his week.

I sent him an e-mail later in the morning telling him what a pleasure it was for me to hear his Corvair stories. He replied with one more.

“During the winter mornings near Lake Michigan, before she left for work, my mom would send one of us to out to start the car. Knowing what I know now (post auto mechanics school), I have an appreciation for "warming up the engine". I also have an appreciation for mom's strategy: think air-cooled engines' heaters, and/or the art of thawing frozen door locks . LOL!”

Wednesday, May 11, 2011

Another Roll Bites The Dust

Last evening I was welding the forward passenger-side floor patch into place when I ran out of welding wire. This, and the fact I’m running out of scrap metal to use as patches, has caused a work stoppage. Another trip to Harbor Freight and some snooping at bodyshops should get me going again.

Monday, May 9, 2011

The First Floor Patch


I neglected to post regarding the initial floor patch. Here it is:

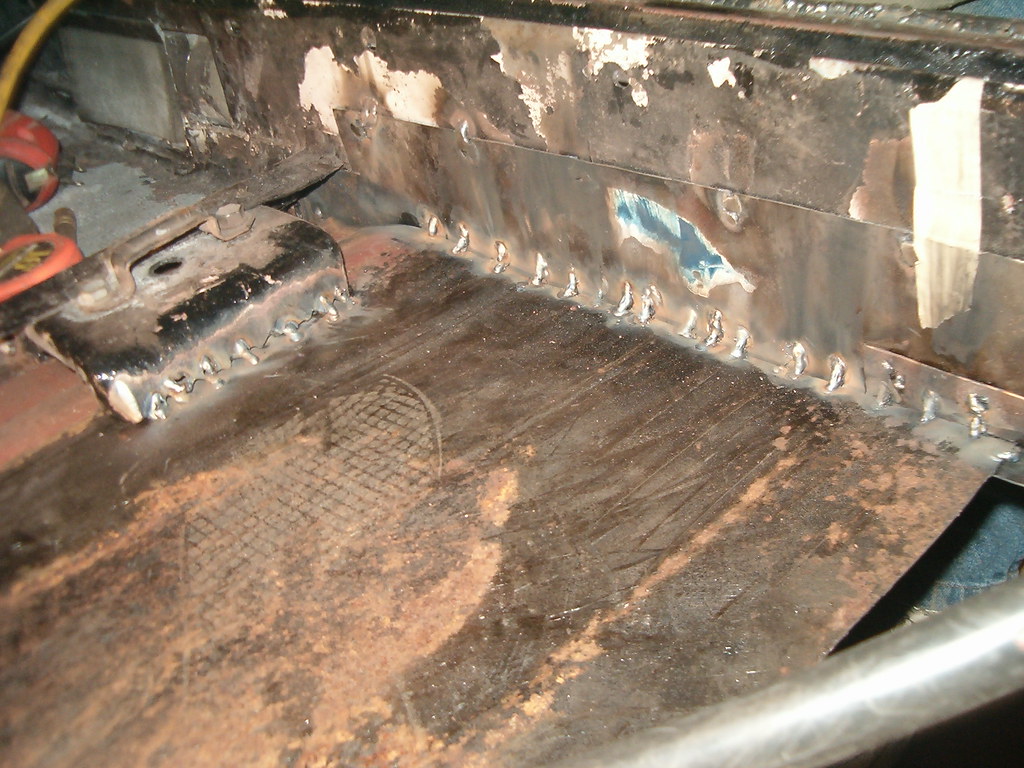
Briefly; to make this patch, I used cardboard to create a template, traced the outline (including the corner cuts) onto the scrap hood, and cut it out. I formed the bend in the outboard and rear edges (just ballparked them), welded the inboard edge to the existing solid floorpan, and hammered the outboard bend until it fit flush with the floorpan. I couldn’t, however, get that edge to stay snug against the floorpan since I there’s no way to get clamps in that area, so I drilled some holes and used sheetmetal screws to temporarily hold the metal where it needed to be while I made molten metal. With the two side edges in place, I moved on to the complex rear edge. It took some more cutting and plenty of banging to get everything in place, but I’m satisfied with how it turned out.

Thursday, May 5, 2011

Another Night, Another Patch


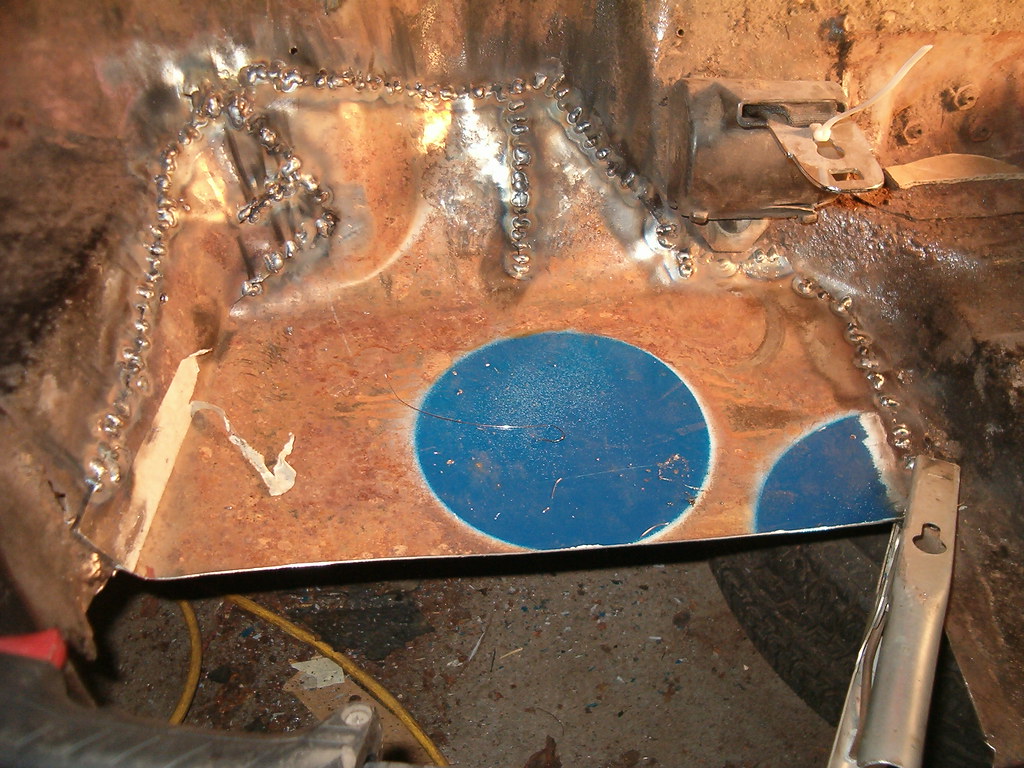
I spent my Wednesday evening cutting, prepping, and installing a second patch in Ringo. This one completes the floor under passenger’s side of the backseat and extends from the front of the previous patch to about 4 inches in front of the interior crossmember that supports the forward edge of the backseat. I made it this long because the replacement floorpan I bought has an opening in it outboard rear corner. This also allows me to plug weld the patch to the purchased floorpan patch.

To get to this point, I measured the overall size of the opening and cut the 18” by 23” piece from the scrap hood.

The hood, by the way, is quickly running out of usable flat metal. I’ve still got the scrap door, but I’m thinking I’ll run out before the floor is complete. Oh well, I’ll try to snag a scrap one from the Ranch when I go up there for their open house.

After de-burring the edges, I came up with the final positioning scheme that had the outboard edge butting against the bottom of the existing floorpan ledge, the rear edge sitting under the previous patch, and the inboard edge riding on top of the existing floorpan. To work around the interior crossmember, I had to make two slices in the patch. Before welding the patch in place, I sprayed some rust converter/primer over the surfaces that would be covered after installation. It was then time to melt some metal. I clamped the outer edge to the ledge and tacked that in place. Then I moved to the rear seam, and by placing the floorjack under the area I was tacking and hammering on the patch, I got a nice close fit between the two pieces of sheetmetal. With that edge tacked down, I continued around tacking the inner edge to the floorpan. First, though, I moved the jack to the forward edge of the patch and using a two-by-six I made sure the patch was a flat as possible. I couldn’t get any of my vise-clamps to reach that far in, so I pushed down on the patch’s inner edge with the end of the hammer while tack welding up the edge. To finish up the install, I welded between the tacks.

I’m pretty happy that I was able to install a patch in one evening. At this rate, I project the floor will be completely patched in only five more evenings.

Tuesday, May 3, 2011

Glinda Gets a GUP


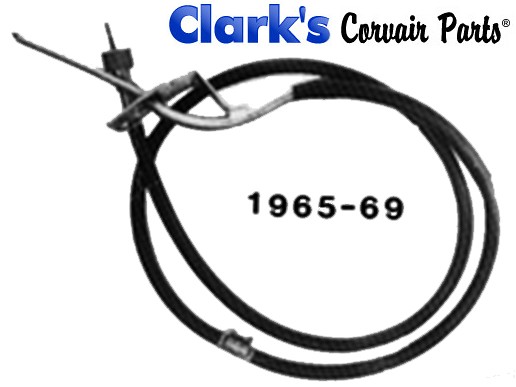
Sunday I informed the lovely Loriann that Glinda would be getting some attention the following evening. So yesterday, after dinner, I pulled her into the driveway and proceeded to reinstall the missing washer and nut for the muffler strap. That was easy fix. Next on the list was replacing the speedometer cable. I had plenty of experience replacing these cables on EMs, but this was my first time with a LM’s. In either model, this cable is thin, flexible shaft inside a coated sheath. It terminates at the rear of the speedometer with a simple nut. On EMs, the driven end attaches to a small gearset in the transmission, and the cable snakes its way under the body and through a hole under the dash. On LMs the path is much simpler emanating from the left front wheel and making a fairly short, straight shot through the hole under the dash. After verifying the shaft had actually broken - by spinning what should have not spun (the end recently undone from the speedo) - I went to obtain my GUP replacement from Betty. I determined it was a GUP by applying the same test and that which should not spin did not spin. I then jacked Betty’s left front off the ground, securely placed a jackstand, and removed the wheel. Two bolts held the driven end to the back of the brake plate and those came off surprisingly easy. Also easily removed was the bolt retaining the shaft to the body – the one that ensured the cable didn’t rub on the tire. Inside the car, I unscrewed the nut at the back of the speedo and pushed that end out through hole in the body. With that part free, I repeated the same steps on Glinda with one small difference. Before being able to push the cable’s speedo end out the hole, I had to remove the grommet that sealed off the opening in the body (Betty’s grommet was missing). I don’t know how GM was able to install that rubber part over the nut, but all the pulling I could manage wouldn’t get the small rubber hole over the significantly larger nut. A couple slits with a razor blade and I finally removed the grommet. After snaking the GUP into place and installing the three bolts (with coatings of anti-seize), I finished the job by slipping on the grommet, screwing the nut at the end of the cable onto the speedometer, bolting on the wheel, and lowering the car back to the ground.

All that, and I had everything closed up for the night by 9.

Monday, May 2, 2011

Miscellaneous Catching Up


It’s been a while since I last posted, and much of that is due to a paucity of progress and no scarcity of regress. Part of my excuse (and it doesn’t help my attitude) is that I’ve been away from home the last two weekends. Granted, they’ve been wonderful visits to family and friends, but Ariel is no closer to having her beloved Ringo back on the road.

First, with the progress. Very little to report here so this won’t take up much space. I cut out, formed, and began the installation of a partial patch for under the right side of Ringo’s backseat. That’s it. Nothing more. Nada. Very troubling.

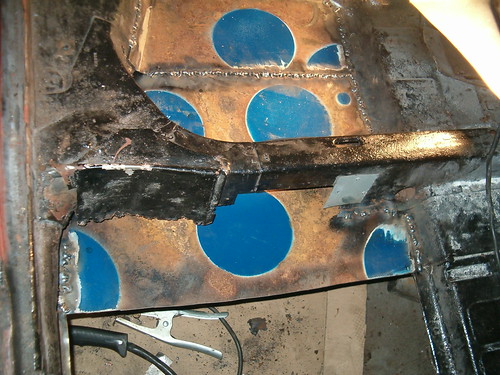
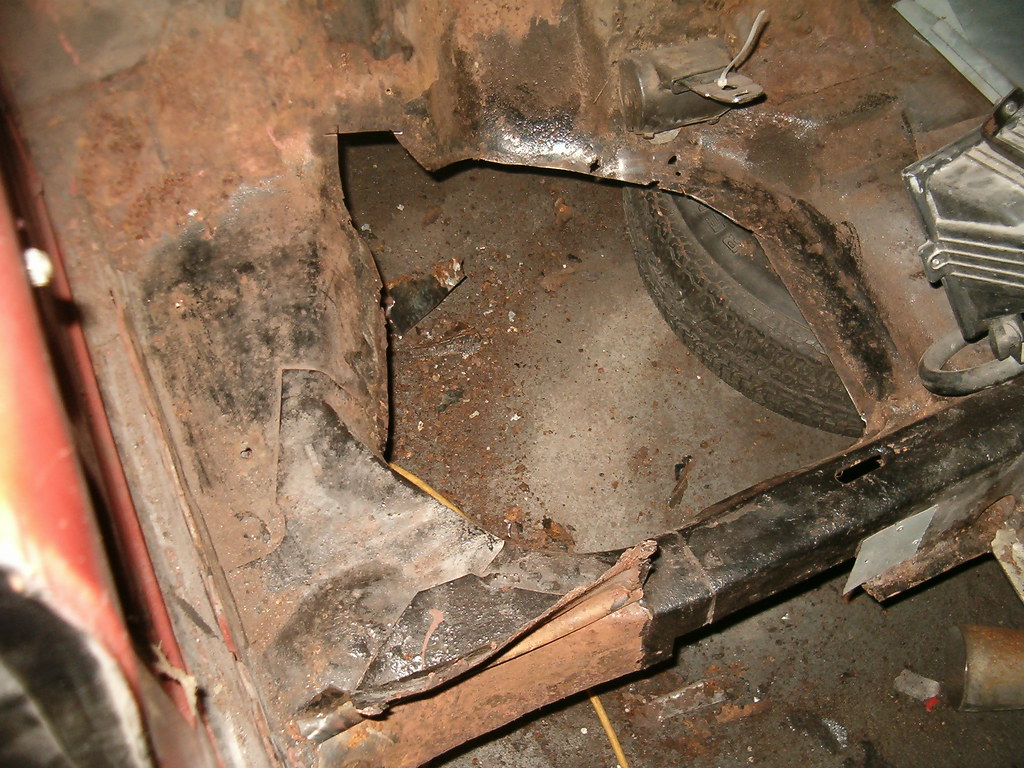
Now, with the regress. Sadly, that which pulls me back far exceeds that which gets me closer to the end of the tunnel. About a week ago Victoria reported that Glinda’s speedometer decided to permanently point to zero. I climbed under the dash and found the speedo cable was loose at its connection to the back of the gauge. Great, I thought. An easy fix. I tightened the nut and felt quite good about things. Later that evening, Victoria took her car out for an errand and came back with the bad news – “the needle still won’t move.” Irr. I haven’t looked any further, but I’m still holding out hope that I didn’t get the nut screwed down far enough. Next, I noticed the muffler hanger was hanging loose. A quick peek under Glinda’s rear showed the nut and stack of washers I’d installed when replacing her exhaust system were missing. Vibration is an effective force. Back to Ringo. Before I started to fashion floor patches, I again had to cut more of his floor’s rotted sheetmetal away. This time it was area under the right side of his back seat. Today’s photo shows how brutal I had to be. Not good.

On a positive note, however, I found a distributor in Betty’s engine compartment. It appears to have a nice shaft to bushing fit, so it’ll make for a nice spare.