Showing posts with label OldBetty. Show all posts

Wednesday, May 26, 2010

Parting Out Pictures

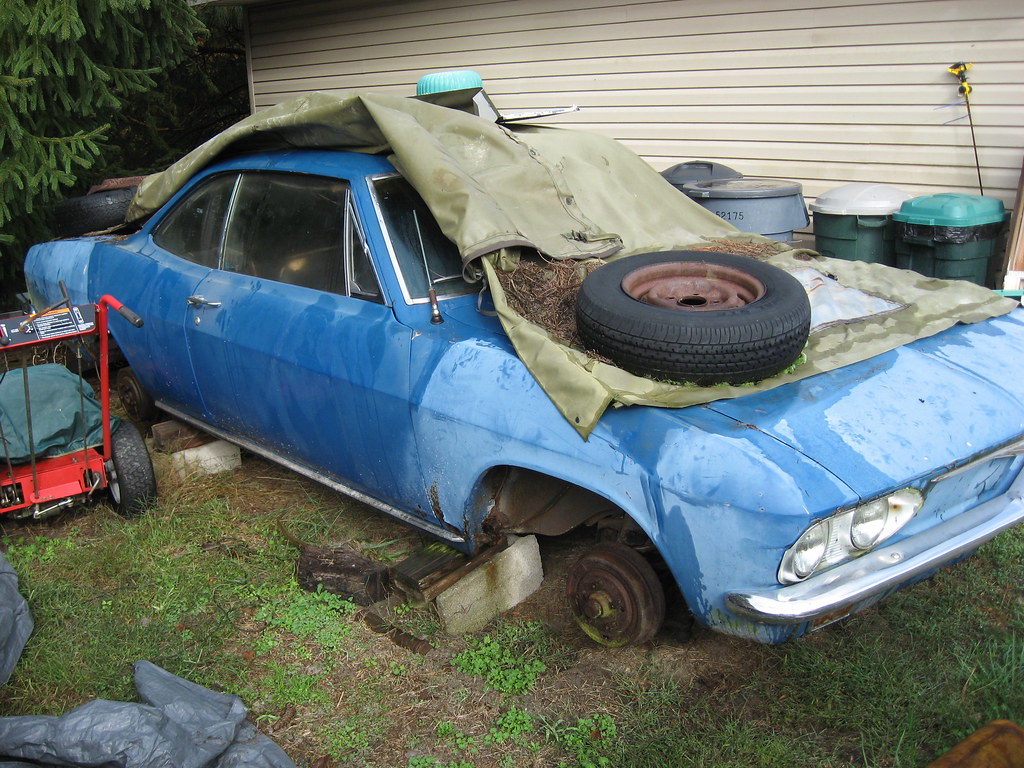
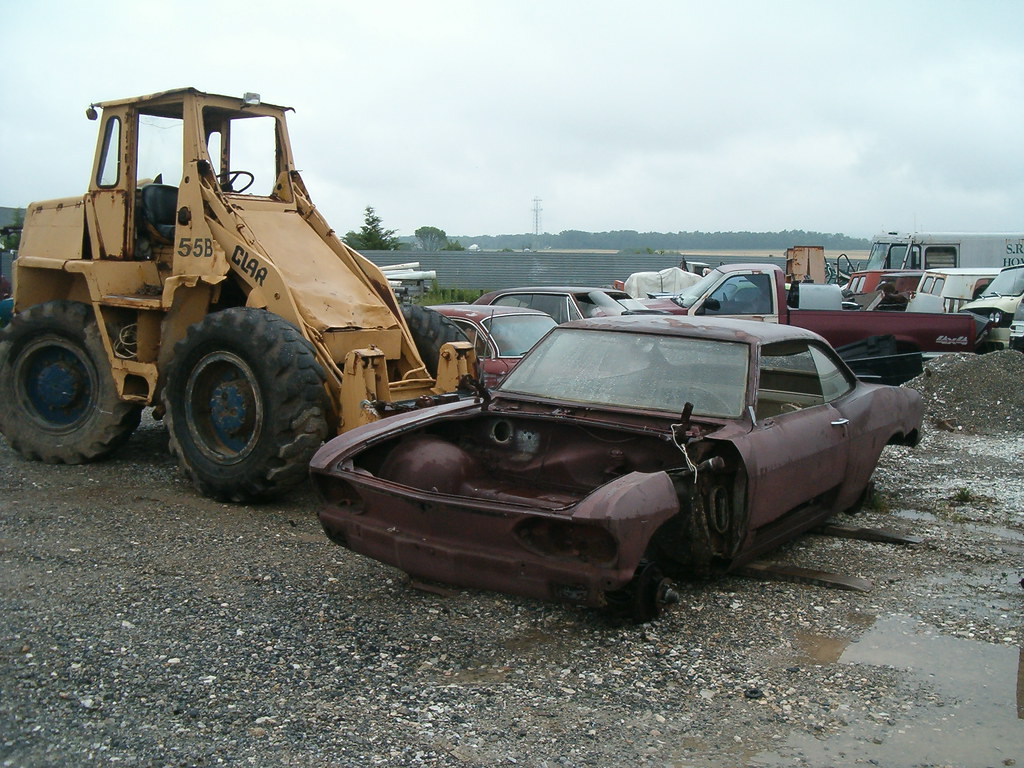
I did take a few pictures during Old Betty’s deconstruction. I posted them on Flickr and made a set you can view by clicking here. Warning: Viewing the photos at this link could cause sad or angry feelings.

Monday, May 24, 2010

Back Down to Five


Old Betty was literally a shell of her old self as I rolled her down the driveway and into the street Sunday morning. She had been stripped of nearly everything I could ever need, and was ready for the journey to her final resting place. First though, I needed to load the back of the Suburban with the tools I hoped to use that day. I was going to search the Ranch’s field of EMs for some solid valance pieces I could cut off for Heidi and Lucy. I had borrowed a nice battery powered Hacksaw and that went in with an extra battery. My cordless drill joined the party. Plastic to lie on, gloves to protect skin, and a face shield to guard eyes went in. Finally, the lug wrench, jack, and socket set to remove wheels and bumper were added and it was time to hitch up Old Betty. The well-used towbar was again pressed into service and I was Corvair Ranch bound.

I won’t go so far as to say this trip was akin to taking an older, ailing pet to the vet for the last time, but I did have mixed emotions. When Old Betty was gifted to me by a generous fellow Corvair club member, I immediately began formulating big plans. She would be my autocross car to complement Lucy, my track car. I felt the torquey 95 HP engine and Powerglide would be a great starter car for my hoped-for parking lot escapades. Then, when an engine-less 4-speed parts car showed up on Craig’s list, the plan changed to converting her into a manually shifted car. Finally, when I discovered her floor and door frames were mostly fiberglass and Bondo, the parts car became New Betty and this car became the donor vehicle. I really struggled with that last decision because I hated to cut up a complete car, but honestly, I couldn’t afford not to. I needed patch panels for Glinda, and I didn’t have the money to buy new ones or source used ones from a vendor out west.

I arrived uneventfully at the Ranch’s parking lot drawing stares from the early arrivers to the Open House. Proprietor Jeff directed me to a spot behind his shop where I unhitched the car and removed the front bumper. Within minutes Jeff’s son, Luke, was there starting up the forklift that he then used to lift Old Betty off the ground so we could remove the wheels I needed for New Betty. Moving the car and forklift out of the way, he lowered her to the ground. At some point she’ll be moved out into the field and I’ll go searching for her the next time I’m there.

Old Betty Gave Her All

An amazing ‘vair weekend! I got everything completed that I’d planned, didn’t break anything that I pulled off Old Betty, and didn’t hurt myself. I was three for three. Then to top it off, I had a great time Sunday at the Corvair Ranch Open House (more on that in my subsequent posting).

Friday, after work, I pushed Old Betty into the garage and set to work removing her engine. My original plan was to keep the differential and transmission in place and just pull the engine, but after reading the cautionary posts on the web and the straightforward instructions in the manual, I revised that plan to dropping the entire drivetrain. I got through the first few steps of disconnecting hoses, wires, and linkages without issue, but hit a wall when instructed to loosen the nuts at end of the rear strut rods. I hadn’t pre-soaked any of the fasteners with penetrating fluid, and one look at these two joints that sit out for all the elements to work their rust-making magic on indicated I should have. With hopes not so high, I doused the nut and bolt threads with my 50/50 mix of ATF and Acetone and applied the impact wrench set on HIGH. After beating on the nuts for a few minutes with no movement, I lit up my propane torch and made the right nut glow but to no avail. Time to revert to Plan A. After removing the starter and the accessible bellhousing to differential bolts and placing the ATV jack under the oil pan, I removed the two nuts holding the engine to the rear mount and slowly lowered the rear of the drivetrain. This exposed the top bolts holding the engine to the differential and after removing them and the forward engine shrouding I removed the three bolts holding the torque converter to the flexplate. It was now crunch time – would I crunch something when I separated the engine? Would the input shaft stick in the torque converter and get bent or broken? I raised the engine so it was aligned with the diff and pried apart the joint. After lowering the engine to clear the mount and pulling it back a few inches amazingly the engine was free and I was able to lower the jack all the way down. Nothing was mutilated! Thank you Lord. With that task complete, it was time to cleanup and hit the hay. All before midnight – yahoo!

Saturday morning I was up early and in the garage with a long mental list of parts to pull and pieces to cut off. First thing though was putting away all the tools and getting the engine out of the way. I carefully wheeled the jack out to the driveway praying the perilously perched engine stayed put. I then piled on the associated parts I’d previously pulled off and covered it all with a big piece of plastic. Back to the car, I removed the rear brake drums and brake assemblies before reinstalling the rear wheels. Lowered to the ground, I rolled the car into the driveway so I could take advantage of the nice weather and the less confined work area. Out came the Sawzall, the drill, and the grinder with a cut-off wheel mounted. A few hours later I had all the body panel patches that I needed. That included most of the left front fender, the bottom section of the driver’s door, a big portion of the left rear fender, trunk floor, and the battery shelf. With that nasty task completed, I went back to removing parts that either unplugged or unbolted. The hood came off, the engine and trunk wire harnesses were harvested, the headlight and taillight assemblies, door locks, ignition switch, front grill bar with trunk lock all found their way into the bin of parts. Next off were the windshield trim, wipers, wiper motor, washer fluid reservoir and bracket, engine mount, and the grill panels at the base of the windshield and backlight. The latter of these required the grinder to remove the heads of the rusted retaining screws. With rain beginning to fall I pushed the carcass back into the garage and proceeded to remove the headlight, dimmer, and wiper switches, the gage cluster, and the glove box. I really wanted to remove the turn signal switch assembly, but at 10 PM, after the full day I’d experienced, I was no match for the c-clip. So after remounting the steering wheel minus the horn pieces, I called it a day.

To be continued…..

Friday, May 21, 2010

Ringo’s Got Pedal Again

Last evening I took Ringo out for test drive. I did notice that slamming on the brakes only locked up the front wheels. I also found the emergency brake adjustment was too loose again. So I put Ringo’s rear in the air supporting him with jackstands placed as far outboard on the control arms as possible to simulate proper wheel-to-body relation. I pulled the wheels and drums and turned the adjusters out enough to the point where the there was just a slight amount of drag on the drums. With drums in place, I stepped on the brake pedal and found it went hard much higher. With drums still in place, I tightened the emergency brake cable until a few clicks produced resistance and the cable was taut before I ran out of clicks. After all that I verified the cable wasn’t dragging in the armor. Hopefully all this will now take care of his brake issues.

This weekend will be filled with Corvair activities. Starting this evening I’m getting serious about parting out Old Betty. My hope is to have the engine out before I knock off tonight. I’ll try to keep the differential and transmission in place so I don’t have to deal with the rear suspension. I’ve never done this project on a LM before, so it will be interesting. I do have the manual, and some stuff I pulled off the web, so I’m not flying totally blind. Tomorrow morning I’ll start cutting away metal to patch Glinda and New Betty. Then I’ll pull off bits that New Betty is missing like a decent hood, taillight sockets, and seatbelts. Finally, if time permits, I’ll remove pieces that history has proven I should have spares for - gauges, switches, and wire harnesses. Sunday morning I’ll hitch Old Betty up to the Surburban, slap on the towing lights, and head up to the Corvair Ranch. It’s their annual Open House, and I’m going to make things more hectic for proprietor Jeff by dropping off an addition to his backyard bodies. Then there’s the fact I need the wheels back for New Betty. Better remember a jack.

Monday, March 15, 2010

Too Many Distractions

I really wanted to spend a lot of time in the garage this weekend working on Glinda’s body, but it didn’t happen. Saturday, in Baltimore, was a rainy, miserable day. The morning was spent hunting down a set of exhaust manifold packings (gaskets) for Ringo. Fortunately Rich, a friend from the local Corvair club, had a set he could part with. It's great having other Corvair folks in the area.

I believe it was sitting in front of the TV while eating lunch that doomed the day for garage time. I just couldn’t drag my butt out of the comfy, warm house and into the nasty, damp garage. I justified it by having to play chauffeur to Mikhaila at 2 o’clock – not enough time to make it worthwhile. Lame, lame, lame.

By dinner-time, the rain had abated, and at 8 o’clock it had stopped, so it was time to replace Ringo’s leaky packings. Even though I could only detect gas leaking from one of the ports, I replaced all six to be safe. I did notice, however, that the #5 gasket looked a little suspect, so that plan was a good one. That repair went well, and he was off the jackstands by 9:30.

Yesterday afternoon Ariel drove Ringo back to school. She got about a half-mile away when the new packings started smoking. I hadn’t used these kind before, so I had no idea to warn Ariel about the smell. She freaked out and immediately turned the car around and headed home. I assured her it was the hot, new gaskets, and told her the smell would go away in a few miles. It did, and she and Ringo made the 90 mile drive without any other incidence.

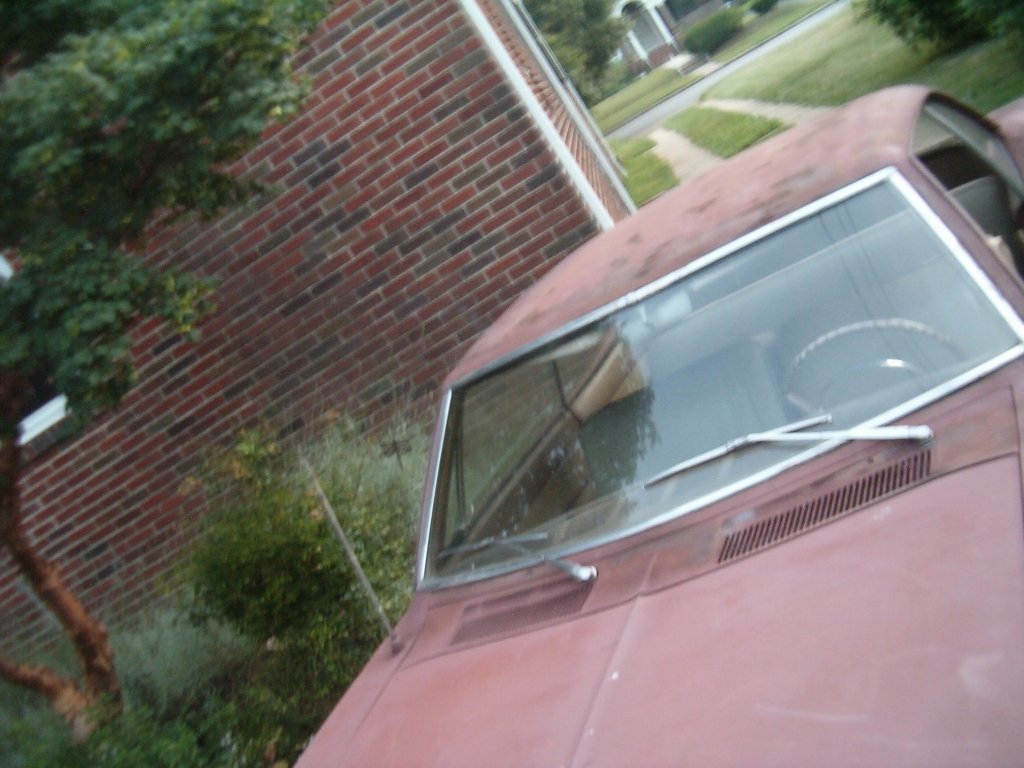
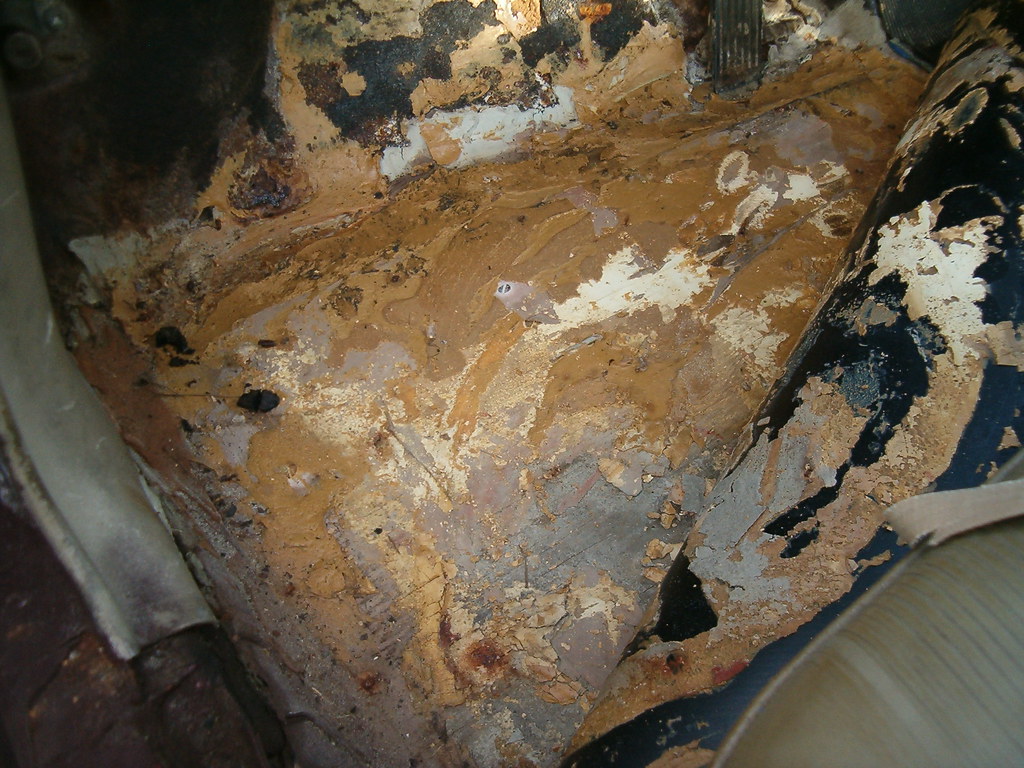
I did go out to the garage yesterday afternoon. Since it was the most accessible area in need of work and the replacement panel on Old Betty seemed, I decided to start Glinda’s body work on her right rear fender. With the grinder’s wire brush wheel spinning at 11,000 rpm, it didn’t take long to be enveloped in a Bondo fog. It was a more extensive expedition than I’d hoped, but I finally found the end of the filler. Fortunately, Old Betty’s equivalent quarter-panel is nice and solid. I then turned my attention to Old Betty applying some masking tape to keep my hacking lines relatively straight. With a cut-off wheel replacing the brush wheel, the grinder got the panel about 98% cut off. The last two cuts had to be made with my little air hacksaw. 
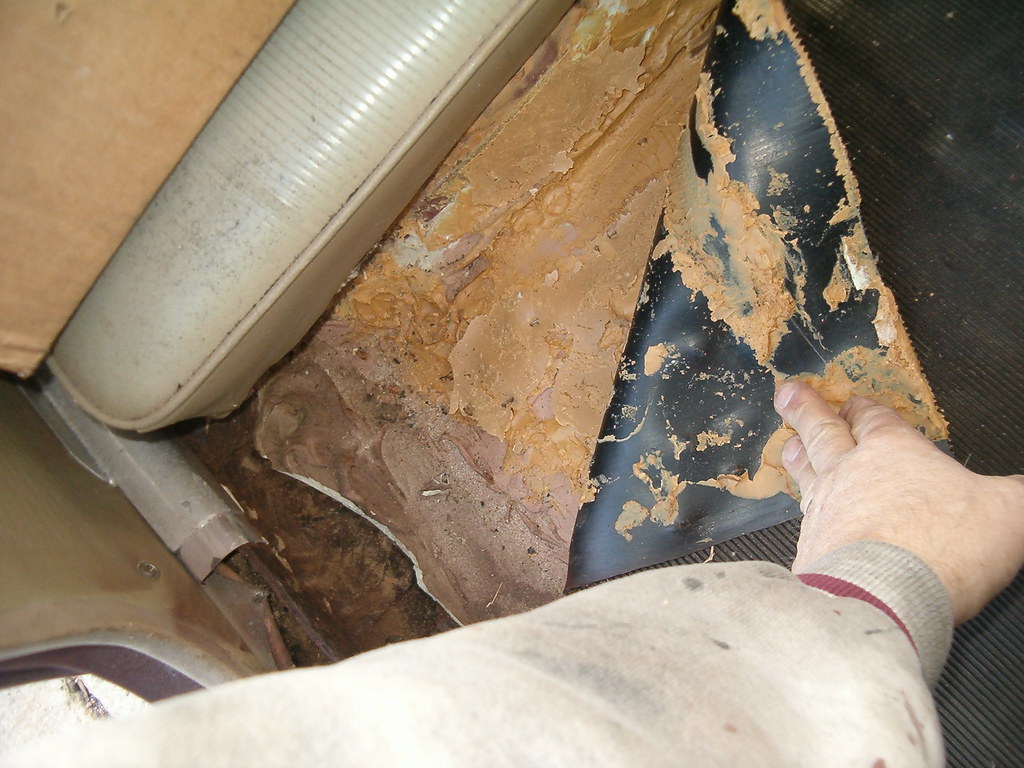
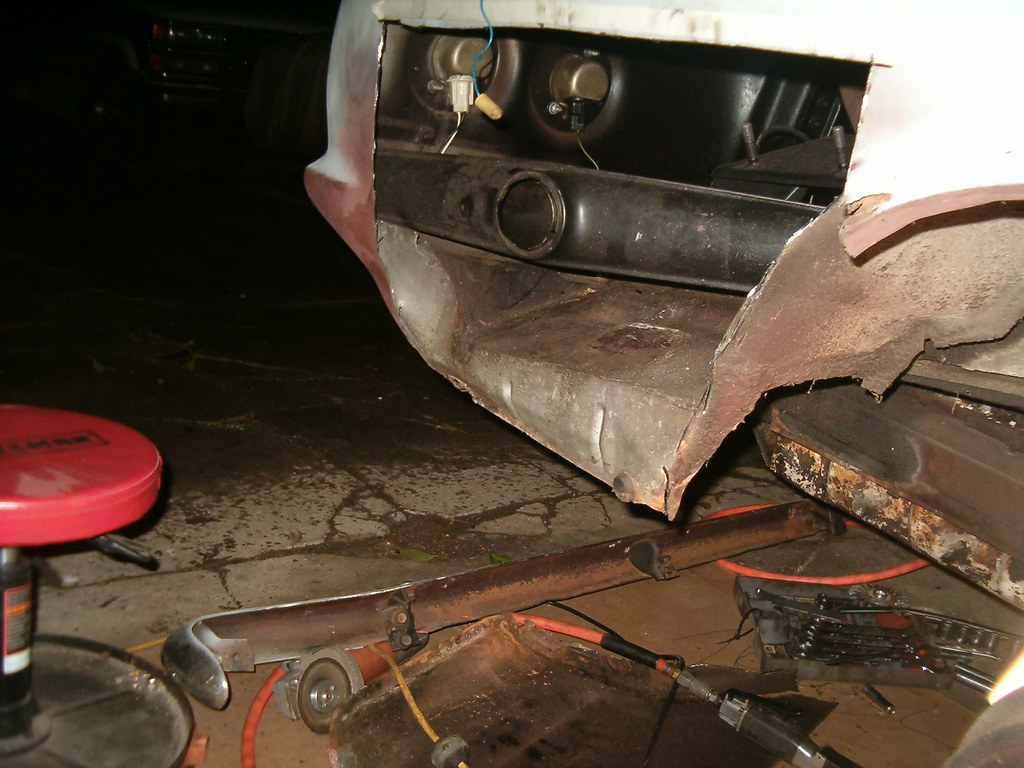
I also needed to remove Old Betty’s rear bumper and exhaust system to access all around the panel. In removing the exhaust I discovered an interesting kludge. A previous owner had broken off the ears of the exhaust manifold where the exhaust pipe flanges are fastened. To provide a secure assembly, they used hose clamps to retain the bolts and nuts to the manifold. Ingenius.

Friday, March 12, 2010

Exhaust and Exhausting

Last night I took a look at and a listen to Ringo’s exhaust. Ariel had complained of a headache and exhaust smell the last time she drove him. I first checked the packings (gaskets) between the exhaust manifolds and exhaust pipe. No leaks there. I did, however, hear excessive noises from the driver’s side exhaust manifold, so I pulled off that side’s shrouding. With the engine running it was easy to confirm that cylinder #6’s spent gases were being allowed to leak into the heater space – not good. Unfortunately, since it was Thursday night, a call to the Corvair Ranch in the morning would not get me the replacement packings in time for Ariel to drive the car back to school Sunday. I had another option – Gary, the local Corvair guru. Unfortunately, I had to leave a message, but I’m confident he’s got the parts in a drawer or on a shelf in his basement.

The next portion of the evening was pushing Old Betty and New Betty around the driveway. I wanted to get Old Betty into the garage before the rain hit so she’d be accessible to cut patches off this wet weekend. It actually went easier than I’d expected, but was exhausting nonetheless.

Monday, March 1, 2010

Need A Plan

I’m blaming it on the weather and an extended work schedule, but I’ve been entirely uninspired to spend any more time than necessary in the garage. For instance, this weekend the temperature was above freezing, and all I could manage to do, car-wise, was straighten a dent in the Suburban. By the way, is it too much to ask people to take responsibility for their actions? Last week the Suburban was parked in front of the house for a few days during which someone ran into the driver’s door AGAIN. A couple years ago that same door was backed into and no one left a note. No one left a note this time either. This is the third time in two years we’ve been victimized by hit-and-runs. Pretty sad that so many people today 1) can’t drive and 2) don’t have a conscience.

Sorry for the tangent – back on topic. I could make a list a mile long of Corvair tasks, so it shouldn’t be so hard to find the motivation to turn off the TV and turn on the garage heaters. I’m now convinced a plan would help. I perceive three different segments to the plan – Glinda’s roadification, Lucy’s improvements, and Betty/PartsCar’s drivetrain swapping.

Glinda’s roadification is basically down to cutting out rusted body sections, welding in replacements, priming, and painting. After the front and rear window channels are repaired, Victoria and I need to re-caulk around the glass edge and re-install the trim.

Lucy’s improvements include doing a tune-up, installing a dual master cylinder, swapping an alternator in place of the generator, and putting in the ’64 rear suspension setup I’ve got all the parts for. I’d love to get all these done before the next track day in early May. While there are some expenses for each of these tasks, none is a bank-breaker.

Then there’s the whole Betty and PartsCar saga. Since I’ve decided that these two cars are changing purposes and thus names, I now can develop a list of tasks that need to be done as soon as possible. New PartsCar is donating its engine, trunk lid, driver’s window, and assorted body panels to New Betty, and some more body panels to Glinda before being towed up to the Corvair Ranch.

So from all this, what’s the plan? Assuming the above forty degree days melt the snow in the driveway the next few days, how about:

  1. Take the driver’s side window out of the NewParts car and install in New Betty.
  2. Move New Betty out of the garage and move New PartsCar in.
  3. Cut out the panels from New PartsCar, remove her trunk lid, and then pull her engine and anything else that’s worth salvaging.
  4. Pull New PartsCar out of the garage and tow her up to the Corvair Ranch.
  5. Put New Betty in the garage, install the trunk lid, and temporarily mount the engine to get it off the garage floor.
  6. Put Lucy in the garage and do the tune-up and master cylinder swap.
  7. If time allows, do the alternator to generator swap.

Throughout all this, Victoria and I will continue to work on Glinda.

Monday, January 25, 2010

CPotD #36 (To Cut Or Not To Cut, Part 2)


Something I’ve been struggling with in this whole PartsCar/Betty decision is sacrificing a solid car. Both cars are in decent enough shape to put through roadification, but each has components the other needs. Betty has an intact hood, but a bad floor, while PartsCar has a rotten hood and an excellent floor. Betty has a running engine, but an automatic transmission, while PartsCar has the 4-speed, but no engine. Both cars could provide the body panels to patch Glinda, but so could many other cars.

It’s that last phrase, “so could many other cars” that I keep coming back to. Today’s CPotD is another photo Victoria took during our visit to the Corvair Ranch. There appear to be plenty of non-restorable cars sitting there that would gladly donate patch panels to our Glinda project.

Tuesday, January 19, 2010

CPotD #32 (Betty’s Paint Scheme)


Yes, I’m well aware that today’s CPotD subject is NOT a Corvair. With all this flux over which car to keep and which to cut up, I wanted to post something about the paint job I’d envisioned for Betty. With her fawn (tan) interior, I thought this orange and black paint scheme was perfect. Now, if PartsCar is going to be the keeper, do I use this same scheme with black interior? I think so.
This image is courtesy of The3dStudio.com. Click here to see other views of this hot Chevelle with the even hotter paint scheme.

What’s Hiding Under Your Mat?

Lower-trim level Corvairs came with rubber mats on the floor instead of carpet. The rubber does an excellent job of retaining moisture, so Model 500 and 700 ‘vairs usually have rusted out floors. As I mentioned in yesterday’s post, Betty’s floor is a kludge of sheetmetal and Bondo, and I believe the former is only held in place by lots of the latter and a couple bolts. Here are some photos.

Behind driver's seat / Behind passenger seat / Driver's footwell

/ /

Underneath the car

/ /

Monday, January 18, 2010

To Cut Or Not To Cut

Why is it a parts car has the most intact floor of any Corvair that’s currently in or has passed through the fleet? Saturday, as I carefully removed the salvageable carpet from PartsCar, my thought was, "so, this is what a Corvair floor without holes or patches looks like." I told Loriann about this irony and she asked, "Why don’t you make the parts car Betty?" "No title and a bashed in driver’s door," was my immediate response. I was home sick from work today, so this afternoon I wandered out into the sunshine, removed the covers over Betty, and made a closer inspection. I pulled up part of the rubber floor mat and was greeted with a LOT of Bondo. I looked underneath and saw big, ugly patches. I did notice, however, that most of the areas Glynda needs patches for are solid on Betty.

I will now be looking into what it would take to get a title for PartsCar, so Betty will become the new PartsCar.

Monday, December 21, 2009

CPotD #20 (How to Get the Young People Involved)


The international Corvair club, CORSA, has been struggling with decreasing membership for a number of years now. The median age of the membership keeps going up since there are very few young adults choosing a Corvair as their hobby. There’s been quite a bit of online conversation as to how we’re going to reverse this trend. How are we going to get young people interested in working on and driving an old car.

For the past seven years, I have been blessed with the opportunity to work on Corvairs with three of my daughters. Each of them is still enthused about their car. Many times, however, they’ve not been so enthused about going out to the garage or driveway to work with dad. Boredom and frustration are two of our biggest enemies. Boredom when the task is menial or repetitive. Frustration when the job doesn’t go as planned and one, or both, of us gets angry. The reward of the car is not enough to inspire them to spend hours getting greasy, sweaty, cold, and sometimes bloody. The other day, however, Victoria asked me when we were going out again to work on her car. That is a triumph in getting a young person involved.

What have I been doing right so my teenager actually wants to go out and work on their cars? Five big factors come to mind.

First, I challenge them. Handing out screwdrivers and wrenches is not their idea of contributing to the project. I put the tool in their hand, give them clear instructions, and let them do the work.

Second, I try to be consistent. Life has a tendency to get in the way of our projects – other cars need work, the house needs attention, Girl Scouts schedule meetings. Regardless, we try to squeeze in at least an hour every Sunday accomplishing something on their car.

Third, I allow flexibility. If a task is not going well, move on to something else. If bolts aren’t coming loose, or worse yet breaking, it’s time to move on to something different. This means I need to be prepared with alternate tasks and the associated parts or materials.

Fourth, I try to show patience. There are times when they don’t follow directions, they don’t understand my clear instructions, or they’re not strong enough to torque that nut off. It’s not easy to get past those times without hard feelings, but I must or working together will be chore not a pleasure.

Finally, and this brings me to today’s CPotD, I try to start them off young. When I towed Betty into the driveway, I gave my camera to 11-year-old Mikhaila and asked her to take pictures. I also had her steer while I shoved Betty into the garage. Giving the young ones fun little helping tasks plants a seed of car "like" in them that I hope to cultivate into a love of their car someday.

Thursday, December 10, 2009

CPotD #13 (Will Betty Get a 4-Speed?)


I just received today's CPotD in an e-mail. This one hundred dollar parts car is for sale, but it has no engine or title. What it does have, however, is a complete setup for a manual transmission (transaxle, pedal set, linkage, shifter, etc).

Ever since I was given Betty, I’ve been scheming to convert her automatic transmission into a four-speed. This opportunity is far-and-away the cheapest one to come my way. It’s a great deal even with the price of gas to one, tow the car home and, two, tow the strip carcass to the Corvair Ranch after I’m done with it.

So what’s stopping me? Even though my typical triumvirate of tribulation is missing the money element, time and space are still there to muck things up. Time-wise, I’m under the gun to get Heidi done before Christmas. Space-wise, I would need to tie up the entire garage for a couple weekends.

First things first. Get Heidi done, and then see if the car’s still available.

Wednesday, September 2, 2009

Betty - How We Got To This Point

Betty came to us as a generous gesture of a fellow CORSA of Baltimore club member. Here's the story as well as the little bit I've been able to do since acquiring her:

Jul 28, 2008: During last week, while I was spending the week at Camp Hope working with our church's youth on poor peoples' houses, I got an e-mail from a fellow Corvair club member. The gist of the message was that he’d bought a couple of Corvairs and “wanted to talk to me about them in detail.” As soon as I got home on Saturday I called his house. When his wife passed him the phone, he greeted me with, "free Corvair dot com" and then asked me if I wanted a 1966 for FREE! He and his son had gone to look at a decent late model. His son really liked it, but the seller needed to sell another one and was insisting on making it part of the deal. Since Rich got a great deal, he now needs someone to get the primered one out of his driveway. He knew I wanted a late-model, so he offered it to me. Without hesitation and with great gratitude I told him I’d take it. It’s got an automatic transmission and the low-horsepower engine in it, but that means I can safely run 87 octane gas. From the picture I’m almost certain it’s a 500 model (entry-level = bench seat, rubber floor mat, dog-dish wheel covers). All cool stuff for me.

Jul 29, 2008: Went and got my new '66 Corvair last night. The Suburban flat-towed it home without incident. My 11-year-old took some pictures. It's got some rust-repair and a couple of spots of rust-through, but for the most part it's a good, solid start for my first late-model. It's going into the garage until after I'm done making the modifications to my '63. Then I'll try to get it roadworthy as quickly as possible. I'm dying to feel the difference of the Corvette-based suspension.

Aug 1, 2008: I took a closer look at my new '66 'vair last night and found some Bondo. Mostly in the floors, but some elsewhere. I’m not complaining since it appears that the rusting has stopped for the most part. I’ll do the bodywork and shoot the paint. The color is something I’m struggling with. It’s got a tan and gold interior so that limits me. I want to paint it a light, non-metallic color, and, according to the rest of the family anything brown (including beige, gold, etc.) are NOT acceptable. I’m leaning towards Datsun 918 Orange. What do you think?

Hope I’m lucky enough to find four decent ones. Haven’t put the call in to the Corvair Ranch yet, but I haven’t finished making and prioritizing my list.

Nov 13, 2008: Betty finally got some attention last weekend. My car buddy and his lovely wife came and visited us, so I drug him out to the garage. While he repaired the battery cabling, I drained some REALLY nasty old gas out of the tank. I pulled the destroyed sending unit and replaced it with a decent, used one from my stash. After pouring some new gas into the tank, we discovered a leak at the sender. The seal where the lead for the fuel level sender had popped out. Not wanting to waste his efforts, I cranked the engine with no spark until the TEMP/PRESS light went out, poured some gas down the carbs and she started right up. No knocking or rattling. Yeah. Once the fuel system is working right, I should be able to get the engine to run smoothly pretty quickly. Next will be the brakes before she’ll be roadworthy.