
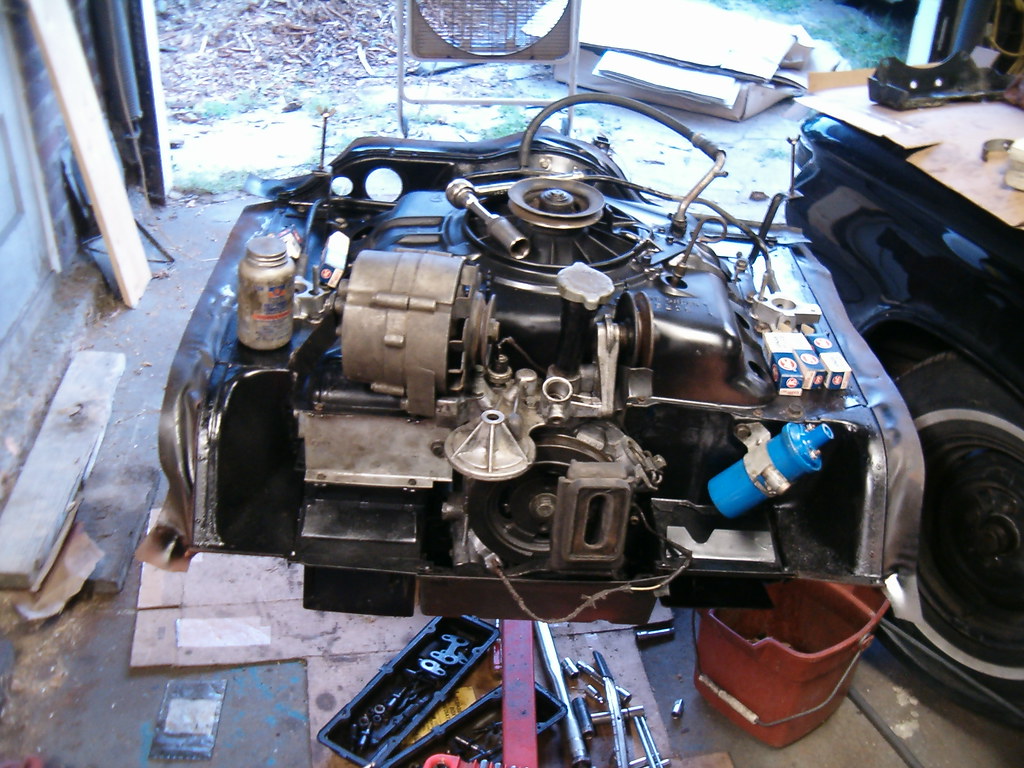
Friday evening was spent with more engine assembly. I put the last piece of shrouding on and installed six new AC sparkplugs. While thinking about ignition, I found the distributor that came with the 95 HP engine, tore it down, inspected, cleaned, lubricated, and reassembled it using new points. Now laying next to it on Ringo’s hood (my staging platform) is a cleaned GUP rotor, cap, and a new gasket. I won’t install the distributor until after I’ve spun the oil pump priming the oil system and that’s not happening until the engine is back in Ringo’s bay.
 While hunting down the distributor, I discovered that the harmonic balancer on the end of Ringo’s previous engine was the one I’d bought after Ringo’s fire, so it was in MUCH better condition than the GUP I’d found on the shelf. So, out came the hub puller and air tools, and an hour later I had swapped out the better balancer for the good balancer and reinstalled the engine mount and rear cover plate.
The last task for that evening was cleaning and installing the pink sparkplug leads.
Saturday morning dawned hot and early, but I was determined to spend a long day in the garage. Since the engine is basically assembled with the handful of remaining bits staged, it was time to file away the extra engine parts. Currently, the dump-bound trailer has a bellhousing, matching engine block halves, and some rusty pieces of shrouding. Eleven pistons, six cylinders, four valve covers, two oil coolers, a couple fans with pulleys, a generator, starter, and a top engine cover, along with a few bags of hardware all found new homes on the already chock-full shelves. I just couldn’t bring myself to recycle any more metal since I have no idea what Mikhaila’s to-be-determined project will need.
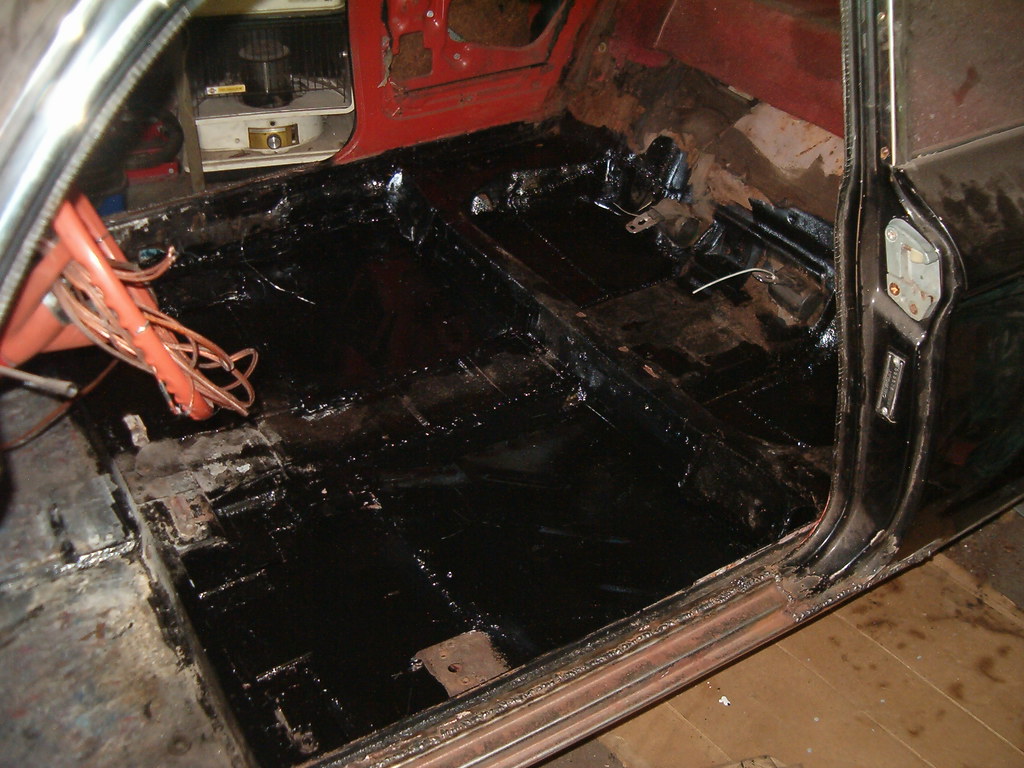 With the garage floor much less crowded, I turned my attention to Ringo’s interior. Yes, something other than engine work for a change. I knew there was only a little bit of CO2/Argon left in the tank, but I wanted to increase the welds holding the seat brackets, so I rolled the wagon up to the door opening, brushed off the mating surfaces, and made more molten metal. Satisfied I had laid a sufficient amount to prevent the seats from coming loose in case of the God-forbid collision; I vacuumed out all the dust and wiped down the surfaces to be painted. A coat of Rustoleum primer was applied to the new metal of the floor patches followed by a coat of shiny black. The portions of floor that were patched using pieces of old hood were given two coats of POR-15. Included in that were some fiberglass patches to close off a few gaps too large for welding. They’ll probably need a couple more coats of POR-15 to completely close off the mesh.
The smell of paint was still heavy in the air as I tackled the tricky task of getting the engine off the engine stand. Since I don’t have an engine hoist or a jack that will go high enough, getting an engine safely off the stand has always been a challenge. This time, I tried a slightly different approach and it worked out wonderfully. Of course, in my focus I neglected to take any photos of my ingenuity. First I place two concrete block side-by-side inline with the engine and far enough apart that the engine stand would roll out between. Across them lay two 2X6’s with the ATV jack sitting atop the stack. That gave me enough height to support the engine while I rolled the engine stand out of the way leaving the head plate still bolted to the bell housing. With 4X4’s now placed atop the 2X6s and outboard of the jack, I lowered the engine so the exhaust manifold retainers held up the engine on 4X4s. That allowed me to remove the ATV jack. Next, I put my transmission jack under the extension of the head plate assembly and the ATV jack under the rear engine cover. A slight lifting of the engine and the concrete blocks and wood pieces were slid out of way replaced by a pair of 4x4s under each exhaust manifold. Once the engine was resting on just the 4X4s, I repositioned the ATV jack under the oil pan, raised the engine, and spun the whole shebang around so I had access to the bellhousing end. I didn’t want to have the engine sit too long on the oil pan, so I lowered it back down on the 4X4s under the exhaust manifold and, after bolting the flex plate to the end of the crankcase, called it a day.
While all this was going on, Victoria and Ariel were off on a road trip to buy an older 16’ foot fiberglass sailboat from a guy in Connecticut. They returned late Saturday night, so the first thing I got to do after returning home from church was help Victoria drain the water from her new acquisition. Her hope is to get the boat in good enough shape to take with us on our upcoming vacation to Assateague Island. It needs a good cleaning and some fiberglass work, but looks pretty solid. So now we are the proud proprietors of old cars, an old pop-up trailer, and an old sailboat. Am I a glutton for punishment or what? Oh yeah, now I need to find a trailer hitch for a LM.
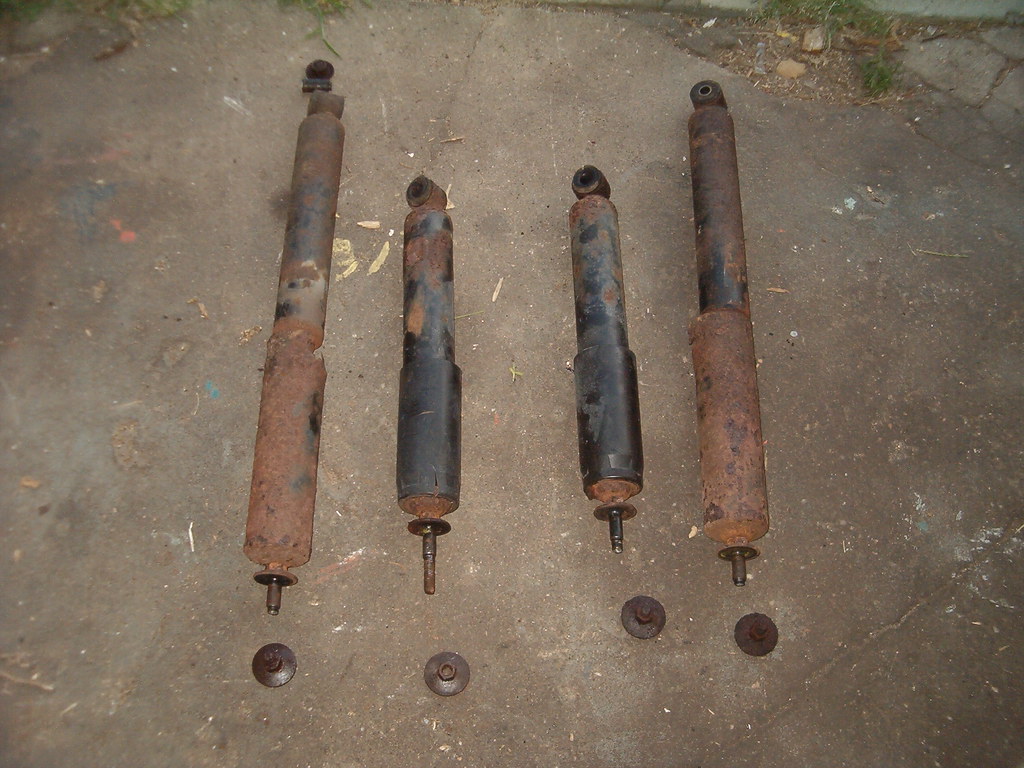 Not Corvair related, but adding to my automotive experience, I spent ALL of Sunday afternoon replacing the shock absorbers on our church’s 2001 Ford Econoline extended van. What a miserable job that was. Each of the four had its own problem. The worst was snapping off a mounting stud and having to drill it out replacing it with a Grade 8 bolt. Funny thing looking back on it was that three of them snapped the top stud off, but only AFTER I’d turned them about halfway off a thirty-second of a turn at a time. Why couldn’t they break right away?
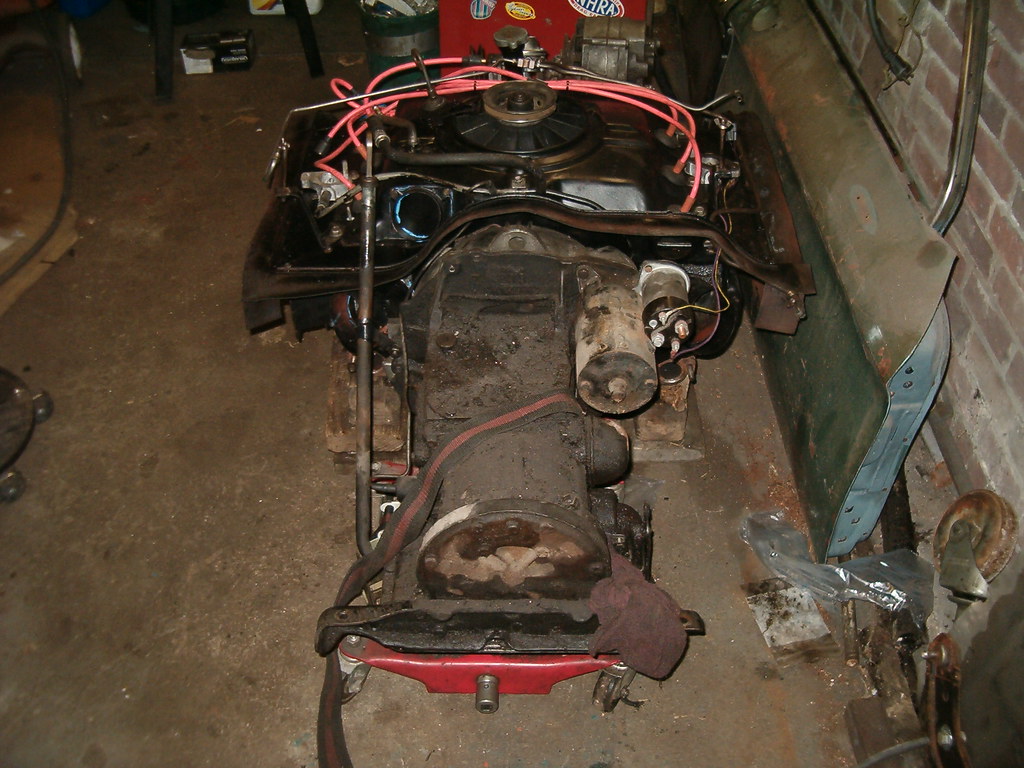 After a dinner break to fill my empty belly and rest my aching muscles, I headed out to the garage and, with Ariel’s help, got the transaxle (Powerglide and differential) loaded on the transmission jack. I rolled it up next to the engine, lined up the bolt holes and created a powertrain. This was a pretty momentous occasion and I celebrated with a little dance. With that out of the way, I proceeded to bolt the flex plate to the torque converter, install the access opening cover, reinstall the front shroud, and assemble the transmission vacuum line using new rubber hose. With the little hand nearing the eleven, it was way past time to call it a day.
No comments:
Post a Comment