First, I need to get the complaints off my chest. Here are the top twenty hassles I had to overcome during the three day weekend to convert Glinda into a manually shifted Corvair. There were plenty more, but my selective memory has already forgot them.
1. I have the habit of doing the hardest, longest projects - be they house or car – on the hottest, muggiest weekends. This weekend held to that tradition.
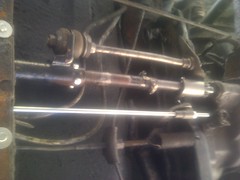
2. I had to sand and wire brush most of the paint I’d put on the shifter rod, after confirming Clark’s instructions with their shifter tube bushing kit “if you painted you shift rod, remove the paint.” Arghhh! An hour down the drain.
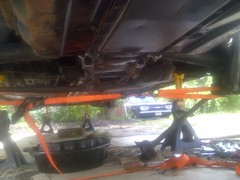
3. It was very depressing to lie on the ground and look up at the rusty underside of a car I’m about to commit my long weekend. I know I won’t even have time to get out the POR-15.
4. Regardless of where I placed my face, rust fell in my eyes.
5. I was reminded that forty-six year-old bolted joints really want to stay bolted. Breaking loose the u-joint bolts carefully enough to not twist off a bolt head is challenging.
6. The plywood I’d planned on using to give me a smooth surface to roll the jacks on being about two inches shy of wide enough, so I was left with rolling smallish wheels over old, heavily cracked concrete.
7. I missed the fact that the generator sticks up enough to catch the perimeter seal while rolling the disconnected and lowered drivetrain out from under the car. Thirty minutes of loosening the retainers and reinstalling the rubber.
8. I found out that a transmission from a ’66 Corvair will not mate to a differential from a ’65 Corvair after bolting the differential to the engine is bummer. I won’t be getting back those three plus precious hours of cleaning, inspecting, and reassembling.
9. I discovered the 5/16 diameter bolts that came out of the ’68 differential will not go into the ¼ diameter threaded holes of the ’65 differential. Overcoming this issue required two trips to Home Depot and two trips to Lowes (don’t ask).
10. I further discovered that normal ¼ bolt hex heads preclude using anything other than an open-end wrench.
11. And I further discovered the ’65 diff yokes are not threaded deeply enough to accommodate the same length strap bolts as the ’66 (hence the additional trips to the hardware store).
12. I realized that new bushings in the shift tube make dead-nuts alignment of the tube to the transmission a must. Now I understand why the stabilizer rod I just straightened needed to be bent.
13. I forgot the differential also bolts to the oil pan. An oily bummer ensued because of that.
14. I noticed the fuel line rubbed on the stabilizer rod unless I installed the sheetmetal piece I neglected to harvest from the ’65 at the Corvair Ranch. At least a half-hour of quality (not) cut-off wheel work on the automatic piece I’d pulled off and I was good-to-go.
15. It took me over an hour of struggling and swearing before I finally remembered I could use a ratcheting strap to pull the rear wheels inboard enough to install the u-joint straps.
16. I spent another hour plus just to get the left side strut rod bolted to the diff after the right side only took fifteen minutes.
17. I forgot to put the clutch rod on top of the strut rod after the last bolt is driven home. Another twenty minutes to undo and re-do.
18. I had the new clutch cable fall off the pedal arm twice.
19. I had to remove the throttle rod pivot four times to provide access for routing the shifter tube, adjusting the shifter tube, tightening the u-joint strap bolts, and installing the bushing that I found lying on the driveway after the previous removal.
20. I did not finish after three days.
Now there were some positive things that occurred through all this, so I’ve created a top twenty of these as well.
1. I have a VERY understanding wife willing to tolerate a bathroom in disarray while I “play” with my car.
2. There are great guys in the Corvair world (thanks Gary, Jeff, and John).
3. Mikhaila was a willing assistant.
4. Physically I can still do this kind of work.
5. Financially I can afford this hobby (thanks Loriann and Dad).
6. The rain held off.
7. I’ve got a nice fan.
8. Nothing fell on me.
9. I didn’t break any bolts.
10. I cut the hole in the carpet in the correct location.
11. Everything eventually fit.
12. I ran the car with the transmission in all gears and there were no squeals or moans (from either the car or me).
13. I happened to still have the early transmission I was supposed to return to my ‘vair buddy John.
14. I happened to have the correct trans-to-diff gasket in my collection of GNPs.
15. Both Home Depot and Lowes were open on Labor Day.
16. Cardboard, zip-ties, and cans of fasteners are indispensable.
17. It’s so nice to have the right tools…
18. …and the right manuals...
19. …and lots of spare GUPs and GNPs.
20. God answers prayers.
With those out of the way, I’ll dive into some details. Friday evening I had hoped to have everything prepped for installation, but was immediately jammed up by the task of installing the new bushings in the shifter tube. That sucked up that night.
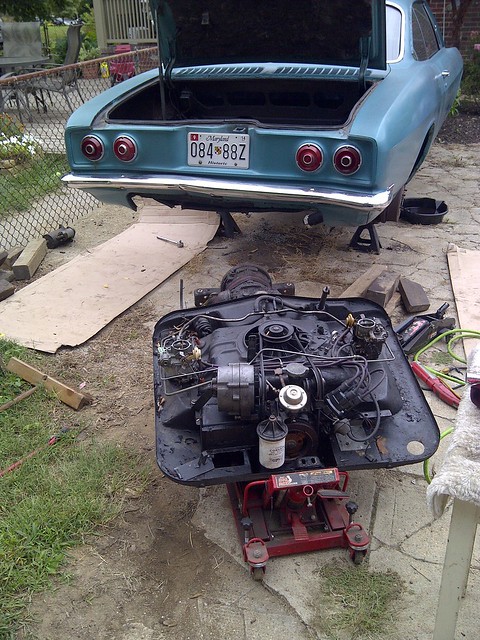
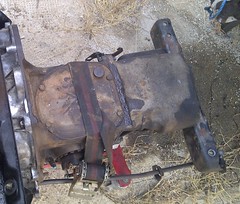
The rest of the weekend was mostly a blur of sweating and swearing. After disconnecting the fuel lines and removing the rear grill, I dropped the drivetrain and rolled it out from under the car. I then removed the transmission, followed by the differential. After removing the three flex plate bolts, I took off the torque converter and then the bell housing. I cleaned off the bore at the end of the crankshaft and tapped in a new pilot bearing. A new crankshaft seal went into the replacement bell housing which was then bolted into place with a new gasket. The flywheel went on next, and while the input shaft centered the clutch disc, I bolted on the pressure plate making sure to match the marks to keep the balance valid. I installed the shaft seal and ring in the bore of the differential shaft before hefting it into position on the flange of the bell housing and bolting it into place. Next it was time to install the transmission. My first clue something was amiss was the gasket Clark’s had sent me. It didn’t look anything like the face of the trans. I went through my collection of gaskets and couldn’t find one that looked like the picture in the manual. I did, however, find a couple of gaskets that were close, so I modified one and Permatexed it to the trans. I hauled it out to the driveway and slid it over the end of the input shaft. At that point it was apparent there was no way these two were going to together. At that point I wanted to cry, but then I remembered the 4-speed that came with the differential. I was supposed to get it back to John, but I hadn’t had a reason to drive out to Eldersburg. Boy was I glad I still had it. I dumped out the old gear oil, stuck the second of the gaskets to the face, applied more Permatex to the outer gasket face, and slid the assembly over the input shaft. In preparation for installing the shifter bits, I removed Glinda’s front seat and put it on Luna’s engine lid for safe keeping. It took some fiddling, but finally all the splines aligned and the trans was face-to-face with the differential. Four bolts later, and the assembly was ready to be rolled back under the car. A short time later and the drivetrain was raised into position, but not without one gotcha’. I forgot to pay attention to the axles and one hung up on the u-joint and jammed. Fortunately no harm was done, and after lowering, adjusting, and re-raising the drivetrain was back in its home. It took a lot of finagling and a phone call to Jeff at the Corvair Ranch before I had the shift tube installed and aligned properly. Next in were all the clutch bits with a cursory positioning of all the adjustments. After installing the starter, hooking up the wires and fuel lines, I started the engine and kept my hand on the coil wire in case things started beating and banging. No unexpected noises – TYL. I shut off the engine and put the shifter in 1st. After restarting the engine I saw the u-joint yokes spinning quite slowly – good. Engine off, shift into 2nd, restart engine, and the spinning sped up a little. This was repeated for all the other gears with expected results – TYL. At this point I felt confident enough to bolt up the axles and strut rods followed by the tunnel covers. With the racing seat and belts bolted in, the rear grill back in place, and the left muffler hanger installed, I turned my attention to the exhaust system. I had cleaned the end of an old u-pipe that had come with Lucy joined to a glasspack muffler and cut it off to replace the flat flange that was on the new exhaust pipe (with crossover). I then cut off the flat flange, laid the prospective assembly over an old pipe, and trimmed the end so the welded assembly will, hopefully, be aligned with the outlets of the exhaust manifolds. At that point it was time to call it a weekend.
Here are all the photos from this swap.
Still left to do. Finish welding, assembling, and installing the exhaust. Find and install a cap over the differential fitting that was used for the now non-existent dipstick. Fire up the engine and adjust the clutch if necessary. Get the leaking front tire re-mounted and install all tires. Drop the car off the jackstands and drive.


No comments:
Post a Comment