My two daughters that still own Corvairs joined me in the driveway Saturday to work on their respective convertibles. About 3 PM, the nice-and-sunny turned into windy-and-more-windy - a cold front swept into our driveway and almost swept away the portable garage and Scarlett’s tarp. In the midst of the gale, the girls soldiered on with their tasks.
Mikhaila was removing broken bits from Scarlett’s left front and cataloguing all the pieces we’ll need to replace. When she finished that, she undid the two bolts holding the trunk-lid latch in place and the turnk was open. She emptied it out and we then worked together to try and push some of the mashed metal back out. I’m not thinking I’ll get away with not replacing large sections of sheetmetal, but I do want to make it easier to cut out the bad and make patches and only with the body in some semblance of straight can that happen. We used the tire jack and an assortment of blocks of wood to push on the front panel. It worked somewhat, but we’ve got a ways to go. After she’d turned into a Popsicle, I released her to go inside and thaw out.
Victoria’s goal was to get Luna running again. She started by installing a pair of recently rebuilt ’68 vintage carburetors including reinstalling the linkage pieces and hooking up the fuel lines. Next, she dropped in and hooked up the battery. Finally, before turning the key, she injected fuel into each carb’s bowl using a syringe. Sadly, when she turned the key, we discovered the battery had gone dead. This is the one that was in Glinda and had gone bad, but I’d recharged it and it seemed to be holding the charge. I was wrong. The plan now is to pull the battery out of Glinda and use it to get Luna running and into the garage.

Showing posts with label battery. Show all posts
Showing posts with label battery. Show all posts
Monday, November 21, 2016

Friday, October 21, 2016
A Quick Trip to the Pick-a-Part

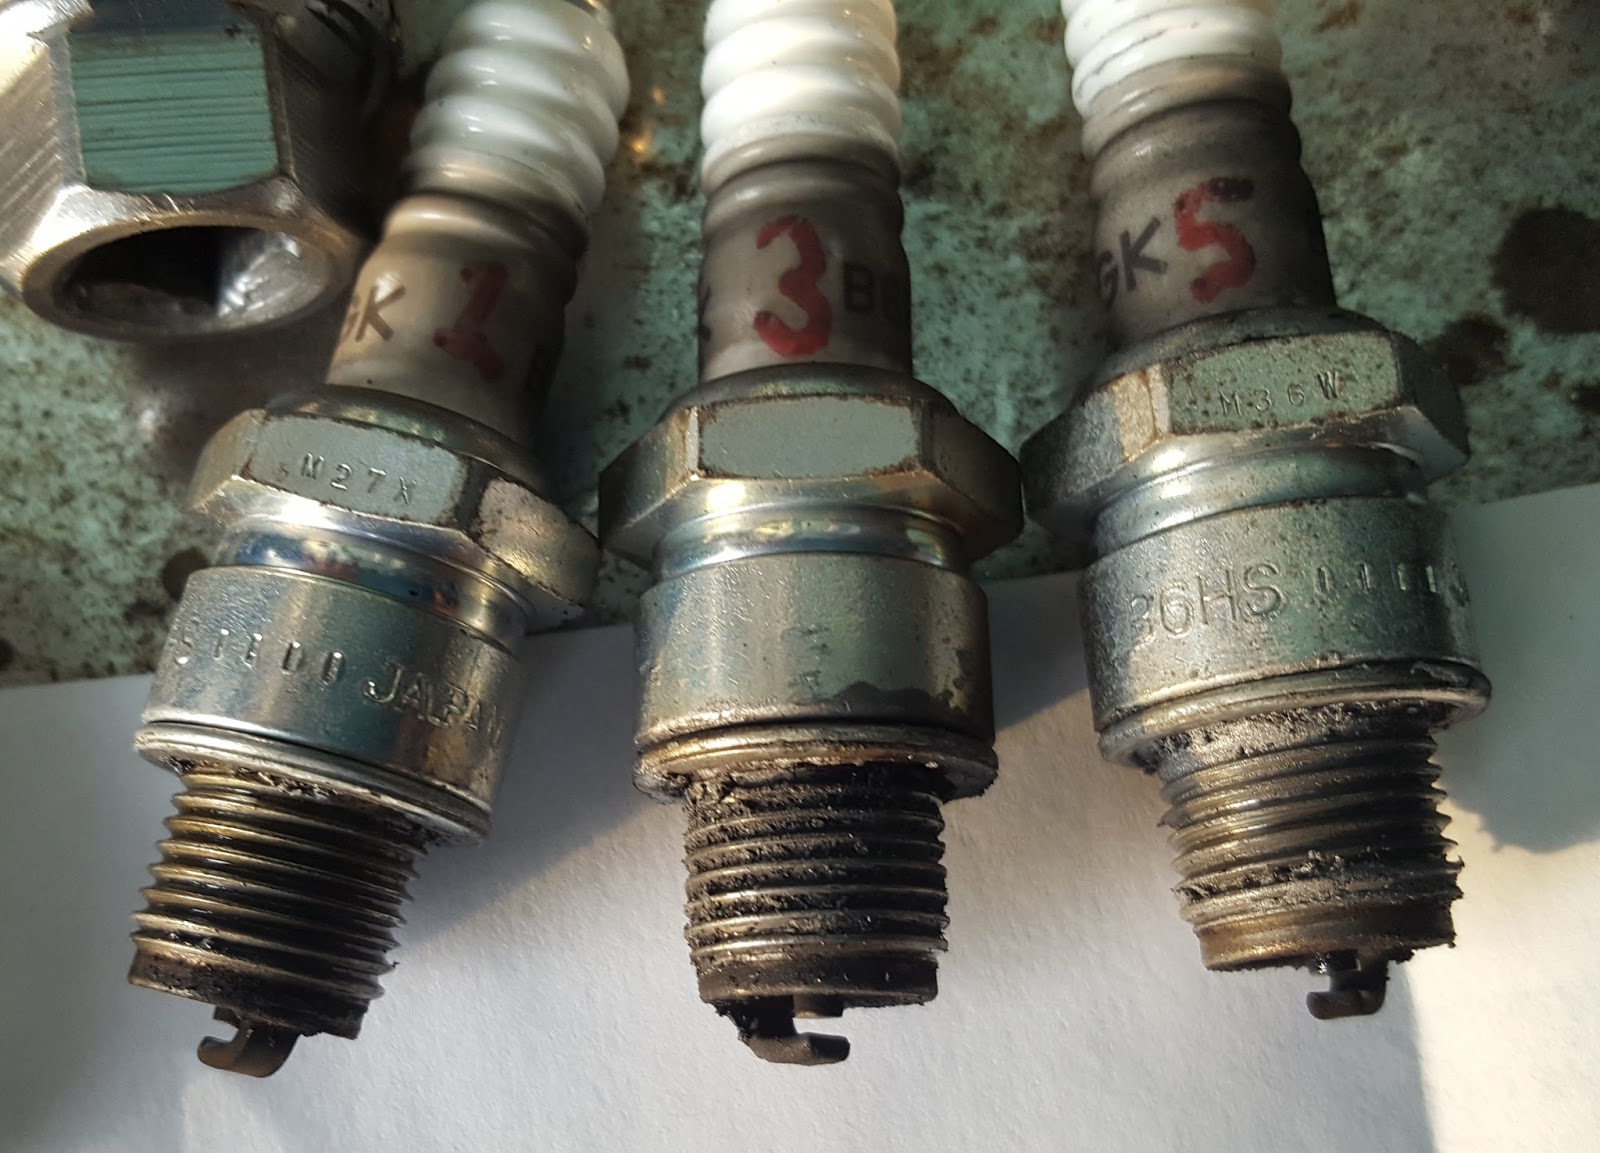
Yesterday evening I spent about forty-five minutes in the garage between getting home from work and dinner. Since Glinda is now running on the two racing carbs, I wanted the spark plugs to be clean so I can best determine if the fuel mixture is not too lean or too rich. I pulled all six of plugs and wire brushed them back to silver goodness. The photos below show their condition as they came out of the engine. Plugs 2,4, and 6 are on the side that had the race carb on it for a couple weeks now and they look a little sooty (rich), while the 1, 3, and 5 plugs were on a stock carb and they look like the mixture was pretty close to right on. I’ll drive her a bit and recheck the plugs. I may go to a slightly smaller jet from the #53 that’s in both carbs. With a little time left before dinner, I yanked off the stock throttle linkage assembly and starter the reinsallt of the fancy after-market setup. I didn't complete the project, but it's nearly done.



At lunch today I popped over to Crazy Ray’s to see what was available. I’ve been toying with relocating Glinda’s battery out of the engine bay, so I was looking for a BMW so I could harvest their battery cable. BMW typically puts their battery in the trunk and uses a long, thick cable to get the juice to the fuse panel. Within the first couple minutes of entering the yard, I came upon a 3-series. About a half-hour later I had a cable in my now-filthy hands. My Leatherman’s knock-off did a great job freeing the cable from its German home. I came back to my desk at work and promptly ordered a battery box off Amazon. Now it’s just the effort of the install and I can cross another item off the To-Do list.
Friday, August 19, 2016
Dead as a Doornail
This morning I slid behind the wheel of Glinda and went to insert the key into the ignition and found something distressing. The switch had been left in the ACCESSORIES position. When I turned the key to the ON, ironically no idiot lights came on even though I felt like an idiot. BTW, is that the correct usage of ironic?
Expectedly, the starter was silent - and motionless too. I let the car roll down the hill some and let out the clutch with the transmission in third gear. The engine spun, but never came close to firing. Irr. I walked back to the house, moved the awesome Challenger out of the driveway, swapped the battery from Scarlett to Ringo, and drove him to work.
Never a dull moment.
I received a response to Ringo's For Sale posting on Facebook's Corvair Trader group. The interested party wanted to know if, 1. I'd be willing to meet him halfway between Baltimore and his home in Maine, and 2. did I think Ringo could make the drive. I responded yes to both with the caveat that the money changes hands (virtually = PayPal) before I hitch Ringo to the truck for a six hour tow. I explained to him the only reason I was towing was I needed transportation to get back home.
Expectedly, the starter was silent - and motionless too. I let the car roll down the hill some and let out the clutch with the transmission in third gear. The engine spun, but never came close to firing. Irr. I walked back to the house, moved the awesome Challenger out of the driveway, swapped the battery from Scarlett to Ringo, and drove him to work.
Never a dull moment.
I received a response to Ringo's For Sale posting on Facebook's Corvair Trader group. The interested party wanted to know if, 1. I'd be willing to meet him halfway between Baltimore and his home in Maine, and 2. did I think Ringo could make the drive. I responded yes to both with the caveat that the money changes hands (virtually = PayPal) before I hitch Ringo to the truck for a six hour tow. I explained to him the only reason I was towing was I needed transportation to get back home.
Monday, August 17, 2015
It's Been Way Too Long
Wow, nearly a month since I last posted. Pretty sad. Anyway, what’s been happening? Well, Mikhaila and I are pretty close to dropping Scarlett off the jackstands, Ringo’s had some work done, and Glinda’s been a reliable daily driver.
More specifically, Scarlett has a re-sealed Powerglide, a Safety-taped shifter cable, two borrowed carbs from Ringo (since I’m sure they work), a solid brake pedal, a coated and installed gas tank, a new in-line fuel filter (by the left rear wheel), hooked up throttle linkage, front seat belts, and all four tires bolted on. In addition to coming off the jackstands, all she needs to get out of the garage under her own power is some gas in the tank, ATF in the transmission, and some ignition system adjustment.
I closed off the opening created by the shredding tire with a membrane tape carpenters use to seal around house windows. It has a strong adhesive backing, is plenty tough, and comes in a roll that’s four inches wide. I also applied Bondo to the treated rust-through around the right rear wheel well. I’ve decided that I will spend my car time this winter working on Glinda. With Mikhaila off to college, Scarlett will vacate the garage and Glinda will take her place. My current list of prioritized projects is:


Regarding Glinda’s ongoing carburetor saga, she’s still showing far better mileage with the stock carbs, so I’m on the verge of sending the modified ones back for replacement. The next fill-up and spark plug inspection will tell the tale.
More specifically, Scarlett has a re-sealed Powerglide, a Safety-taped shifter cable, two borrowed carbs from Ringo (since I’m sure they work), a solid brake pedal, a coated and installed gas tank, a new in-line fuel filter (by the left rear wheel), hooked up throttle linkage, front seat belts, and all four tires bolted on. In addition to coming off the jackstands, all she needs to get out of the garage under her own power is some gas in the tank, ATF in the transmission, and some ignition system adjustment.
I closed off the opening created by the shredding tire with a membrane tape carpenters use to seal around house windows. It has a strong adhesive backing, is plenty tough, and comes in a roll that’s four inches wide. I also applied Bondo to the treated rust-through around the right rear wheel well. I’ve decided that I will spend my car time this winter working on Glinda. With Mikhaila off to college, Scarlett will vacate the garage and Glinda will take her place. My current list of prioritized projects is:
- Treat body rust appropriately
- Get replacements for the racing carburetors and install
- Paint and install the correct dash (no transmission shifter)
- Replace the ignition switch
- Tighten up the front steering (maybe replace the box with a quick-steer unit)
- Weld in floor patches
- Weld in the trunk bottom
- Relocate battery
- Dye the gray racing seat black to match
- Install both racing seats in place of the front bench


Regarding Glinda’s ongoing carburetor saga, she’s still showing far better mileage with the stock carbs, so I’m on the verge of sending the modified ones back for replacement. The next fill-up and spark plug inspection will tell the tale.
Tuesday, March 26, 2013
Make It Better to Make It Gone

I may have a prospective buyer for Lucy. He answered my Craigslist ad last week and we had a tentative appointment for him to stop by Sunday afternoon, but that ended up not happening (he did call me, so my faith in mankind is still intact). We rescheduled for Wednesday evening, but I'll leave Lucy parked on the curb while I drive something else to work tomorrow, so the guy can start his inspection prior to my arrival.
 Much of this last weekend was consumed with non-car activities, but I was able to complete Lucy’s alternator swap Friday night. With my new Harbor Freight soldering iron, I finished splicing the LM alternator harness into the EM harness. After protecting the soldered joints with shrink tube, electrical tape, and plastic armor, I installed the new voltage regulator. Since it is smaller than a stock EM regulator, I had to fashion a couple adapters from strips of sheetmetal leftover from past radio installations. I was finally able to turn the key and see if the GEN-FAN light would go on and then go off once the engine was running. I first plugged my charging system monitor (voltmeter) into Lucy’s lighter socket so I could see how much electricity the alternator of unknown provenance was putting out – if anything. The light came on with the key in the ON position, so I knew I’d wired up the idiot light circuit correctly. The light went off once I got Lucy’s engine to fire. The monitor was showing a nice, steady reading of greater than 14 volts. Project successfully completed.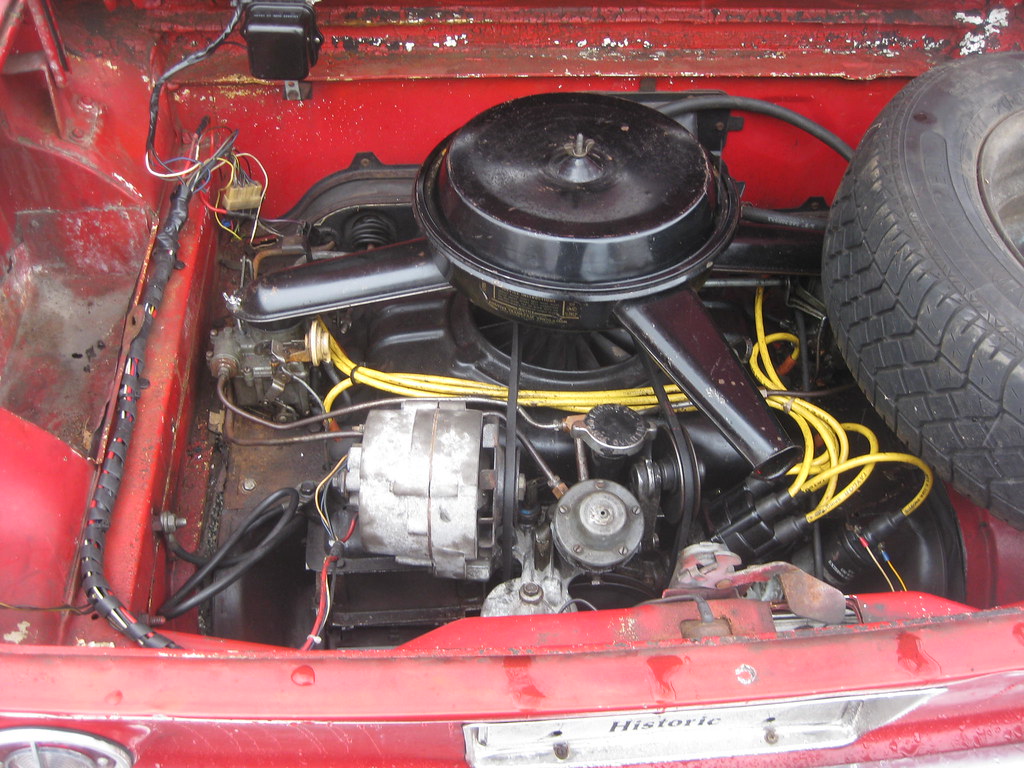

The only other car work that was accomplished occurred Sunday afternoon and was precipitated by a Saturday morning text message from Ariel, “My car wouldn’t start so I had to take your truck,” and, “the battery is dead I think.” Thinking the terminals were corroded, I gathered up my voltmeter, wrenches, wire brushes, and Ringo’s key and headed out to the curb. The meter read over 12 volts once I probed the battery’s two terminals, so I plopped my butt into the driver’s seat and turned the key. At first, the engine barely turned, but eventually it began spinning fast enough for the engine to start. I let it idle for a while noting the charging voltage was above 14. That told me the alternator and voltage regulator were doing their job. Confident I’d put enough juice into the battery to get another start out of it, I turned off the engine and thoroughly cleaned the positive and negative terminals and connectors, reattached everything, turned the key to START, and the engine returned to a nice, steady idle. Fifteen more minutes of idling and charging and I pronounced him good-to-go (with fingers crossed on both hands). By the way, he started right up this morning.
Subscribe to:
Posts (Atom)