Showing posts with label fuel. Show all posts

Wednesday, January 6, 2016

Baby, It Was Cold Outside

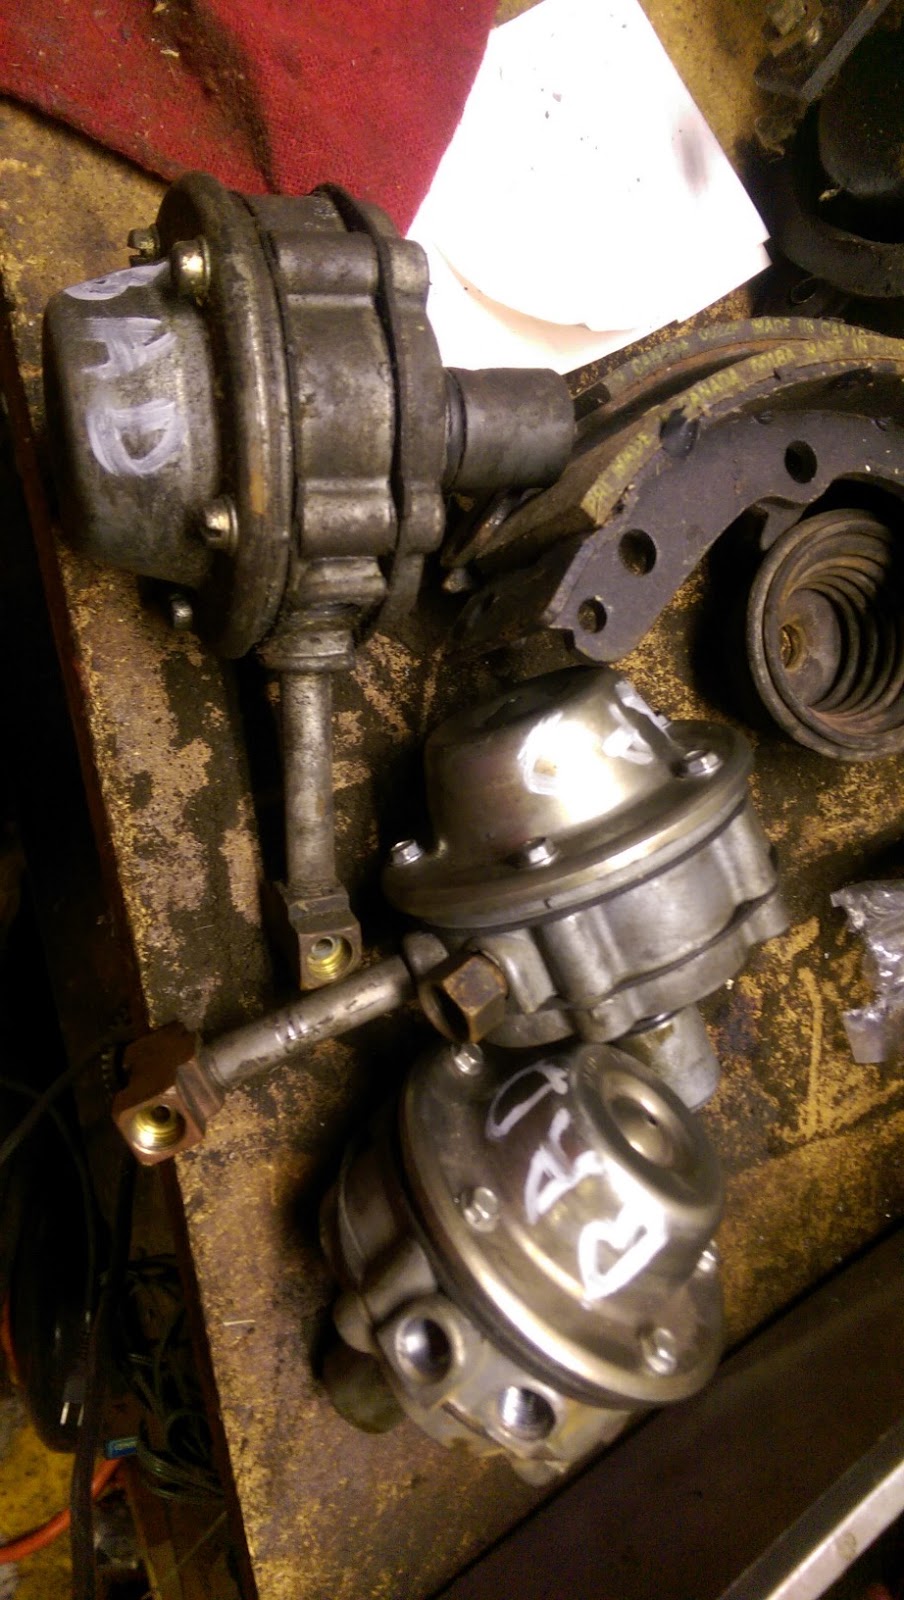
With Scarlett still occupying the garage, work on getting Ringo back on the road had to take place in the twenty-something degree discomfort of the driveway. I had quick to point the finger at a carburetor, but a Facebook posting by my Corvair-buddy Geoff reminded me of the saying, “95% of fuel problems are electrical.” So, the first thing I did after donning layers of grungies was hook up the dwell meter and crank the engine. Dwell was still reading 32, but I went ahead and put back on the previous point’s plate with a GUP set of points with the contacts slightly sanded. Since the cold battery didn’t have enough oomph left to set the dwell by cranking with the starter, I went old-school and set the point gap. As I was turning the engine with a wrench to get the point’s rubbing block on top of a cam, I noticed gas dripping from the fuel pump. Irr. I pulled off the offending part and replaced it with the newish-looking one off Scarlett. After a little gas went into each carb, the engine fired right up and settled into a nice idle … for about a twenty seconds before dying. Irr. Figuring the supposedly functional fuel pump wasn’t so functional, I cracked open one of the fuel line fittings and cranked the engine – sure enough, no gas. Off came that pump and I immediately marked it BAD. On went the next newish-looking pump from the
stash. After attaching the inlet tube, I poured a little gas down each carb, started the engine, and crossed my fingers that I’d see pulses of fuel come out of the outlets. Nothing. Another pump gets BAD written on it. The final pump from my stash was seized, so I had no choice but to put the original back on. With all the fitting tightened, I started the engine and tightened the pump’s screws to stem the drops to just a slow ooze. The dwellmeter indicated my gap-setting, while good enough to get the engine running, wasn’t quite where it needed to be. A tweak or two with a screwdriver and dwell was back to about 32 degrees. That was followed by a re-setting of the timing to 12 degrees BTDC.

At that point my fingers were too cold to continue. Replacing the muffler had to wait until another evening – hopefully one with temps at least in the thirties.

Monday, August 17, 2015

It's Been Way Too Long

Wow, nearly a month since I last posted. Pretty sad. Anyway, what’s been happening? Well, Mikhaila and I are pretty close to dropping Scarlett off the jackstands, Ringo’s had some work done, and Glinda’s been a reliable daily driver.

More specifically, Scarlett has a re-sealed Powerglide, a Safety-taped shifter cable, two borrowed carbs from Ringo (since I’m sure they work), a solid brake pedal, a coated and installed gas tank, a new in-line fuel filter (by the left rear wheel), hooked up throttle linkage, front seat belts, and all four tires bolted on. In addition to coming off the jackstands, all she needs to get out of the garage under her own power is some gas in the tank, ATF in the transmission, and some ignition system adjustment.

I closed off the opening created by the shredding tire with a membrane tape carpenters use to seal around house windows. It has a strong adhesive backing, is plenty tough, and comes in a roll that’s four inches wide. I also applied Bondo to the treated rust-through around the right rear wheel well. I’ve decided that I will spend my car time this winter working on Glinda. With Mikhaila off to college, Scarlett will vacate the garage and Glinda will take her place. My current list of prioritized projects is:
  • Treat body rust appropriately
  • Get replacements for the racing carburetors and install
  • Paint and install the correct dash (no transmission shifter)
  • Replace the ignition switch
  • Tighten up the front steering (maybe replace the box with a quick-steer unit)
  • Weld in floor patches
  • Weld in the trunk bottom
  • Relocate battery
  • Dye the gray racing seat black to match
  • Install both racing seats in place of the front bench
If the kitchen project goes well, I may even prep and paint the car. I’m torn between Summit Racing’s Teal Green Metallic and Bright Aqua Pearl. Then again I may go crazy and shoot the car with Orange Pearl.
 
Regarding Glinda’s ongoing carburetor saga, she’s still showing far better mileage with the stock carbs, so I’m on the verge of sending the modified ones back for replacement. The next fill-up and spark plug inspection will tell the tale.

Tuesday, May 26, 2015

A Eureka Moment


Thanks to a Facebook contributor, it appears I now have the solution to Glinda’s poor running and horrible gas mileage.

A little background. Back when I sent the original '68 carburetors down to a carb guru to have the jets relocated for racing, he discovered that he could not modify them because of all the smog changes GM made. He, instead, traded me some '66 carb bases with the modifications. He sent them back to me without any of the interior parts since that was the way he’d received the ‘68s. I rebuilt the bases using the ’68 parts.

Sadly for me, there’s an important difference between the '65-’67 and the ’68s I’d disassembled. GM put a small needle valve in bottom of the carb base that I did not know about (not in earlier or later carbs). Without this valve, fuel runs too freely into the well that feeds the venture, thus the 14 MPG. Running way too rich had fouled the plugs with soot, explaining why, with the near-flooding, performance was so poor. A phone call to Jeff at the Corvair Ranch, and a couple GUP needles are on their way to me.

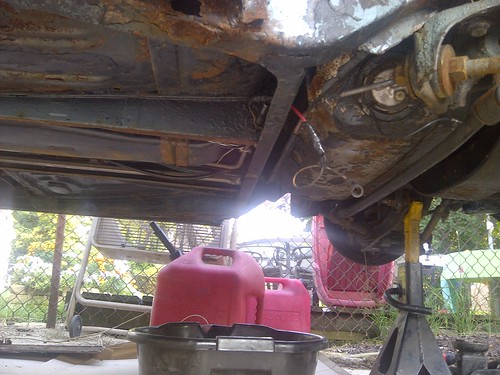
Prior to this discovery, I’d thought there had to be a leak in one of the fuel lines – probably the pressurized return line. That belief prompted me to put Glinda up in the air so I could remove the tunnel covers and inspect everything from the bottom-side. Everything was dry even with the engine running. While I was lying on the ground revving the engine, I could easily see the black smoke associated with an engine running rich. That’s what provoked me to take a video (click her to see, but turn down the volume), post it to Facebook, and seek the help of the Corvair community.

I also pulled the spark plugs and cleaned all the soot from them. Finally, I re-set the floats to ’66 carburetor spec values for level and drop. Once the needles are installed and the carbs are bolted back together, this engine should run like a top.

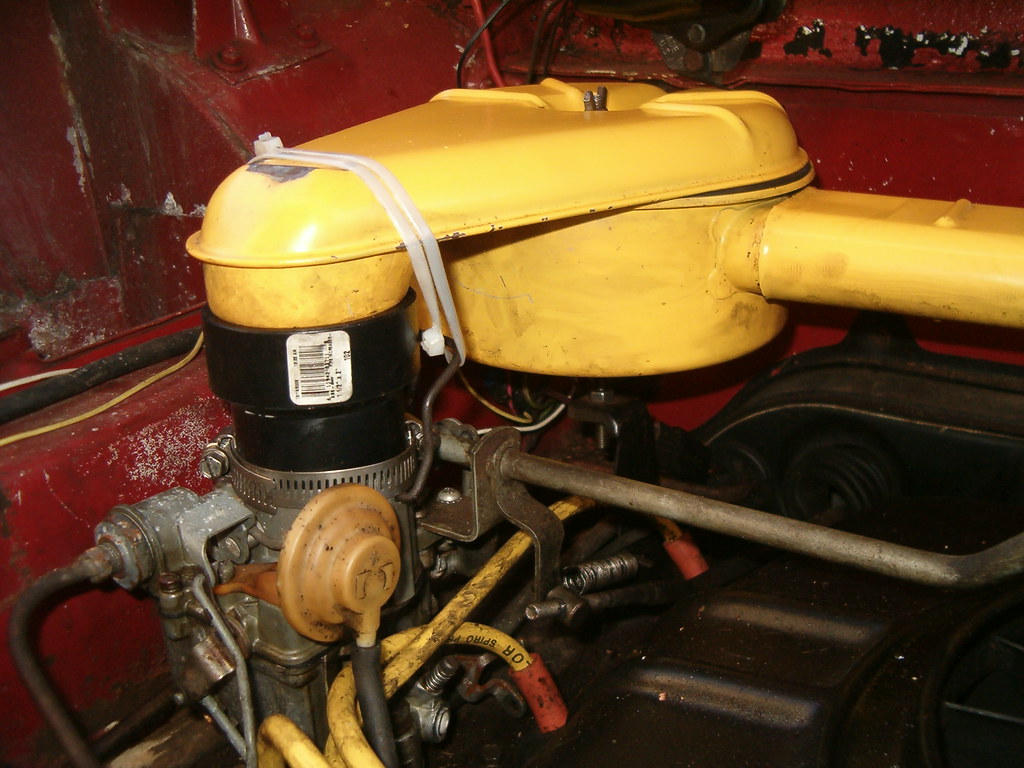
Another task I was able to get to yesterday were creating two extended J-bolts to retain the raised air cleaner. As shown below, I’ve been using zip-ties since adding the PVC spacers. Not anymore. The welder permanently joined two nuts so the stock J-bolt screws into one end and a 3 inch long piece of threaded rod goes into the other end. A nice benefit to this new setup is the J-bolt is now captured. I’ve lost at least one of the stock J-bolts after removing the air cleaner and placing it on the ground. Once loosened, the extended nut on one side and wing-nut on the other will keep the J-bolt permanently part of the air cleaner.

After cleaning the garage, I then took a few minutes to get out the buffer and see if anything could be done with Glinda’s oxidized paint. I tackled the passenger side of the hood figuring I had nothing to lose. After a few minutes of buffing, the pad had a green tint to it as it should. I then got out the Turtle Wax and applied it per the directions. The one side of the hood looks nicer, but there’s no way I’d say it’s shiny.

Tuesday, February 3, 2015

A Day of Waste and a Day of Headway

Last week I e-mailed a response to a Craigslist seller of Corvair bumpers. The body of my e-mail made an offer and told the seller I could drive up Saturday morning to get the two items. His short reply on Thursday was, “Sure, that’s fine.” My immediate response back was a request for an address and a phone number. Friday came and went and no reply, so I sent another e-mail. Saturday morning the lovely Loriann, Mikhaila, Victoria, and I decided to head north even though I still hadn’t received confirmation for pick up that day. I had my Blackberry, so while I waited we shopped (not for car parts) and took in some Lancaster-area attractions. By 4 that afternoon, there was still nothing, so we headed back home bumper-less. It wasn’t until Sunday afternoon the guy finally checked his e-mail and replied. I guess all the optimism in the world won’t trigger someone to respond to an e-mail. While he’s still holding the good price, I’m not sure I’m willing to blow off another day driving up into PA to fetch them. We’ll see what happens with the rest of this month.

On the headway-front, Mikhaila and I spent a fruitful couple of hours in the garage Sunday afternoon. She applied POR-15 to Scarlett’s underside and to a few of her own body parts. Hard to believe she was able to spread it so far since she was covered head-to-toe. While she was spreading paint, I was readying the engine for starting. I bolted on two carburetors with fresh gaskets, found the best gas lines in my stash and installed them to the new-looking fuel pump. Wanting to save some tasks for Mikhaila to accomplish, I diverted my attention to the brakes. I installed the two new rear brake lines and screwed in the tube fittings coming from the front of the car. We’ve still got a ways to go with brake system including bolting in the dual master cylinder new lines up front.

Once Mikhaila was up from under the car, I had her help me install the alternator (yes, Scarlett has been converted from generator to alternator). Next we were going to put on the fanbelt, but I vetoed that due to a dry-feeling bearing in the idler pulley. I know I’ve got a few spares in much better shape, so we’ll catch that next time. The last item before we fire up the engine is a new set of spark plug leads. I’ll be ordering these from Silicone Wire Systems, but I need Mikhaila to pick out a color first.

I just noticed I've now had over 75,000 hits on my blog. Cool!

Friday, January 2, 2015

So, How’d We Do?

When last I posted I was hopeful that Mikhaila and I would make significant progress on Scarlet during our ten days of holiday. While we were able to spend some quality time in the garage, we got neither the engine running, nor the salon ready for carpet.

Instead we removed the stabilizer bar (we’ll need to replace the bushings and bolts), the strap retaining the fuel tank (nothing broke), and the fuel tank itself. Since it was above freezing (TYL), we filled the tank with water and watched it escape through a dozen or so tiny rust holes. This tank won’t be reused. Thankfully, I’d kept Two-tone’s tank. I pulled it out of storage and we filled it with water, only discovering one tiny hole. That’ll easily be closed off with the sealant we’ll be using to coat the tank’s interior.

Leaving the tank in the sun to dry, we moved on to the rear bearings. Starting on the left side, we discovered that some of the pieces (guard and deflector) were missing, so I pulled a GUP rear axle assembly from my stash and we proceeded to tear down the bearing. With the bearing exposed, I set Mikhaila to cleaning with brake cleaner while I tore down the left side. This assembly, fortunately, had all its pieces. When both sides were thoroughly degreased, we packed and reassembled using synthetic grease. Getting the retaining rings in were the trickiest (and most frustrating part of the job).

The other big job we completed was taking inventory of my boxes of GNPs and GUPs. I’ve inherited a couple collections of parts as well as parted out a few Corvairs over the years and never did a good job documenting what I’ve actually got on hand. It took a couple hours to go through the boxes with me dictating part names (or Clark’s numbers when they were available on the original packaging) while Mikhaila typed them into a word file. The list (minus a number of big, loose parts like engine block halves, heads, cranks, manifolds, etc. numbered over two-hundred-fifty items. Prior to starting this exercise, I filled a wheelbarrow and a garden cart with parts and pieces I’d never use. These were hauled to the curb and, minutes after posting a “curb alert” ad on Craigslist, were gone.

With a couple significant house projects basically dealt with, I spent yesterday out in the driveway. After installing a couple lowering shackles on the rear of the truck, I turned my attention to Glinda. With the air cleaner off, I did the hand-over-the-carb-rev-the-engine thing and that seemed to help (but not completely fix) the rough running.

Next, I backed her up onto my new ramps and with Mikhaila’s and the lovely Loriann’s help, I made some adjustments to the clutch linkage and got rid of the annoying catch (clunk). Something associated with the clutch fork was dragging up in the bellhousing. It would let go about the same time the clutch would engage. To get rid of it, I moved the two clevises (I checked, the plural of clevis is not clevi) about an inch each on their associated threaded rods. Clunk gone; me happy.

Finally, I installed the carb top spacers that had been floating around since they failed to work right on Lucy nearly four years ago (see photo). I notched the two PVC adapters to clear the ribs on the carb tops and applied small foam tape to fill in the small gap between the adapter inside diameters and the carb outer diameters. The smaller end of each adapter fit snugly on the bosses at the ends of the air cleaner crossover. Instead of using the J bolts to retain the crossover, I used zip-ties through the same holes. To take up the new gap between the air cleaner’s underside and the mounting surface of the support, I cut a piece of ½ inch PVC. To extend the threaded rod that captures the cleaner’s cover, I welded two ¼-20 nuts together (I love using my welder). The upside of all this is smoother flow of the air coming into the carburetors since the right angle turns have been moved a couple inches above the inlets. This morning I drove Glinda to work, and the rough running is still there, but not nearly as bad. As I pulled into the parking lot at work and down-shifted, the aforementioned clunk was there again. Irr. Guess a little more adjustment is necessary. Irr again.
Wednesday, August 20, 2014

I Hate the Smell of Gasoline in the Morning

As I posted yesterday, Monday evening was spent replacing the leaky float in Glinda’s gas tank. Yesterday afternoon I bugged out of work at 4 and was pouring gas into Glinda’s tank by 5. After putting about three gallons in, I turned the ignition key to ON and watched while the gas gauge needle did … NOTHING. I had it in my head that the capacity of the tank was twelve gallons, so a fourth of that should at least move the needle above E. As a check of the gauge, I disconnected the sender and measured resistance across it - about 3 ohms – the same value I got for a completely empty tank.

Thinking the new float was bad or I'd put it on backwards and it had stuck to the wall of the tank, I siphoned out the fuel in the tank and removed the sender - the float was dry and empty; measured the resistance across the sender while manually moving the arm – it went from about 3 ohms to about 90 ohms; plugged the sender back in; grounded the sender's black wire; and had a friend watch the gauge as I manually moved the arm with the sender in the same orientation as it would be in the tank - the needle moved just as it should. By the way, as soon as I disconnected the sender, the gauge needle did go to well above F. I then flipped the float around (even though it now disagreed with the manual), reinstalled everything, poured about three gallons in - needled didn't move from E.

Okay, everything checked out as functional, but the stubborn donkey-esque needle wouldn’t be budged. My next step was to go whining on the internet and see what stupid error I was making. Responses came back that four gallons was not enough to move the float. GM meant it to be that way. Since the tank holds 14 gallons (not 12), once the needle reaches E, you’ve still got three to four gallons of reserve fuel.

Excellent – I spent three precious hours solving a non-existent problem. I guess gas fumes do have a long-term, detrimental effect on brain activity.

Tuesday, August 19, 2014

Will It Continue?


Late yesterday afternoon, I had a meeting at a location about 4 miles closer to home than my desk. At the meeting’s end, instead of driving back to the office, I continued on home and went to work on Glinda. After donning grungies, I put the car up on jackstands and, with great determination, attacked the faulty fuel gauge. After a number of electrical tests, I concluded the problem must be with the sender. To the chagrin of the lovely Loriann, I drained the fuel from the tank releasing a cloud of fumes to pollute her air. With the gas safely stored in containers, I removed the ring retaining the sender at the bottom of the tank and removed the assembly. The heavy float emitted a fine spray of 93 octane as I turned it over. Problem detected. Fortunately, I had a new float and a new sender sitting on the shelf, so taking the chance that it’s a good sender, I installed it. At that point, the dinner bell was ringing, so I quit for the night.


While I’d been waiting for the gas to siphon into the gas containers, I began preparing parts for the pulling of the drivetrain. I removed the two tunnel covers, the fuel pump, the oil gauge tube hookup, and the air cleaners. I disconnected the fuel lines and the connectors at the alternator.

Now I need to keep the momentum going since I just signed up for the event and spent $25 on a used helmet. I’m really going to New Jersey Motorsports Park!

Monday, July 14, 2014

Two-and-a-Half Hours to Fix a Switch

Actually, it only took a half-hour to fix switch, but it took two hours to finally decide that that was the problem, remove it, and then reinstall it after the rebuild. When both the gas gauge and the wiper stopped working, I jumped to the conclusion that GM’s construction of the switch uses a pot-metal (soft) housing retaining the plastic, copper, and steel of the switch’s internals, contacts, and connectors. The basic function of the switch is to connect combinations of blade connectors to the housing, and, thus, to ground. This completes different 12 volt circuits running through the wiper motor causing it to spin slow or fast. As I posted before, when I was installing the clutch pedal, I had to undo all the wire bundles under the dash. I surmise, then, that I yanked on the wires going to the switch, causing the contact-to-housing connection to fail. I ended up removing the switch from the dash, disassembling it, cleaning the contacts, coating them with di-electric grease, stacking all the pieces back into the housing, and then crimping the housing to the insulator making sure I caused the housing to touch the correct contacts within the switch.

With the switch back in place and the wipers wiping again, I turned my attention to the other dash-mounted failure – the gas gauge. I removed the screws retaining the heater controls and pulled it out of the way to give me access to the back side of the gauge. I then pulled off the connector, turned the key to ON, and measured the voltage at the tan wire – 12.4 V which just happens to be the reading on the voltmeter that’s bolted under the dash. Therefore, the sender is still connected to the gauge, but providing no resistance to the electron flow, indicating – to me – the float is on the bottom of the tank even though the tank is full of gas.

Given all the time I wasted on these two projects, I didn’t have time to do anything more on the car that evening.

Thursday, June 26, 2014

Ungrounded?

The lovely Loriann’s daily-driver had a breakdown the other day, so while I wait for parts, she’s driving the truck, and I’m behind the wheel of Glinda. Swapping the right-side carb from Ringo onto Glinda (replacing the one with a noticeably higher fuel level) has pretty much erased the quick-throttle bogging issue. With that problem solved, it’s been difficult not to use the loud pedal more exuberantly. With that, I’m not sure I’m doing my fuel mileage test any good.

It appears that I’ve messed up the grounding of the dashboard when I was installing the new clutch and brake pedals. I first noticed that the wiper switch wasn’t working, and then the fuel gauge is now stuck on E. Monday evening I tried finding the disconnected, wayward wire, but struck out. After some web research, I found the ground strap in an assembly diagram, so that’ll be my next inspection point.

Of course it could also be a coincidental failure of both items, but I deeply doubt it.

Monday, June 9, 2014

I Am So Frustrated

All is not rosey with the fleet right now. No work has commenced on Scarlett, Victoria is uninspired to work on Luna, Glinda’s fuel mileage woes continue, and Ariel just reported that Ringo’s driver’s door won’t open. Argh!

As mentioned, Glinda’s mileage keeps dropping (we’re down to less than 11 mpg), but I still can’t find why. While it does look (slightly sooty tail pipe) and smell like her engine is running rich, I find it hard to believe that the #52 jets are responsible. These are the same jets that, on the stock carburetors, gave nearly 20 mpg, but on these rebuilt ’66 vintage carbs the mileage keeps dropping. It’s that last bit of information that makes me believe something is leaking and the leak is getting worse. I need to find the source of that leak and fix it. Regardless, I still need to swap in the smaller #51 jets I got from the Corvair Ranch to treat the bogging under quick throttle issue.

It appears I’ll be buying a used door latch from the Ranch and installing it in Ringo’s inoperable door. That won’t be fun. At least it failed in the closed position. Ariel says she’ll finally be a serious car shopper come early July.

Monday, March 10, 2014

Yes, Progress Was Made


Can I say that my winter of discontent is gone? Not quite, but the light at the end of the tunnel went from a hazy blur to a noticeable circle. Saturday had the beautiful weather that was predicted so working in the driveway was pleasurable. Attempting to stick to my to-do list of Friday’s post, I started by installing the pressure gauge using some 3/8” fuel hose, and a spare fuel pump nipple. With the engine idling the current fuel pump (call it pump #1) showed a reading of 10 psi (remember stock is 3-4). I was giddy with joy over this failure. It appeared that I’d found the source of Glinda’ horrendously low fuel mileage. Not to fix the failure. With two GUP pumps on the shelf, I decided to see if either of them has the right output before I popped open pump #1. Well, pump #2 was only slightly better at 9 psi, while pump #3 was the Arnold Schwarzenegger of fuel pumps with a reading of 14 psi. Not wanting to un-mount a pump again, I removed the five small cap screws holding the pump sandwich together, cut off about a half coil from the internal spring, and reassembled the pump. That brought the pressure down to about 12. It took five more disassemble/cut the spring/reassemble/test cycles before I got the pressure down to just a hair above 4 psi. In the end, I’d removed about two coils from the spring leaving only four. I didn’t have a chance to do a test drive to see if the quick-throttle bogging was gone, but once the rain washes the salt away, I’ll be able to get her back on the road.


The next task on the list was to install the new stereo. That went well, and the tunes that come out of the two six by nines on the package shelf sound awesome! At that point, it was time to knock off for the day.

Sunday afternoon it was Ringo, not Glinda, that kicked off the car-work. Ariel had gone to drive him to church Saturday morning and discovered his left rear tire was almost flat. She limped him over to the house, and I jacked up his left rear, pulled the tire, and quickly found the leak-causing nail. A few minutes later, the nail was out, the hole was plugged, the tire was tested and then re-installed on the car. When I’d gone to Ariel’s work to deal with the broken pin in Ringo’s door, I’d noticed the driver’s door was very difficult to latch. To address that problem, I moved the strike plate as far out as it would go. This made it possible to get the door to latch without slamming it and it doesn’t seem to have affected the fit. TYL.


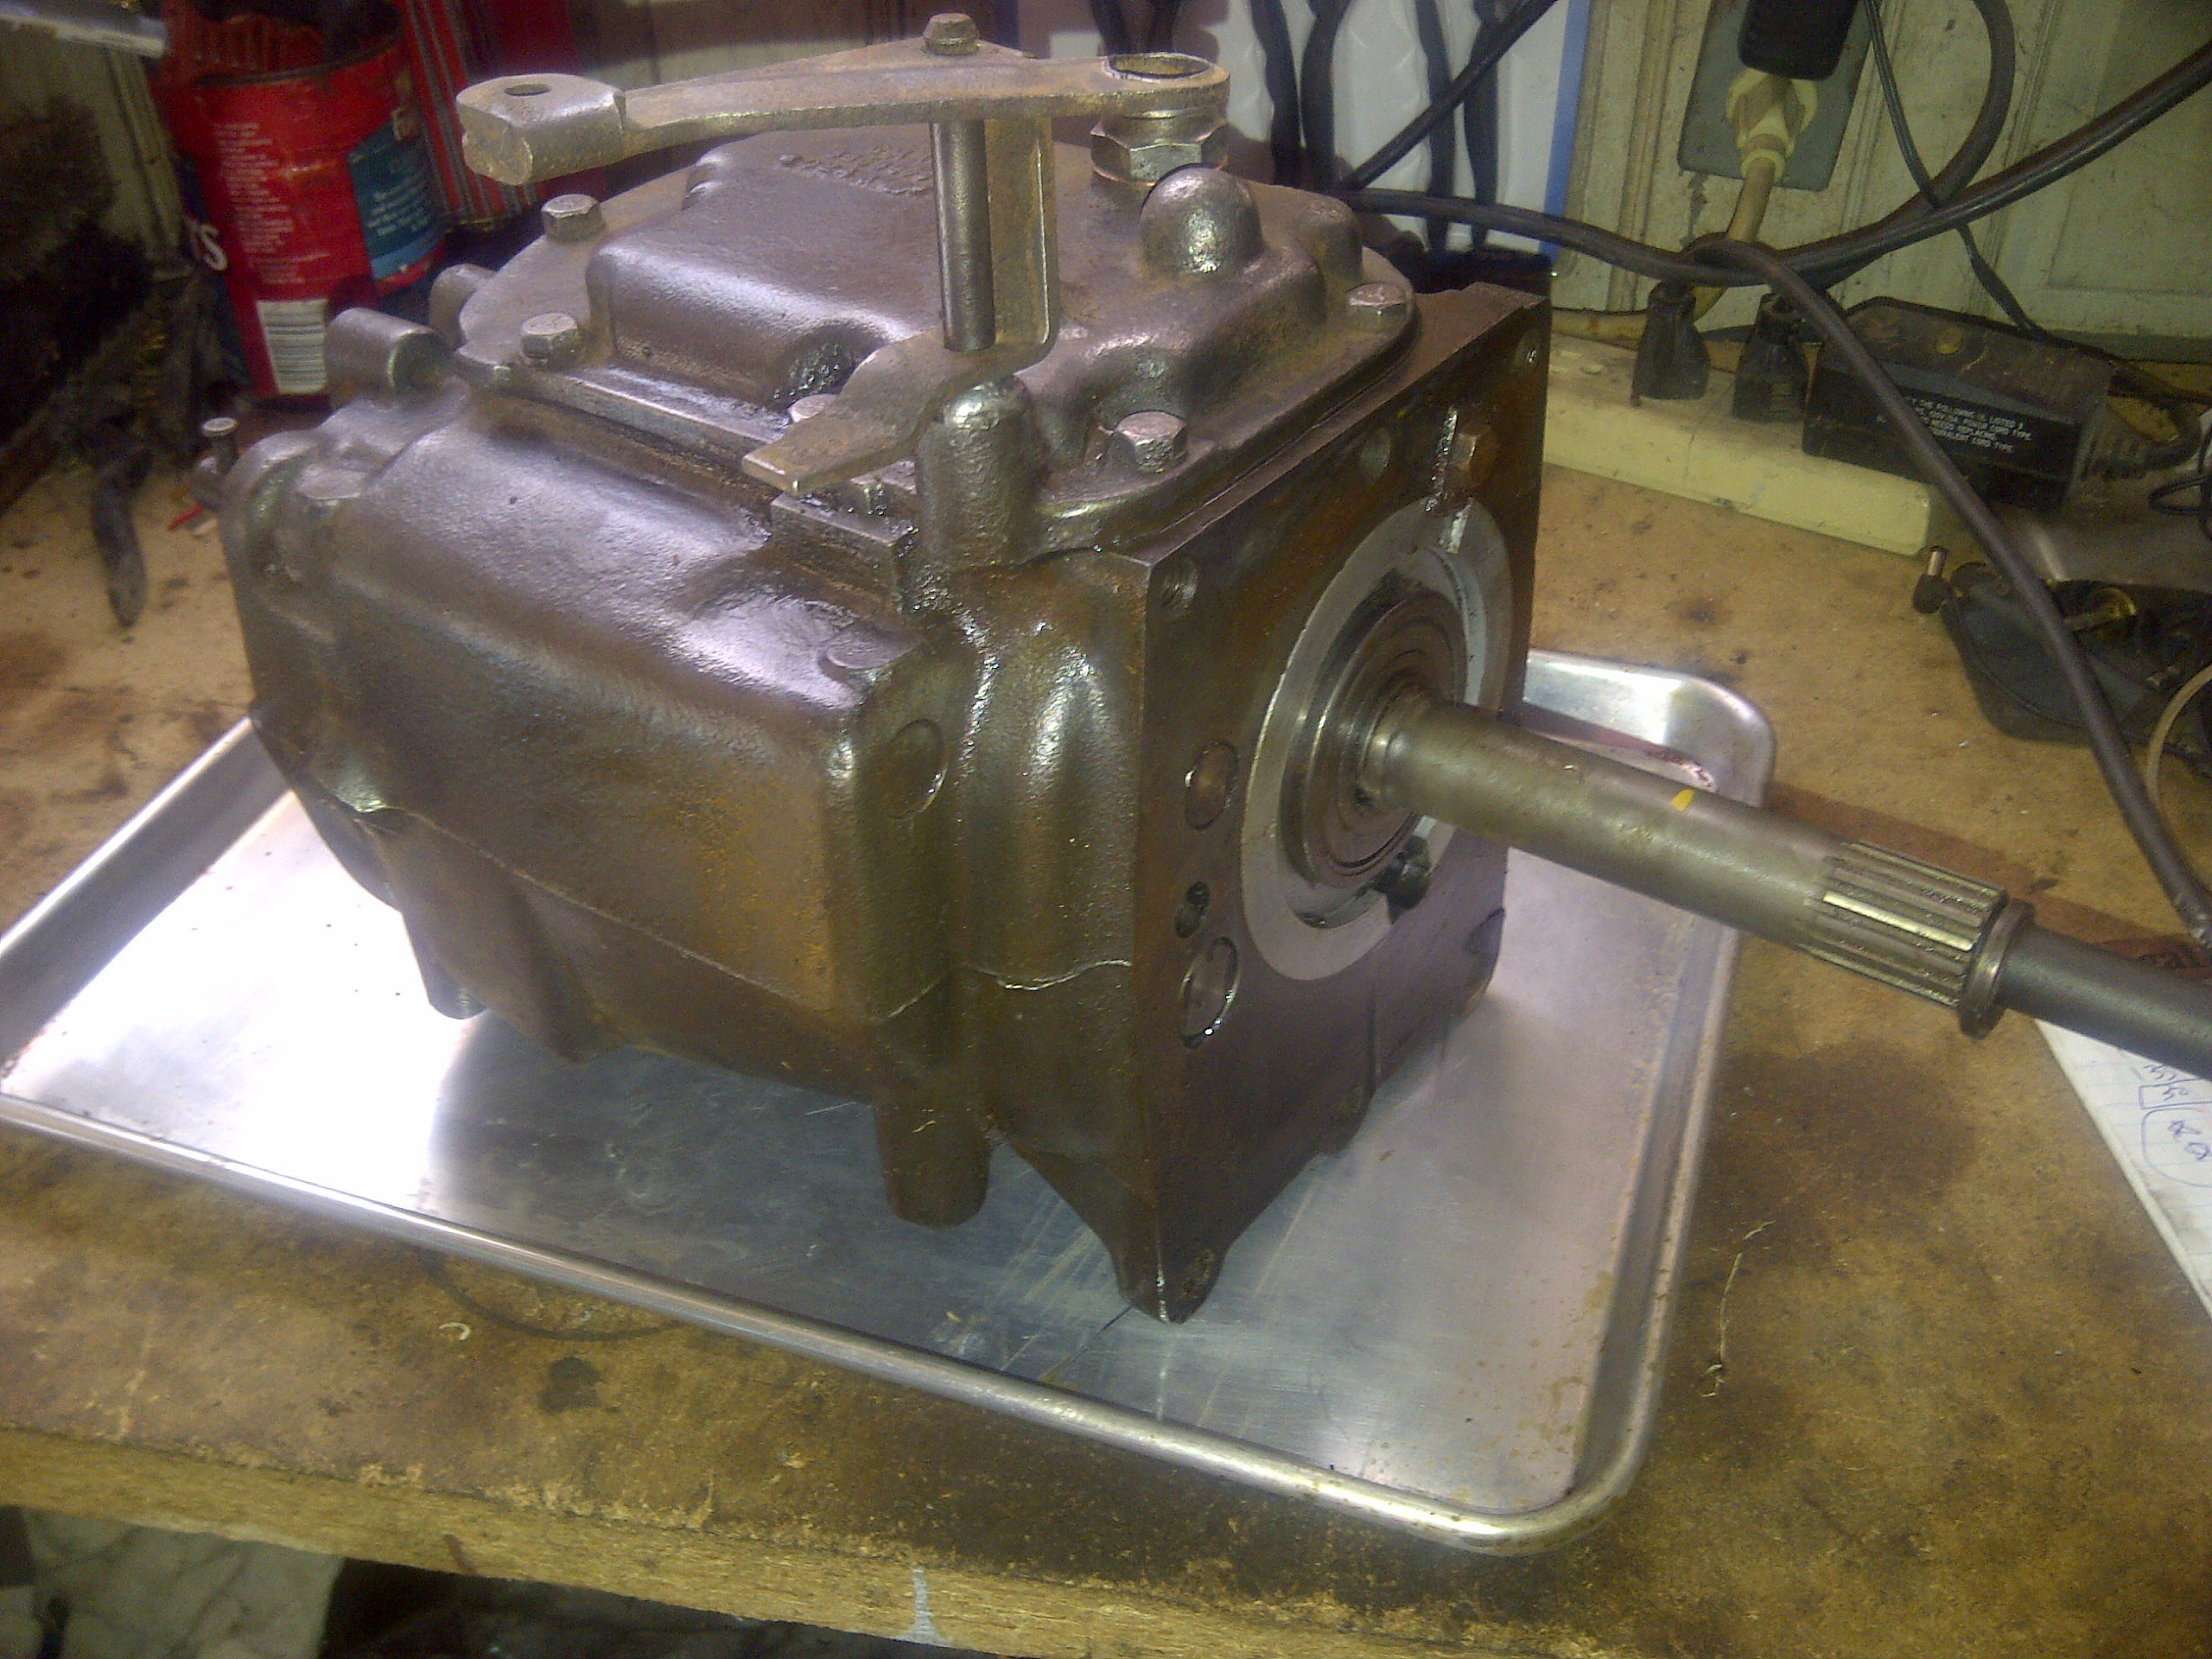
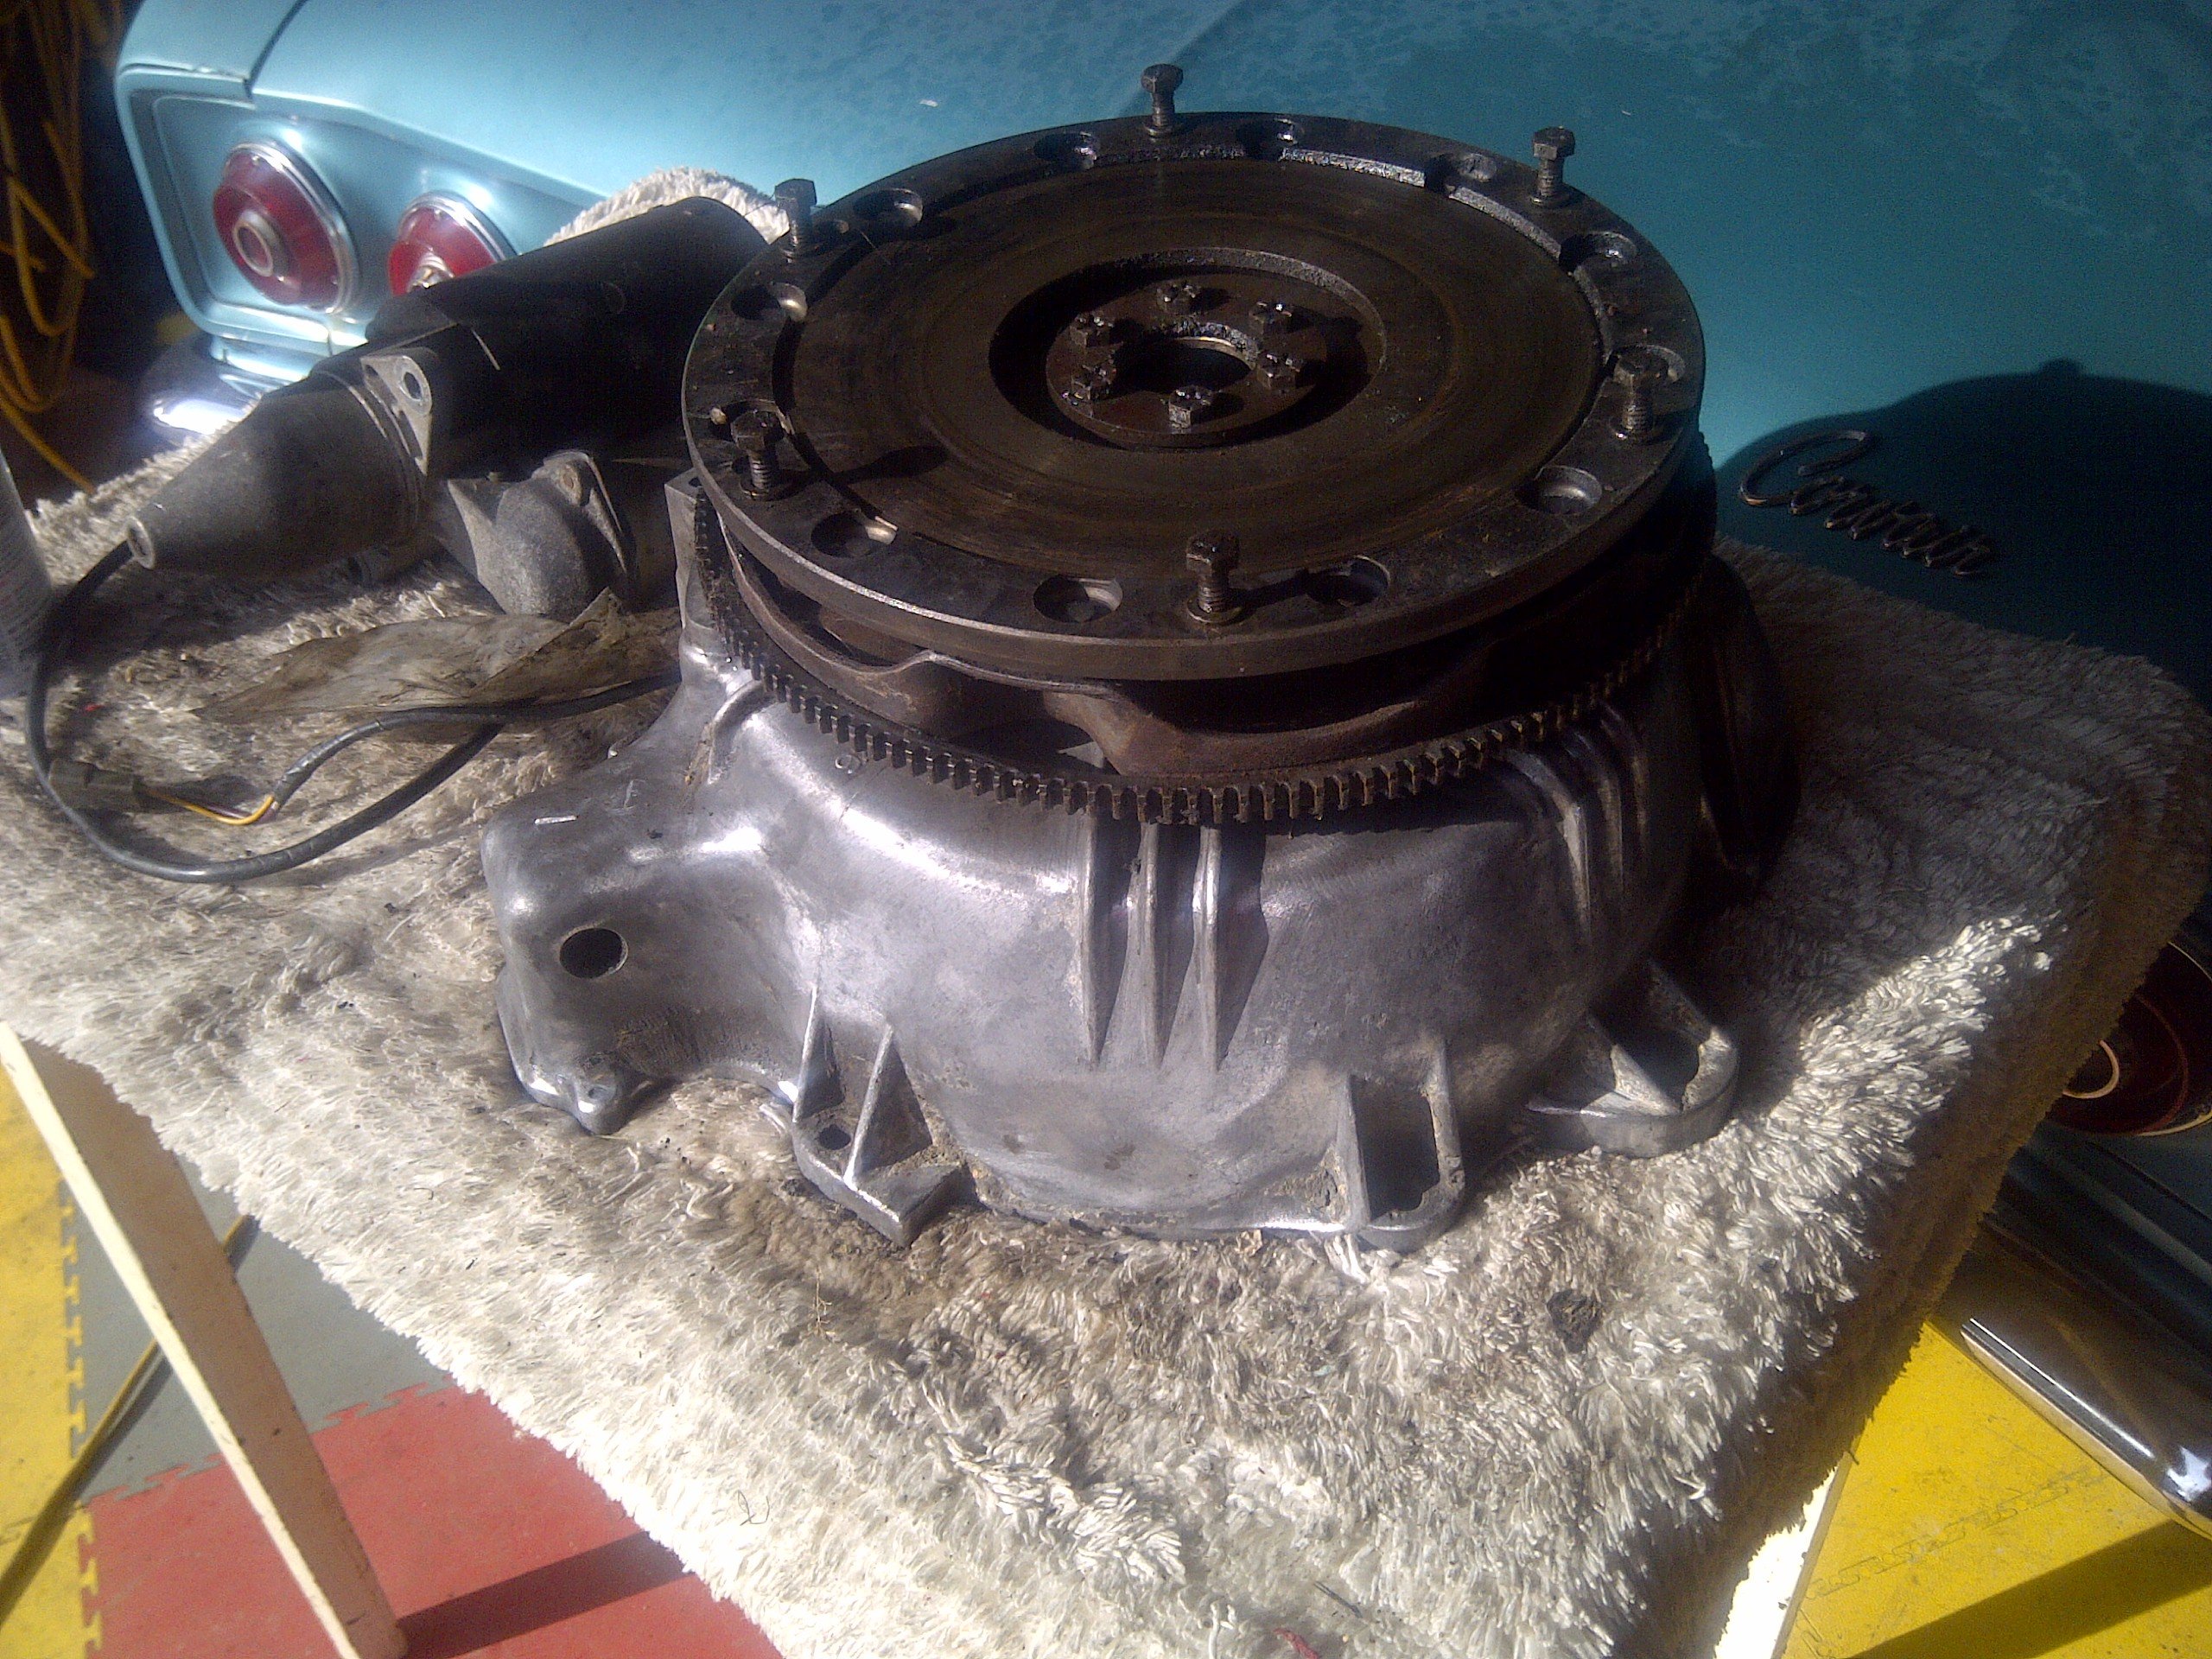
With Ringo roadworthy again, I decided to divert from Glinda’s to-do list and focus on prepping the 4-speed swap parts as opposed to installing the pedal assembly. Out of the portable garage came the transmission and after some quality time on the receiving end of my grinder-mounted wire brush, it looks like something usable. As I was turning the housing around, clear 90 weight oil oozed out the hole in the differential mounting face and it looked clean. I’m not going to mess with the tranny since the optimist in me equates good oil with good transmission – it’s easy that way. Next out onto the grass for a good brushing was a bellhousing that had the letters LM written on it. I’m praying I marked it correctly. It too became clean-looking and was set in the garage for clean storage. I noted that I’ll need to replace the engine seal that is part of the bellhousing. Next I dug out the pressure plate, flywheel, and associated fasteners. The flywheel feels tight, so I’ll be able to replace the rivets with screws without any troubles (fingers-crossed). Finally, I gave a glance at differential that came out of Phil’s Corsa and the broken end of the output shaft reminded me I need get a replacement differential or rebuild this one with a new shaft. I’m going with option number one if I can score a stock open one for less than $100.


What a joy it was to make some headway in getting Glinda’s transmission swap. There are a lot of work left to do, but I’m confident now that I’ll be able to squeeze it all in before the Memorial Day weekend track day scheduled in New York.

Friday, March 7, 2014

Will It Happen?

Will the winter of my discontent come to an end this weekend? Will Glinda become more than just the object of my rejection? Can I find the source of her gas-hoggedness? Will the 4-speed swap begin? I pray the answer to all these questions will be a resounding yes come Monday. The weather is predicted to be tolerable, there aren’t any house projects scheduled, and Ringo is currently roadworthy (TYL).

With TwoTone in the driveway, Glinda has the place of honor (in the garage). My plan is to start my car-day by checking her fuel pressure. It’s supposed to be 3-4 psi. Anything higher than that will cause the level in the carburetor bowls to be higher, and thus reduce gas mileage. There is a fix to reduce the output pressure of the pump, and that is to shorten the length of the pump’s spring. I’m praying this is the problem, and that the fix goes easily. Next on the agenda is installing the new stereo and speakers that have been sitting on the garage floor for a few months.


Item three is slapping on the IROC wheels and tires I bought at Rich’s parts sale. I posted the following doctored up JPEG on Facebook today to get opinions on how I should colorize the wheels, if at all. For now I’ll put them on plain, but painting the insets of the spokes body color is a leading candidate for change.


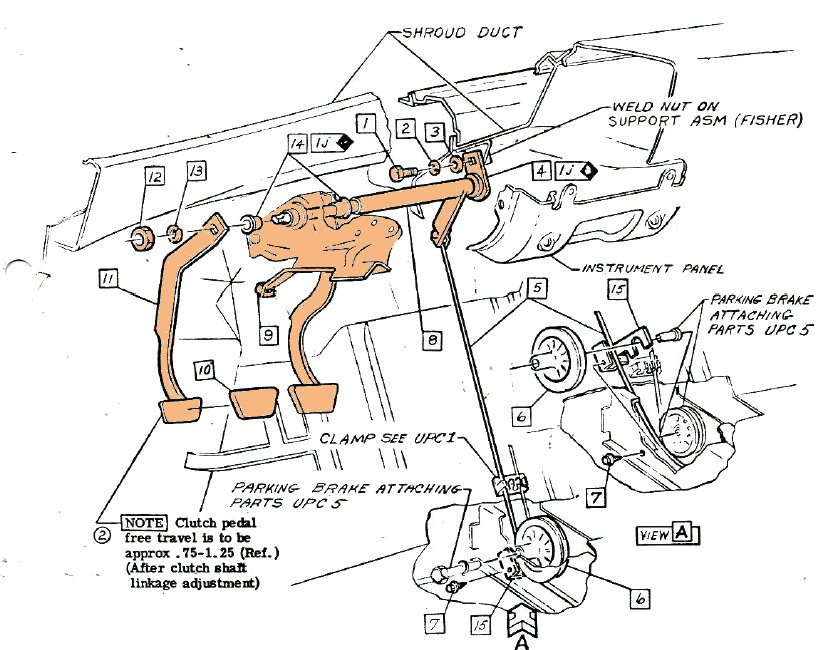
Finally, I’ll begin the 4-speed swap by installing the pedal assembly. I won’t care if the third pedal can’t do anything – I’ll just zip tie it out of the way. Hopefully, this will leave me time to gather together all the parts and pieces that I’ve collected for this swap allowing me to determine what I’m missing. Finally, I’ll check the condition of the flywheel. My hope is that it’s in good enough shape for me to replace the unreliable rivets with 7 mm bolts.

Come Monday I’ll report back on what, if anything, I actually accomplished.

Wednesday, February 26, 2014

Too Much Fuel?

Last Sunday I reinstalled the re-rebuilt carburetors onto Glinda with high hopes that the quick-throttle bogging of the engine would be gone. The reason I could bring myself to this state was that the carburetor that had not been showing an accelerator pump shot miraculously fixed itself. I was going to tear it down on the workbench, but gave the linkage one more blip and lo-and-behold out came a couple squirts of gas from the accelerator pump port.

Anyway, the carb went on, followed by the spark plug leads I’d borrowed for TwoTone’s startup, followed by the air cleaner and spare tire. The engine fired right up and settled into a thousand-rpm high idle. Success!

Or was it? The next morning I drove the car to and from work and sadly watched the gas gauge needle drop nearly an eighth of a tank. Tuesday I drove the thirsty beast again and watched the needle drop below three-quarter tank. Argh!

Maybe the fuel pressure is too high? I ordered a fuel pressure gauge setup from Amazon that should arrive today, so I’ll be checking. It’s supposed to only be four to five psi. Higher than that overfills the bowls and will cause the engine to run rich. I’m praying this is the case.

Oh, and the bogging? Still there, but not as bad.

Friday, February 7, 2014

Luna to Get Some Lovin’


Last night Victoria was over at the house and I asked her if she could carve a couple hours out of her very busy schedule each week to work on her convertible with me. She, and I think I detected some enthusiasm, said, “yes, how about Saturday or Sunday?” Excellent! Let’s call this step one towards cancelling my “Don’t do it” credo.

Now, what task will we tackle first? As you can see in the sidebar, eleven options are available to us, but some are not feasible right now (install top, sand and paint) and some are not critical to make the car roadworthy (clock, bearings). That still leaves some jobs we can knock off before spring arrives, but what should we start with – what would properly kick off a series of weekend sessions? Well, at this point, the disappearing gas is the most annoying trait of this ‘vair, so I’m leaning towards tackling that issue.

My plan (I feel I type that a lot) is to put the car on jackstands so we can get underneath and go searching for visual clues of leaking fuel paying special attention to the tank and the rubber hoses. Note: since this project and some of the other ones on Luna’s list require getting her up off the concrete, I’m putting jackstands on my Harbor Freight shopping list so we can just leave her without leaving me stand-less. If we can’t find the leak visually, we’ll try audibly. I’ll stuff a rag in the fuel filler, disconnect the line at the pump and gently pressurize the system with air while Victoria can listen for a hiss. My hope is we find a cracked hose. If it’s the tank, I’ll get to find out how long the seller’s offer of “going through his stash of part to provide anything I need to get the car on the road.”

Monday, December 9, 2013

I Don't Mind Being Wrong

A decade-plus of maintaining old cars as daily-driver has taken its toll on my optimistic nature. When anything goes wrong with a fleet vehicle, I now automatically jump to worst-case scenarios. After last Thursday’s report from Ariel on Ringo’s misbehavior, I got all doomsday on myself. I couldn’t help but assume another engine teardown was in my future – perhaps another ring had broken or a valve had burned. After driving him the short distance that night, my jaded brain still believed the worst.

Given the weather conditions of this weekend past, I really should have dealt with him Saturday when temps were tolerable and the skies weren’t leaking white stuff, but my belief that his issue was beyond a simple fix caused me to put off the inevitable. As it was, Sunday was the day of reckoning. Planning for long-term times under the car, I felt it was mandatory to get him in the garage before commencing any repair. That meant, sadly, I needed to get TwoTone off the jackstands and out into the driveway. For that to happen, though, I had to repack the front wheel bearings, mount the two front hubs followed by wheels at all four corners, and put all the boxes of recently removed parts into the salon. Only then was I able to drop her to the floor. Oh yeah, at this point in the afternoon, there was now three inches or more of snow on the ground and on Ringo, so some quality time with a snow shovel and broom was required before I could roll any car anywhere.

With TwoTone out of the way, I climbed behind the wheel of the supposedly broken car and turned the key. Hmm. Started right up. Hmm. Settled into a smooth idle. This was nothing like I’d encountered a couple night earlier. I was able to drive him into the garage without a hint of a problem. As he calmly idled, I did the pull-a-spark-plug-lead-and-listen-for-a-drop-in-rpms test and all cylinders seemed to be contributing to the engine’s output. A quick-blip of the throttle revealed the problem as a slight banging commenced from the fuel pump area. I discovered the screw retaining the pump was loose. Less than a full turn with the ½ wrench followed by a snugging of the jam nut and all appeared good-to-go. With sleet now coming down and the lovely Loriann’s vehicle blocking my way to the street for a shakedown drive, I decided to quite while I was ahead. In hindsight I decided the loosening of the fuel pump caused a reduction in fuel flow until there wasn't enough left in the carburetor bowls to feed the engine as Ariel was cruising down the interstate to work.

This morning I was greatly relieved when he delivered me to work with nary an indication that only four days earlier I’d been convinced the sky was falling.

Wednesday, November 13, 2013

Doing Some Digging


When I started blogging waaayyy back in April of ought-two, I had a number of reasons to record the highs and lows of the Corvair portion of my life. One of them was I knew I wouldn’t be able to trust my memory to dredge up every swap and adjustment I’d made over the years. “When, if ever, did I replace Heidi’s generator; or did I just rebuild the one that came with her?” “Is Ringo still running the same set of sparkplugs that went in when I rebuilt his engine, and when was that?” “Have I ever done anything with Glinda’s distributor?” The only way I would find the answers to questions like those – questions I really wanted answered – was to write (or in this case type) it all down as it happened.

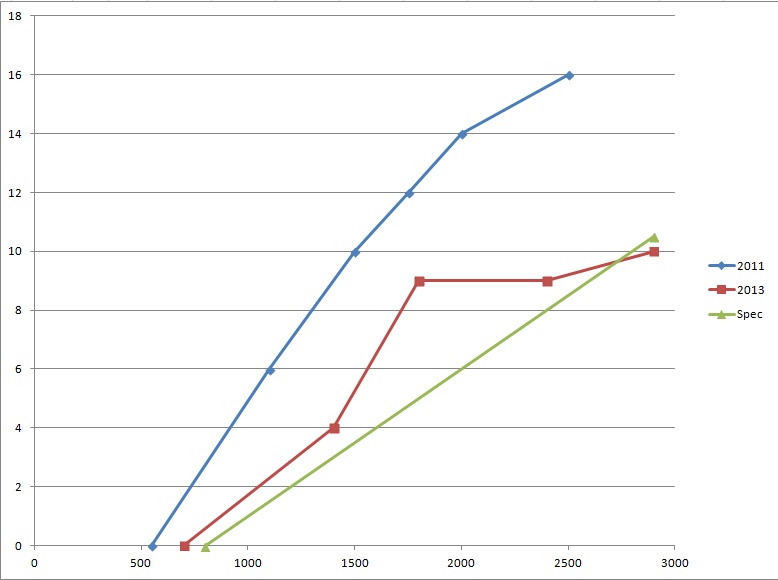
This morning I was messing around with my all-inclusive Corvair spreadsheet and discovered I’d created another graph at some point showing Glinda’s advance versus rpm curve. That prompted me to search this blog using the keywords Glinda and distributor to see what I may have posted using the graph. Over a dozen posts popped up including the one dated February 3, 2011 where I discussed that old graph. At that time she was Victoria’s daily-driver and I was – surprise, surprise – trying to improve her gas mileage. I wrote that I’d gotten a list of things to check in reply to a CorvairCenter posting one of which was to verify that the proper distributor was being used since Chevy supplied different distributors with different advance curves depending on the engine/transmission combination. Not being able to find the number, I, instead, measured and plotted advance versus rpm. Take a look above where I've put up a new graph showing advance then and now compared to a revised spec curve. The interesting thing was the curve I plotted nearly two years ago does not match the curve I generated yesterday. Even more compelling is the old curve shows more advance than Chevy intended. With these anomalies, I went searching through the other posts to determine when, if ever, I’d replaced Glinda’s distributor.

Here’s a distributor time-line for Glinda. 12/9/2010: replaced original distributor with one from the shelf. 1/17/2011: rebuilt original distributor. 1/20/2011: finished rebuilding the original distributor. 1/25/2011: installed rebuilt original distributor. 2/8/2011: noticed dwell movement. 2/11/2011: made graph. 5/17/2012: rediscovered changing dwell. 6/21/2012: replaced points plate. 11/6/2012: noticed fuel improvement, attributed to "rebuilt distributor".

So where do I go from here? Well, first I’ll open up the distributor, remove the points plate, and thoroughly clean and lubricate the weights and springs with the hope that more advance will kick in. More is better unless it results in pinging. Second, I still believe the carbs are running rich, so I’ll try to get TwoTone’s rebuilt carbs corrected and swap them on to Glinda to test my theory. Finally, as a buddy of mine at work is urging me to do, I’ll “just get the 140/4-speed project done and installed.”

Feel free to bypass this paragraph regarding the ongoing truck saga if you are only here to catch up on Corvair activities. As I reported yesterday, the seal I’d gotten hadn’t fit correctly. I decided to bite the bullet, pay the big bucks, and go to the Chevrolet dealership to get the “right” parts. After calling the parts department and giving them the truck’s VIN, the parts counter-person looked up the yoke kit (which includes a seal) and lo-and-behold they came up with a part number different than the one I’d bought online. They had the kit in stock, so my VISA card took a $160 dollar hit, but I was still happy to walk out of there with “right” parts. I got home and immediately walked to the truck to compare the “right” parts with those I’d pulled off the truck. To my IMMENSE disappointment, the “right” parts I’d bought were not right. The yoke was much significantly larger and there was no way it would work. A phone call this morning to the dealership, with a different counter-person on the line, and I now have a different part number for the “right” kit. Of course, he had no idea why my VIN spat out the wrong part number yesterday. Today I was smart enough to bring the old parts in with me so when I went there at lunch, I was able to set new and old side-by-side and it appears they are the same this time. The part’s guy did a little research and discovered the VIN he’d heard me tell him over the phone yesterday had an E, rather than the Z it should have – he misheard me. To add insult to injury, the right yoke is smaller than the wrong yoke, yet it cost me an additional $19.

Tuesday, November 12, 2013

My Head Hurts

Since the parts I’d ordered to get the fleet’s tow vehicle (the truck) back on the road showed up in yesterday’s mail, I decided to ignore Glinda’s gas guzzling issue and reassemble its differential. That did NOT go as planned since the cheap Chinese seal included in the yoke kit did not fit correctly into the front end of the axle housing. Instead of having to press it in, the darn thing just slid into the bore. With no interference fit to hold it in place (and seal the outside diameter), the part is useless and must go back. That means at least two more days of the truck being out of commission.

With that roadblock firmly in my way, I chose another path and grabbed work light, dwell meter, timing light, notepad, and pen and headed out to the curb where Glinda sat. In response to yesterday’s blog post, I received a comment that I should check the centrifugal advance of Glinda’s distributor since a lack of advance at higher rpms would be detrimental to her fuel mileage. I hooked up the timing light, disconnected and plugged the vacuum advance hose, and fired up the engine. With the light aimed at the timing marks, I revved the engine and watched with a little sadness as the timing climbed with the rpms. Okay, it’s moving, but is it moving enough? I hooked up the dwell meter and flipped its switch to tachometer mode. After begging Mikhaila to come out and “drive” the car for me, I had her press and hold the gas pedal at different engine speeds while I measured the timing. The following graph shows the different advances I measured plotted against the spec’s straight line values.

The differences are probably just due to not being able to hold the rpms perfectly steady. Regardless, the centrifugal advance weights seem to be doing their job inside the distributor.

On to vacuum advance. The spec says I should be seeing 24 degrees of advance when the carburetor port is sucking air at a level of fifteen inches of mercury. I hooked up my vacuum gauge and determined Glinda’s engine hits this mark at around 2000 rpm. With the vacuum advance tube reconnected to the advance on the distributor, I turned the engine back on and noted the advance due to vacuum was about 8 degrees. When I revved the engine up to the aforementioned 2000 rpm, it jumped up to 17. Bear in mind, gentle reader, that part of this jump was due to centrifugal advance. If I back out the centrifugal advance at 2000 rpm, I end up with only 10 degrees instead of the required 24.

Thinking this was an aha moment, I awoke this morning with hopefully simple task of swapping out Glinda’s current vacuum advance with one from a distributor on the shelf. I did that, but it doesn’t look like it’s made much difference. Only time (and miles) will tell. One other thing I’ll check (thanks to a Facebook post from a ‘vair guy) are a plug from each bank. If one is sooty, then that carb is running rich and I’ll swap it out for the one good rebuilt carb from TwoTone.

Monday, November 11, 2013

Glinda’s A Guzzler

I didn’t expect that fixing the gas starvation issue would just create a gluttony issue. Once I replaced Glinda’s fuel filter, she’s been going through 93 octane like a camel after a couple months in the Sahara. Friday, with the needle just above E, I filled the tank. Since I use fuelly.com to track gas mileage, my reply to the text to them told me her gulp-rate was 14 mpg. Ouch! My first thought was a leak somewhere, so as soon as I got home I put my nose to the ground and then in the engine compartment. Nothing smelled like gas.

That night, I needed to first deal with the leaky exhaust before going further with her thirty ways. The crux of the exhaust problem was a bad gasket (donut, packing) between the left exhaust manifold and the exhaust pipe. As is nearly always the case, the fasteners at this joint were a rusty mess barely resembling a nut and stud. Knowing there was no way I’d be able to cleanly undo that joint, I was prepared with replacement GUP manifolds complete with stainless studs and brass nuts as well as a set of GNP gaskets. As expected it didn’t take much effort to wring off the nuts and the associated portion of each manifold stud. With the pipe disconnected, the six nuts holding the manifolds were far more cooperative and the old manifolds were free in no time at all. With new gaskets the replacement manifolds were bolted into place followed by reattachment of the exhaust pipe with its new gaskets. With the car still up on ramps to listen for leaks, I turned the engine on and my efforts were rewarded with a much quieter condition and no leaks detected. A silent CO monitor will be the final proof, so I'll only know after I put some miles on the car with the heater on full-blast.

Back to the mileage issue. I decided to try swapping out the current carburetors for the set Mikhaila and I recently rebuilt for TwoTone. Once everything was hooked up it took a few cranks to get some gas into the bowls, but the engine eventually fired up. Sadly, one of the carbs was not working. Something must be clogging the jet or an inner passage. With that disappointing discovery, I got to remove those carbs and bolt back on the old carbs.

The next morning I drove down the interstate and was able to seemingly watch the needle descend - an indicated quarter tank burned in about 40 miles of driving. That’s about 13 mpg. Arghhh! The next fix I tried was replacing the fuel pump while not hooking up the vapor return line. If the leak is in that line, I wanted it out of the equation. Sadly, more driving yesterday showed apparently no improvement.

While I was still in grungies, I spent some time later that day clearing out more parts I’ll never use. They went into the bed of the truck freeing up some shelf space in the garage. With that done, I turned my attention to TwoTone. I first cleaned all the bearings and stuff we’d removed from the front hubs. Then I finished disassembling the right front brake system. It’s now ready for Mikhaila to wire brush clean and then coat with Rustoleum rusty metal primer and black paint. Then we’ll be able to put the brakes and hubs back together and drop the car back to the floor.

Oh yeah, I almost forgot. I worked on Luna too. Whilst putting Ringo back on the road I needed to borrow a couple items off Victoria's car - the alternator and the choke tripper. Clark's came through with a new tripper and I tore down Ringo's loose alternator, inspected everything, and put it back together without any of the slop there was there before. Not sure what I did, but I hope I did it right. With those parts put back on the engine, it’s back where it was a year ago. Victoria and I have had some conversations about Luna. She is soooo busy I can’t imagine her ever having time to take a weekend off to help me install the convertible top on her car. She promises she’ll turn down some nanny jobs and will be able to get the top on early next spring. With that in mind, I told her I would squeeze some Luna-time into my schedule. That car, while able to stop and go, has a number of issues that should get corrected before it can be considered reliable transportation. It too, seems to have a gas issue. The few times we’ve tried to take it out, we’ve ended up having to put about three gallons of gas into the tank in order to get it to start. Since the gauge doesn’t work, all we know is that it won’t start, we pour in three gallons, and it starts. Anyway, that needs to be resolved (I’ve got a couple gauges of suspect condition I’ll swap in before pointing my finger at the fuel sender in the tank - although I even have a GNP for that).

Monday, November 4, 2013

And On We Go

I’m sure, gentle readers, that you’ve been on pins and needles in anticipation of my next posting. “Did the new fuel pump fix Glinda’s woes?” “Did Ringo, once back in the control of Ariel, crap out again?” “How bad is the truck?” I hear (or is it see, or not see, or… oh hell I’ll get on with it) all your unwritten questions, and I will now address them. Be forewarned, however, plowing through this missive may raise more new questions than answer existing ones. Let’s start off with the easy things. By Ariel’s silence on the subject, Ringo behaved himself during the couple days she drove him before she went off on a mini-vacation in South Carolina. I pray I gave him enough attention that he provides, at the very least, a trouble-free, safe fall and winter’s worth of transportation.

A brief paragraph on the fleet’s main support vehicle, the truck, and the nasty noise emanating from its rear end (typing that brings a childish smile to my face). I never made it to the dealership. Instead, I put the backend up on jackstands, pulled off the rear wheels, and had Mikhaila “drive” (operate the gas pedal) while I looked and listened for the source of the VERY nasty sound. It didn’t take long to discover the rear portion of the driveshaft start to bounce around as the truck’s indicated speed slowly climbed. After Mikhaila stepped on the brake and put the shifter in Park, I slid farther underneath and jiggled the u-joint. The sloppiness in the yoke indicated that, at best, I needed to replace the differential’s pinion bearings. The dealer only wants $1300 to do the job. Seriously????!!!! The price for new bearings, seals, and gasket was, online, less than $100. Since then, I’ve read a couple online descriptions of the work, and while tricky, it certainly wouldn’t warrant my forking out the price of one-and-a-half Corvairs. So, once I verified the ring and pinion are still in good shape, I’ll be visiting RockAuto.com and ordering their Differential Overhaul Kit.

Finally, on to Glinda and her frustrating fuel delivery issues. Last Wednesday it only took me about thirty minutes to R&R the fuel pump with a GUP. A subsequent short test drive that included a full-throttle blast up the highway proved the fuel pump was not the issue. To me that’s a good news bad news thing. Good that I’ve still got a spare fuel pump. Bad that I need to dig deeper to get Glinda reliably roadable again.

On the way home from work the next day, I stopped by CarQuest and bought another inline fuel filter. Once I put Glinda’s right rear up on a jackstand and removed the wheel, I liberated the old filter and immediately thought to myself why didn’t the manufacturer make the filtering medium a different color than rust. Just moving the still fuel-filled filter created a cloud of rusty particles giving the part a snow-globe appearance as I peered through the transparent plastic housing. The new filter went in smoothly, but before the test drive, I took advantage of the raised rear and installed the two lower shrouds so Mikhaila and I could have heat during our morning commute (her to the bus stop, me on to my work). With all wheels back on pavement, the moment of truth was here. The sixty-five mile per hour blast that had brought the car to its knees only yesterday had no negative effect on her this time. TYL – another issue eradicated. An additional item was also crossed off the to-do list. For quite a while, stomping the gas pedal resulted in the engine dying. I’d been attributing this adverse behavior to bad carburetors, but the problem all along had been low fuel levels in the carb bowls.

Friday morning, fifteen minutes after I cranked up the heat during the morning commute, the carbon monoxide detector began to let me know that fixing the exhaust leak needed to be moved to the top of the to-do list. So that’s what I’ll be doing this evening. It’s always something.

Tuesday, October 29, 2013

Can It Get Any Worse?


Well, of course it can, but right now things seem pretty dismal. While Ringo is back on the road and appears to be behaving, I still have two misbehaving vehicles – Glinda and the truck. The fuel issue with Glinda has been a real pain. After last night, I feel I’ve narrowed it down to the fuel pump. Yeah, yeah, I should’ve started there, but the frugal engineer I am was intent upon to misinterpret the symptoms and fix everything else but the real root of the problem. The truck has recently developed a horrible noise that I need the dealership to diagnose. Anyway, back to the specifics of the fleet work.

This weekend I spent part of Saturday afternoon in the garage stripping the bottom seat upholstery I’m trying to reuse off Ringo’s old driver’s seat. To do that I first needed to separate the bottom from the back which, fortunately, wasn’t too difficult. I then brought up my sewing machine from the basement and replaced a piece of rotten cloth on the seat cover. After putting some Gorilla glue over a cracking seam, I set the cover aside while I stripped the upholstery off the replacement seat bottom. Sunday afternoon I was back in the garage hog-ring pliers in hand putting black seat cover on new (to me) seat bottom frame. After bolting the seat into Ringo, I called Ariel and told her to come get her car.

Yesterday I pulled Glinda’s right front wheel up a ramp so as much gas as possible would shift away from the bottom access hole. After disconnecting the hose, I drained about three gallons out before the stream stopped allowing me to remove the fuel pickup assembly, and replace the sock that filters the gas going into the fuel line. The only problem was the sock I was sure I had was nowhere to be found. Irr. Knowing I had an inline filter farther down the line, I reinstalled the assembly without a sock. This morning I confidently sat behind the wheel and entered the beltway getting up to speed with no problem. Sadly, that confidence was dashed against the rocks a mile later when the motor quickly ran out of oomph and I barely made it to the next offramp. I nursed it home only having the engine die three times before I was able to back her down the driveway. I swapped key rings and drove the truck to work (with all its untoward noises). Tonight I replace the fuel pump.