This weekend I was actually able to spend a lot of time working on cars (some Corvairs even) while still completing the major house project I had committed to. Saturday I spent a couple hours redoing Ringo’s rear brakes. This was one of those projects where one thing led to another which led to another. First, as I was disassembling the right rear to install the GUP e-brake cable, I noticed the shoe linings were in pretty rough, cracked shape, so I went to the box of GUP EM brake parts and pulled out two forward and two rear shoes to use. Once I got the right side put back together I moved over to the left. There I found the liners in even worse shape (had it been that long since I’d changed them?). Anyway, I put the parts back together including lubricating and turning down nearly all the way the adjusting wheel. Next, putting the hub on was much more difficult than it should have been. I made a closer inspection to ensure nothing was amiss with my work and I found the rear shoe wouldn’t retract completely to the post. Close inspection showed the one piston was seized in the wheel cylinder. A few persuasive taps with a hammer and the piston retracted and seemed freed up. I completed the brake reassembly, mounted the tires, and dropped his rear off the jackstands. After firing up the engine using the hotwire under the hood, I let the engine warm up thoroughly while I put away tools. Next, I backed him up onto the ramps so I could properly adjust the emergency brake cable length. Once that was done to my satisfaction, I drove him back down, and moved on to the more pressing project of the day – the new kitchen.
The next afternoon I’d promised my buddy, Jonathan, I’d come over to see if we could, together, solve his Corsa’s starting woes. Of late, the engine won’t consistently crank when the key was turned – the starter would spin, but the pinion of the Bendix drive wasn’t always engaging the ring -gear on the pressure plate. Additionally, the last time he’d tried to crank the engine, the solenoid got stuck in the start position and the starter just spun away. The only way to stop it was to disconnect power to the starter. We did a bit of checking of the wiring and everything seemed to be in good stead (12 volts to the purple wire when the key is in the Start position, power to the engine with the key in the On position, etc.). After those checks and reconnecting all the leads, lo-and-behold the starter stopped its incorrect spinning and responded to the turn of the key again. We hadn’t, however, fixed the inconsistent cranking. The engine would only turn on every fifth or so turn of the key, and once it did start cranking it wouldn’t even make it a full revolution before the pinion would pop out of engagement and the starter would uselessly spin freely. Jonathan removed the starter and we connected it directly to the car’s battery and watched the Bendix as I shorted the S terminal to 12V. Strangely, the pinion would pop out upon the starter being energized, but it would not stay in the full out position. After a second or two it would begin to slowly draw back into it’s at rest position even though the starter motor was still spinning away. Hmmm. Bad starter perhaps? He’s going to go get another rebuilt one and we’ll keep our fingers crossed.
After returning home, still wearing grungies, I went back to work on Ringo and replaced the balky ignition switch (seemed to be the theme for the day).
The last task for him was to replace the front seat belts. The ones he'd been sporting since Ariel and I put him on the road came out of my LeMans and allowing them to disappear with his sale would no do. The shelf contained a number of replacements, but I chose a set of new (although probably circa 1975), brown ones from Pep Boy's. I'd bought these at part's auction a few years back.
Now Ringo sits at the curb awaiting a round-the-neighborhood test drive and transmission fill before a few days of daily-driving. Once I'm sure the bugs are worked out, the Craigslist ad goes up.

Showing posts with label brakes. Show all posts
Showing posts with label brakes. Show all posts
Tuesday, October 20, 2015

Friday, October 2, 2015
When It Rains, Blah, Blah, Blah
When it rains and you’re driving a nearly fifty year old car, chances are good the wipers will stop working. That happened to me today as I was running some lunchtime errands. Something to add to Glinda’s to-do list.
The GUP parking brake cable for Ringo showed up in yesterday’s mail with an added surprise. I’d asked Jeff (Corvair Ranch proprietor) if he happened to have an EM convertible rear window lying around gathering dust. He thought he had, and lo and behold it was also packed in the box. Now Mikhaila and I have all the parts necessary to get Scarlett on the road.
The GUP parking brake cable for Ringo showed up in yesterday’s mail with an added surprise. I’d asked Jeff (Corvair Ranch proprietor) if he happened to have an EM convertible rear window lying around gathering dust. He thought he had, and lo and behold it was also packed in the box. Now Mikhaila and I have all the parts necessary to get Scarlett on the road.
Monday, September 28, 2015
I'm So Sorry Ariel
Had a nice time Sunday afternoon working on Ringo. I was able to get the engine to start by hotwiring to the purple solenoid wire, but not with the key. Looks like a replacement ignition switch in on hit to-do list. With the engine stuttering along, I put the hand over each carb. The right one behaved properly basically killing the engine by starving it for air, but the left one just made a hissing noise when blocked - a bad vacuum leak. I pulled off the carb and put on a new base gasket, bolted it back on, and refired the engine – no change. I looked and felt carefully around the carb’s mounting area. My fingers and ears told me the leak was between the carb base and top. Remember these carbs were the ones Mikhaila and I hastily rebuilt when Ringo’s original pair were swapped onto Scarlett in anticipation of the “great starting” that never happened. Off came both carburetors and put back in place were Ringo’s original pair. After a few seconds of cranking to fill the bowls with fuel, the engine started up and settled into a nice, smooth, but somewhat high idle. After warming up, the idle still wouldn’t come down until I cleaned the throttle shaft of the right carb which allowed it to close fully and drop the rpm down into the 1000 range with the transmission in Neutral.
I then settled behind the steering wheel, made sure I had a good brake pedal, and dropped the trans lever into D. A few maneuvers to get the car away from the fence, and I pulled the parking brake to keep him from rolling. Much to my frustration the handle pulled much farther that it should and brakes were never applied – broken cable. Irr.
Ringo’s driver’s door has been stuck shut since about a month or so before Ariel stopped driving the car, so that was the next focus of my attention. While still sitting in the driver’s seat, I pulled back on the inside lever hard and slammed my shoulder into the door – lo and behold it popped open. TYL. I got out of the car and looked closely at the engagement of the latch to striker plate – the striker plate was obviously too low. Loosening the three Phillip’s head retaining screws allowed me to slide the latch up. I tightened the screws and attempted to close the door – it wouldn’t fully latch. Moving the plate out about a quarter of an inch did the trick though. Now the door latches nicely with the expected amount of closing force. I feel SO badly that Ariel struggled with this door for far too long. I know I adjusted the plate when the problem first arose, but was never able to get it into a spot where a normal closing force would get it to fully latch – she really had to slam it to get it to fully close. Now it’s fixed – just a few months late.
Back to the brakes. To check out the issue, I backed the rear of the car up on the ramps and blocked the wheels to keep it there. I slid under and immediately found the cross-cable was much longer than it should be. The cable had broken near the right rear wheel, and the only way to replace it is to disassemble both rear brake assemblies which I started to do with the right side.
Running out of time, I needed to take apart the racing carbs so the bases could be sent back to the guy that modified them for replacement. Once the bases were completely bare, I closed up the garage and called it a day.
I called Jeff at the Corvair Ranch and I should see a GUP cable assembly by the weekend.
I then settled behind the steering wheel, made sure I had a good brake pedal, and dropped the trans lever into D. A few maneuvers to get the car away from the fence, and I pulled the parking brake to keep him from rolling. Much to my frustration the handle pulled much farther that it should and brakes were never applied – broken cable. Irr.
Ringo’s driver’s door has been stuck shut since about a month or so before Ariel stopped driving the car, so that was the next focus of my attention. While still sitting in the driver’s seat, I pulled back on the inside lever hard and slammed my shoulder into the door – lo and behold it popped open. TYL. I got out of the car and looked closely at the engagement of the latch to striker plate – the striker plate was obviously too low. Loosening the three Phillip’s head retaining screws allowed me to slide the latch up. I tightened the screws and attempted to close the door – it wouldn’t fully latch. Moving the plate out about a quarter of an inch did the trick though. Now the door latches nicely with the expected amount of closing force. I feel SO badly that Ariel struggled with this door for far too long. I know I adjusted the plate when the problem first arose, but was never able to get it into a spot where a normal closing force would get it to fully latch – she really had to slam it to get it to fully close. Now it’s fixed – just a few months late.
Back to the brakes. To check out the issue, I backed the rear of the car up on the ramps and blocked the wheels to keep it there. I slid under and immediately found the cross-cable was much longer than it should be. The cable had broken near the right rear wheel, and the only way to replace it is to disassemble both rear brake assemblies which I started to do with the right side.
Running out of time, I needed to take apart the racing carbs so the bases could be sent back to the guy that modified them for replacement. Once the bases were completely bare, I closed up the garage and called it a day.
I called Jeff at the Corvair Ranch and I should see a GUP cable assembly by the weekend.
Monday, July 6, 2015
Three Cars, Three Updates
Glinda: No Racer No More
A couple weeks ago I hopped into Glinda for a quick evening drive. I started her up, and pulled away from the curb. Since it had been raining, I turned the wiper knob to clear the windshield, but nothing happened - at least nothing wiper-wise. Some other things DID happen though. The radio shut off, the tach needle went to zero, and so did the voltmeter. I immediately turned off the wiper switch and everything went back to working. Since I didn’t want to get stuck somewhere, I pulled her back to the curb, with the intent of dealing with the problem later. The following morning, before turning on the car, I pushed in the wiper switch rather than turned it as a test – the wipers worked as normal. I turned them off, and, thinking the previous evening’s gremlin had moved on, I started the car and drove away. A few moments later, I checked Glinda gauges and found the voltage sitting at 10.8 rather than the normal 14+. Not having a spare vehicle available to me this morning, I continued on to work minimizing my use of electrical stuff. By the time I pulled into my parking spot at work, the gauge was now reading about 10.2. I shut off the car, and then turned the key to the ON position – the gauge needle was now pointing at slightly above 12. The drive home, however, was business as usual. The voltmeter needle pointed back to where I was used to seeing and all seemed fine.
The lovely Loriann and I decided that Mikhaila needed a car to drive while waiting for us to finish Scarlett. Glinda drew the short straw. To facilitate Glinda’s new duties, Mikhaila and I swapped out the racing seat and harness for the stock bench and belts, and we put back the skinny tires in place of the wide racing wheels. I rode with Mikhaila giving out instructions as she wheeled the car around the neighborhood. She did quite well getting used to the heavier steering and relearning the manual transmission skills she’d not had to put into practice for months.
Yesterday, after recording another tank-full of atrocious gas mileage, I gave up on the modified carburetors and swapped on Scarlett’s pair. With the recently rebuilt carbs hooked up and some gas poured down each throat, the engine reluctantly fired. After a few moments, gas started squirting out of the vent holes of the right carb. Off went the engine and off came that carb top, but not until I checked the accelerator pumps – no squirts in either carb. Inspecting the removed top assembly, I found that the wire needle retainer was preventing the needle from easily seating itself. So, I removed and re-set the float levels to ’65 setting (1-1/16” full up and 1-1/2” for full drop). I then dug out some new accelerator pump cups and a couple GUP pump assemblies from my stash. I found that the two assemblies both had pliant cups that worked perfectly in their associated bores, so one went on in place of the right top’s non-functioning one. After reinstalling that side, I pulled the left top assembly off made the same changes. Next, I needed to again clean all the filthy, fouled spark plugs (this is getting old). With everything installed and connected back up, jumping 12 volts to the purple wire contact got the engine running right away. No gushing gas and blips of the throttle were met with immediate rpm responses from the engine. I climbed in, belted up, and took her for a spin around the neighborhood. She ran better than she had in months – coincidentally the same number of months the racing carburetors had been on the engine.
Needless to say, I was quite happy as I backed her up to the garage opening. I got out my length of clear tubing, shot some water in, hooked both ends up to the appropriate vacuum ports, and balanced the carbs. With the air cleaner back on, I adjusted the idle fuel screws per the manual before setting the idle speed to 800 and shutting the engine lid convinced all woes with that car were now behind me. That euphoria lasted less than twenty-four hours ended by a single text from Mikhaila: “Glinda keeps stalling and the gas gauge went from full this morning to half full when I ran an errand.” CRAP! I thought I’d get to work on the house this evening, but NO!
Scarlett Brakes Won’t Bleed
During the last week Mikhaila and I have had a couple productive sessions in the garage. Scarlett now has all her new brake lines in place as well as her exhaust system completely hooked up. With the last brake line fitting tightened, she and I spent at least an hour and went through over a pint of brake fluid trying to get a solid pedal. With all the components of the system being new, there was a lot of air that had to be bled out. After running out of fluid, we were still getting air with each opening of a bleeder valve. Part way through the task, I got smart and adjusted the pedal rod making it longer so it would push the pistons in the new dual master cylinder deeper. This seemed to get more fluid pushed out with each stroke. I hope we’re right around the corner from an air-free system.
The muffler hanger arrived in the mail Saturday morning, so we bolted it to the engine. A new strap held the GUP muffler in place and a new 2” muffler clamp solidified the exhaust pipe to muffler joint. The engine is ready to start up other than the fact that 1) I took the carbs for Glinda, and 2) I put battery back in Ringo (see more below).
Mikhaila also took advantage of the seats being out and more thoroughly scrubbed the years of dirt from each of the front bucket seats. We also stripped the old rear window material from the three trim sticks in preparation of a new top getting installed (a ways off from happening).
Ringo Readies for Upcoming Sale

Yesterday, I pulled the tarp off Ringo with the intent of deciding what I would do to this car before I put it on the market. Instead, I jumped right into the fray by swapping back in the battery he’d so graciously loaned to Scarlett. A bit of gas poured into each carburetor and a few revolutions of the engine by the starter and the engine was running smoothly like he’d been on the road a week ago not a year ago. Next on the checklist was bodywork made necessary by the destructive right rear tire. I bent and pounded the sheetmetal behind the wheel into some semblance of its original shape. Grabbing the grinder fitted with the wire brush attachment, I attacked the mess along the front edge of the wheel-well as well as the inside of the wheel-well (is that too many wells?). I also brushed away the flaking paint and surface rust on straightened out section. Next, I pulled a jar of rusty metal primer and brushed over all the exposed steel.
I remembered that the last time I’d seen Ariel drive away in this car, one of the rear taillights wasn’t working. It took some cleaning and bulb replacement, but after a half-hour or so I had all essential lights operating properly.
With all this progress, I decided I’d move him out into the middle of the driveway so I could access the stuck driver’s door. I climbed behind the wheel, put my foot on the brake pedal, and it went all the way to the floor. I climbed back out, popped the trunklid, spun off the master cylinder cap, and stared down into an empty master cylinder reservoir. Hoping against all hope I filled the reservoir with fresh fluid and crossed my fingers. Maybe, I though, the seals will magically rejuvenate themselves after a good soaking with DOT 3.
This morning though, I went ahead and made the call to the Corvair Ranch and ordered a rebuild kit. I also asked Jeff to send me a Powerglide re-seal kit, two carburetor rebuild kits (so I rebuild the two EM carbs on the shelf to put on Scarlett’s engine), and a muffler strap for Glinda.
A couple weeks ago I hopped into Glinda for a quick evening drive. I started her up, and pulled away from the curb. Since it had been raining, I turned the wiper knob to clear the windshield, but nothing happened - at least nothing wiper-wise. Some other things DID happen though. The radio shut off, the tach needle went to zero, and so did the voltmeter. I immediately turned off the wiper switch and everything went back to working. Since I didn’t want to get stuck somewhere, I pulled her back to the curb, with the intent of dealing with the problem later. The following morning, before turning on the car, I pushed in the wiper switch rather than turned it as a test – the wipers worked as normal. I turned them off, and, thinking the previous evening’s gremlin had moved on, I started the car and drove away. A few moments later, I checked Glinda gauges and found the voltage sitting at 10.8 rather than the normal 14+. Not having a spare vehicle available to me this morning, I continued on to work minimizing my use of electrical stuff. By the time I pulled into my parking spot at work, the gauge was now reading about 10.2. I shut off the car, and then turned the key to the ON position – the gauge needle was now pointing at slightly above 12. The drive home, however, was business as usual. The voltmeter needle pointed back to where I was used to seeing and all seemed fine.
The lovely Loriann and I decided that Mikhaila needed a car to drive while waiting for us to finish Scarlett. Glinda drew the short straw. To facilitate Glinda’s new duties, Mikhaila and I swapped out the racing seat and harness for the stock bench and belts, and we put back the skinny tires in place of the wide racing wheels. I rode with Mikhaila giving out instructions as she wheeled the car around the neighborhood. She did quite well getting used to the heavier steering and relearning the manual transmission skills she’d not had to put into practice for months.
Yesterday, after recording another tank-full of atrocious gas mileage, I gave up on the modified carburetors and swapped on Scarlett’s pair. With the recently rebuilt carbs hooked up and some gas poured down each throat, the engine reluctantly fired. After a few moments, gas started squirting out of the vent holes of the right carb. Off went the engine and off came that carb top, but not until I checked the accelerator pumps – no squirts in either carb. Inspecting the removed top assembly, I found that the wire needle retainer was preventing the needle from easily seating itself. So, I removed and re-set the float levels to ’65 setting (1-1/16” full up and 1-1/2” for full drop). I then dug out some new accelerator pump cups and a couple GUP pump assemblies from my stash. I found that the two assemblies both had pliant cups that worked perfectly in their associated bores, so one went on in place of the right top’s non-functioning one. After reinstalling that side, I pulled the left top assembly off made the same changes. Next, I needed to again clean all the filthy, fouled spark plugs (this is getting old). With everything installed and connected back up, jumping 12 volts to the purple wire contact got the engine running right away. No gushing gas and blips of the throttle were met with immediate rpm responses from the engine. I climbed in, belted up, and took her for a spin around the neighborhood. She ran better than she had in months – coincidentally the same number of months the racing carburetors had been on the engine.
Needless to say, I was quite happy as I backed her up to the garage opening. I got out my length of clear tubing, shot some water in, hooked both ends up to the appropriate vacuum ports, and balanced the carbs. With the air cleaner back on, I adjusted the idle fuel screws per the manual before setting the idle speed to 800 and shutting the engine lid convinced all woes with that car were now behind me. That euphoria lasted less than twenty-four hours ended by a single text from Mikhaila: “Glinda keeps stalling and the gas gauge went from full this morning to half full when I ran an errand.” CRAP! I thought I’d get to work on the house this evening, but NO!
Scarlett Brakes Won’t Bleed
During the last week Mikhaila and I have had a couple productive sessions in the garage. Scarlett now has all her new brake lines in place as well as her exhaust system completely hooked up. With the last brake line fitting tightened, she and I spent at least an hour and went through over a pint of brake fluid trying to get a solid pedal. With all the components of the system being new, there was a lot of air that had to be bled out. After running out of fluid, we were still getting air with each opening of a bleeder valve. Part way through the task, I got smart and adjusted the pedal rod making it longer so it would push the pistons in the new dual master cylinder deeper. This seemed to get more fluid pushed out with each stroke. I hope we’re right around the corner from an air-free system.
The muffler hanger arrived in the mail Saturday morning, so we bolted it to the engine. A new strap held the GUP muffler in place and a new 2” muffler clamp solidified the exhaust pipe to muffler joint. The engine is ready to start up other than the fact that 1) I took the carbs for Glinda, and 2) I put battery back in Ringo (see more below).
Mikhaila also took advantage of the seats being out and more thoroughly scrubbed the years of dirt from each of the front bucket seats. We also stripped the old rear window material from the three trim sticks in preparation of a new top getting installed (a ways off from happening).
Ringo Readies for Upcoming Sale

Yesterday, I pulled the tarp off Ringo with the intent of deciding what I would do to this car before I put it on the market. Instead, I jumped right into the fray by swapping back in the battery he’d so graciously loaned to Scarlett. A bit of gas poured into each carburetor and a few revolutions of the engine by the starter and the engine was running smoothly like he’d been on the road a week ago not a year ago. Next on the checklist was bodywork made necessary by the destructive right rear tire. I bent and pounded the sheetmetal behind the wheel into some semblance of its original shape. Grabbing the grinder fitted with the wire brush attachment, I attacked the mess along the front edge of the wheel-well as well as the inside of the wheel-well (is that too many wells?). I also brushed away the flaking paint and surface rust on straightened out section. Next, I pulled a jar of rusty metal primer and brushed over all the exposed steel.
I remembered that the last time I’d seen Ariel drive away in this car, one of the rear taillights wasn’t working. It took some cleaning and bulb replacement, but after a half-hour or so I had all essential lights operating properly.
With all this progress, I decided I’d move him out into the middle of the driveway so I could access the stuck driver’s door. I climbed behind the wheel, put my foot on the brake pedal, and it went all the way to the floor. I climbed back out, popped the trunklid, spun off the master cylinder cap, and stared down into an empty master cylinder reservoir. Hoping against all hope I filled the reservoir with fresh fluid and crossed my fingers. Maybe, I though, the seals will magically rejuvenate themselves after a good soaking with DOT 3.
This morning though, I went ahead and made the call to the Corvair Ranch and ordered a rebuild kit. I also asked Jeff to send me a Powerglide re-seal kit, two carburetor rebuild kits (so I rebuild the two EM carbs on the shelf to put on Scarlett’s engine), and a muffler strap for Glinda.
Tuesday, April 21, 2015
A Weekend of Work, But all Lights are Still Mighty Small
Those would be the lights at the end of the tunnels called Glinda and Scarlett.
Friday evening I backed Glinda up onto ramps and slid underneath to try and figure out what was causing the clicking linkage clicking. I disconnected the cable from the pivot arm being careful to keep tension on the cable so its other end didn’t come off the pedal arm inside the car (a zip-tie did the job). Next I removed the small cover that closes off the clutch volume inside the bellhousing. That gave me access to jiggle and push the clutch fork around. Lo and behold, I got a clip-related click when I pushed the fork inboard. Problem solved? Only putting everything back together and taking the car out on a test drive would verify. That’s what I did, and before I could complete my couple miles and stop-and-go, the clunk had returned. By the time the car was back on the ramps, the whole area under the car was too hot to handle, so I gave up for the night.
The other sad outcome of the test drive was the unsolved rough running. I’d thought (hoped) the problem had been a failed Pertronix electronic ignition, so I was confident (mis-guided) that putting the stock points plate back in would result in a free-revving 110. Pedal to the metal in first and second gear and the tach needle would never go above four thousand. It’s so sad (there’s that word again) that I can’t get the work on this car going in the right direction. Mikhaila and I spent a solid six hours in the garage last weekend trying to make some headway with her car. What did we have to show for it? Three crusty brake lines lying on the floor and a better understanding of Scarlett’s electrical issues.


As to the first, Saturday was brake day. I had high hopes we’d get the final brake pieces installed and the system bled of air. After bending and screwing in the last piece of brake line, I went around and made sure all bleed valves were tight. Sadly, when I got to the right front (with the new wheel cylinder), I found I could not get a wrench on the valve. It looks like I mistakenly used a LM cylinder. Irr. We dug Scarlett’s original cylinder out of the box of brake parts, punched out the old guts, cleaned it in the parts washer, honed the inside, blew it clean, and stuffed it with a GUP rebuild kit. The newly rebuilt cylinder then replaced the incorrect and we were good-to-go. We topped off the master cylinder and began the dance of Press-Press-Hold. She would press the brake pedal twice and hold it on the third pump while I cracked open the bleed valve to let out the air. After a few minutes of this, I looked under the car and saw significant amounts of brake fluid dripping onto the cardboard. Irr (there’s that word again). We both grabbed paper towels and wiped up the mess. We then removed the front underside tunnel covers and confirmed the back-to-front brake line was rotted through in a couple spots. The rear tunnel cover came off next followed by the humped cover under the dash. That gave us access to remove the entire line. As I lay under the rear of the car looking at the crusty left and right rear lines, it was easy to make the call and remove them too. I’ll get the replacement lines from Napa sometime this week for installation next Sunday.
The next day, we hooked up a 12 volt supply to the ends of the battery cables and began a thorough check out of Scarlett’s electrical systems. The connectors for the right rear taillight showed 12V with the headlight switch pulled, but the left side was dead. We moved to the front and found both headlight plugs were powerless. A quick check showed we’d never returned the dimmer switch after painting the floor. With one pulled from GUP stock, cleaned up, checked, and plugged in, we had 12V at both contacts of both plugs. Yay! We then plugged the connectors to send the juice to the headlights, pulled the switch, but were rewarded with all four beams staying dark. Dead bulbs – no problem. Sadly (there’s that word again), though a continuity check showed all bulbs were still fine. We spent the next hour or so swapping switches and cleaning contacts until we finally got all the bulbs to burn brightly. TYL. We moved on to the blinkers, and, the left side checked out as did the front right side, but there was no electricity making it back to the right rear plug. I’m thinking the issue is in the blinker switch assembly – a little cleaning and adjusting is called for. Finally, I had Mikhaila connect the two brake light wires (the ones that plug into the brake light switch), so we could check out that circuit. Result – right works, left doesn’t. Again, the blinker switch is probably the culprit.
Friday evening I backed Glinda up onto ramps and slid underneath to try and figure out what was causing the clicking linkage clicking. I disconnected the cable from the pivot arm being careful to keep tension on the cable so its other end didn’t come off the pedal arm inside the car (a zip-tie did the job). Next I removed the small cover that closes off the clutch volume inside the bellhousing. That gave me access to jiggle and push the clutch fork around. Lo and behold, I got a clip-related click when I pushed the fork inboard. Problem solved? Only putting everything back together and taking the car out on a test drive would verify. That’s what I did, and before I could complete my couple miles and stop-and-go, the clunk had returned. By the time the car was back on the ramps, the whole area under the car was too hot to handle, so I gave up for the night.
The other sad outcome of the test drive was the unsolved rough running. I’d thought (hoped) the problem had been a failed Pertronix electronic ignition, so I was confident (mis-guided) that putting the stock points plate back in would result in a free-revving 110. Pedal to the metal in first and second gear and the tach needle would never go above four thousand. It’s so sad (there’s that word again) that I can’t get the work on this car going in the right direction. Mikhaila and I spent a solid six hours in the garage last weekend trying to make some headway with her car. What did we have to show for it? Three crusty brake lines lying on the floor and a better understanding of Scarlett’s electrical issues.
As to the first, Saturday was brake day. I had high hopes we’d get the final brake pieces installed and the system bled of air. After bending and screwing in the last piece of brake line, I went around and made sure all bleed valves were tight. Sadly, when I got to the right front (with the new wheel cylinder), I found I could not get a wrench on the valve. It looks like I mistakenly used a LM cylinder. Irr. We dug Scarlett’s original cylinder out of the box of brake parts, punched out the old guts, cleaned it in the parts washer, honed the inside, blew it clean, and stuffed it with a GUP rebuild kit. The newly rebuilt cylinder then replaced the incorrect and we were good-to-go. We topped off the master cylinder and began the dance of Press-Press-Hold. She would press the brake pedal twice and hold it on the third pump while I cracked open the bleed valve to let out the air. After a few minutes of this, I looked under the car and saw significant amounts of brake fluid dripping onto the cardboard. Irr (there’s that word again). We both grabbed paper towels and wiped up the mess. We then removed the front underside tunnel covers and confirmed the back-to-front brake line was rotted through in a couple spots. The rear tunnel cover came off next followed by the humped cover under the dash. That gave us access to remove the entire line. As I lay under the rear of the car looking at the crusty left and right rear lines, it was easy to make the call and remove them too. I’ll get the replacement lines from Napa sometime this week for installation next Sunday.
The next day, we hooked up a 12 volt supply to the ends of the battery cables and began a thorough check out of Scarlett’s electrical systems. The connectors for the right rear taillight showed 12V with the headlight switch pulled, but the left side was dead. We moved to the front and found both headlight plugs were powerless. A quick check showed we’d never returned the dimmer switch after painting the floor. With one pulled from GUP stock, cleaned up, checked, and plugged in, we had 12V at both contacts of both plugs. Yay! We then plugged the connectors to send the juice to the headlights, pulled the switch, but were rewarded with all four beams staying dark. Dead bulbs – no problem. Sadly (there’s that word again), though a continuity check showed all bulbs were still fine. We spent the next hour or so swapping switches and cleaning contacts until we finally got all the bulbs to burn brightly. TYL. We moved on to the blinkers, and, the left side checked out as did the front right side, but there was no electricity making it back to the right rear plug. I’m thinking the issue is in the blinker switch assembly – a little cleaning and adjusting is called for. Finally, I had Mikhaila connect the two brake light wires (the ones that plug into the brake light switch), so we could check out that circuit. Result – right works, left doesn’t. Again, the blinker switch is probably the culprit.
Tuesday, March 3, 2015
The List Dwindles

Bundled for the cold, Mikhaila and I went out to the garage yesterday afternoon for a couple hours of quality Scarlett time. I’d purchased all the parts I thought would be necessary to get us to the brakes-are-done point, so we voraciously attacked that project. We bent the new front left brake line to match the old one and routed – Mikhaila on her back under the car and me jumping between right front wheelwell and under the dash. Next we bent and installed the left front followed by finding and popping in the grommets. Sadly, one has gone missing, but I’m hoping I’ve got a GUP sitting in box A4 (see previous post on inventorying). After bench-bleeding the new dual master cylinder, we bolted it to the firewall and moved on routing the last two brake lines. Since the threaded holes in the side of the master cylinder were larger than the stock lines, I’d bought adapters. The thickness of the rear adapter (for the front lines) forced us to re-bend the end of the existing brake line, and then, once it was lined up, we discovered I’d bought the wrong adapter. So, we moved on to the new line connecting the front port of the master cylinder to the existing brake line fitting under the dash. We carefully located and drilled a new hole, ran the grommet over the brake line and stuffed one end of the tube through the hole. After popping the grommet into place, bending a generous U in the tube, and screwing it into the adapter on the master cylinder, we climbed under the dash again and found the tube I’d bought wasn’t long enough to make the bends to connect to the rear line. Now I have two reasons to go back to Napa. Hitting that dead-end forced us to move on to other endeavors. I decided it was a good time to make a list of the minimum amount of work necessary to get the car on the road. We came up with the following list:
- Buy brake line fittings, short brake line, and replacement lightbulbs.
- Bend and install brake line and install the fitting.
- Install seat
- Bleed brakes
- Buy spark plug leads
- Take muffler and pipe to muffler shop
- Install exhaust system and spark plug leads
- Check fluids
- Borrow battery
- Start and run engine
- Check transmission
- Check compression
- Scrape paint off windows
- Check lights
With the garage finally warm and some time before dinner, we decided to continue working. The easiest task to cross off our list, we felt, was checking the lights. I grabbed my 12V transformer and we hooked it up to the battery cable ends. I had Mikhaila turn the key, but instead of seeing idiot lights illuminated on the dash, we saw and smelled smoked coming from the transformer. The + and – terminals are unmarked on the transformer, and when I’d recently put new leads on, I'd gotten them backwards. It was toast – literally. Taking that as a sign, we shut off the heaters, turned off the lights, and locked the door as we headed back to the house.
Monday, February 23, 2015
It Had Been Too Long
Even though the garage was at least ten degrees colder than the outside temperature yesterday, I didn’t hesitate to fire up the kerosene heaters to make it tolerable. After an hour or so, I ventured out to work on Scarlett. Mikhaila wasn’t feeling well, so I was on my own. That meant I pick tasks carefully – try to finish off jobs she’d find very uninteresting. I started by putting the drums back on all four corners – wheels and tires won’t be far behind. Next, I rummaged through my collection of fanbelt idler pulleys, selected the smoothest spinning (but not too freely) one and mounted it to the engine with a new fanbelt. I then hooked up the temporary input fuel line (the one with the rubber hose on the end to feed into a gas container) to the fuel pump. Once we get a new set of plug leads and bolt on an exhaust system, the engine will be ready to start. Speaking of exhaust system, I removed her muffler from the broken exhaust pipe, pulled a GUP pipe from the rafters, and then spent the next half-hour cleaning old exhaust packing off the two flanges. I still need to take the pipe to a muffler shop and have them expand the clamp depression out of it.
Other than hacking away at solidified exhaust donuts, the other time consuming project was attacking the whole brake routing thing. I measured all the fittings and discovered the parts Clark's had sent me were not going to work. The master cylinder has two different diameter holes for the front and rear circuits. The existing line that goes from the master cylinder to the T-block that feeds the front two wheels is smaller than its associated master cylinder holes, so I'll need a reducer for that one since the one Clark's sent is too small for the master cylinder. Then, the line that feeds the rear wheels is smaller than the coupling Clark's sent, so I'll need a new coupling as well as a reducer for the master cylinder. I wrote everything down and will spend some quality time at the local NAPA to get the parts needed.
Other than general straightening up, the only other task I undertook was installing a vertical magazine rack. It was very difficult finding an open spot on the wall, so I ended up rearranging my pegboard to make room. With it hanging, I filled each slot with manuals and catalogs. This freed up room on a shelf that I quickly filled some stuff that had been sitting on the floor.
Other than hacking away at solidified exhaust donuts, the other time consuming project was attacking the whole brake routing thing. I measured all the fittings and discovered the parts Clark's had sent me were not going to work. The master cylinder has two different diameter holes for the front and rear circuits. The existing line that goes from the master cylinder to the T-block that feeds the front two wheels is smaller than its associated master cylinder holes, so I'll need a reducer for that one since the one Clark's sent is too small for the master cylinder. Then, the line that feeds the rear wheels is smaller than the coupling Clark's sent, so I'll need a new coupling as well as a reducer for the master cylinder. I wrote everything down and will spend some quality time at the local NAPA to get the parts needed.
Other than general straightening up, the only other task I undertook was installing a vertical magazine rack. It was very difficult finding an open spot on the wall, so I ended up rearranging my pegboard to make room. With it hanging, I filled each slot with manuals and catalogs. This freed up room on a shelf that I quickly filled some stuff that had been sitting on the floor.
Tuesday, February 3, 2015
A Day of Waste and a Day of Headway
Last week I e-mailed a response to a Craigslist seller of Corvair bumpers. The body of my e-mail made an offer and told the seller I could drive up Saturday morning to get the two items. His short reply on Thursday was, “Sure, that’s fine.” My immediate response back was a request for an address and a phone number. Friday came and went and no reply, so I sent another e-mail. Saturday morning the lovely Loriann, Mikhaila, Victoria, and I decided to head north even though I still hadn’t received confirmation for pick up that day. I had my Blackberry, so while I waited we shopped (not for car parts) and took in some Lancaster-area attractions. By 4 that afternoon, there was still nothing, so we headed back home bumper-less. It wasn’t until Sunday afternoon the guy finally checked his e-mail and replied. I guess all the optimism in the world won’t trigger someone to respond to an e-mail. While he’s still holding the good price, I’m not sure I’m willing to blow off another day driving up into PA to fetch them. We’ll see what happens with the rest of this month.
On the headway-front, Mikhaila and I spent a fruitful couple of hours in the garage Sunday afternoon. She applied POR-15 to Scarlett’s underside and to a few of her own body parts. Hard to believe she was able to spread it so far since she was covered head-to-toe. While she was spreading paint, I was readying the engine for starting. I bolted on two carburetors with fresh gaskets, found the best gas lines in my stash and installed them to the new-looking fuel pump. Wanting to save some tasks for Mikhaila to accomplish, I diverted my attention to the brakes. I installed the two new rear brake lines and screwed in the tube fittings coming from the front of the car. We’ve still got a ways to go with brake system including bolting in the dual master cylinder new lines up front.
Once Mikhaila was up from under the car, I had her help me install the alternator (yes, Scarlett has been converted from generator to alternator). Next we were going to put on the fanbelt, but I vetoed that due to a dry-feeling bearing in the idler pulley. I know I’ve got a few spares in much better shape, so we’ll catch that next time. The last item before we fire up the engine is a new set of spark plug leads. I’ll be ordering these from Silicone Wire Systems, but I need Mikhaila to pick out a color first.
I just noticed I've now had over 75,000 hits on my blog. Cool!
On the headway-front, Mikhaila and I spent a fruitful couple of hours in the garage Sunday afternoon. She applied POR-15 to Scarlett’s underside and to a few of her own body parts. Hard to believe she was able to spread it so far since she was covered head-to-toe. While she was spreading paint, I was readying the engine for starting. I bolted on two carburetors with fresh gaskets, found the best gas lines in my stash and installed them to the new-looking fuel pump. Wanting to save some tasks for Mikhaila to accomplish, I diverted my attention to the brakes. I installed the two new rear brake lines and screwed in the tube fittings coming from the front of the car. We’ve still got a ways to go with brake system including bolting in the dual master cylinder new lines up front.
Once Mikhaila was up from under the car, I had her help me install the alternator (yes, Scarlett has been converted from generator to alternator). Next we were going to put on the fanbelt, but I vetoed that due to a dry-feeling bearing in the idler pulley. I know I’ve got a few spares in much better shape, so we’ll catch that next time. The last item before we fire up the engine is a new set of spark plug leads. I’ll be ordering these from Silicone Wire Systems, but I need Mikhaila to pick out a color first.
I just noticed I've now had over 75,000 hits on my blog. Cool!
Monday, January 19, 2015
I Hate When This Happens
The “this” I’m referring to is not having the right part at the right time. Sadly, Mikhaila and I had last night’s brake work stopped by not having the right brake hose. I am, however, getting ahead of myself.
Back up to Saturday. I started the sunny day by placing portable heaters in the salons of both Ringo and Glinda in hopes of drying out any dampness that may have leaked in from melting snow and pelting rain. This was in preparation for enclosing both cars in tarps. Since Glinda’s carpet was quite waterlogged, only Ringo was dried out by afternoon’s end. With a Sunday filled with rain predicted and daylight quickly fading, I went ahead and encased both cars in Harbor Freight’s finest silver tarp-age. While I removed the heater from Ringo, I kept it going in Glinda.
Also, during the afternoon, I took advantage of the Glinda’s now toasty interior to do more repairs to the headliner and sun-visors. Black thread and a curved upholstery needs were my tools to replace the failed seams.
Yesterday afternoon and evening, I burned a bunch of kerosene while spending most of the afternoon and part of the evening in the garage working on and around Scarlett. The list of tasks accomplished includes: removing both front brake lines for replacement, grinding down the new wheel cylinder so it didn’t interfere with the drum, installed the new brake hoses with the copper washers, swapped out the old left rear axle for the newly greased one (the one with all the parts), and raising the car up a few notches on each jackstand.
After dinner, Mikhaila joined me and we reassembled both rear brake assemblies. When we went to install the hoses, I discovered that I was in possession of two LM rear hoses instead of EM ones. Not sure how it happened, but back in August of 2013 Clark’s shipped me C332 even though I have C331R in my spreadsheet. This morning I was on the phone with them ordering the right parts. At some point, both Glinda and Luna will be getting new rear brake hoses.
Before calling it a day, Mikhaila and I measured the two brake lines, so I could buy replacements. We got about 29 inches for the left side and nearly 50 for the right.
Back up to Saturday. I started the sunny day by placing portable heaters in the salons of both Ringo and Glinda in hopes of drying out any dampness that may have leaked in from melting snow and pelting rain. This was in preparation for enclosing both cars in tarps. Since Glinda’s carpet was quite waterlogged, only Ringo was dried out by afternoon’s end. With a Sunday filled with rain predicted and daylight quickly fading, I went ahead and encased both cars in Harbor Freight’s finest silver tarp-age. While I removed the heater from Ringo, I kept it going in Glinda.
Also, during the afternoon, I took advantage of the Glinda’s now toasty interior to do more repairs to the headliner and sun-visors. Black thread and a curved upholstery needs were my tools to replace the failed seams.
Yesterday afternoon and evening, I burned a bunch of kerosene while spending most of the afternoon and part of the evening in the garage working on and around Scarlett. The list of tasks accomplished includes: removing both front brake lines for replacement, grinding down the new wheel cylinder so it didn’t interfere with the drum, installed the new brake hoses with the copper washers, swapped out the old left rear axle for the newly greased one (the one with all the parts), and raising the car up a few notches on each jackstand.
After dinner, Mikhaila joined me and we reassembled both rear brake assemblies. When we went to install the hoses, I discovered that I was in possession of two LM rear hoses instead of EM ones. Not sure how it happened, but back in August of 2013 Clark’s shipped me C332 even though I have C331R in my spreadsheet. This morning I was on the phone with them ordering the right parts. At some point, both Glinda and Luna will be getting new rear brake hoses.
Before calling it a day, Mikhaila and I measured the two brake lines, so I could buy replacements. We got about 29 inches for the left side and nearly 50 for the right.
Monday, January 5, 2015
Two Steps Forward, One Step Back
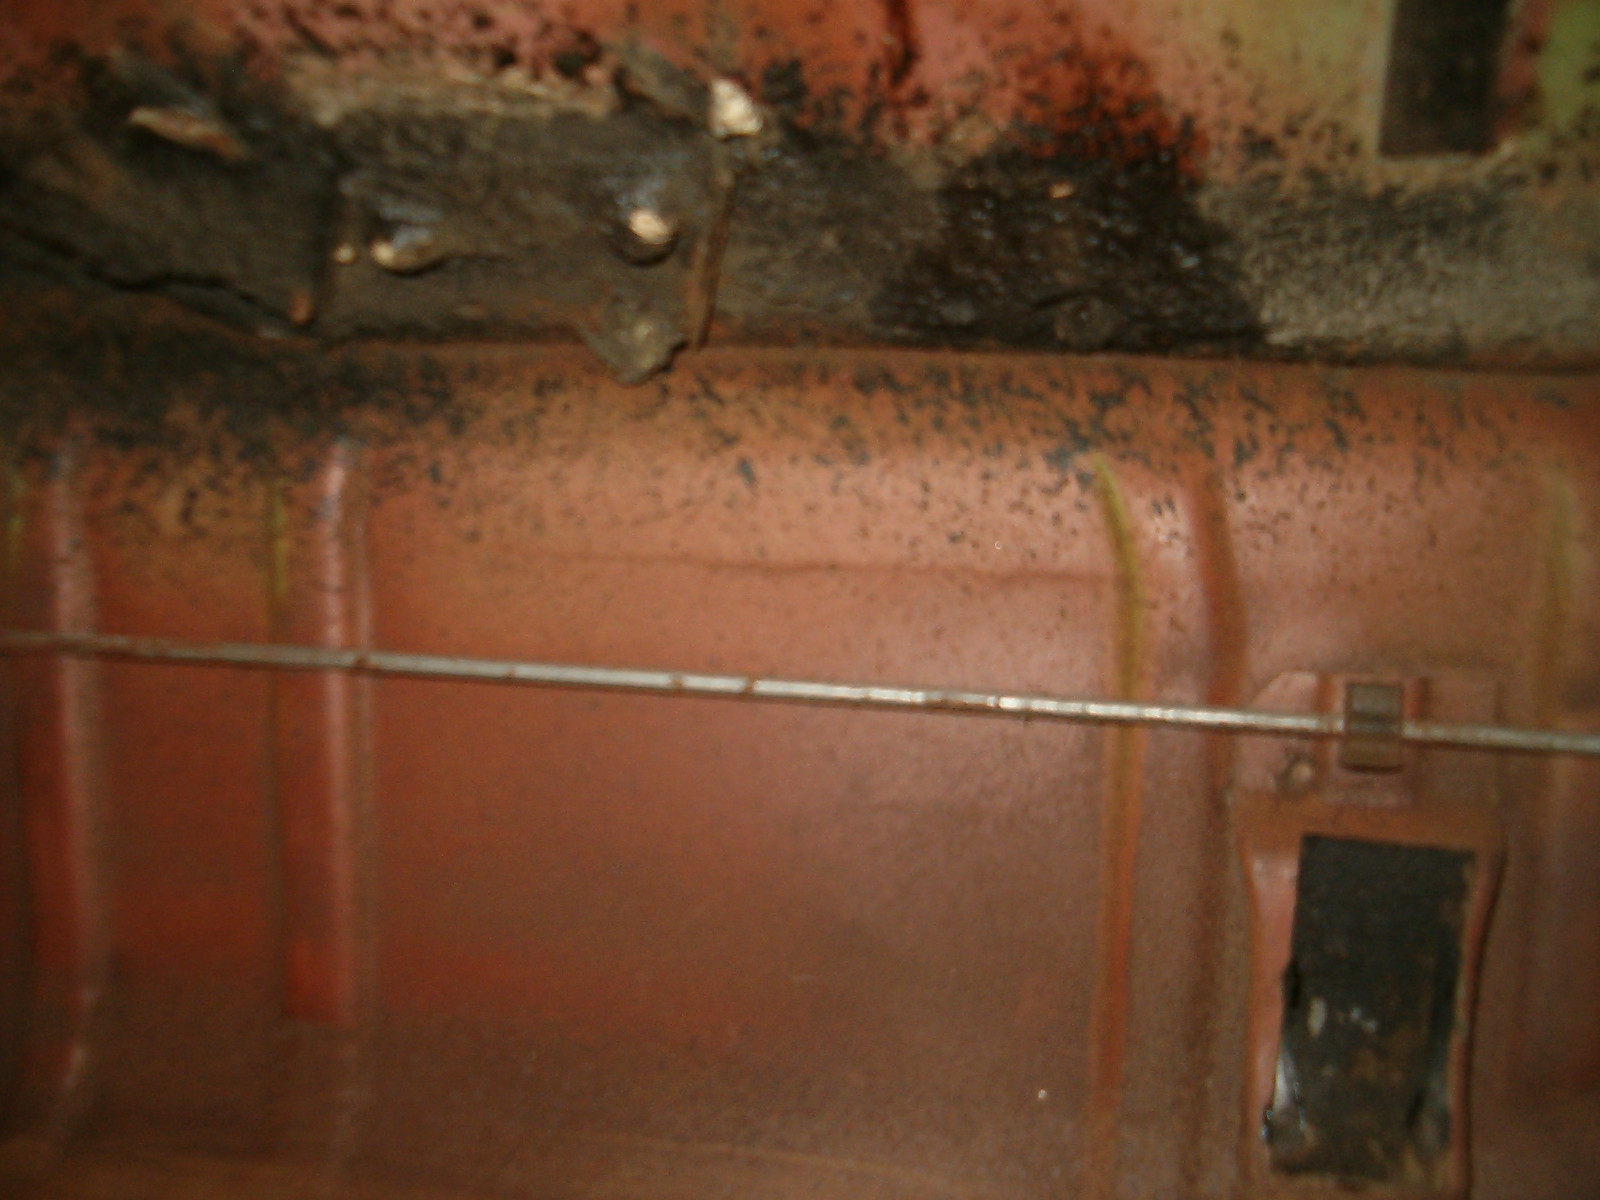
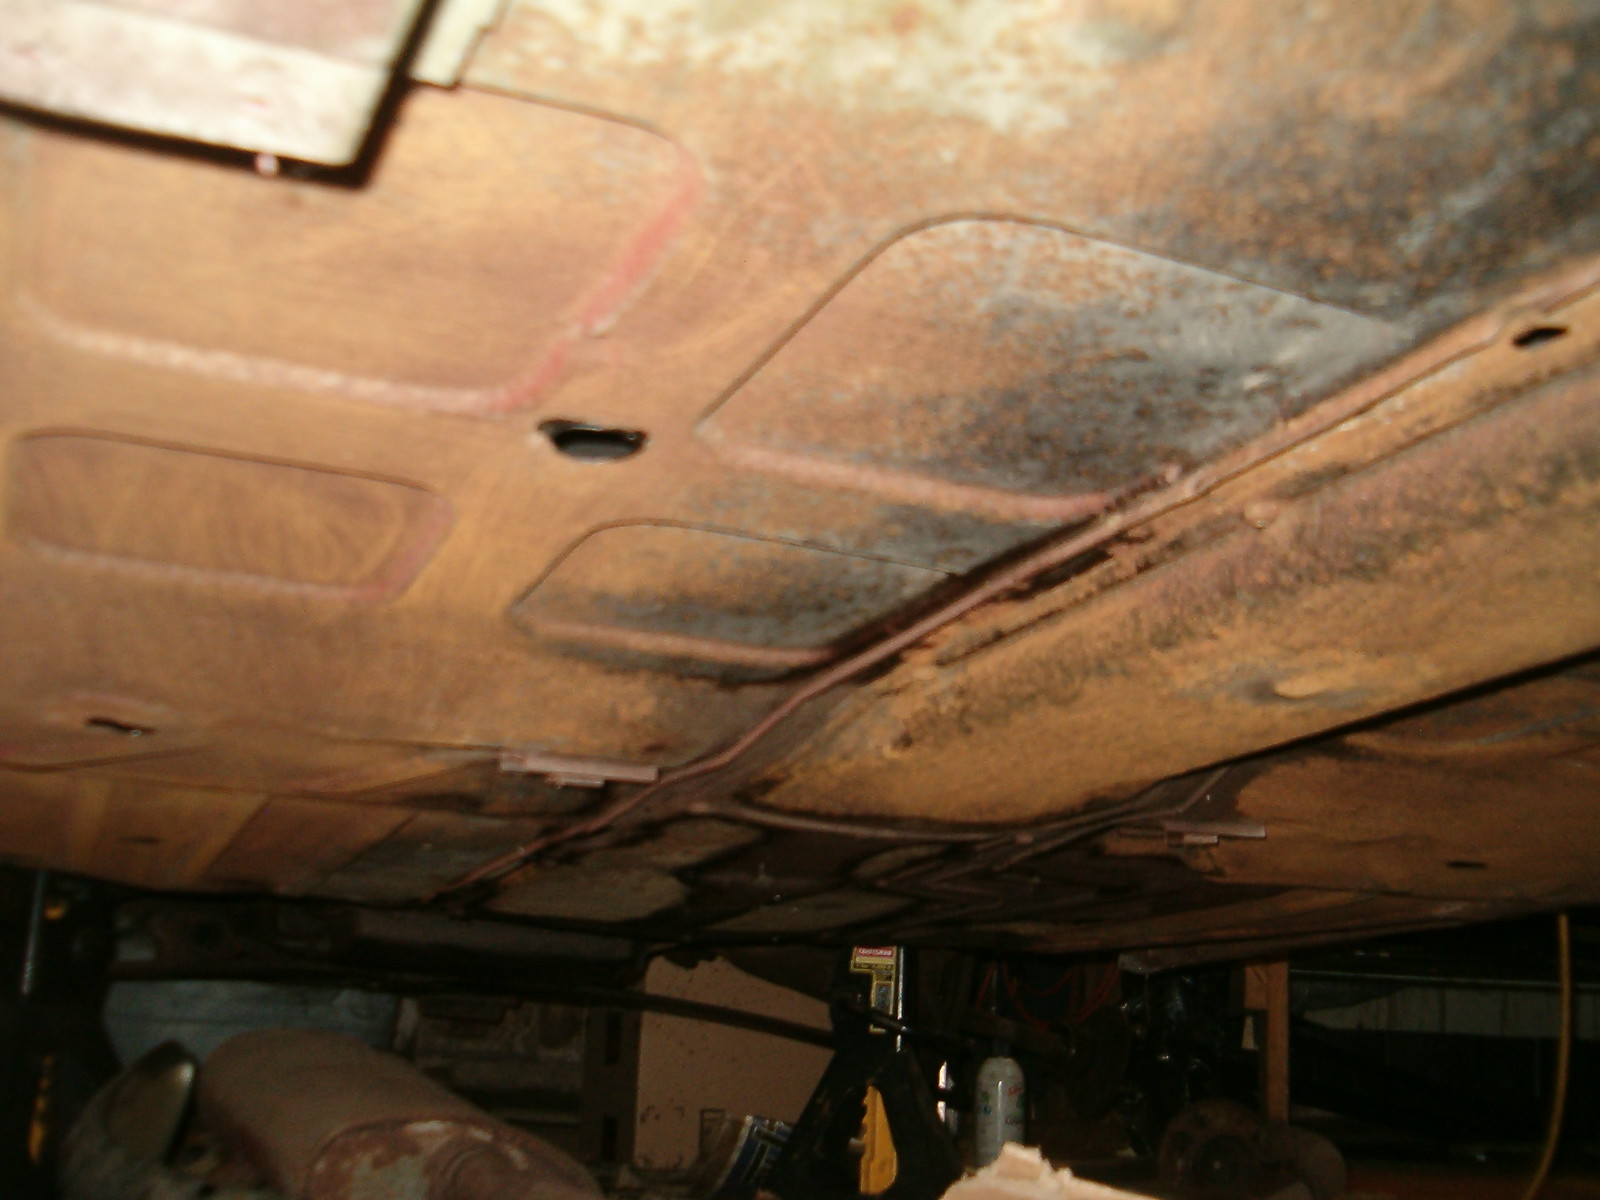
Mikhaila and I had a great weekend working together in the garage. I’m trying to balance disassembly and cleaning projects with reassembly and coating ones to keep her enthusiastic. This last weekend she climbed under the car and wire brushed all the loose rust and gruck from the underside surfaces while I carefully inspected the brake lines for corrosion. Since this car spent such a long time in storage, the galvanized lines are in very good shape and don’t need replacing.
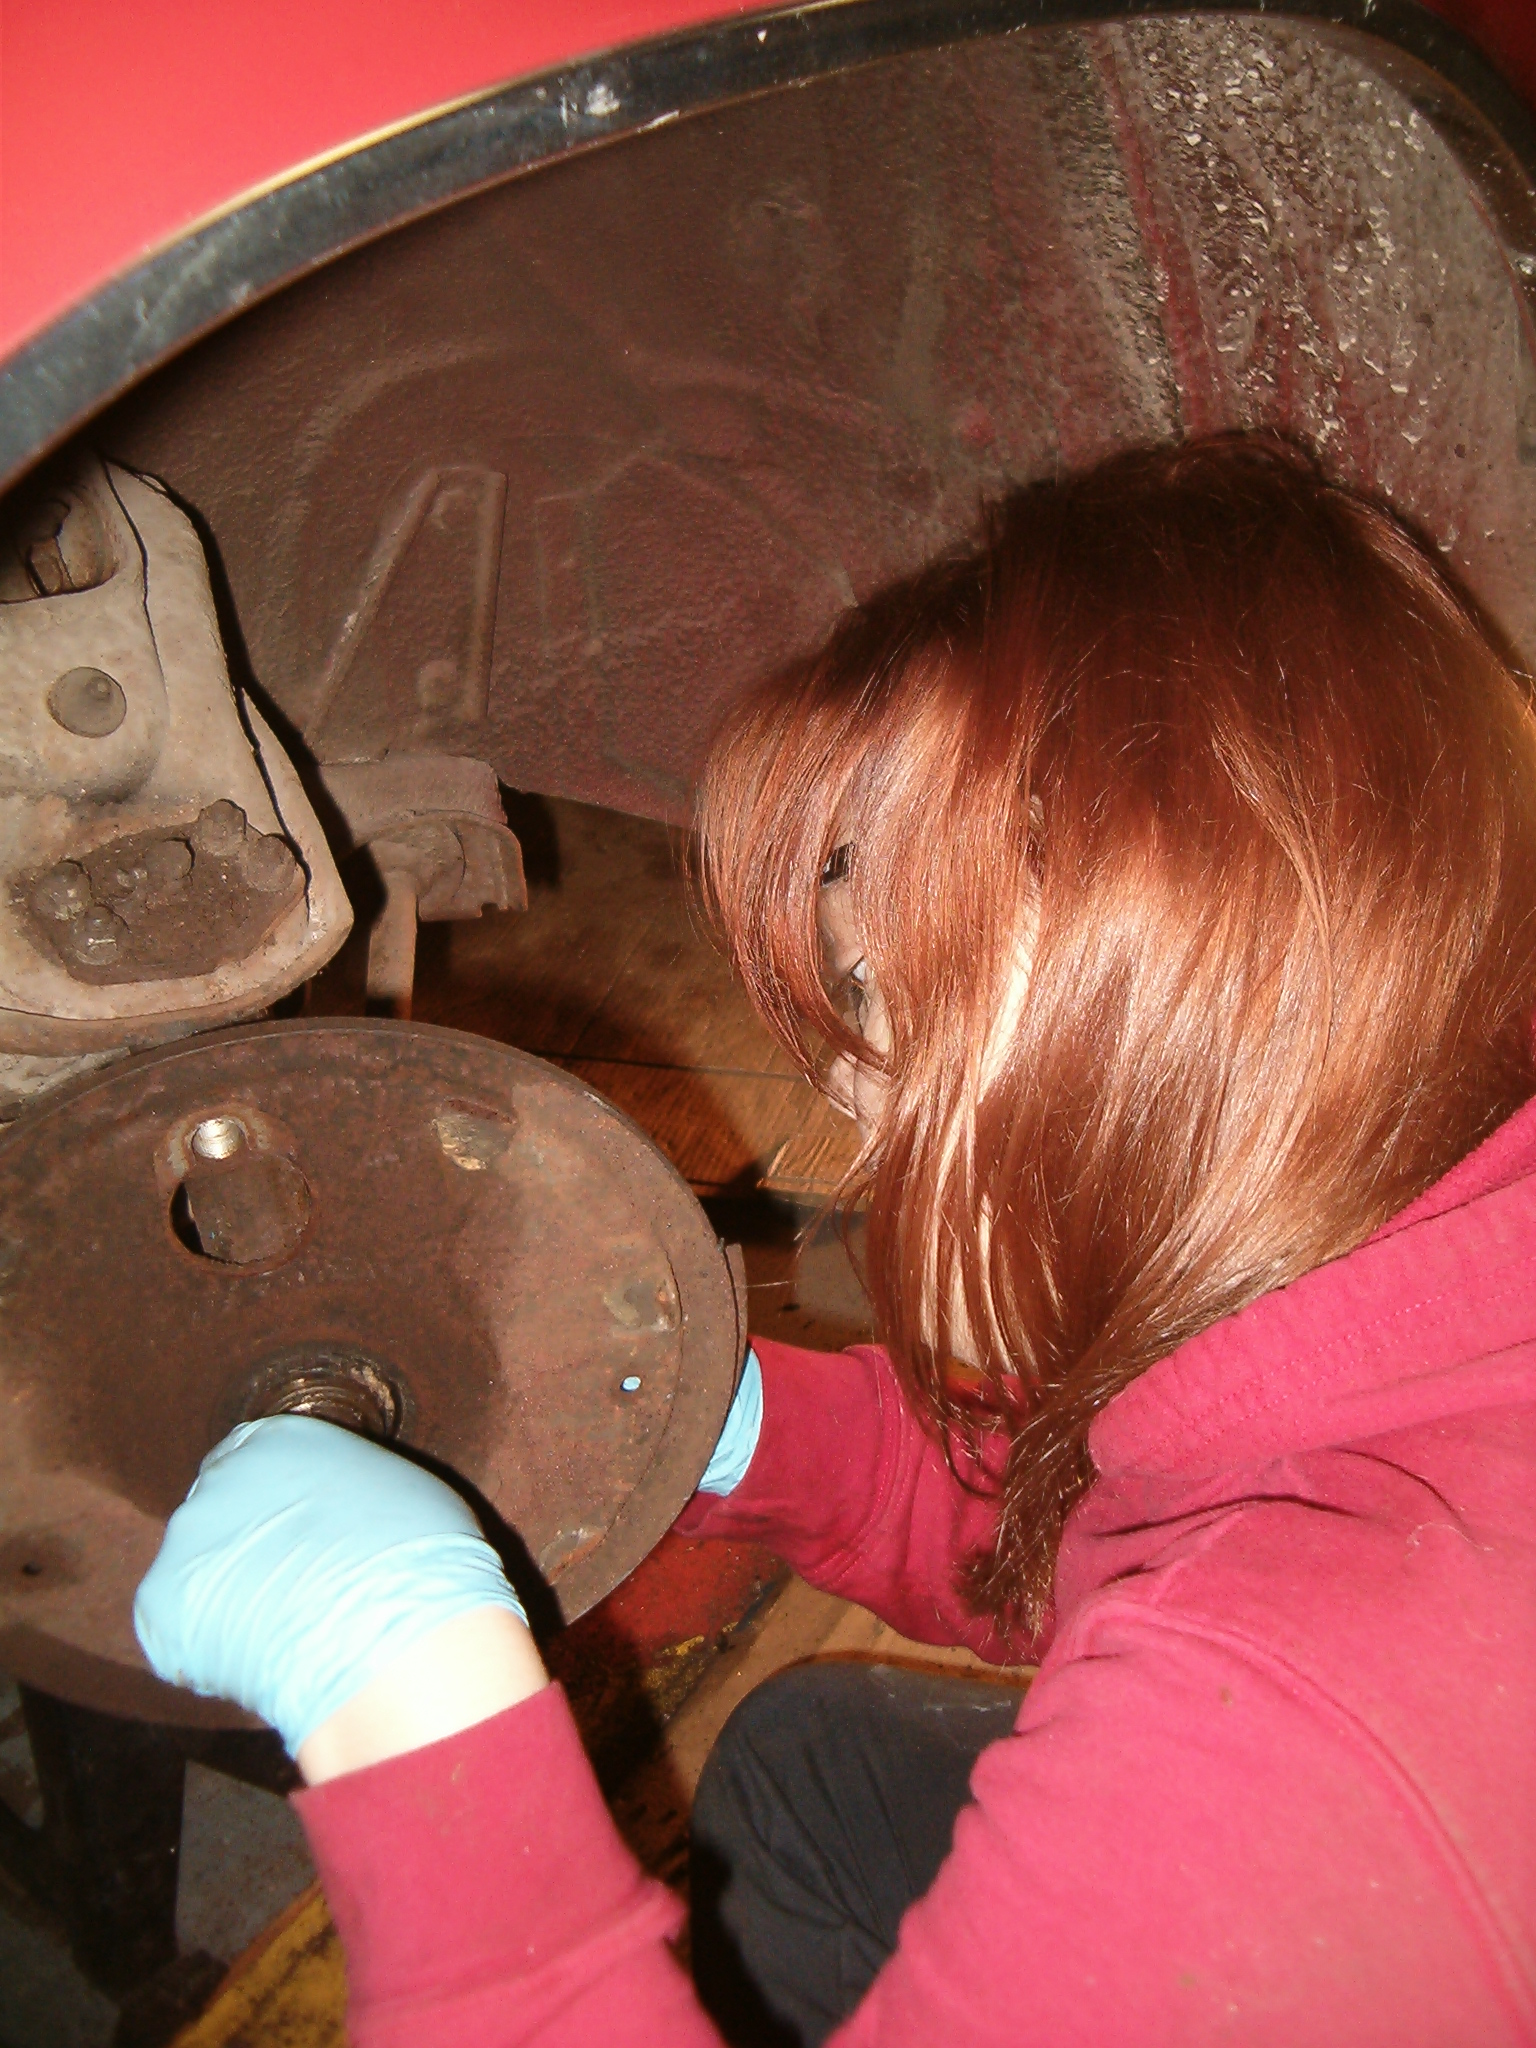
Next, we assembled the two front brake assemblies. The left side went well until we went to bolt on the drum. Once the nut was torqued the drum refused to turn. We concluded the outside ear of the new wheel cylinder is sticking out too far interfering with the drum. Sadly, this is a known possible issue, and we got bit by it. As others have done, I’ll grind down the ear until the drum spins freely.

Speaking of wheel cylinders, we next discovered the wheel cylinder I had in my stash of stuff was not for the right side as I’d originally written down. Therefore, we were dead in the water until I made the call to Clark’s … or were we? I’d saved the old cylinder, so I punched out the used-up innards and inspected the bore. It wasn’t too bad looking, so, after unscrewing the bleeder valve, Mikhaila and I honed out the inside until it was clean and smooth. I cleaned up the two pistons and then handed Mikhaila one of the 7/8ths rebuild kits from the storage box marked RJS. She stuffed the cylinder’s bore with spring, cups, and pistons generously coated with DOT 3 brake fluid. On went the end caps and we could continue putting the right front brakes back together. Since we’d re-used the original wheel cylinder, the drum spun freely once it was installed with freshly greased bearings. The last brake task we undertook was installing the new brake hose. While it easily screwed into the cylinder’s threaded hole, it took some finagling to get the brake line’s fitting screwed into the other end of the hose. It wasn’t until this morning I remembered I’d forgot to insert the new copper washer. Irr.
Our time in the garage ended when we almost completed the rebuilding of Scarlett's second carburetor (the other carb came off Glinda – more on that later).
By that time on Sunday evening it was getting cold and windy – perfect timing for me to leave the heated garage for the brisk driveway where Glinda waited to have a new fanbelt put on and the second modified carburetor reinstalled.
Regarding the fanbelt, I’d blogged back in mid-November how high-rpm escapades had caused Glinda’s fanbelt to come off. Since I wasn’t carrying a new belt at the time, I reinstalled the flipped one and crossed my fingers. Last Friday I had to come in to work, and I decided to drive Glinda forgetting – again – to put a spare belt in the trunk. Well, my lame-ness was rewarded as the wounded belt busted soon after I left my work’s parking lot. Not having a spare, I first tried to nurse the car home with occasional stops. Finally, engine clattering on a hill forced me to give up and call upon the lovely Loriann to come rescue me again. Even though she’d brought me a replacement belt, I’d decided I didn’t want to deal with disconnecting the line feeding the oil pressure gauge in the dim illumination of a streetlight, so we left the car parked in a church parking lot and I returned an hour or so later with the truck and tow-bar and drug Glinda home. In the comfort of my own driveway with plenty of light, I undid the oil line, installed a new Clark’s fanbelt, and reconnected the oil line in a matter of minutes.
Along with a carburetor rebuild kit, my last order from Clark’s Corvair Parts included four accelerator pump cups. I installed one of these on a GUP pump and tested it in the shelved modified carb base that wouldn’t work previously, and the new cup did the trick – nice squirts with each blip of the throttle shaft. I removed Glinda’s right carb assembly (it had the borrowed unmodified base), carefully separated the top from the base preserving the gasket, swapped on the newly tested pump, and mated the racing top (added vent tubes) with the racing base (relocated jets). The assembly was then installed onto the engine and a turn of the ignition key resulted in the wonderful rumble of the Corvair 110 pumping air through the Flowmaster. After both chokes had fully opened, I shut down the engine, disconnected the choke pull-off hoses from each carb, connected the ends of my clear tubing containing a few tablespoons of water to the aforementioned vacuum ports, and re-fired the engine. Minor tweaks of the throttle screws and the water stopped moving. I tightened the fancy linkage and the carbs were synched. After reconnecting the pull-off tubes, Glinda was ready for a test drive. There was still some stumbling around mid-throttle, but, finally, putting my right foot to the floor elicited a grin rather than a grimace.
She's now ready for some sprited commuting - just in time for snow to force me to permanently pull her off the salty roads.
Monday, September 29, 2014
The Beat Goes On


After two hours, the mosquitoes starting biting, so I released her to go inside, and I turned my attention to Glinda. Since I was already dirty and there was a couple hours before dinner, I thought, “what the heck.” After placing her rear up on jackstands high enough to get the tires off the ground, I set the ignition to ON, and shorted the purple starter wire to the positive battery terminal to make the engine spin. As soon as the engine started turning, I heard and felt some clunking that I perceived as coming from the starter/clutch area. After a second or two of slow turning, I decided to pursue investigating that area before starting the engine. I slid under the car and removed the starter and took a series of photos slightly rotating the engine between shots. I didn’t really see anything significant like bits of metal or broken teeth, but I didn’t go more than forty-five degrees or so before moving on.

One issue that I definitely needed to address to rule out as a cause of the banging was the ineffective bolt hole in the front of the transmission. This stripped hole was allowing the drivetrain to shift from its designed orientation. I removed the loose bolt, made a quick trip to Home Depot to buy a replacement bolt one size longer, and then slid back under the car to try out my fix. With the other two bolts still snug, I drove the new screw into the hole. Even though I felt I was engaging more threads than before, the gap failed to close and the bolt failed to tighten.
At this point, I knew the only fix would be to install a helicoil in the failed hole. To prep for that operation, I disconnected the clutch, throttle, and shifter couplings, put the jack in place to support the transmission, and removed the bolts holding the trans to the support. I then lowered the trans to ensure I could get access to the bad hole (which I could). After that I placed the transmission on a jackstand and put all the tools away.
Once I was cleaned up, I went to Amazon.com and placed an order for 3/8-16 helicoil kit. It should arrive in a couple days.
Monday, September 15, 2014
Done With Racecars For a While

Sunday afternoon Mikhaila joined me in the garage for some quality Corvair time with her car. While I returned to Luna her borrowed wheels, Mikhaila continued cleaning Scarlett's (this post marks the date where she agreed to give her car a decent name in place of RedVert) seats. So far it appears the original upholstery will be usable.
 Once Luna was down on the ground and the jackstands were available, we put Scarlett up in the air and removed her wheels to give us access to the hub ends of the brake system. I had given Mikhaila options as to where we start first on her car: engine, brakes, bearings, fuel. She chose brakes. We’ll be doing this job in stages with stage 1 being inspection of what’s there. From what we could see, the lines and hoses are actually in pretty good shape, but we’ll be replacing the rubber hoses anyway. To improve access to the rear fittings, we undid the outer ends of the heater ducts. While under the car, I noticed the exhaust pipe has rusted through in one spot, so I decided we should also remove the exhaust system which helped with brake fitting access as well. We sprayed both ends of all four hoses before moving on.
I’m anxious to determine the condition of the engine, so Mikhaila and I went to work prepping the engine for starting. After removing the spark plug leads, we discovered mice had moved heater box insulation to the volume under the Upper Shroud (turkey roaster). That meant that we needed to remove that shroud to clean out all the finned passageways of the heads and jugs.
 We accomplished that in surprisingly quick order by removing the alternator (this EM’s been modified), the vacuum balance line between the carburetors, the PCV valve tubing, and all the screws holding the shroud in place. Since the top shroud is sandwiched by the front shroud, the three screws for that piece had to be loosened. With the top now free, we finagled it off the engine. Mikhaila then gave each spark plug a generous shot of penetrating fluid which we decided to let sit and work its magic for a day or so.
Some of the parts Scarlett is missing include the side shrouds. John had allowed me to go through his stash of used parts and I did uncover a side shroud, but it ended up being for a turbo engine, and won’t work for us. The last task for Mikhaila and I before knocking off for the day was to go through my GUPs and see if I had the sheetmetal that Scarlett required. We found side shrouds (with good seals), a rear engine mount cover, and a couple lower shrouds (both with good thermostats). I really need to get rid of all the excess crap I’m keeping on shelves. It makes it very difficult to find the right GUP. Wait, the crap are the GUPs.

Wednesday, May 28, 2014
Gone, but Not Forgotten
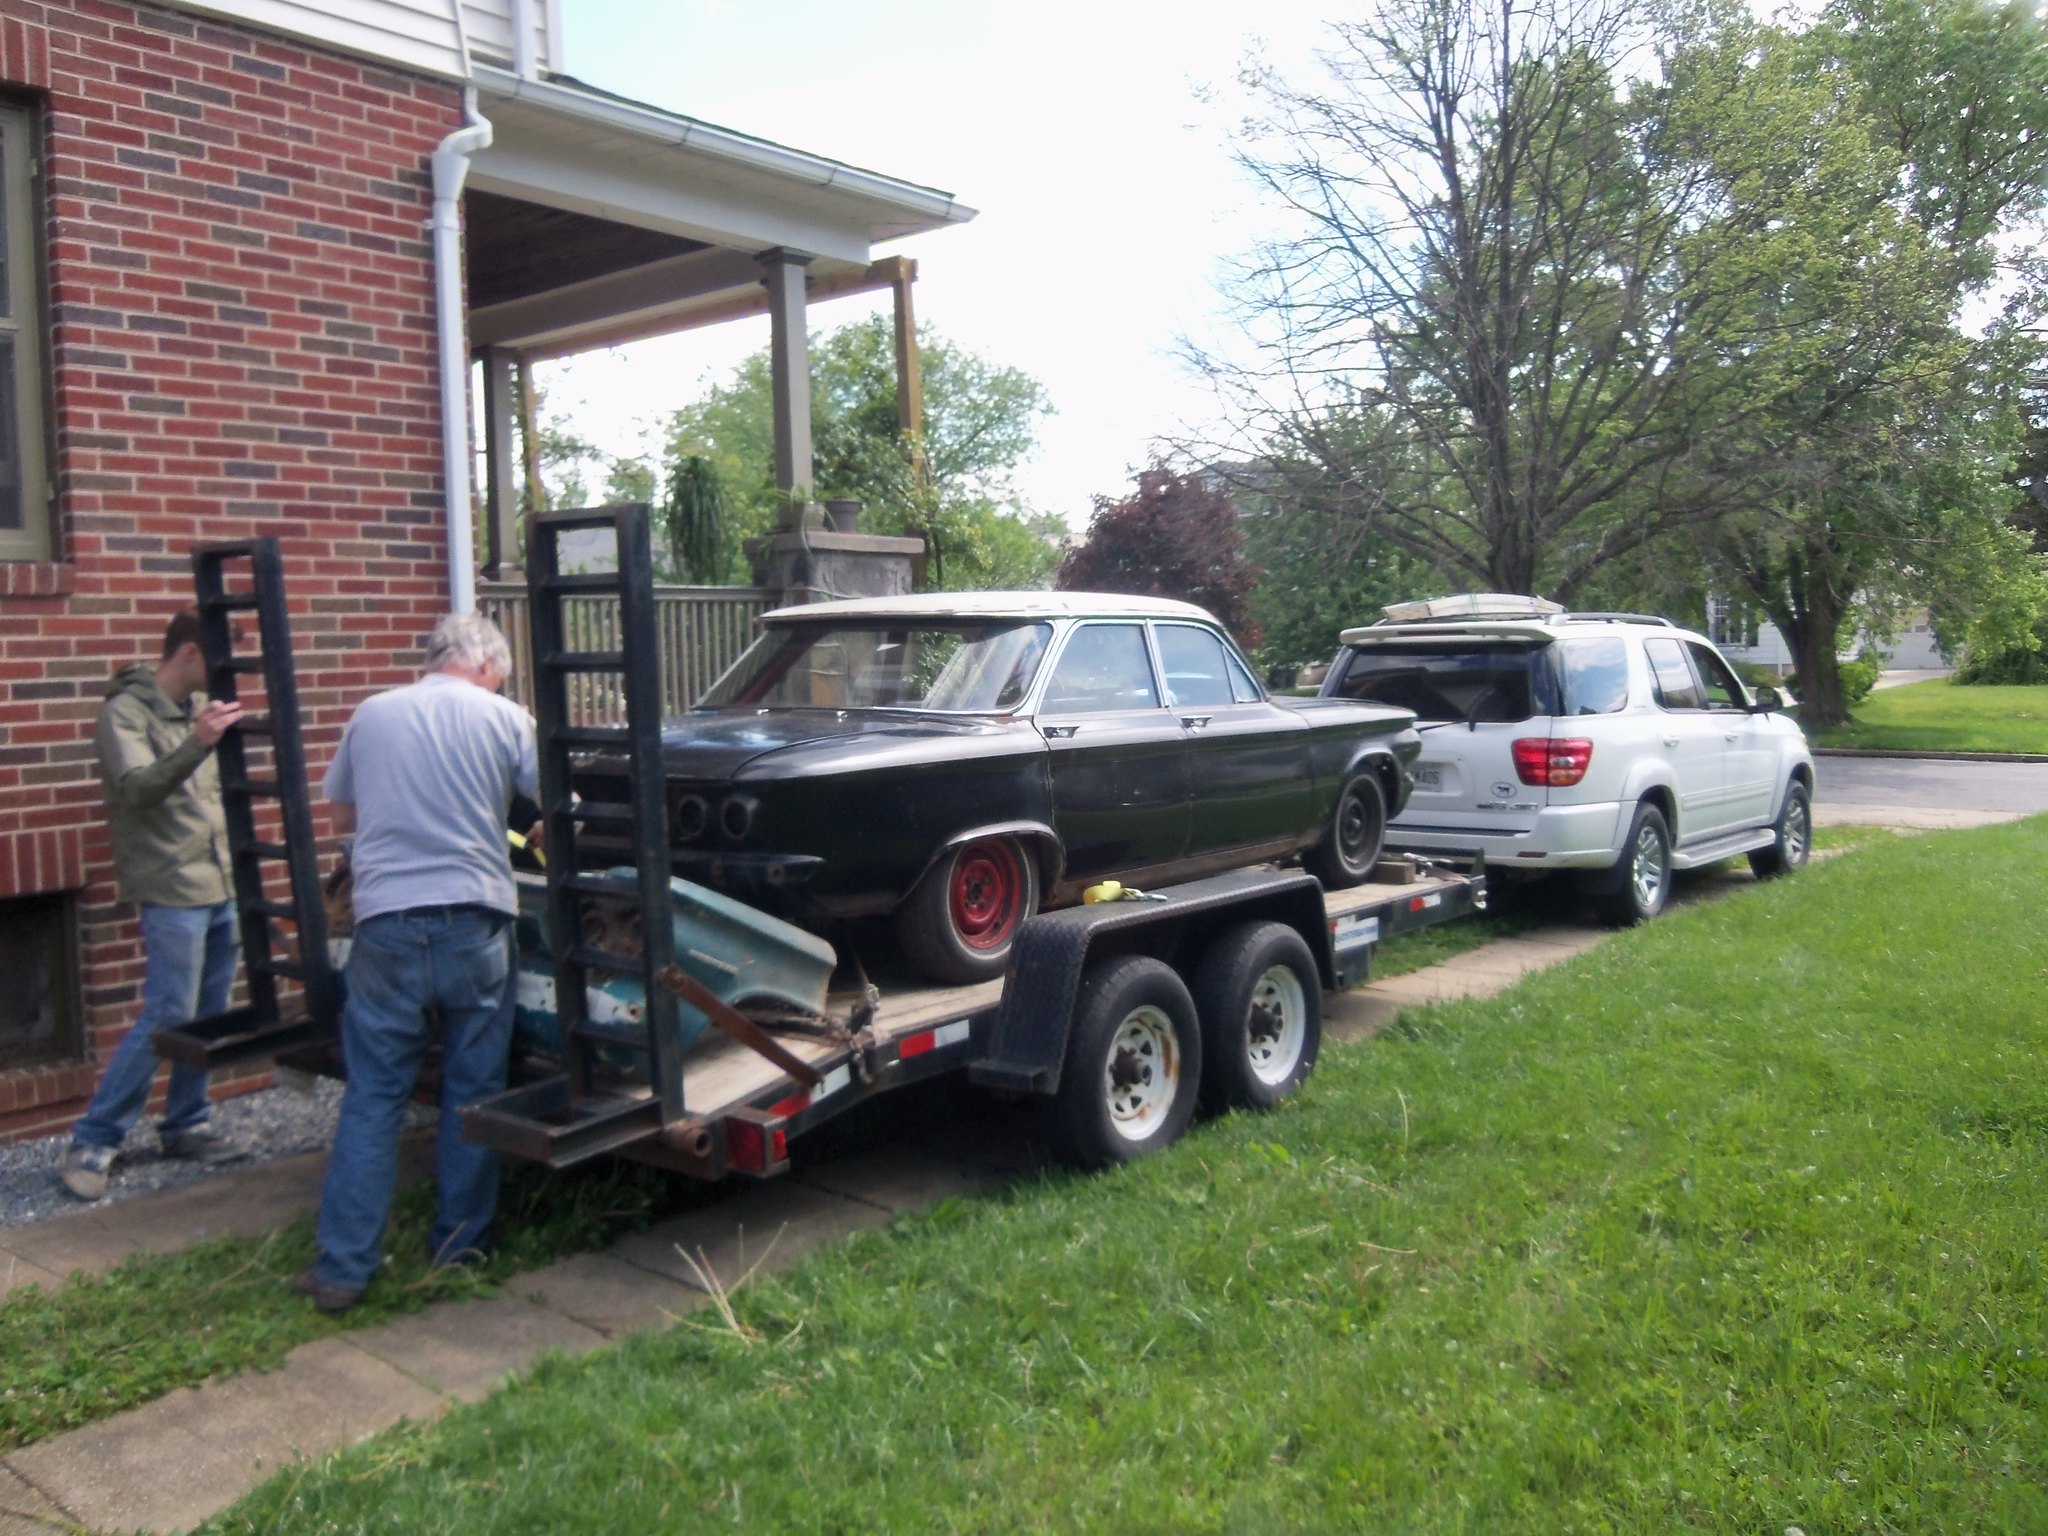
I told the lovely Loriann, there’s a space in my driveway and a hole in my heart. I’m always saddened when I sell a car; Saturday was no different when TwoTone was hauled away. I can take comfort in the knowledge that the new owner, a really nice guy and his teenage son, will probably have her back on the road faster than Mikhaila and I would have. ‘Vair buddy, John’s, free ’64 coupe sealed the deal. They’ll be converting TwoTone to a 4-speed. It’ll be too cool.
What else is happening with the fleet?
There’s no change, sadly, with the ongoing battle with Ringo’s driver’s door. Even after adjusting the door, it’s back to needing to be slammed. Irrr. It’s nice to report, though, that Ariel’s only needed to use the ignition bypass once.
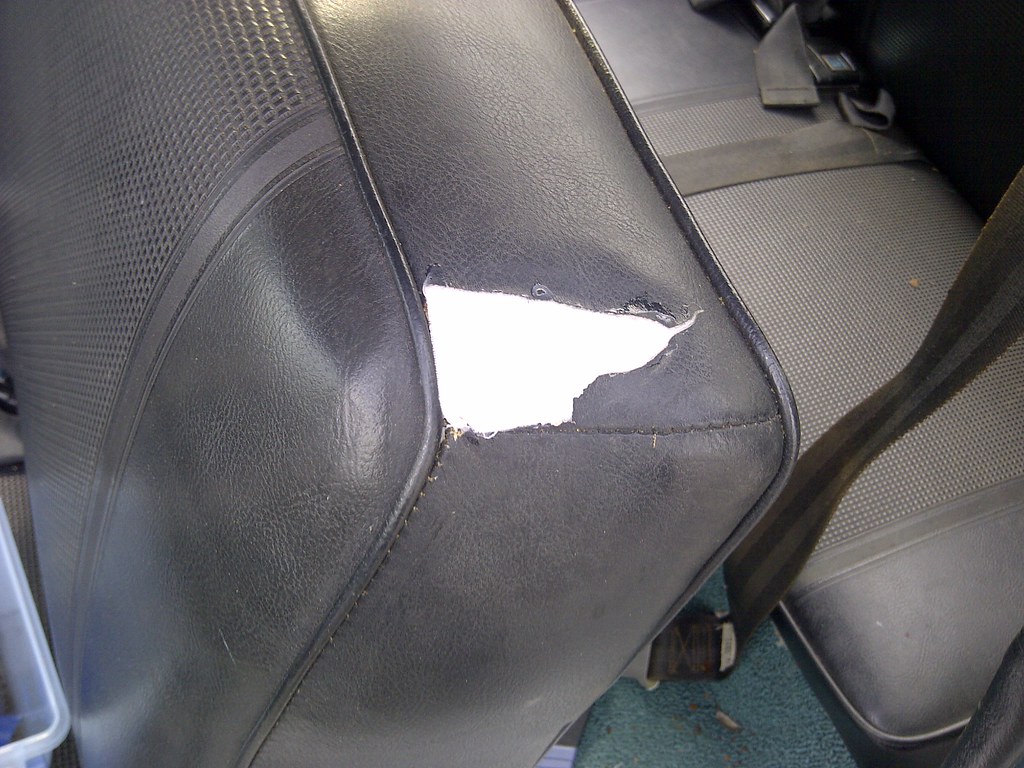
I spent some time on Glinda last weekend. Saturday afternoon I decided to install the new clutch and brake pedal assembly. When I first started planning to do this swap, I researched what I’d need to do, and had been led to believe that the large support bracket was different to accommodate the clutch, so I bought a used version along with the pedals and pertinent parts. Over the last few weeks I’d cleaned up the used parts, primed them, and shot them with a couple coats of Rustoleum gloss black. With them ready to go, I crawled under the dash to determine the best path of attack. It didn’t take long for me to figure out the bracket that was in the car looked exactly like the one I’d bought. Okay, the hardest part of the job didn’t need to be done. Yay. The existing brake pedal came out once I’d popped off the clips that held the two shafts (pivot and master cylinder rod) in place, slid the shafts out, and dropped the pedal straight down. Getting the new, longer clutch pedal shaft into its pivot hole required me to remove the defroster duct; which required me to remove the glovebox; which required me to remove the new radio housing. With all that stuff out of the way, the clutch shaft slid into the hole, through the brake pedal, out the other side of the bracket. The clutch pedal slid over the end and was retained with a washer and nut. It took a while to convince the duct it needed to go back in, but it finally succumbed, and the rest of the reassembly went well. An adjustment to the brake pedal switch completed the pedal swap. The other task I undertook was repairing the failing vinyl on the driver’s seatback. I’d purchased a repair kit a while back. Step 1 was to glue a backing cloth to the backside of the vinyl surrounding the hole. Since it required a four hour cure, that was the end of Glinda work for the weekend.

Sunday was Luna day. Yes, the car that hasn’t moved in months got some attention. Victoria and I decided it was time to tackle installing the convertible top. With the sun beating down on us, we fought with the attaching the rear window piece to the trim sticks for a couple hours. Finally, we had to give up since the baking black vinyl and cloth were getting too hot to handle. While we made some good headway, it would have been nicer to finish the job. Well, they’ll be other weekends. While she (Luna) was out in the driveway I fixed the tie-rod problem I’d discovered when we did a lube job soon after bringing her home. A previous mechanic had adjusted the joint in such a way as to bind the balljoints. I needed to turn one end relative to the adjusting sleeve, but that entailed some doing. First, I needed to loosen the two clamp nuts from there associated bolts. This was done with great trepidation since these guys are known to just torque right off due to being seized. Well, God was looking down on me since both came off cleanly with only penetrating fluid and careful wrenching. The threaded connection of the tie-rod end into the sleeve took the aggressive application of flame to get it to the point where, with me standing on the end of a pipe wrench, I could get it to move. It only took a few degrees of rotation to free the tie-rod centering it in its travel. After cleaning the bolts on the wire wheel and generously applying anti-seize, I reassembled the clamps, dropped the car off the jackstands, and called it a day.
Monday, May 12, 2014
A Little Bit of Ringo
I left on a business trip last Tuesday afternoon. Less than four hours later, Ariel had finished her work day and was ready to go home. “Not so fast,” said her un-trusty steed, Ringo. Instead of a cranking engine upon the turn of the ignition key, she got nothing but illuminating idiot lights. Fortunately, I had prepared for this oh-so-expected event and left the truck parked at the house just for her usage. Victoria rescued her sister and all was forgotten until Saturday morning when Ariel and I travelled in the truck with the towing equipment bouncing around the bed behind us. Upon our arrival at the mall lot, I inserted the key, gave it a twist, and, sure enough, nothing but two red lights. With the switch left in the On position, I walked to the car’s rear, popped open the engine lid, pulled out the dipstick, unplugged the purple wire, touched the end of the dipstick to the starter end of the now-exposed connector, and bridged the twelve volt circuit by brushing the edge of the dipstick against the positive terminal of the battery. Those gyrations were rewarded with a spin of the starter and an immediately running engine.
Having averted the hassle of dragging the car to the driveway, I instead drove him home. It seemed like every mile added another annoyance to the to-do list – squeaking speedometer, bad brake pulling when pushing the pedal, and intermittent blinker blinking were thusly noted. Later that day, I made a jumper wire with a ring terminal at one end that was attached to the S terminal of the starter solenoid. The other end was covered and routed to a waiting position behind the battery. The next time the key won’t start the car, touching the end of this jumper should get things spinning. On to the brakes.
With the assistance of the lovely Loriann, I confirmed the bad brake sounds was coming from the right front, so off came the wheel followed by the hub exposing the brake components. A quick inspection showed me the shoes still had sufficient liners on them, but the self-adjusting-ness hadn’t been working so these shoes had to travel a lot farther before they contacted the drum – not good. I disassembled all the parts, cleaned things up, lubricated the adjusting screw, put a dab of grease on each of the backing plate’s six contact points, and put everything back together. I spun the adjusting screw widening the shoe spacing until I could just barely slide the drum over the shoes. As expected, given the wear of the drum, once the drum was seated on the spindle, the wheel spun freely. I hand-tightened the bearing nut and did a pedal test of the brakes. The system passed the hard, harder, hardest test and then I seated the nut and retained it with a cotter pin. The wheel was bolted back on, the wheelcover banged back into position, and the car came down off the jackstands. On to the blinkers.
These leaky, old vehicles end up with damp carpets under the dash which accelerates corrosion of any uncoated metal surfaces above. The blinker unit presses into the fuse block and it’s not unusual for this connection to go bad over time. I pulled and reinstalled the blinker a few times thus cleaning off the contacting surfaces and this fixed the intermittency – moving the stalk resulted in a blinking arrow every time. On to the speedometer.
Lying on my back with my legs dangling over the back of the driver’s seat is not the most comfortable position, but it’s what has to be done to remove the speedometer cable and spray liquid graphite onto and into the speedometer’s bushing. Thankfully the can came with a little red tube that one hand could aim while the other pressed down on the spray button. Back on went the cable, and then I was able to unfold my body and fall out of the car. On to the celebratory beer.
PS Ringo’s has started with the key every single time since I used the dipstick bypass Saturday.
Having averted the hassle of dragging the car to the driveway, I instead drove him home. It seemed like every mile added another annoyance to the to-do list – squeaking speedometer, bad brake pulling when pushing the pedal, and intermittent blinker blinking were thusly noted. Later that day, I made a jumper wire with a ring terminal at one end that was attached to the S terminal of the starter solenoid. The other end was covered and routed to a waiting position behind the battery. The next time the key won’t start the car, touching the end of this jumper should get things spinning. On to the brakes.
With the assistance of the lovely Loriann, I confirmed the bad brake sounds was coming from the right front, so off came the wheel followed by the hub exposing the brake components. A quick inspection showed me the shoes still had sufficient liners on them, but the self-adjusting-ness hadn’t been working so these shoes had to travel a lot farther before they contacted the drum – not good. I disassembled all the parts, cleaned things up, lubricated the adjusting screw, put a dab of grease on each of the backing plate’s six contact points, and put everything back together. I spun the adjusting screw widening the shoe spacing until I could just barely slide the drum over the shoes. As expected, given the wear of the drum, once the drum was seated on the spindle, the wheel spun freely. I hand-tightened the bearing nut and did a pedal test of the brakes. The system passed the hard, harder, hardest test and then I seated the nut and retained it with a cotter pin. The wheel was bolted back on, the wheelcover banged back into position, and the car came down off the jackstands. On to the blinkers.
These leaky, old vehicles end up with damp carpets under the dash which accelerates corrosion of any uncoated metal surfaces above. The blinker unit presses into the fuse block and it’s not unusual for this connection to go bad over time. I pulled and reinstalled the blinker a few times thus cleaning off the contacting surfaces and this fixed the intermittency – moving the stalk resulted in a blinking arrow every time. On to the speedometer.
Lying on my back with my legs dangling over the back of the driver’s seat is not the most comfortable position, but it’s what has to be done to remove the speedometer cable and spray liquid graphite onto and into the speedometer’s bushing. Thankfully the can came with a little red tube that one hand could aim while the other pressed down on the spray button. Back on went the cable, and then I was able to unfold my body and fall out of the car. On to the celebratory beer.
PS Ringo’s has started with the key every single time since I used the dipstick bypass Saturday.
Monday, December 2, 2013
Long Weekends are Wonderful

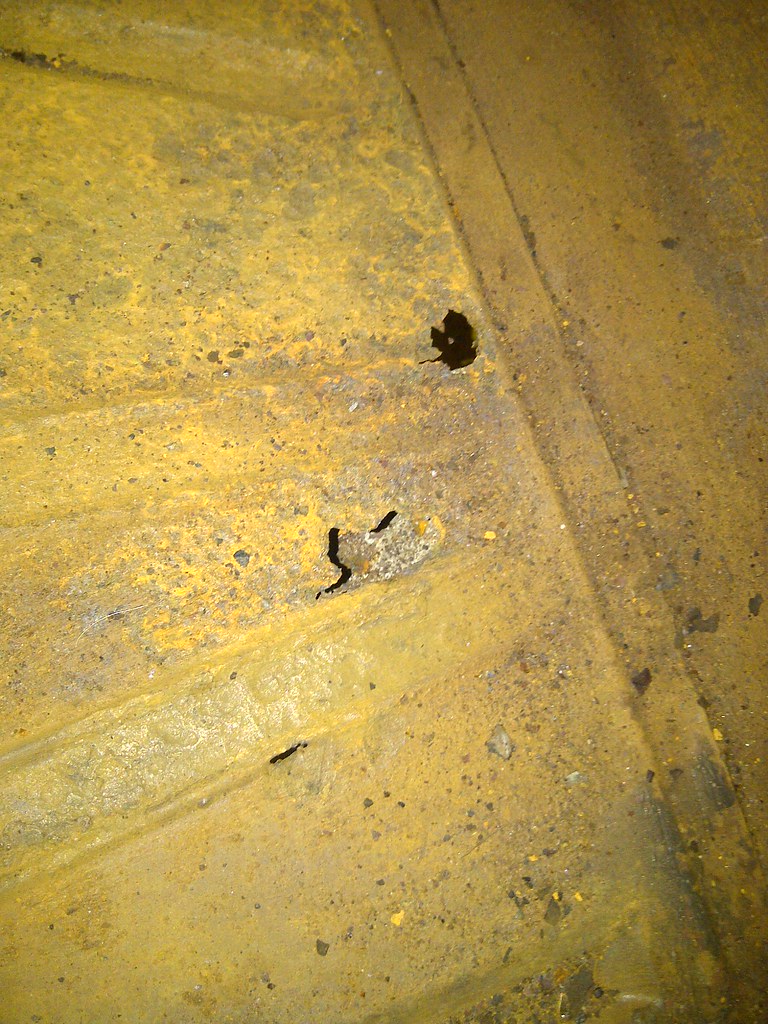
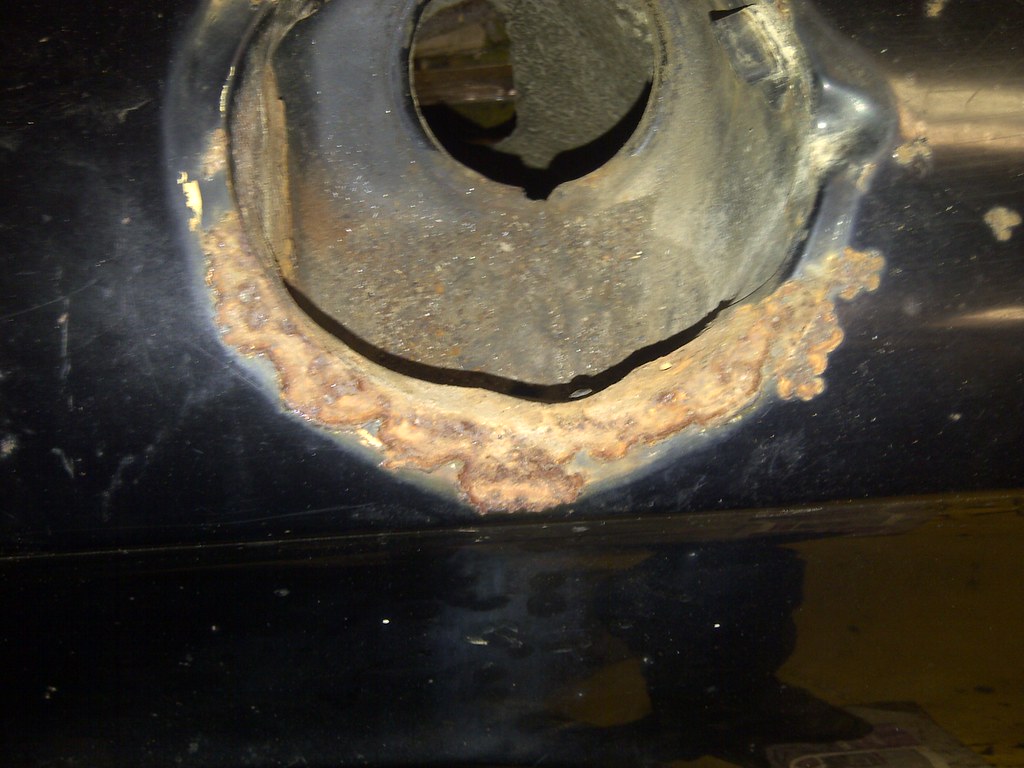
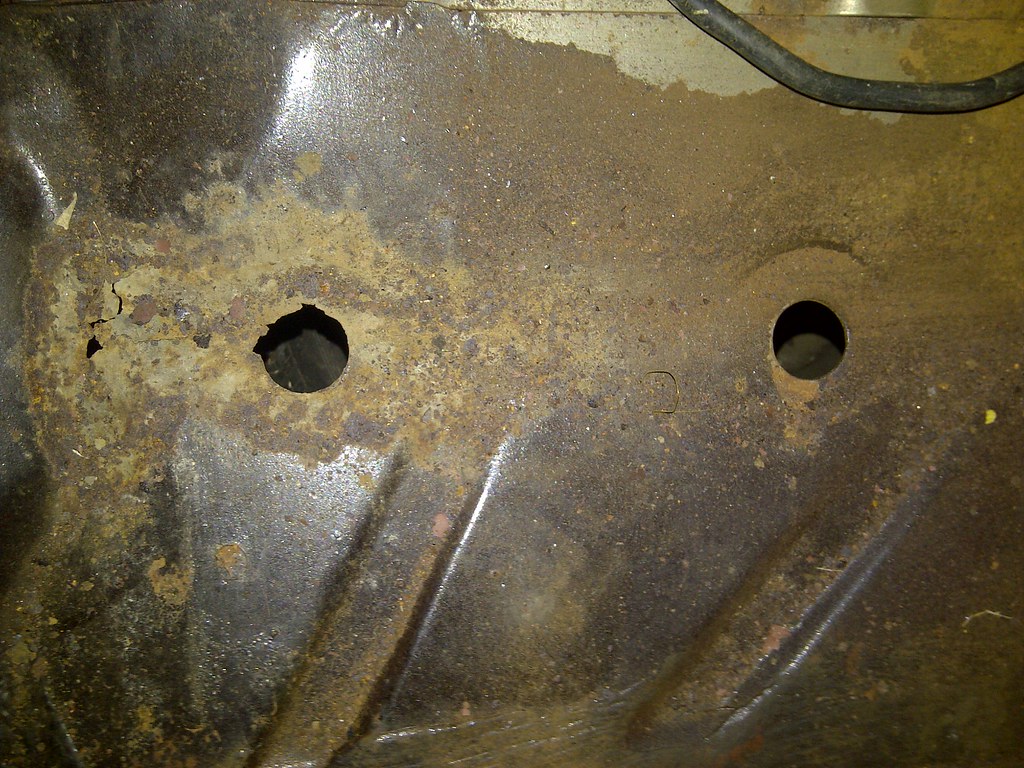
Two solid outings in the garage over the past four days and Mikhaila and I have got TwoTone nearly stripped down to the state where we can start bodywork. All that work and I can count on one hand the number of broken fasteners (one bumper bolt, one seat stud, one gas door screw, and one heater vent screw). At this point: the interior is empty except for the gauge set and the headliner; the trunk is empty except for the wiper motor, and the exterior is bare except for the door handles. Sadly, rusted-out areas were revealed as the trim came off – especially the rocker panel area at the front of the rear wheel opening. The floor has a couple holes about an inch-and-a-half in diameter. Both these areas will need to be cut out and new metal welded in. This, in addition to replacing the bashed-in left front corner, appears to be all the welding required.
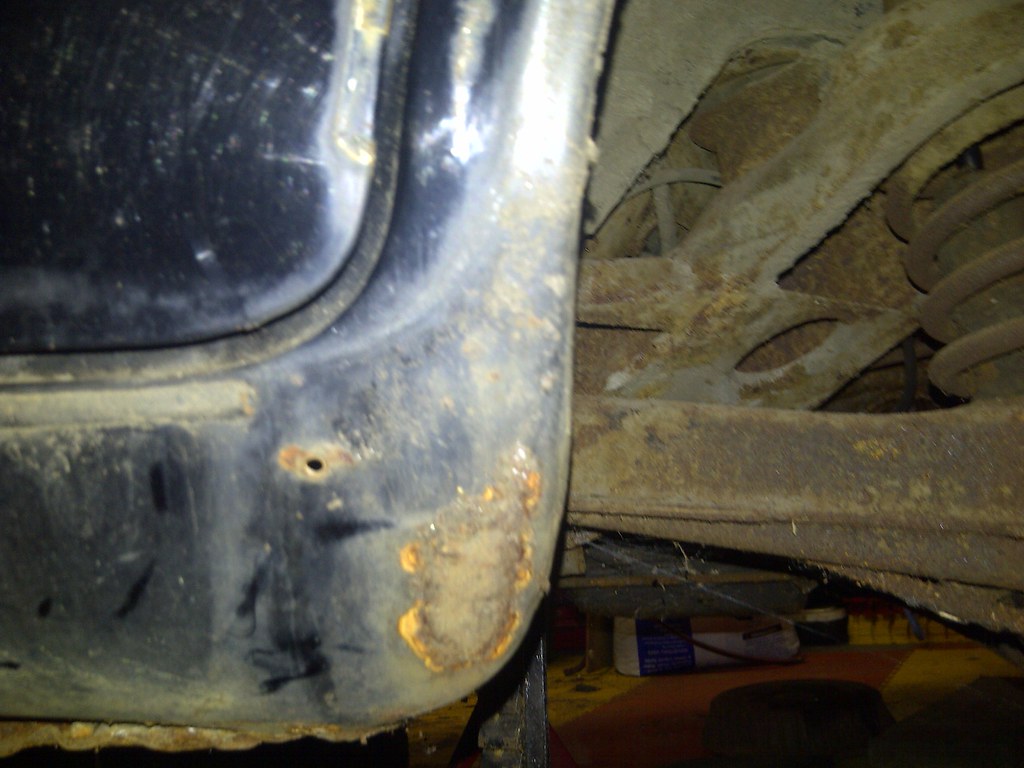
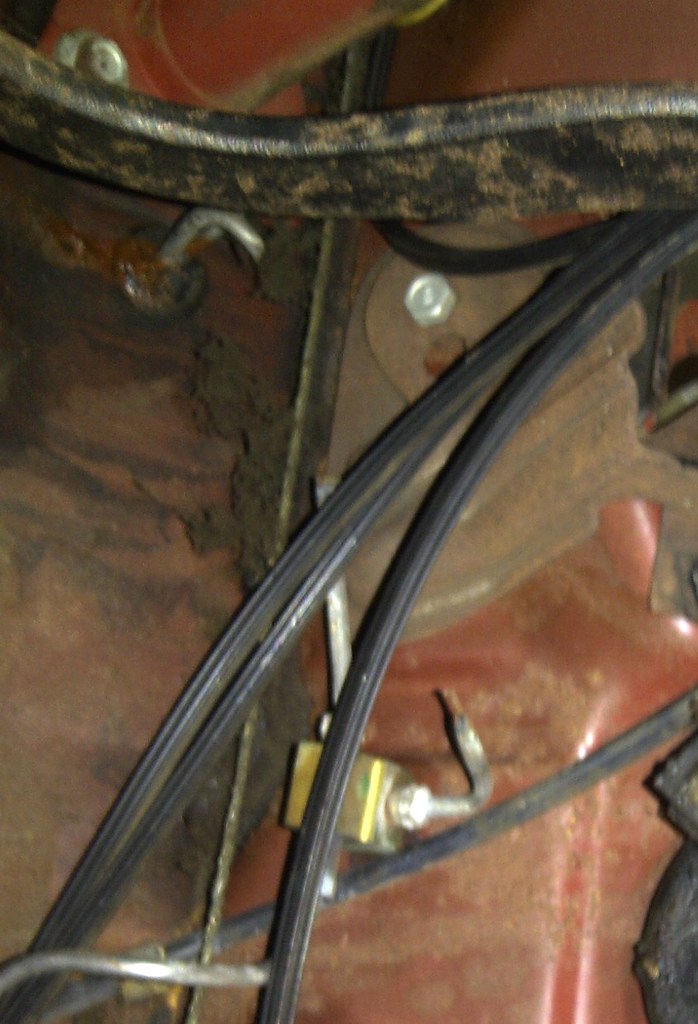 Another sad discovery we made while clearing out the interior was that the brake lines had all been cut. I’m not sure why someone thought it a necessary act, but it will cost me some time and money to replace what looked to be solid, rust-free tubes.
On the Glinda front, I re-reassembled the “bad” carburetor from TwoTone and installed it in place of the left carburetor (let’s call this one an original). The engine would not run right, so I’m writing that carburetor off completely and will obtain a rebuildable replacement from Vince (Rich’s unsold stash). The original went back on and a test drive around the neighborhood proved to me she’d probably get me to and from work. So, today I pressed her back into daily-driving duty. My first stop of the morning was the gas station where I put in about $40 of 93 octane. I texted Fuelly.com the mileage and amount it took to fill the tank and immediately received a text back telling me that the last tank-full elicited a whopping 11 miles per gallon. My hope is putting the new carbs on will return the mileage back to the 18-19 range I was seeing before I put on the carbs with the relocated jets. To add insult to injury the leak from the rear of the transmission is getting worse. I happened to have some Lucas transmission treatment on the shelf, so I poured a pint down the fill tube and we’ll see what happens.
Thursday, November 14, 2013
Must Make Her Rollable
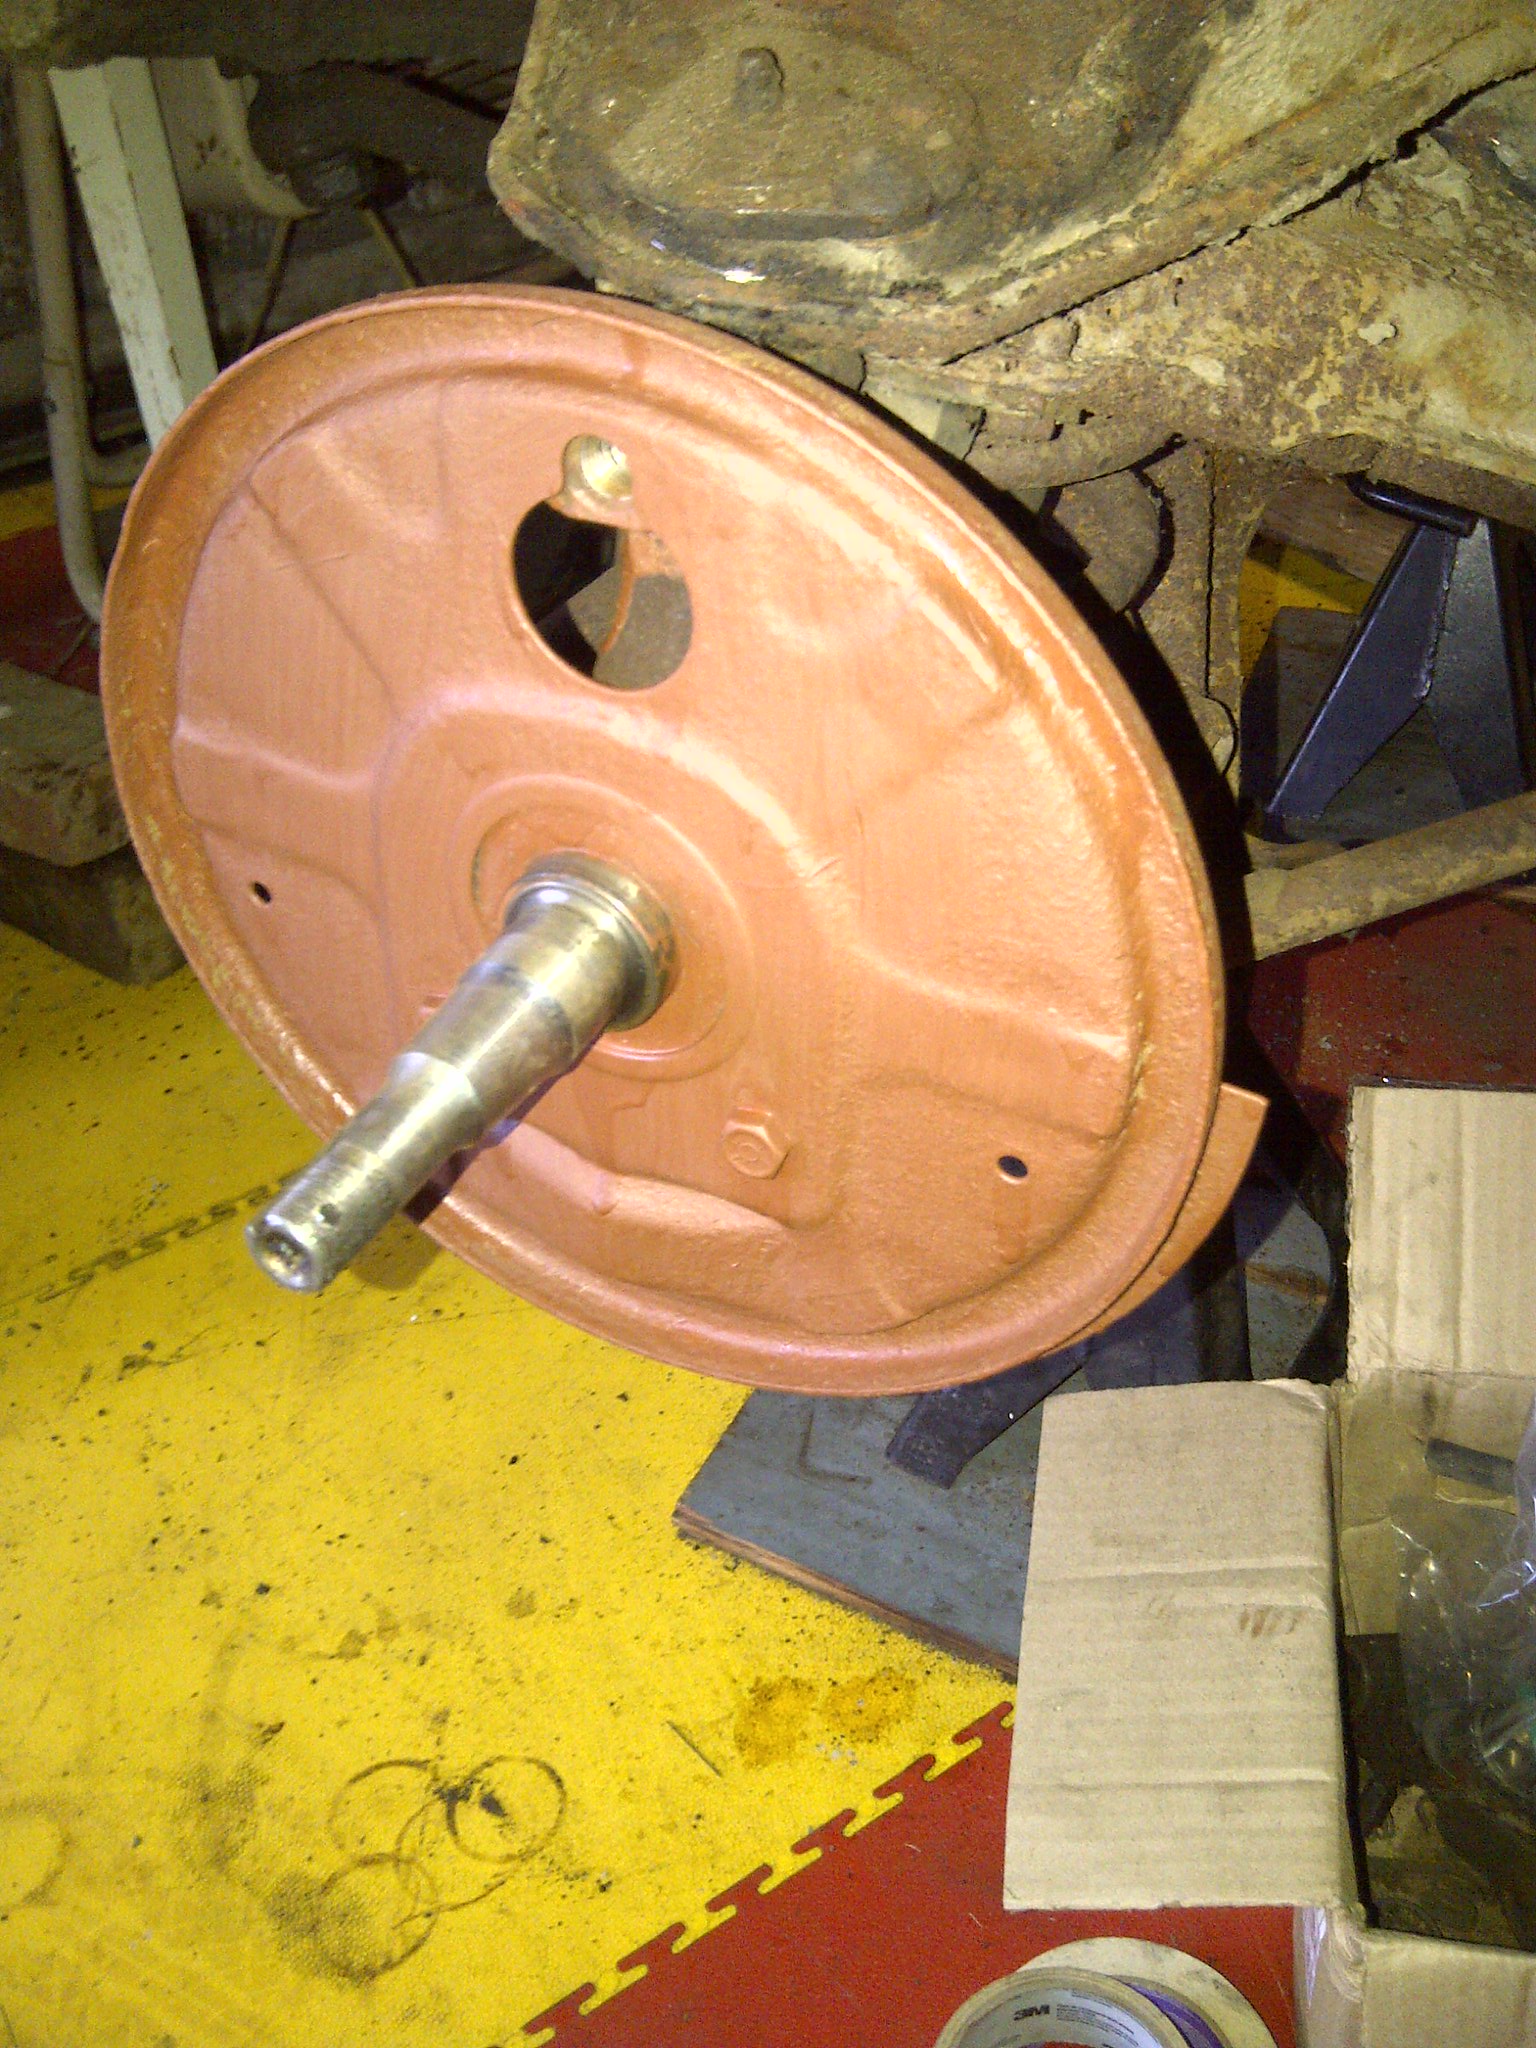
Last night, at the dinner table, I blurted out that Mikhaila and I had to spend some quality time with her car. I went on to explain that, with all the bad luck I’ve been having with the fleet and the onset of brrr-cold nights, I needed to be able to roll TwoTone out of the garage to make room for the next daily-driver that craps out. In order for that happen, I went on, she and I needed to finish the work we’d started on the front end. Loriann asked how long that would take, and I replied three hours of Mikhaila’s wire-brushing, priming and painting the brake backing plates would be her commitment, while I would then rebuild the brakes, pack and install the wheel bearings, and bolt on the hubs and wheels before lowering her off the jackstands.
Mikhaila offered to go out to the garage that night and get started, so right after dinner, I fired up a couple of the kerosene heaters. Thirty minutes later she and I were hard at work – her wire brushing the right front backing plate while I disassembled the brakes on the left. By the end of the evening, all the priming was done. A couple coats of gloss black Rustoleum and some cleanup on the seal surfaces is all that’s left to do before I bolt up the mix of GNP and GUP brake components.
Yesterday I blogged about unreliable my memory is. Well, it’s not quite all gone. As I gathered up the recently cleaned front wheel bearing parts, I inspected the front seals and pronounced them unusable. I actually remembered seeing new Clark’s replacements in a box, so I went to the shelves, opened the box I thought they were in, and pulled out the package with C319A written on the outside. There were, in fact, EM wheel bearing seals. Inventorying all the GNPs I’ve got in assorted boxes is still on my general to-do list.
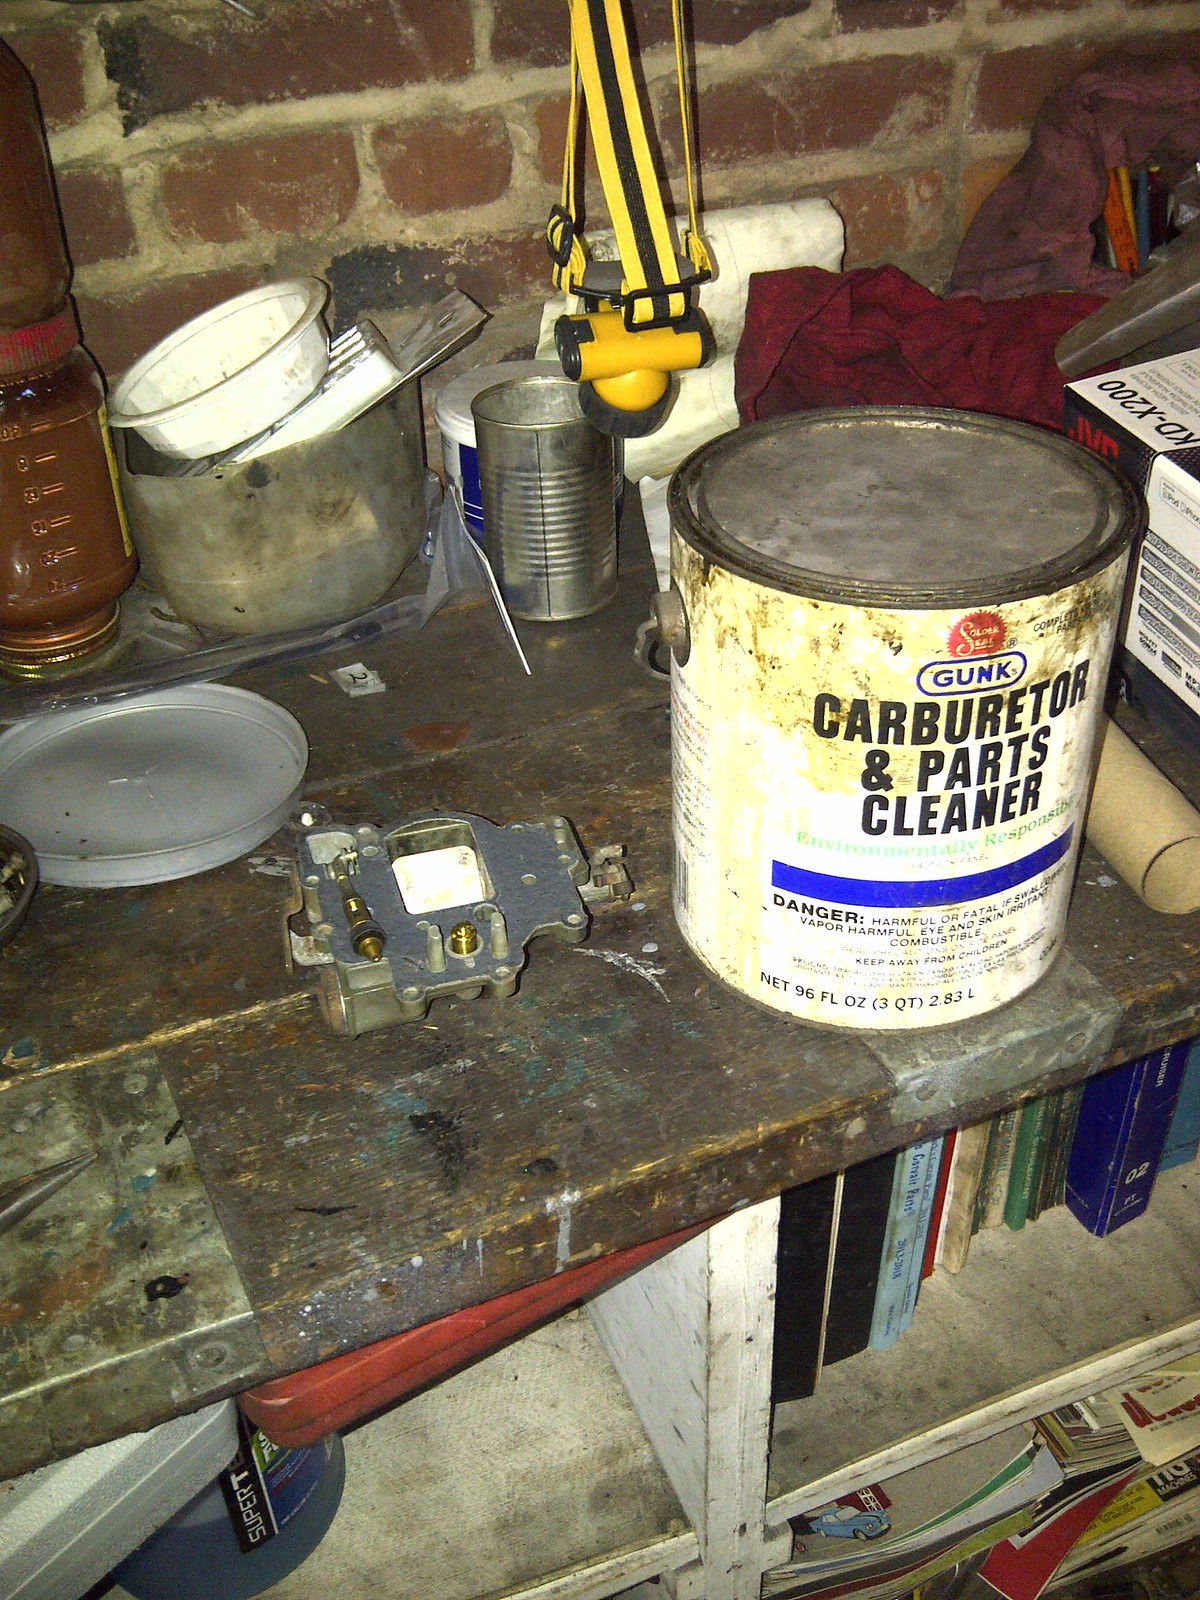
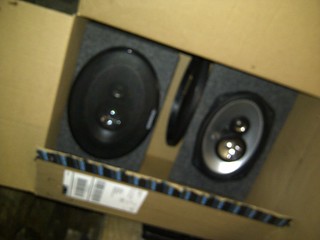
Finally, I unpacked the Amazon.com box that had showed up earlier in the day. Out came the carpeted speaker boxes which were immediately filled with my new 6X9 speakers. Not sure why I’m spending time and money on a car that I’m really disgusted with right now, but I started down this path of going beyond AM before Glinda began misbehavin’.
Monday, September 30, 2013
A Big Dent
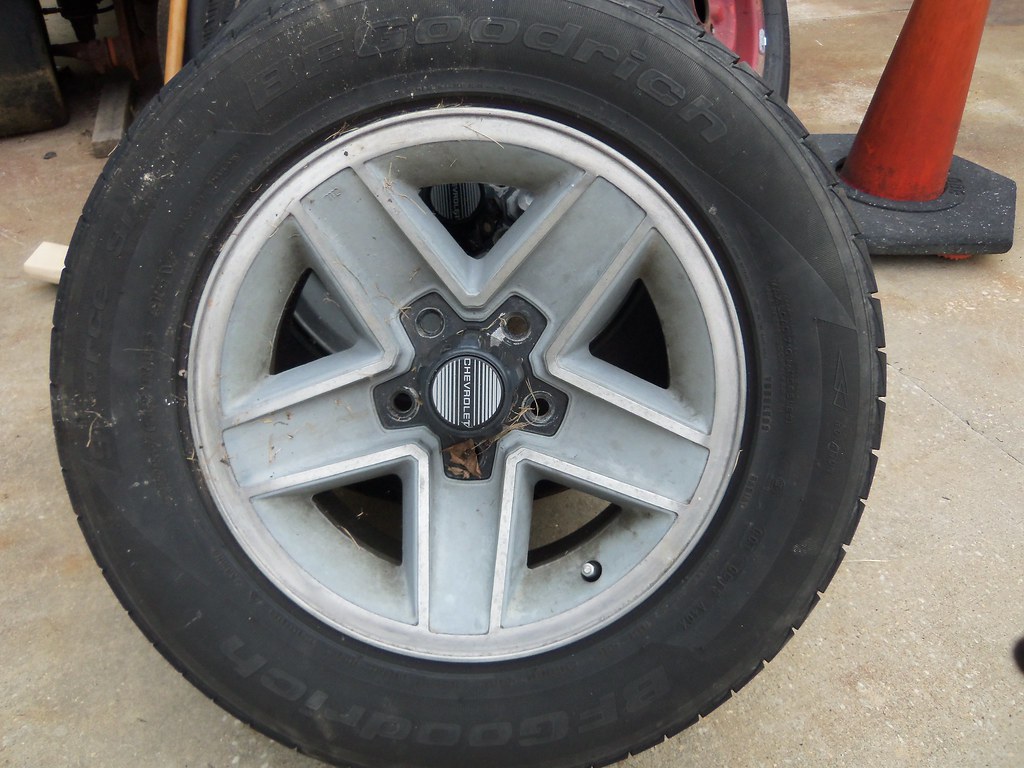
I’m talking about the parts sale yesterday, thankfully, not one of the fleet. At least a couple dozen buyers showed up yesterday and scarfed up a bunch of Rich’s stash. With proceeds over $6000 and low prices, that’s a lot of parts going to a lot of happy Corvair folks. I bought two sets of wheels, an IROC –Z set with tires for Glinda

and a set of 14” Torque Thrust wheels for my LeMans.

I also selected a gasket set to re-seal TwoTone’s engine, a Hurst shifter and LM manual shift dash for Glinda’s transformation, a complete LM engine block (all cleaned up and read for assembly) to replace the 140 block that’s still greasy and has broken bolts stuck in it, an interesting custom dual exhaust pipe with a crossover for Glinda, a set of brand new VelveTouch brake shoes for the next time she and I hit the track, and a GUP Powerglide shift cable for Ringo. I’m reviewing the parts list and photos to see if there’s anything left that I’m still interested in. At the same time, I’m struggling with where I put all this new stuff.
Speaking of Ringo, I answered a local e-mail offering a free bucket seat to the first person willing to drive to Laurel, MD to claim. I immediately replied since Ringo could really use a new driver’s seat that had enough life left in to to allow Ariel to see over the steering wheel. That seat is now sitting on Luna's engine lid waiting for me to have a day where I can do a seat cover swap with Ringo's sad seat.
I did get a few hours of garage/driveway time this weekend. Friday night, I disassembled Glinda’s front suspension enough to extract the two lower control arms. Saturday, after helping with the sale setup (which included loading all my buys into the bed of my truck), I stopped by guru Gary’s house and borrowed his balljoint R&R tool. When I got home, I drug Mikhaila out to the garage where she applied the rest of the primer coat to TwoTone’s gas tank while I did battle with pressing out the old balljoints and pressing in the new. When we were both done, she and I disassembled TwoTone’s left front brake assembly, disconnected the incoming hard brake line from the old flex line, and tapped out the innards of the wheel cylinder. Just by virtue of us being able to tear down the cylinder assembly, I’m confident the bore will be in usable shape after a good honing.
After dinner, she was too tired to continue, so I went back out to complete Glinda’s suspension renew and had the last bolt in place and the rubber of the new-to-her front wheels on the ground by 10:30. Only a few issues: 1. it appears my grease gun doesn’t have the gumption to pump grease into the new joints - I’ll buy a new one this evening; 2. the right front tire was flat – hopefully it’s just from sitting for a few months; and 3. I’m just not sure about how I’ll like Glinda’s stance and look with the new-to-her IROC wheels and tires. The front tires are lower profile 205/50-15s while the rears are 225/60-15. With the fronts being about two-and-a-half inches smaller in diameter, I decided to leave Glinda’s front springs alone rather than executing my original plan of cutting off another half a coil - I figured the difference in tire diameter would drop her front enough to level out her current up-facing rake. That may still be, but the look I need to get used to (or not) is front tires that look tiny in the large wheelwell. I’ll drive her with the new set up for a while and see if it grows on me. I still have the option of swapping the stock steelies and tires back on. Photos forthcoming once she’s completely re-shod.
and a set of 14” Torque Thrust wheels for my LeMans.

I also selected a gasket set to re-seal TwoTone’s engine, a Hurst shifter and LM manual shift dash for Glinda’s transformation, a complete LM engine block (all cleaned up and read for assembly) to replace the 140 block that’s still greasy and has broken bolts stuck in it, an interesting custom dual exhaust pipe with a crossover for Glinda, a set of brand new VelveTouch brake shoes for the next time she and I hit the track, and a GUP Powerglide shift cable for Ringo. I’m reviewing the parts list and photos to see if there’s anything left that I’m still interested in. At the same time, I’m struggling with where I put all this new stuff.
Speaking of Ringo, I answered a local e-mail offering a free bucket seat to the first person willing to drive to Laurel, MD to claim. I immediately replied since Ringo could really use a new driver’s seat that had enough life left in to to allow Ariel to see over the steering wheel. That seat is now sitting on Luna's engine lid waiting for me to have a day where I can do a seat cover swap with Ringo's sad seat.
I did get a few hours of garage/driveway time this weekend. Friday night, I disassembled Glinda’s front suspension enough to extract the two lower control arms. Saturday, after helping with the sale setup (which included loading all my buys into the bed of my truck), I stopped by guru Gary’s house and borrowed his balljoint R&R tool. When I got home, I drug Mikhaila out to the garage where she applied the rest of the primer coat to TwoTone’s gas tank while I did battle with pressing out the old balljoints and pressing in the new. When we were both done, she and I disassembled TwoTone’s left front brake assembly, disconnected the incoming hard brake line from the old flex line, and tapped out the innards of the wheel cylinder. Just by virtue of us being able to tear down the cylinder assembly, I’m confident the bore will be in usable shape after a good honing.
After dinner, she was too tired to continue, so I went back out to complete Glinda’s suspension renew and had the last bolt in place and the rubber of the new-to-her front wheels on the ground by 10:30. Only a few issues: 1. it appears my grease gun doesn’t have the gumption to pump grease into the new joints - I’ll buy a new one this evening; 2. the right front tire was flat – hopefully it’s just from sitting for a few months; and 3. I’m just not sure about how I’ll like Glinda’s stance and look with the new-to-her IROC wheels and tires. The front tires are lower profile 205/50-15s while the rears are 225/60-15. With the fronts being about two-and-a-half inches smaller in diameter, I decided to leave Glinda’s front springs alone rather than executing my original plan of cutting off another half a coil - I figured the difference in tire diameter would drop her front enough to level out her current up-facing rake. That may still be, but the look I need to get used to (or not) is front tires that look tiny in the large wheelwell. I’ll drive her with the new set up for a while and see if it grows on me. I still have the option of swapping the stock steelies and tires back on. Photos forthcoming once she’s completely re-shod.
Wednesday, September 25, 2013
It Ain’t Easy Selling Parts
As I've mentioned in previous posts, I'm working with the family of a friend and Corvair-nut that recently passed away to find new homes for the vast collection of 'vair stuff he'd collected over many years. I spent last Saturday morning with Rich's hard-working son, Vince, clearing out some room in the garage, moving big items to allow access to everything, and attempting to catalog everything that will be available for sale. The photos I took can be found on this flickr set:
I've finalized the sale date (this coming Sunday noon to 4) and sent out invitations along with a 185-item price sheet. I thought I'd been clear in my e-mails that you had to attend with cash to buy parts, but I'm still getting replies with people placing orders and asking about shipping. Oh well – as I like to say, "The world is full of people." Regardless, it looks like there'll be a pretty good turnout, and the weather's supposed to be nice (TYL).
I've struggled to price the items as attractively as possible to sell as much as possible and still be fair to Rich's family. When Rich asked me to help, he indicated he felt a third-off pricing would be good. For less desirable parts, I've gone with that using Clark's catalog prices as a guide, but for the hard-to-find, really cool stuff (of which there are many), I've bumped that percentage up to fifty. I'm sure many will end up finding exceptional deals, including me. In addition to the wonderful feeling I'm getting from helping out Rich's family, I'm getting the benefit of selecting the parts I want before anyone else. It has been VERY, VERY hard to restrain myself. There are, as I mentioned before, some really cool stuff in Rich's stash that I would love to have. And then there are many parts that Mikhaila and I will need for TwoTone's roadification, as well as many parts I'll need when building the 140 HP engine for Glinda. I'll be at their place again Saturday morning to make my final choices and clear them out of the way.
Now, back to what's happening in my garage. TwoTone got some attention last Sunday afternoon. Mikhaila and I finished assembling our father-daughter pair of carburetors. We then moved on to the recently removed gas tank. After shaking out what seemed like a tank-full of dusty, brown, flaky chunks of stinking yuck, we attacked the inside using the flattish end of a long pry bar scraping off as much of the ancient gasoline residue from the inner walls as possible. More shaking with the two-inch drain hole facing down resulted in a sizable addition to the yuck pile. Amazingly, some of the residue was still gooey. I speculated the car was parked back in the early-80s with a full tank of gas.
With the tank's inside nearly empty, Mikhaila turned her attention to its exterior. A wire wheel inserted into my drill proved to be the right tool for her to remove all the loose rust. Thankfully there wasn't much, so she was able to move on brushing on a coat of Rusty Metal Primer before telling me she was too tired to continue. I'm not pushing things with her, hoping to build old car endurance over time.
After she headed inside to detoxify herself, I went around to the all the front brake fittings soaking each in the 50/50 acetone/ATF solution in preparation of the next big project – brake renew. We've got the soft parts (cylinder rebuild kits, hoses) and the tubing, brake pads, and hardware all look to be in terrific shape, so we're just a master cylinder away from having everything necessary to make TwoTone stop on a dime.
Wednesday, August 28, 2013
Still Plenty Going On

With the responsibility of helping Rich’s family get rid of a good portion of his collection of cars and parts, it seems as if the fleet has grown again. Saturday morning I met a man who drove up from Richmond to consider buying Rich’s Corsa. He very carefully looked over the entire car before we even started up (good for him). He commented on how wonderful the photo montage I put up on Flickr was – all the areas of concern were included and he wasn’t surprised by anything he saw now that he was looking at the actual car. He did, however, point out some bubbled pain on the top front edge of the dash – right under surface rust at the base of the windshield – and confessed his concern for the condition of the metal in the channel. We then fired up the engine and it settled into a nice, low idle. After a few minutes of listening and blipping the throttle, we took it out for a test drive. What a BLAST! I’d never driven a LM with a manual transmission, nor had I ever driven a 140-powered ‘vair. I could really get used to it though. The shifter in this car has very short and positive throws – very different from Lucy’s EM shifter. And the power - oh my goodness! 'Nuff said.
I shared with Vince how badly I wanted to buy his dad’s car, but that I needed to sell my ’68 first. I went on to tell him that I’ve had some e-mail conversation with a gentleman in MD looking for a Corvair for his wife who’s supposed to be coming up to look at both the Corsa and my ’68 sometime next week. Depending on what he does, I’ll decide what I’ll do next. If he doesn't buy either, I may put the Corsa on eBay, or I may put Glinda on eBay. I just don’t know.
The other vehicle I’m helping to sell is a cool dune buggy kit. It’s an Action Roadster that Rich picked up a while ago and has since sat in his garage. I’ll put it on Craigslist next week and hope a buyer finds it.
On the home front, work continues on TwoTone. I just placed an order with Clark’s for parts that will start the overhaul of that car’s brake system. Soon to arrive will be brake hoses for front and rear as well as wheel cylinder rebuild kits. In the meantime, Mikhaila and I have been continuing our carburetor work. All the parts have finished their bath in carb cleaner and are laid out on the workbench with the two rebuild kits awaiting reassembly.
Wednesday, June 19, 2013
Progress is Good
I got to spend some time in the garage last night. Started by working on the backlight opening. First I cut patches from fiberglass cloth, and after masking off the channel, I popped open the can of POR-15 and poured a half-cup’s worth into a cleaned-out cat food can. Then I carefully applied the coating over the entire channel focusing on the rusted metal areas. Another coat of POR-15 held the patches in place, and a third coat on the patches finished them off for the evening. In between the second and third coats, I drug Mikhaila out to help me flush the brake lines of old fluid replacing it with hi-temp synthetic fluid. She did a masterful job pumping the brake pedal. After the third coat went on the channel, I wire-brushed the main portion of the front crossmember, vacuumed away the dust, and used the POR-15 that was left in the cat food can to keep rust away from this vulnerable part.
Subscribe to:
Posts (Atom)