Tuesday, October 23, 2012

No Spares is a Tenuous Situation


I’m praying I don’t jinx myself by posting the following bit of information. The lovely Loriann is relying on an eighteen year old vehicle with a wobble and over 318,000 miles as her daily-driver while I do battle with her PT Cruiser. My daily-driver is the ever-faithful Heidi while Lucy languishes in the driveway with most of her interior bits piled on her roof (this really needs a photo). The PT Cruiser work is a not-so-simple timing belt change, while Lucy awaits the welding in of floor patches. Tonight is crunch time on the Cruiser with high hopes for completion.

It hasn’t been all house-painting (the other massive consumer of my limited time away from work and family) and swearing at Chrysler engineers. I’ve had some time for ‘vairs and garage. When last I posted (which was too long ago), I’d filled a cart with discarded engine parts. The next night I promised a fellow CORSA of Baltimore club member my perceived expertness in getting his Corsa on the road. He’d had the electronic ignition quit on him, so he was reverting back to the tried-and-true points and condenser. Simplistically, a running engine is an equation consisting of compression, spark, and fuel. Since the car ran fine before the electronics crapped out, we assumed the compression part was good. I was able to get the spark part working using the instructions found here. Since the car had sat for a few months, the fuel part was missing. We tried a few cranking sessions without seeing any fuel squirting from the primary carburetors. Since my bedtime was quickly approaching, we called it a night with the fun and games to continue in two weeks.

Thursday, I received a hopeful e-mail in reply to my YellowVert Craigslist ad. Subsequent back-and-forth resulted in James’ arrival at fleet headquarter that afternoon. He shared how he was shopping for a father-son project, but knew nothing about Corvairs. So I did a sell job going so far as taking him for a spin around the neighborhood in Glinda. By the end of our drive I’d dropped the price to $300 minus the second interior and he seemed ready to pull the trigger, but instead of saying, “I’ll take it,” he asked me, “Would you be willing to take payments?” He went on to explain that’s the only way his wife would let him get the car. I had to tell him no since I still had some other parties interested. He left me with a request I reconsider his offer if none of the other parties comes through. Sadly, those other parties haven’t come through. Someone e-mailed with me Sunday with everything all set for him to drive out that afternoon and give me a deposit to hold the car for him, but all of my high hopes came crashing down when a final e-mail showed up telling me his buddy told him he was paying too much for the car. I responded that his buddy was wrong and the $300 I’d come down to was a good deal considering I could part out the car selling and then still get $200 from the scrap-man. Oh well, it’s looking more and more like I’ll be removing her engine, cutting off fenders and such, and hauling her to the ranch.

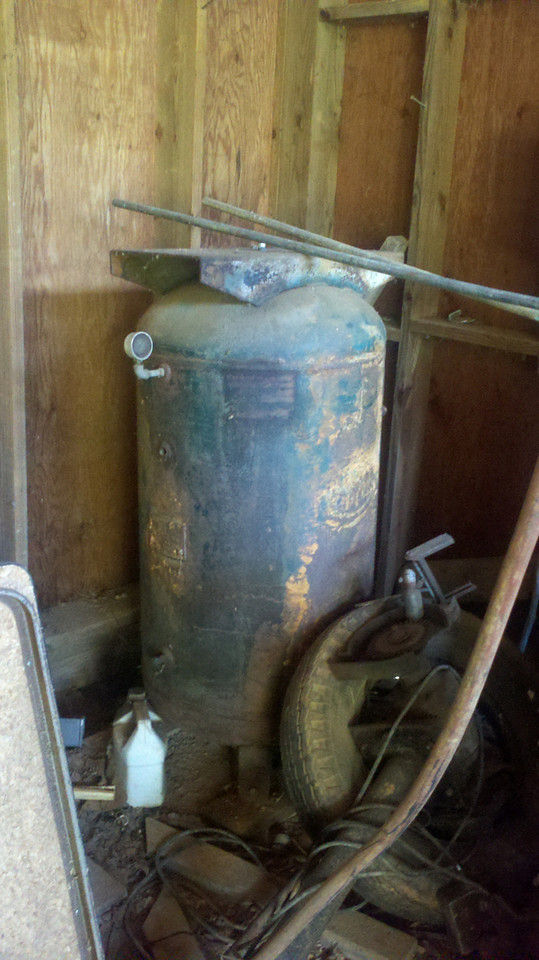
Thursday evening I rolled Lucy out of the garage and stapled up the insulation I’d purchased a week back. That project went well other than some of the long boards and pipes I’d been storing in the rafters would not go back up since the insulation was taking up space they’d previously been using. Oh well, I love a storage challenge – NOT! I spent the rest of the evening moving more stuff around making room for the PT Cruiser project.

Lucy had been garaged for a couple reasons. First, the aforementioned missing metal in the floor. Second, the forcible expulsion of spark plug number four from its threaded home. The latter issue was corrected Saturday morning by the tapping of the stripped hole and subsequent installation of a K-D insert. Like nearly every other project I undertake, this one was not without its frustration. Following the recommendations I’d read on a Corvair Center forum thread, I rotated the engine until the rotor was pointed at the number four cap terminal. Then, to capture all the chips from tapping, I filled the combustion chamber with shaving cream and gave the tap a healthy coat of grease. I slowly turned the tap in the hole, being careful to keep the driven end centered in the hole in the engine cover. After a few turns, I’d back out the tap, clean out the chips, recoat, and cut a few more turns. After repeating these steps about a dozen more times, the tap was turning freely indicating I now had new threads along the hole’s entire length. With a smaller hose attached to the end of the shop vac, I sucked out the shaving cream and then cleaned out the threads with a solvent-soaked rag. The instructions that came with the insert directed me to spin the insert onto a spark plug, coat the external threads with the included sealer, and install the spark plug until it bottomed out. I did all that, but, inexplicably, the plug didn’t go in as far as I’d expected before it became really difficult to torque. I gave it a few more turns using some serious effort before calling good-to-go. Fearing I’d just back out the insert, I left the plug installed and patted myself on the back for deciding to use a new plug since it may be stuck in the head until I have to do an engine rebuild. I finished up the effort by installing new plugs in the rest of the holes. After pouring a little gas down a carb’s throat the engine started right up, and, if not for the clatter of a lazy lifter, she was running as good as she ever did.

The rest of Saturday’s garage time was devoted to the PT Cruiser so, other than reiterating what a struggle it is working within a VERY confining engine compartment, I’ll leave this non-Corvair missive for a different outlet.

Tuesday, October 16, 2012

Out With The Trash

Last night I carved out some more floor space in my garage by going through the ’64 110HP that came as part of Phil’s collection. This was the one that had water in it. The rust-free crank and camshaft are keepers and went with the other GUPs on the shelves. The heads looked usable, so they joined some of their brothers on the shelf. Some of the valvetrain components went into a box along with head nuts and lockwashers. Finally, the shrouds, which had good seals on them, were jammed on the shelf of sheetmetal. Everything else was tossed into our garden cart for a ride to the recycler.

Speaking of recycler, they get forty cents a pound for pure aluminum. Now I have to remove the studs and other steel from the engine case halves and rear cover in order to collect. Otherwise, I’ll only get ten cents a pound. Once I tear down Ringo’s old engine, also a ’64 110, I figure I may have ten bucks of future soda cans.

Monday, October 15, 2012

Pullin’ Parts

Any afternoon pulling parts off of Corvairs is better than a few hours of employment, so I took last Friday afternoon off and spent it at the Corvair Ranch with Ken, a ‘vair good buddy of mine. I’d put together a list of bits and pieces I wanted to remove from PartsWagon and PartsCoupe. With Ken’s urging, for every part on the list we were able to unbolt, there was another part I just couldn’t leave behind. Three hours later we had the Suburban filled. Parts of note include PartsWagon’s rear hatch, engine cover, windshield, windshield trim, back seat, bumpers, the extremely fragile hatch covers, and a trailer hitch. The latter may come in handy if I do follow through with cool dream number two-hundred-thirty-one (a trailer made from a wagon’s rear half).

One item that really intrigued me, but which I was unable to remove was an aftermarket radio housing in PartsCoupe. In EMs, the radio is mounted in a separate sheetmetal enclosure that hangs under the center section of the dash. PartsCoupe’s radio was a period-correct Motorola AM/FM with a smaller display area than the stock GM of the time. To accommodate the size difference some company created a radio house that looked factory – it bolted to the dash and was painted. Not that I’d have a use for it, but it was unique and cool. Maybe next time I’ll try harder.

I spent a majority of Friday evening’s garage time unloading the Suburban moving all the parts into Wilma. Once empty, the truck got a thorough vacuuming.

With an hour or so left before bedtime, I moved on to YellowVert. Noone’s come forward wanting to buy her, so I’ve decided to part her out and the sooner the better. The first response to my revised post on the Corvair Center Forum asked for a second of the passenger side fender. The interested party is repairing some collision damage on an LM and needs some good, solid metal for the job. Since I don’t have a key to let me in the trunk, I removed the left front headlight bucket and unscrewed the two bolts holding the latch to the hood. Amongst the acorns and mouse-nest was, what appears to be, a new back window for a convertible top all rolled up in its original plastic packaging. I was more interested in the condition of the trunk, so I didn’t take it out to judge its condition. Could be a treasure.

Thursday, October 11, 2012

Dealing with a Beast

Tuesday night I unloaded the compressor tank from the back of the Surburban – it must weigh a couple hundred pounds. With Victoria’s able help, it’s now safely on the concrete of the driveway. Now I have a number of hurdles to go over before it becomes part of my air supply. First, I need to make sure it’s safe by conducting a hydrostatic test. That is done by: plugging all the outlets in the tank buy one, orientating the tank so that the one open hole is at the highest point, filling the tank completely with water, screwing in a Schrader valve fitting, pressuring the water to roughly 200 psi (150% max), looking for leaks. Once I’ve proven the tank’s not going to kill anyone, I’ll drain the water, brush off any loose rust and shoot some Rustoleum primer all over it followed by a coat of paint that causes it to blend in with the brick wall of the garage that it’ll be sitting in front of. Then it’s just a matter of moving it into place and plumbing it into the system. After searching the web and questioning my car buddy, I’ll be putting the tank in-line as opposed to connecting it with a T fitting.

Part of Tuesday’s antics included moving Luna out of the driveway. In order to do this, I had to deal with replacing the fuel pump. As reported a couple weeks ago, Luna’s carbs weren’t getting any gas after I installed a replacement fuel pump. Since we’d put about five gallons of gas in her tank before her test drives, I assumed there was plenty left in the tank and the issue was with the pump. So, I installed a different new pump that had showed up with Phil’s stuff, primed the carbs, and started the engine. It took a few times of unsuccessfully seeing gas squirting before I decided to make sure there really was gas in the tank. While blowing air back through the fuel line leading to the tank, I had Victoria listen for bubbles – nothing. After pouring a couple gallons of 87 octane into the empty chamber, lo and behold the engine ran, the pump pumped … and leaked. Irrr. A few turns on each of the screws that hold the pump together and the dripping ceased. Success … in a way. Where did all the gas go? Could it have really all evaporated during Luna’s extensive inactivity? I carefully searched for dripping fuel and could find none. We’ll know more once she gets her new top installed and is on the road as a daily-driver.

Last night, being one of my two designated garage nights, was spent dealing with more garage things. I believe all I accomplished was making a larger mess of the space. I picked up some free insulation yesterday and it’s now piled on top of Lucy. Looks like it’ll just fit between the roof rafters. Any help will be appreciated with winter just around the corner. Now I just need to find time to staple it up. I also took some time to deal with the beast of an air tank. After moving it out of the middle of the driveway, I removed the lower drain plug and was thankful when no water came out. There was some powdery rust residue, but not too much. I am a lot of confidence the tank will past testing. I also removed the other fittings and created a mental list (uh-oh) of the plugs and caps necessary to close off every port. The only unknown is how to connect the top port to a pressure source. I’m sure I’ll do my typical thirty minutes of pawing through all the brass and iron fittings at Home Depot.

My last effort of the evening was actually car-related. I popped the engine lid on YellowVert and put wrench to harmonic balancer bolt and successfully rotated the engine. Feeling the euphoria of learning the engine was not seized, I endeavored to the pull the spark plugs with the plan of doing a compression test on each of the six combustion chambers. After removing the three plug wires from the driver’s side, I was greeted by the sight of more acorns. When vacuuming failed to get them out, I decided the car will be sold as-is. I’ll throw the acorns in for free.

Monday, October 8, 2012

An Exhausting Weekend

First, a status on the eBaying of some of Phil's parts: it didn't happen.I decided I’d try a couple other avenues before dealing with eBay. I gave the CorvairCenter Forum folks first crack at the wire wheel covers and 140 4-barrel carb intake setup. The wheelcover post got not responses, but I did sell the intake setup. The wheelcovers were then put up on Craigslist and the only response I’ve gotten so far was SPAM , so they’ll go up on eBay in the next day or two.

During the school year, Wednesday has always been a fleet night since the lovely Loriann and Mikhaila have their Girl Scout meeting. This year I’m getting an additional designated fleet night since the lovely Loriann’s new job as our church’s youth director means she’s occupied each Friday evening. So, last Friday night, I backed Ringo’s rear up onto the ramps and tackled the dreaded effort of replacing his muffler and tailpipe. With all exhaust projects, one must be prepared to replace every component because, as noted many times before, rust never rests and this axiom is never better illustrated than on the metal of mufflers and pipes carrying away the escaped byproducts of each engine explosion. Even though Ringo’s muffler had only been on a few months, I was ready to replace all components from the exhaust manifolds to the tailpipe.

Why, you may ask, am I removing a perfectly fine part – especially when the removal is rife with possible swearing opportunities? Well, when Ringo was ready to be put back on the road, I needed a muffler and the only GUP Jeff had in his Corvair Ranch stock was for a ’64 and newer Corvair. While it wasn’t correct for Ariel’s ’61 coupe, it could be used, so I played the cheapskate and bought and installed it. Since Heidi now needs her muffler replaced, I purchased a new EM muffler from Clark’s intending to swap Ringo’s onto Heidi and bolt the new one onto Ringo. That way each would then be sporting proper parts.

Back to last Friday – I first liberally applied penetrating fluid onto and around the nuts of the clamp at the exhaust pipe-muffler joint as well as the slip joint itself. After giving it a few minutes to magically do its thing, I torqued off the nuts and, by jiggling and twisting the muffler and finally beating on the end, I was amazingly able to remove the muffler. I then gave the exhaust gaskets (the ones between he manifolds and the pipe flanges) a close inspection and deemed them undamaged. The new muffler and tailpipe slid into place easily and the clamping of the two joints was anti-climactic. Ringo’s engine fired right up and settled into its subdued rumble with all the exhaust exiting only through the tailpipe – no leaks. TYL.

With his rear still raised, I used the rest of the evening to change his oil and filter. This overdue task should have been done a few hundred miles ago (a rebuilt engine should have it’s oil and filter replaced around 500 miles after putting it on the road). The oil drained from the crankcase appeared normal, so I’m gonna’ go with this being an indication my rebuilding job was acceptable to the engine gods.

The final task before rolling Ringo off the ramps was a slight tightening of the fanbelt. A quick, uneventful spin around the neighborhood and he was parked at the curb.

Heidi was then driven down the driveway and backed up the ramps for her portion of the muffler transplant. A quick review of the state of things indicated the exhaust gaskets would need replacing since the failed muffler had vibrated the end of the exhaust pipe and caused enough damage to the gaskets to render them useless. Since it was nearing 10:30 at night, I just squirted the penetrating fluid on the threads and joints that need it and called it a night.

It wasn’t until yesterday afternoon that I was able to get more car time. Completing the muffler transplant was priority one. It was far more difficult on this car than it was on Ringo since the muffler had been on the car since January of ’06. Once the hanger had been unbolted, the old muffler came right off, but left its mounting flange still at-one with the exhaust pipe. Next came the most remarkable part of the project – all four fasteners holding the pipe to the manifold came off without breaking. A huge TYL. Then, with the help of a cutoff wheel mounted on my die-grinder, I carefully cut a slit through just the remnant of the muffler flange and peeled it off the exhaust pipe. A few minutes at the wire wheel, and the exhaust pipe was ready to be reinstalled with new gaskets. On it went and the muffler that I’d removed from Ringo soon followed. After sliding in the tailpipe, I rotated the muffler and tailpipe to their proper position and installed the two clamps. The subsequent test run of the engine cause me to tighten the four flange fasteners at the exhaust manifolds until no pulsing jets of air were escaping.

With the car off the ramps, my next task was cleaning up and lubricating the pivot of the gas pedal. It had been sticking badly for the past week or so – to the point of being tricky to drive safely. After pulling the carpet back, I removed the screws holding the forward cover off and one of the two screws holding bushing support to the floor. The second screw refused to budge, so I ended up having to bend the support enough to break it at the resistant attachment point. Some scotchbrite removed rust and polished the rod. The bushing was cleared out with the appropriately sized drill bit. The joint was liberally greased and bolted back into place with the tunnel and carpet following suit. No more sticking!

With some more car-time left, I used the borrowed engine hoist and put the two competed engine assemblies on moving dollies I’d recently bought at Harbor Freight. This will make maneuvering them around the garage possible after I return the hoist to its owner.

The final bit of fleet-related news took place this afternoon when I added a couple tools to my arsenal. I bought a ginormous (at least to me) air tank that took two of us and a tractor to load it into the back of the Suburban. I’m going to plumb this in series with my current air supply system to bump up my reservoir capacity by two-hundred percent. While the seller was clearing a path from the corner of his pole barn to the door, he invited me to peruse the rest of the building’s contents since it was his intention to clear it out ASAP. I found an old welder and drill-press, but the item that caught my eye, and ended up coming home with me, was nice, beefy, USA-made grinder on its own stand. This purchase will allow me to dedicate polishing to my low-horsepower Harbor Freight unit.

Now I need to figure out how I’m going to get the beast of a tank out of the Suburban and into place. Thank goodness I still have Larry’s engine hoist because I don’t have a tractor.

Thursday, October 4, 2012

eBay, Here I Come

The other day I received an e-mail from eBay announcing free listing until the 6th. Well, I’ve got some of Phil’s stuff that I wanted to sell, and this seems like the perfect opportunity. I would have liked to have put the items on Craigslist so I didn’t have to deal with shipping things, but this way I get a much larger audience and, hopefully, more for the items. Up for auction will be the 4-into-1 manifold/carb setup I pulled off CorsaVert and a bunch of wheelcovers that came with the collection. Last night was cleanup and snap pictures night. I’m hopeful sales will provide me enough money to fill my welding gas bottle.