Last weekend was an eventful one, Corvair-wise, but not one that resulted in me getting greasy (and thus getting Glinda closer to being back on the road). I'm concerned that Glinda will be ready for the imminent departure to Michigan. I need to find another gear and get going.
Saturday morning dawned early with the lovely Loriann and I driving up to the Corvair Ranch to pick up the newly-bushed front control arms. Unbeknownst to my willing wife, I’d also intended to dig through Jeff’s bin of coil springs in search of Heavy Duty (HD) versions of the LM fronts and rear. After greeting Jeff, I dropped my truck’s tailgate, pulled out a milk crate containing an example of Glinda’s current coils, a Vernier caliper, tape measure, and two pairs of gloves. When I handed her a set, she gave me a incredulous look and asked me I expected her to do with them. “You’re going to help me find some springs,” I replied. Grudgingly, she followed me to the bin as I explained what we were hunting for. Within 20 minutes, our mission was complete – and her sharp artist eyes were the reason it hadn’t taken much longer. She’d found the springs just by looking through the grid of the bin. I was mightily impressed. A few minutes later, I’d paid Jeff for his work along with a few parts I needed from him and we were on our way.
About thirty minutes down the road, my cell phone rang. It was Jeff, and he was looking at a box of control arms complete with nice, new bushings. I’d been so focused on finding springs, I’d completely forgotten about the control arms. Irrr. An hour was wasted running back up to Gettysburg. Once home, there were a number of chores I needed to deal with, so no more garage time was available.
Sunday afternoon I bid farewell to the lovely Loriann and Mikhaila for their week of mission work in central PA. Afterwards, I ran over to Gary Segal’s to buy some new rear suspension bolts and then on to another ‘vair friend’s house. The purpose of this visit was quite sad. Rich has been fighting lung cancer for a while, and the decision was recently made to stop fighting the battles and make the most of his last days. He has an extensive collection of cars, parts, and tools, and, while his son is keeping a number of vehicles and the parts and tools to support their restoration and maintenance, there will still be a very large stash of goodies that will need to find new homes. Back when I found out about Rich’s terminal situation, I offered to help the family in any way I could. A few days later, I got an e-mail asking if I’d be willing “to dispose of his Corvair items.” It is his wish that the local club members get the first opportunity to buy items, but then it will open up to the surrounding chapters of CORSA before going up on Craigslist and eBay. Anyway, I got to Rich’s house and spent about an hour talking with him and his son, Vince, about all things Corvair. Vince gave me a tour of the collection so that I had a sense of what would be available. Bins of parts (including quite a few sets of wheels), shelves of tools, and at least two vehicles will need to be sold. I’m hoping I get to see him at least one more time before the cancer claims another victim.
Since then, I’ve been putting in quite a few hours at my paying job as well as spending yesterday and Wednesday at the mission camp. Last night, after returning home, I headed out to the garage and worked on the backlight installation and suspension. I inserted the trim clips and coated the mating surface of the pinchweld with primer before moving on to removing the useless inner bushings from the rear strut rods. After modifying their replacements, I partially pressed them into place. My vise doesn’t have enough oomph to fully seat them, so they’ll need to be shoved home by a real press. The last task of the day was removing the nuts and freeing the control rods from the crossmember. The first nut took about an hour of heating, soaking, beating with the imact wrench, heating again, more beating, and finally standing on the end of the torque wrench de-seized that which was one. A few minutes after that, I had the nut off and the rods rusty threads cleaned up. I tried the same approach to the other rod, but instead of breaking the nut-to-rod bond, I broke my torque wrench. It was then definitely time to call it a day.
Today I visited my favorite toy store and bought the largest ½ inch breaker bar Harbor Freight sells. Tonight that nut is mine.

Friday, June 28, 2013
Wednesday, June 19, 2013
Progress is Good
I got to spend some time in the garage last night. Started by working on the backlight opening. First I cut patches from fiberglass cloth, and after masking off the channel, I popped open the can of POR-15 and poured a half-cup’s worth into a cleaned-out cat food can. Then I carefully applied the coating over the entire channel focusing on the rusted metal areas. Another coat of POR-15 held the patches in place, and a third coat on the patches finished them off for the evening. In between the second and third coats, I drug Mikhaila out to help me flush the brake lines of old fluid replacing it with hi-temp synthetic fluid. She did a masterful job pumping the brake pedal. After the third coat went on the channel, I wire-brushed the main portion of the front crossmember, vacuumed away the dust, and used the POR-15 that was left in the cat food can to keep rust away from this vulnerable part.
Monday, June 17, 2013
A Vairy Nice Father’s Day Weekend
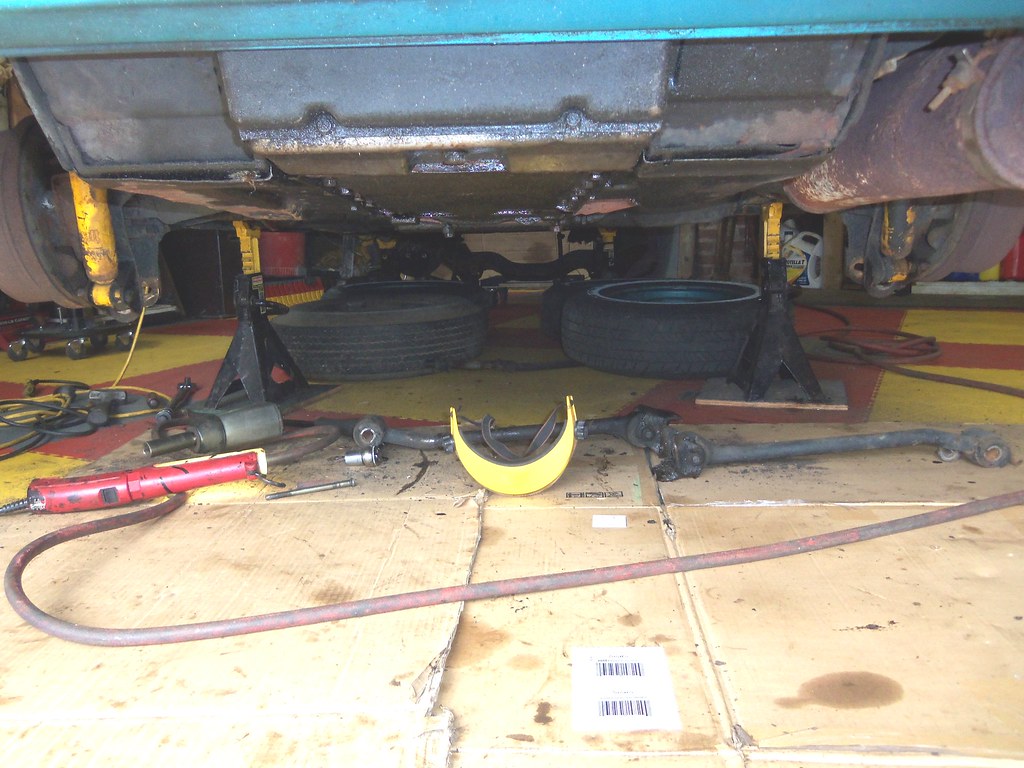
When last I posted, I’d just broken the nuts off both rear strut rods where they bolt at the rear wheels. A few minutes yesterday attacking the remaining bolts with the 4” cutoff wheel on my grinder and the rods were lying on the garage floor. Unlike the oil-destroyed inners, the outer bushings look to be in decent condition, so, rather than buy entire new rods, I’m following a helpful post on the CorvarCenter forum and bought a couple replacement bushings. Gary (the local Corvair guru) offered to sell me a couple replacement bolts to replace those I just cut up.
I also got the stabilizer rods and shock absorbers removed, and was fortunate enough not to break any more fasteners.
 With the suspension all out, I tackled the backlight opening. It took a couple hours, but I got the channel completely cleaned out and ready for some coats of POR-15. I’ve decided I don’t have the time to fix the rust correctly (cutting out and welding in patches), so I’ll be coating with POR-15 and patching with fiberglass cloth laid in. Fortunately, there are only a few rust-throughs, so this fix should be sufficient to keep the window in and the water out.
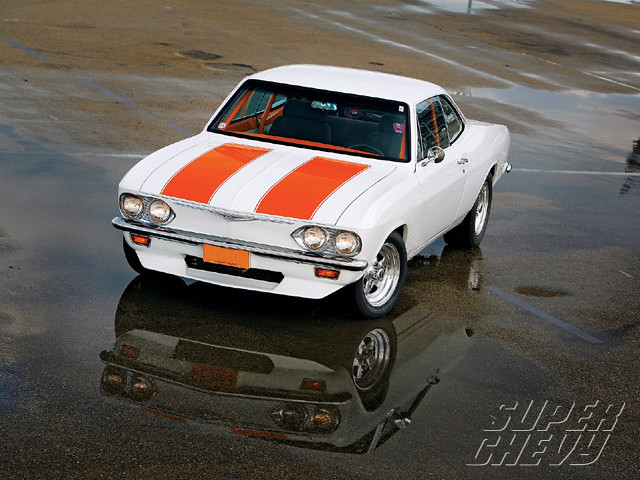
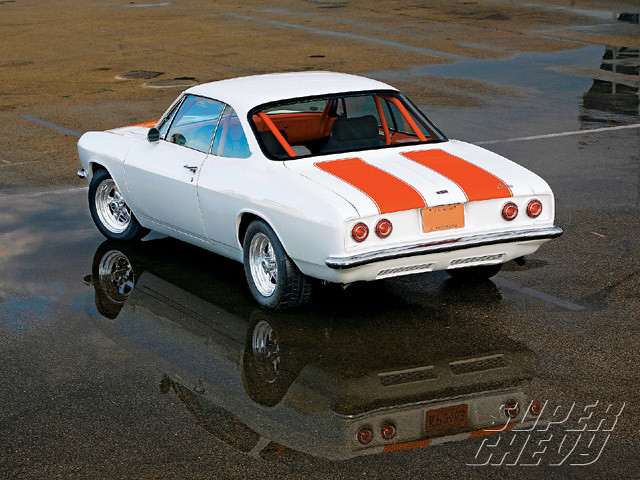
After working on Glinda, I was treated to a delicious Father’s Day dinner followed by card opening. The girls gave me two cards since they couldn’t decide between two funny ones. Each card contained a coupon, one for a six pack of the beer of my choice each month for the next six months. The other coupon was for a set of racing stripes for Glinda. I’m quite excited about that and have already started perusing the web for the perfect scheme. I’m leaning towards this design. You've got to use your imagination to change the colors to turquoise body and white (or maybe gray or maybe silver) stripes.
Thursday, June 13, 2013
I Know How To Break Bolts
Last night I got Glinda’s rearend up on jackstands and began working on her rear suspension. I immediately saw some serious rubber failure on the strut rod bushings. They’ll have to be replaced before the car hits the track. After wire brushing all the threads I could get to of the suspension bolts, I attempted to loosen the right side's strut rod outer nut using my impact wrench. After about four minutes of cycling torque on the nut and then on the bolt head and still no movement, it was time to bring out the torque wrench. This was the successful tool when I needed to get the big nuts off the front suspension’s lower control arms. This time, however, the wrench was too strong for the job and the bolt broke just beneath the nut. Oh well, I was going to replace the bolt anyway. On to the other side. I contemplated getting the torch out, but didn’t really want to deal with the fumes of burning rubber. With my optimism curbed and my torque wrench engaged, it didn’t take long to get some movement of the nut. Sadly, it was the bolt twisting, and a bit more pushing on wrench handle and the second bolt was twisted off.
Some quick research this morning on the CorvairCenter forum comforted me in that I’m certainly not the first to experience this frustration. There was a lot of conversation regarding replacement of the nearly $100 a piece strut rods with adjustable ones used on Corvettes. I’m trying to score some GUP ones for cheap from local guys, but I’m will to go the ‘vette design route if that doesn’t pan out.
Some quick research this morning on the CorvairCenter forum comforted me in that I’m certainly not the first to experience this frustration. There was a lot of conversation regarding replacement of the nearly $100 a piece strut rods with adjustable ones used on Corvettes. I’m trying to score some GUP ones for cheap from local guys, but I’m will to go the ‘vette design route if that doesn’t pan out.
Wednesday, June 12, 2013
This Part of the Nightmare is Over
All the tools I’d hoped would be necessary to remove the upper and lower front control arms:
- Needle nose pliers (to pull cotter pins)
- 3/8” impact wrench, assorted sockets, assorted wrenches (to remove nuts and bolts)
- A couple sledgehammers (to release ball joints using the magical method of banging both sides of the attached part at once)
- 1 evening
- Needle nose pliers (to pull cotter pins)
- 3/8” impact wrench, assorted sockets, assorted wrenches (to remove less than 20% of the nuts and bolts)
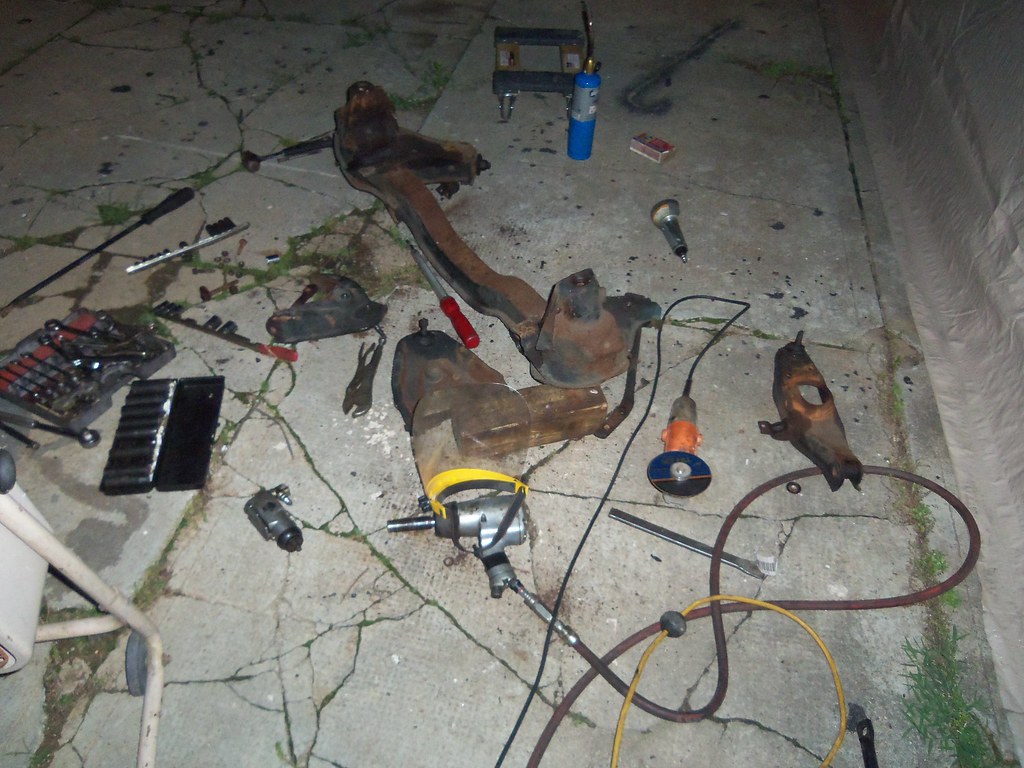
- 1/2” impact wrench, assorted sockets, assorted wrenches, propane torch, center punch, drill, drill bits, pneumatic chisel, cold chisel, sledgehammer, pry bars, jack, mover’s dolly, drift, 3” pneumatic cut-off wheel, 4” electric cut-off wheel, torque wrench (to get the other 80% of the nuts and bolts out, as well as remove the entire front crossmember to give me access to the more stubborn fasteners)
- Pickle fork and sledgehammer (to release ball joints)
- 3 evenings
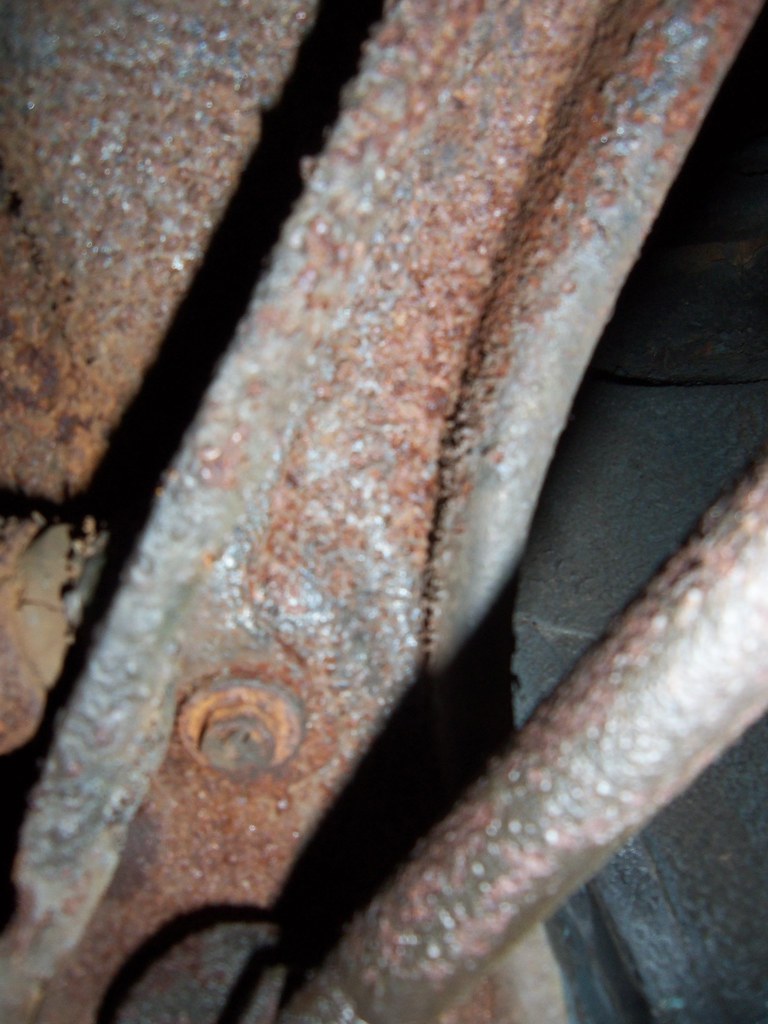
Driver's side bolt with rounded off head.
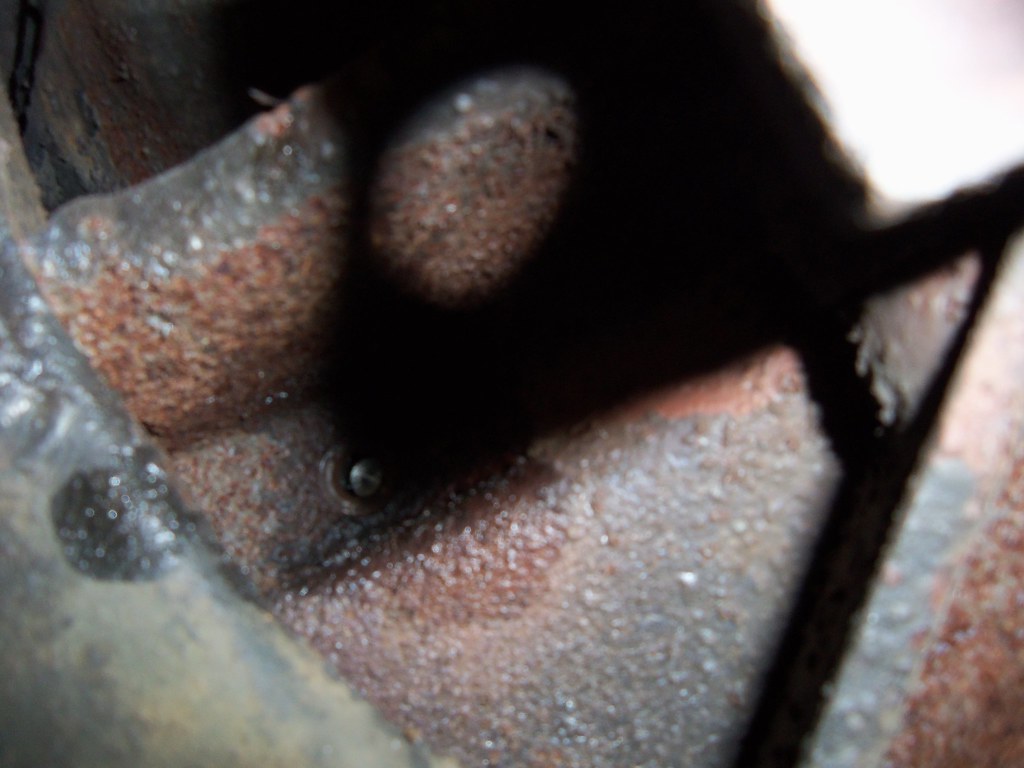
The other bolt with the head drilled off.
A lightened front end.

The control arms are in the back of the truck, the new polyurethane bushings are in the cab, the shipping box is in my cubicle, the Corvair Ranch's address is in my phone, and a lunch-time trip to FedEx is on my calendar. Given the high price of shipping things, I toyed with the idea of just driving the parts up to the Ranch, but my time is too precious to give up an evening. I'm already planning on driving up there to pick them up once the new bushings are in since I'll also be going through Jeff's stash of LM coil springs to find Heavy Duty front and rear coil springs to replace Glinda's standard stiffness springs.
Monday, June 10, 2013
I Jinxed Myself
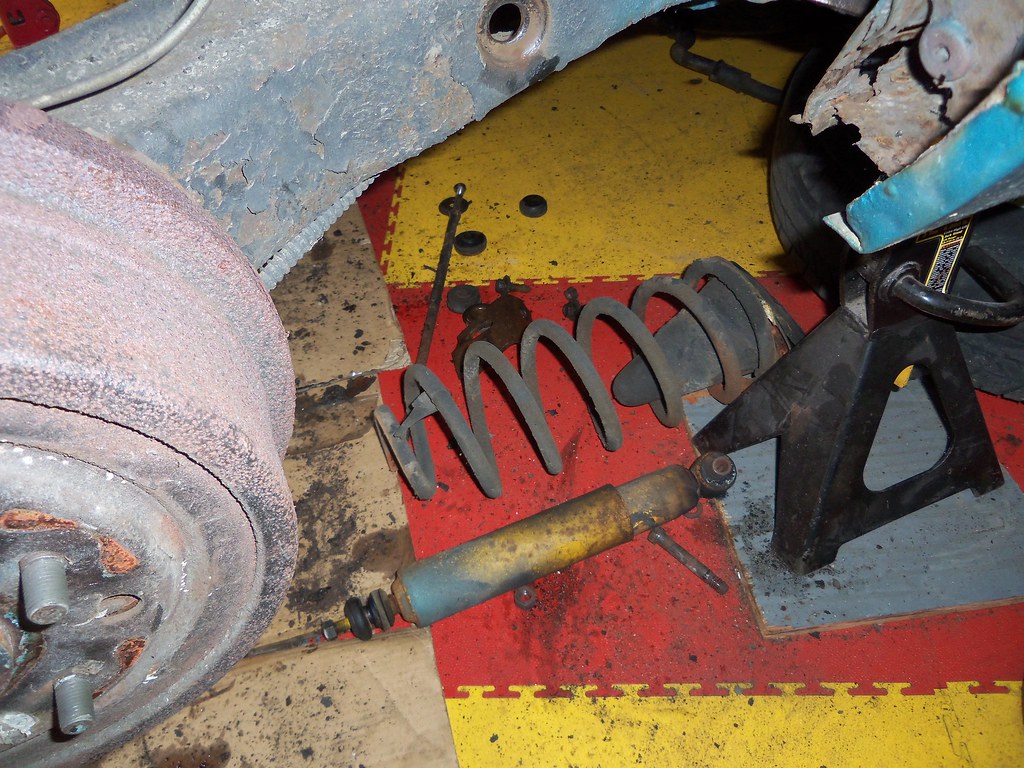
The other day, when I typed “schedules are made to be broken,” I really didn’t think it would go as far making every task on the list a big pain in the butt. I knew suspension disassembly would be difficult, and it’s proving that and more. Friday evening I spent a few hours in the garage working on the passenger side and couldn’t finish much more than removing the shock, breaking loose the balljoints, and removing the coil spring. The issue that held me up after that was removing the big bolt retaining the lower control arm. It took the leverage of the torque wrench to break free the nut, but that was as far as I would get that night. Beating and banging on the end of the bolt wouldn’t budge it. The impact wrench would spin the bolt in the inner sleeve of the arm’s bushing, but it would not come out.
It wasn’t until last evening that I could get back out to the garage. A few more spins of the bolt followed by some aggressive whacks with the sledgehammer and the bolt finally moved. A few minutes and a few whacks later the bolt was out and the control arm was free. The futility of trying to remove components from the crossmember was heightened by the struggle to loosen the two nuts holding the upper control arm in place. Finally, I got it through my thick skull that the crossmember would have to removed.
First, however, I broke loose the balljoints on the driver’s side and removed that side’s coil spring. It is safer to remove the spring when the crossmember is still attached to the car to keep it immovable while lowering the control arm to free the spring – lots of energy in a car’s compressed coil spring.
Next, I said a prayer and proceeded to spin out the first two bolts on the right side – that was too easy. With the jack supporting the crossmember, I engaged the 9/16ths 6-point socket over the third bolt and pressed the impact wrench’s trigger. I was immediately rewarded with spinning of the socket, but NO spinning of the bolt - it’s points were rounded. Crap! Moving to the driver’s side, the first bolt did the same thing, but the last two spun right out. In baseball, batting .666 is phenomenal. In automotive disassembly nothing less than 1.000 is allowed.
That seemed to be a good time to quit, clean the grease from hands, arms and face, and pop open a Yuengling’s Black and Tan.
Thursday, June 6, 2013
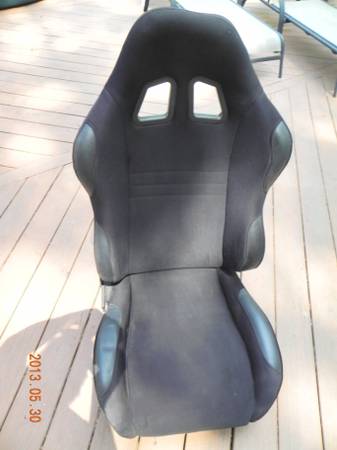
It’s a Nice, Comfy Seat
I made the drive out west last night and got a great deal on a very nice and comfortable racing seat. I have no idea how close the mounting holes are to Glinda’s mating bolt holes, but adapting the feet, if necessary, looks to be pretty easy – just weld on some plates. In fact, I may have to do that anyway just to raise the seat since it looks like it sits pretty low. I do want to be able to see above the steering wheel. Also, with the quick-steer arms installed, the steering effort’s gonna’ increase and I’ll need to make sure the thin-rimmed steering wheel is optimally located.
Wednesday, June 5, 2013
Sticking to Stock and Sticking to the Schedule
To ensure I miss nothing preparing Glinda for the upcoming national convention and its associated driving events, I’m creating a schedule of tasks that need (and some that are desired) to be completed by the July 13 departure date. The most involved jobs are upgrading the suspension, repairing the backlight channel, installing the backlight and trim, finding and installing a decent driver’s seat, and installing an anchor for a 5-point harness.
It’s the last two items, as well as moving the battery to the trunk and adding a tachometer that have me really thinking. Glinda is still VERY stock. The only modifications from the way the General built her are the nice carpet kit from Clark’s Victoria and I installed and the lack of engine smog equipment the previous owner removed. The set of speakers in the rear package tray don’t count since they’re coming out. With this originality in mind, I’ve challenged myself to come up with creative ways of making any modifications as inconspicuous as possible or easily reversible. Removing the bench seat is just a matter of removing four fasteners and pulling it out. The racing seat would be set up to bolt at the factory points, but I will have to expose the two inboard holes that should be in the car. I’ll also have to poke a hole through the carpet and drill one in the floor in front of the driver’s seat to anchor the anti-submarine belt of the harness. To anchor the shoulder belt of the harness I plan on bolting a chain between the two left side rear seatbelt and connecting the harness to that. If I do that right, I could even keep the stock belts bolted in place as well. The lap belt portion of the harness would just bolt in place of the current lap belt. My original plan for the tachometer was to mount it in the empty clock spot in the middle of the gauge cluster, but I think I’ll go old-school and strap it to the steering column. The electrical connections would be with a plug allowing me to remove the tach fairly easily. I think the battery in the trunk will just have to be conspicuously wrong. What I may do, however, to keep the illusion is empty out one of the dead batteries I have lying around until it’s just a plastic shell with two posts on top. I’ll even route battery cables to the firewall and the ground stud. The engine compartment will look stock with very little excess weight.
 On to sticking to the schedule. During the school year Wednesday evenings are Girl Scout night for Loriann and Mikhaila, so I usually make the most of that and spend it in the garage. Tonight I was scheduled to tear apart Glinda’s front suspension. Instead, I’ll be driving west to check out, and hopefully buy, a racing seat I just found on Craigslist. So, just like at work, schedules are meant to be broken.
It’s the last two items, as well as moving the battery to the trunk and adding a tachometer that have me really thinking. Glinda is still VERY stock. The only modifications from the way the General built her are the nice carpet kit from Clark’s Victoria and I installed and the lack of engine smog equipment the previous owner removed. The set of speakers in the rear package tray don’t count since they’re coming out. With this originality in mind, I’ve challenged myself to come up with creative ways of making any modifications as inconspicuous as possible or easily reversible. Removing the bench seat is just a matter of removing four fasteners and pulling it out. The racing seat would be set up to bolt at the factory points, but I will have to expose the two inboard holes that should be in the car. I’ll also have to poke a hole through the carpet and drill one in the floor in front of the driver’s seat to anchor the anti-submarine belt of the harness. To anchor the shoulder belt of the harness I plan on bolting a chain between the two left side rear seatbelt and connecting the harness to that. If I do that right, I could even keep the stock belts bolted in place as well. The lap belt portion of the harness would just bolt in place of the current lap belt. My original plan for the tachometer was to mount it in the empty clock spot in the middle of the gauge cluster, but I think I’ll go old-school and strap it to the steering column. The electrical connections would be with a plug allowing me to remove the tach fairly easily. I think the battery in the trunk will just have to be conspicuously wrong. What I may do, however, to keep the illusion is empty out one of the dead batteries I have lying around until it’s just a plastic shell with two posts on top. I’ll even route battery cables to the firewall and the ground stud. The engine compartment will look stock with very little excess weight.
On to sticking to the schedule. During the school year Wednesday evenings are Girl Scout night for Loriann and Mikhaila, so I usually make the most of that and spend it in the garage. Tonight I was scheduled to tear apart Glinda’s front suspension. Instead, I’ll be driving west to check out, and hopefully buy, a racing seat I just found on Craigslist. So, just like at work, schedules are meant to be broken.
Monday, June 3, 2013
Now I Really Need to Get On the Stick
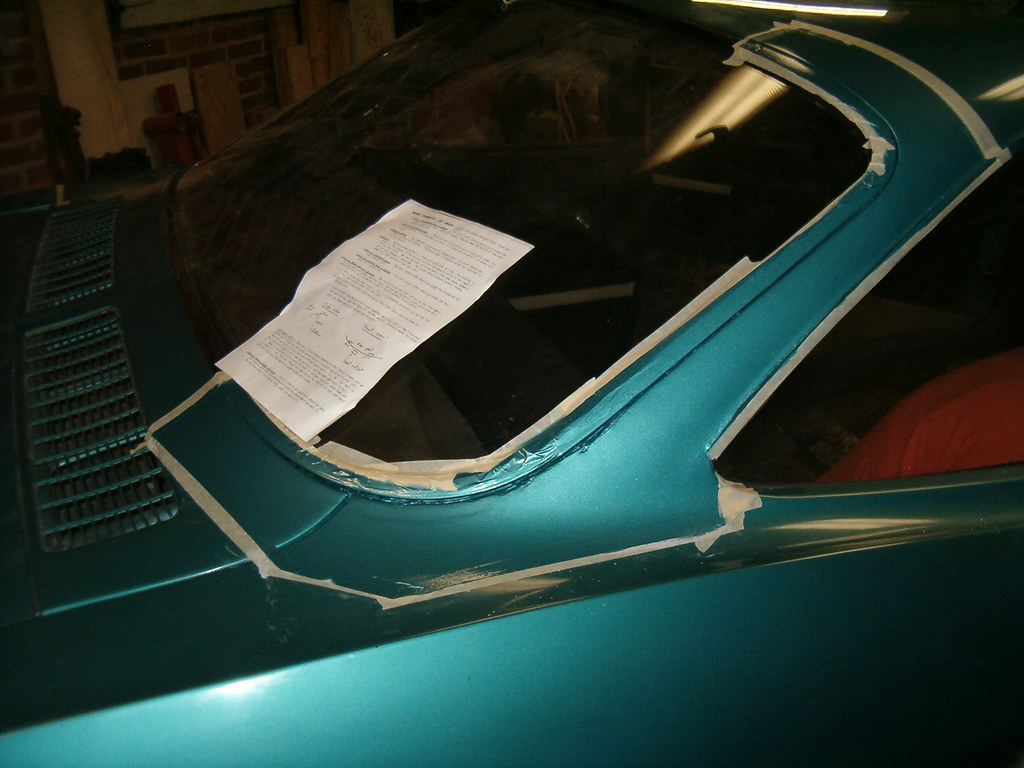
I spent part of Saturday afternoon working on Glinda. I drove her into the garage guiding her front end up onto the ramps to give me good access to all the front suspension fasteners. Using an eye dropper applicator, I liberally applied the proven 50-50 mix of ATF and acetone to as many threads as I could get to before rolling the car down off the ramps. Then, I dug out all the silicone and hardened original adhesive that filled the channel surrounding the backlight. With all that out of the way it didn’t take too much of an effort to cut through the remaining adhesive with my nifty windshield removal tool. With the glass out of the opening, I was reminded of the filler work I’d had to do a few years back.  Back then I hadn’t wanted to remove the glass so I’d carefully brushed off the loose rust, treated the remaining rotten steel, and artistically sculpted bondo to fill in the missing metal. That work was followed by a few coats of primer and paint to hide my handiwork (as pictured to the right). I now get to make the repair correctly – with sheetmetal patches MIG welded into cleaned out holes. Holes that will be carefully cleaned up to remove all rot. All this work is additional to my current plans of trackification, hence the title of this blog. By the way, I love mixing the aviation origin of the phrase with a car blog.
Speaking of trackification, Friday evening I had a very nice conversation with one of the more respected Corvair racers, Dave Edsinger. Dave had me share with him my plans for the car and what I’ve already done. Fortunately, none of the handful of new suspension parts I’ve purchased will have to go back. Furthermore, he gave me a lot of help towards getting Glinda set up to be an awesome streetable track car. Some of the changes he recommended for the front end included getting heavy-duty springs and cutting a coil off, shortening the control arm bushing spacer to increase the stiffness of that joint, and installing the quick-steer arms I’ve got. For the rear, he urged me to buy some 250# stock car springs and ensure the bushings in strut rods, control arms, and stabilizer links are all in good. For both ends, he gave me alignment values he’s found work best and encouraged me to find some good shocks (“even in they’re used”). The new front end bushings should all be her this week, so I may need to make a trip up to the Corvair Ranch Saturday morning to get Jeff’s mechanic to press off the old and press on the new. That means I need to get Glinda’s front end disassembled this week.
Like the title says – it's time to get on the stick.
 Back then I hadn’t wanted to remove the glass so I’d carefully brushed off the loose rust, treated the remaining rotten steel, and artistically sculpted bondo to fill in the missing metal. That work was followed by a few coats of primer and paint to hide my handiwork (as pictured to the right). I now get to make the repair correctly – with sheetmetal patches MIG welded into cleaned out holes. Holes that will be carefully cleaned up to remove all rot. All this work is additional to my current plans of trackification, hence the title of this blog. By the way, I love mixing the aviation origin of the phrase with a car blog.
Speaking of trackification, Friday evening I had a very nice conversation with one of the more respected Corvair racers, Dave Edsinger. Dave had me share with him my plans for the car and what I’ve already done. Fortunately, none of the handful of new suspension parts I’ve purchased will have to go back. Furthermore, he gave me a lot of help towards getting Glinda set up to be an awesome streetable track car. Some of the changes he recommended for the front end included getting heavy-duty springs and cutting a coil off, shortening the control arm bushing spacer to increase the stiffness of that joint, and installing the quick-steer arms I’ve got. For the rear, he urged me to buy some 250# stock car springs and ensure the bushings in strut rods, control arms, and stabilizer links are all in good. For both ends, he gave me alignment values he’s found work best and encouraged me to find some good shocks (“even in they’re used”). The new front end bushings should all be her this week, so I may need to make a trip up to the Corvair Ranch Saturday morning to get Jeff’s mechanic to press off the old and press on the new. That means I need to get Glinda’s front end disassembled this week.
Like the title says – it's time to get on the stick.
Subscribe to:
Posts (Atom)