The “this” I’m referring to is not having the right part at the right time. Sadly, Mikhaila and I had last night’s brake work stopped by not having the right brake hose. I am, however, getting ahead of myself.
Back up to Saturday. I started the sunny day by placing portable heaters in the salons of both Ringo and Glinda in hopes of drying out any dampness that may have leaked in from melting snow and pelting rain. This was in preparation for enclosing both cars in tarps. Since Glinda’s carpet was quite waterlogged, only Ringo was dried out by afternoon’s end. With a Sunday filled with rain predicted and daylight quickly fading, I went ahead and encased both cars in Harbor Freight’s finest silver tarp-age. While I removed the heater from Ringo, I kept it going in Glinda.
Also, during the afternoon, I took advantage of the Glinda’s now toasty interior to do more repairs to the headliner and sun-visors. Black thread and a curved upholstery needs were my tools to replace the failed seams.
Yesterday afternoon and evening, I burned a bunch of kerosene while spending most of the afternoon and part of the evening in the garage working on and around Scarlett. The list of tasks accomplished includes: removing both front brake lines for replacement, grinding down the new wheel cylinder so it didn’t interfere with the drum, installed the new brake hoses with the copper washers, swapped out the old left rear axle for the newly greased one (the one with all the parts), and raising the car up a few notches on each jackstand.
After dinner, Mikhaila joined me and we reassembled both rear brake assemblies. When we went to install the hoses, I discovered that I was in possession of two LM rear hoses instead of EM ones. Not sure how it happened, but back in August of 2013 Clark’s shipped me C332 even though I have C331R in my spreadsheet. This morning I was on the phone with them ordering the right parts. At some point, both Glinda and Luna will be getting new rear brake hoses.
Before calling it a day, Mikhaila and I measured the two brake lines, so I could buy replacements. We got about 29 inches for the left side and nearly 50 for the right.

Monday, January 19, 2015
Monday, January 12, 2015
More Thinning
No, I’m not talking about the top of my head. I’m talking about Corvair parts I’ll never use. Yesterday, bundled against the cold, I tackled the task of replacing the cover on Luna’s home (the temporary garage). I started by removing the tarp I’d tied to cover all the holes in the roof. Then I pulled off the front and rear tarp pieces. Finally, I took off the top in pieces as just pulling on it caused the aged material to disintegrate.
With no walls it was easy to drag out parts and pieces that had been in storage. To facilitate installing the new pieces, I moved much of the contents out from under the frame and into the driveway. It took some fiddling, but I got the new cover installed in a little over an hour. I made sure I didn’t make the restraints tight since I believe the initial installation was too snug and contributed to the early failure of the top where it rubbed on the frame. If I could easily slide a hand between tarp and rail, I called it good.
With the garage enclosed again, I picked though the stuff in the driveway and chose what would stay and what had to go. The two 140 HP engine block assemblies stayed, as did the tub with the 140 heads and the one with the parts I’d gleaned from the 140 engine that was in Phil’s Corsa convertible I parted out. Also staying are a ‘64 Powerglide and mating differential (in case there’s an issue with Scarlett’s), the manual transmission out of the aforementioned Corsa, manual transmission bellhousings (one EM and one LM), Heidi’s original engine block/crankshaft/bellhousing assy (I should make that into a piece of art someday), some piston/rod assemblies and cylinders, body portions to patch Luna’s holes, Scarlett’s set of wheels, and one torque converter with a nice, barely worn ring gear. Moved to the back garage were a spare engine lid and hood (to use for patching holes). That which was left was loaded into the truck for a trip to recycler were four torque converters, two powerglides, a couple automatic bellhousings, a non-posi differential, and the old garage tarp pieces.
Sunday wasn’t the only car day of the weekend. I spent part of Saturday at my buddy Jonathan’s garage. He’d done some significant work on his Corsa’s engine by installing a trick cooling fan setup (based on a vertical Porsche unit) and an upgraded oil system. With all that done, however, he was unable to get the engine to start. The first thing I noticed after I was done oohing and aahing over the new stuff was the spark plug leads were installed wrong. I had him turn the engine to top dead center to verify that they were off by one post. I did a quick inspect of the cap and it looked very used up, as did the rotor, so Jonathan pulled nice ones off his shelf of parts and they were pressed into service. With the leads properly placed, I had him crank the engine - still no firing. I hooked up an inductive timing light and asked him to crank again - there was no spark going to the plugs. Further sleuthing using a voltmeter and the wiring diagram for his electronic ignition module revealed it wasn’t getting the right voltage. We hooked up a wire bypassing the resistance portion of the ignition wire and the engine fired right up, albeit at quite a high idle. Thinking the timing was too advanced, I turned the distributor clockwise and got the engine to slow down, but also causing backfiring through the carbs. Jonathan then discovered some binding in the throttle linkage, so he disconnected the carbs from the linkage and the engine settled into a nice thousand rpm idle. I aimed the timing light’s beam at the harmonic balancer and found the engine to be a little too retarded (is it still politically correct to use that term?). A slight adjustment and the line and the 16 degree BTDC mark were aligned. That’s a little more advanced than stock, but his engine is far from stock. Also, since it was idling at 1000 rpm, the centrifugal advance is probably doing its thing, albeit slightly. He’ll do the final timing adjustments using the twist-it-till-it-pings method. I tightened the hold-down nut, and we moved on to putting his multi-spark unit back into the ignition system. With the wires all in place per the Crane diagram, we tried starting the engine – nothing. The timing light confirmed a lack of spark again. We spent a while double-checking all the wiring and concluded the box must be bad. We put the wiring back the way it was when the engine ran and it started right up again. He’ll be in touch with the Crane folks to see what to check next.
Monday, January 5, 2015
Two Steps Forward, One Step Back
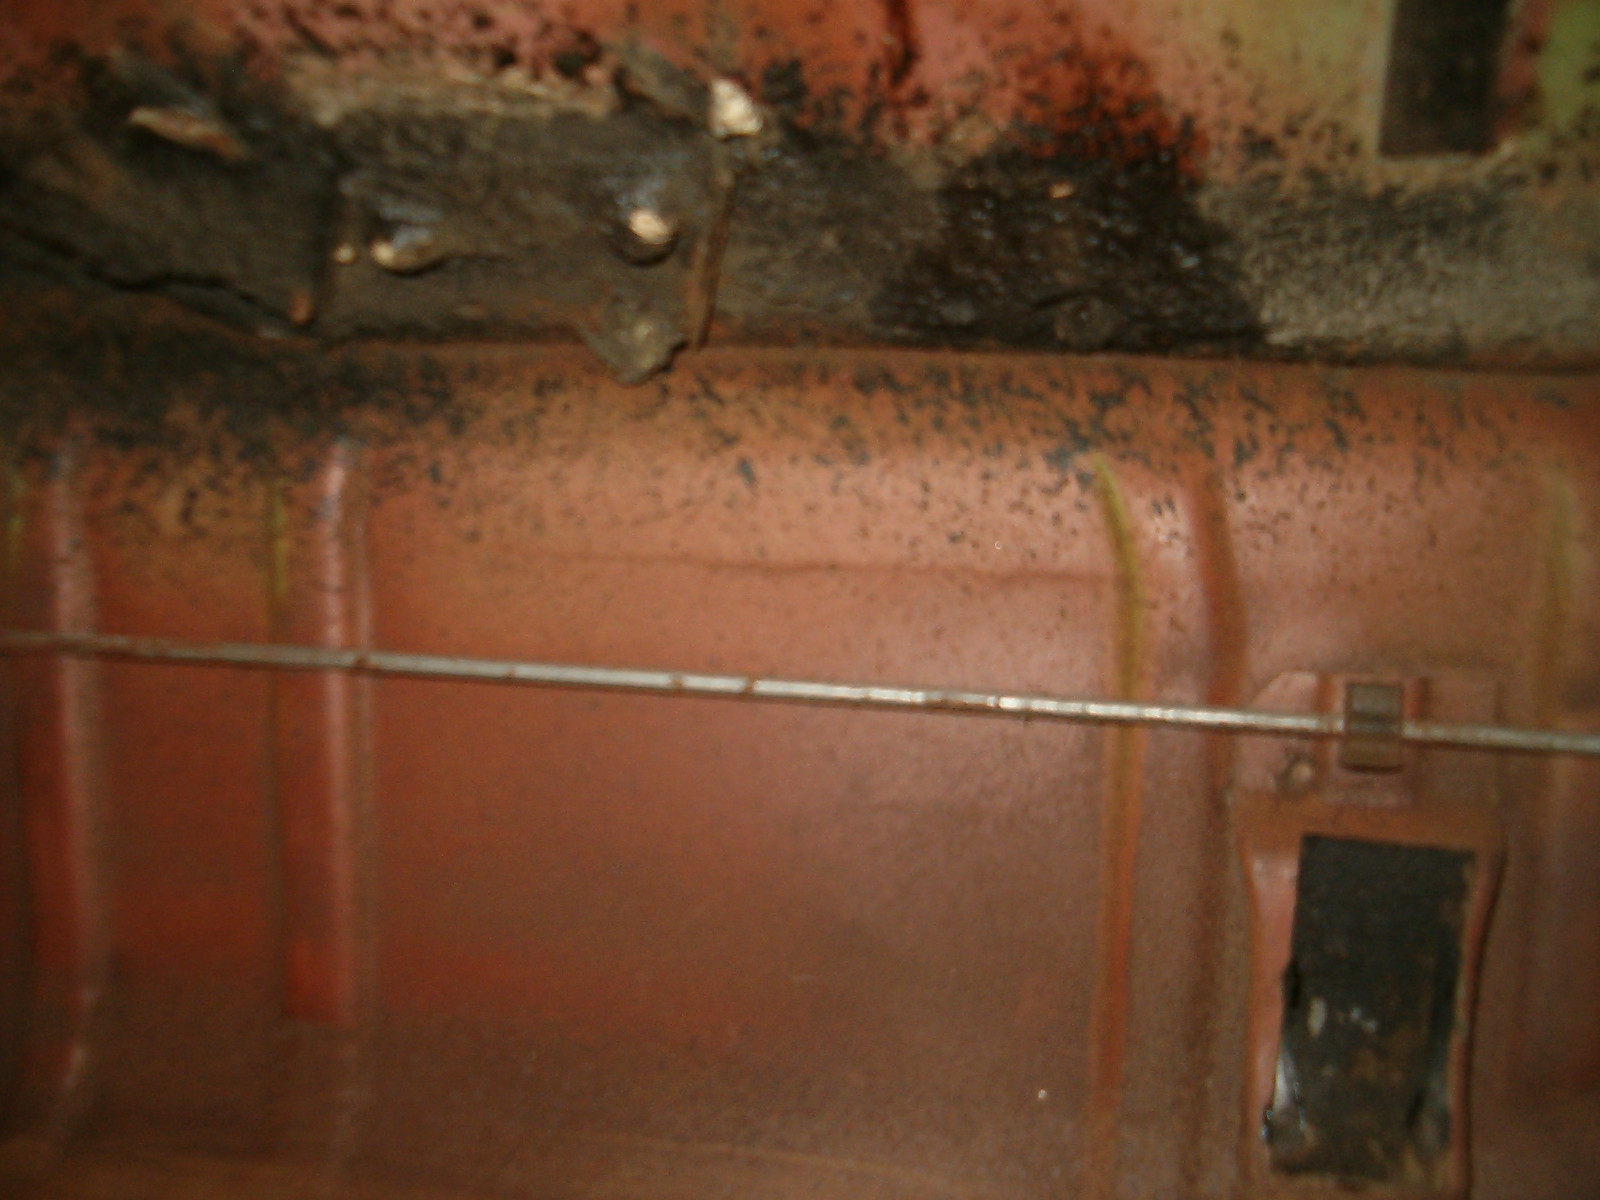
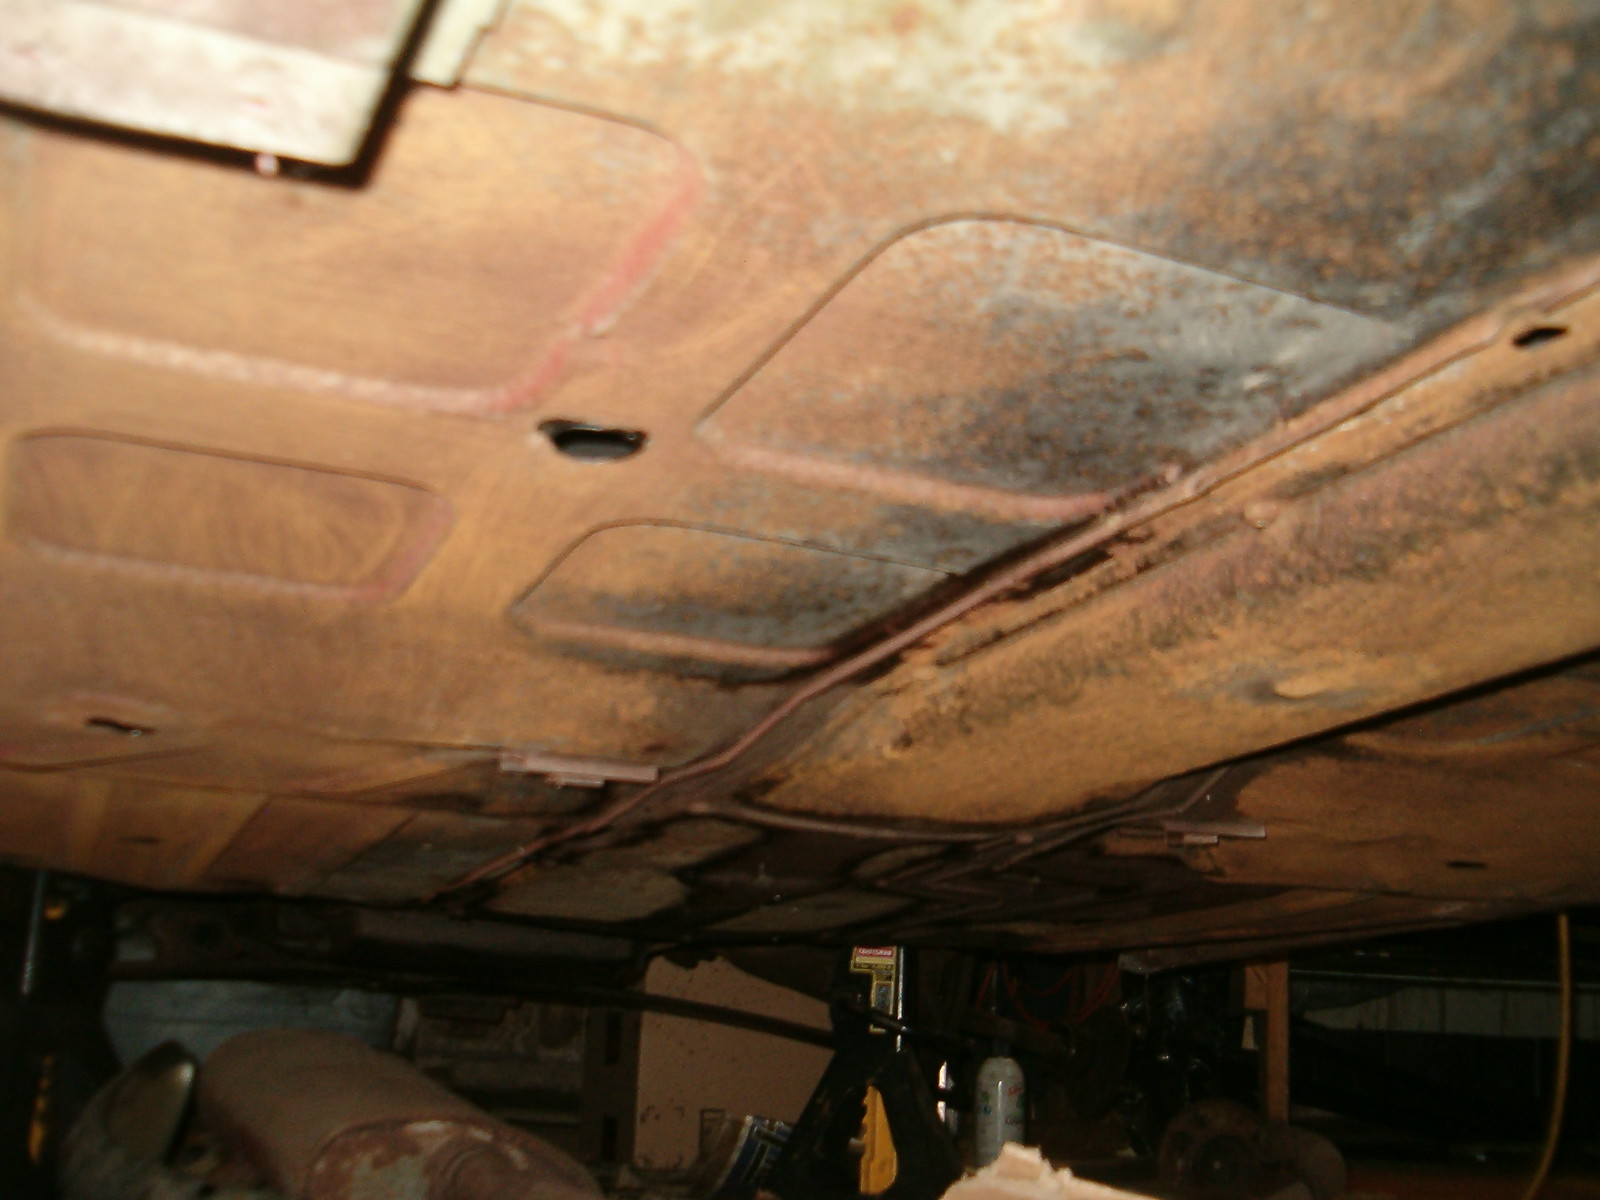
Mikhaila and I had a great weekend working together in the garage. I’m trying to balance disassembly and cleaning projects with reassembly and coating ones to keep her enthusiastic. This last weekend she climbed under the car and wire brushed all the loose rust and gruck from the underside surfaces while I carefully inspected the brake lines for corrosion. Since this car spent such a long time in storage, the galvanized lines are in very good shape and don’t need replacing.
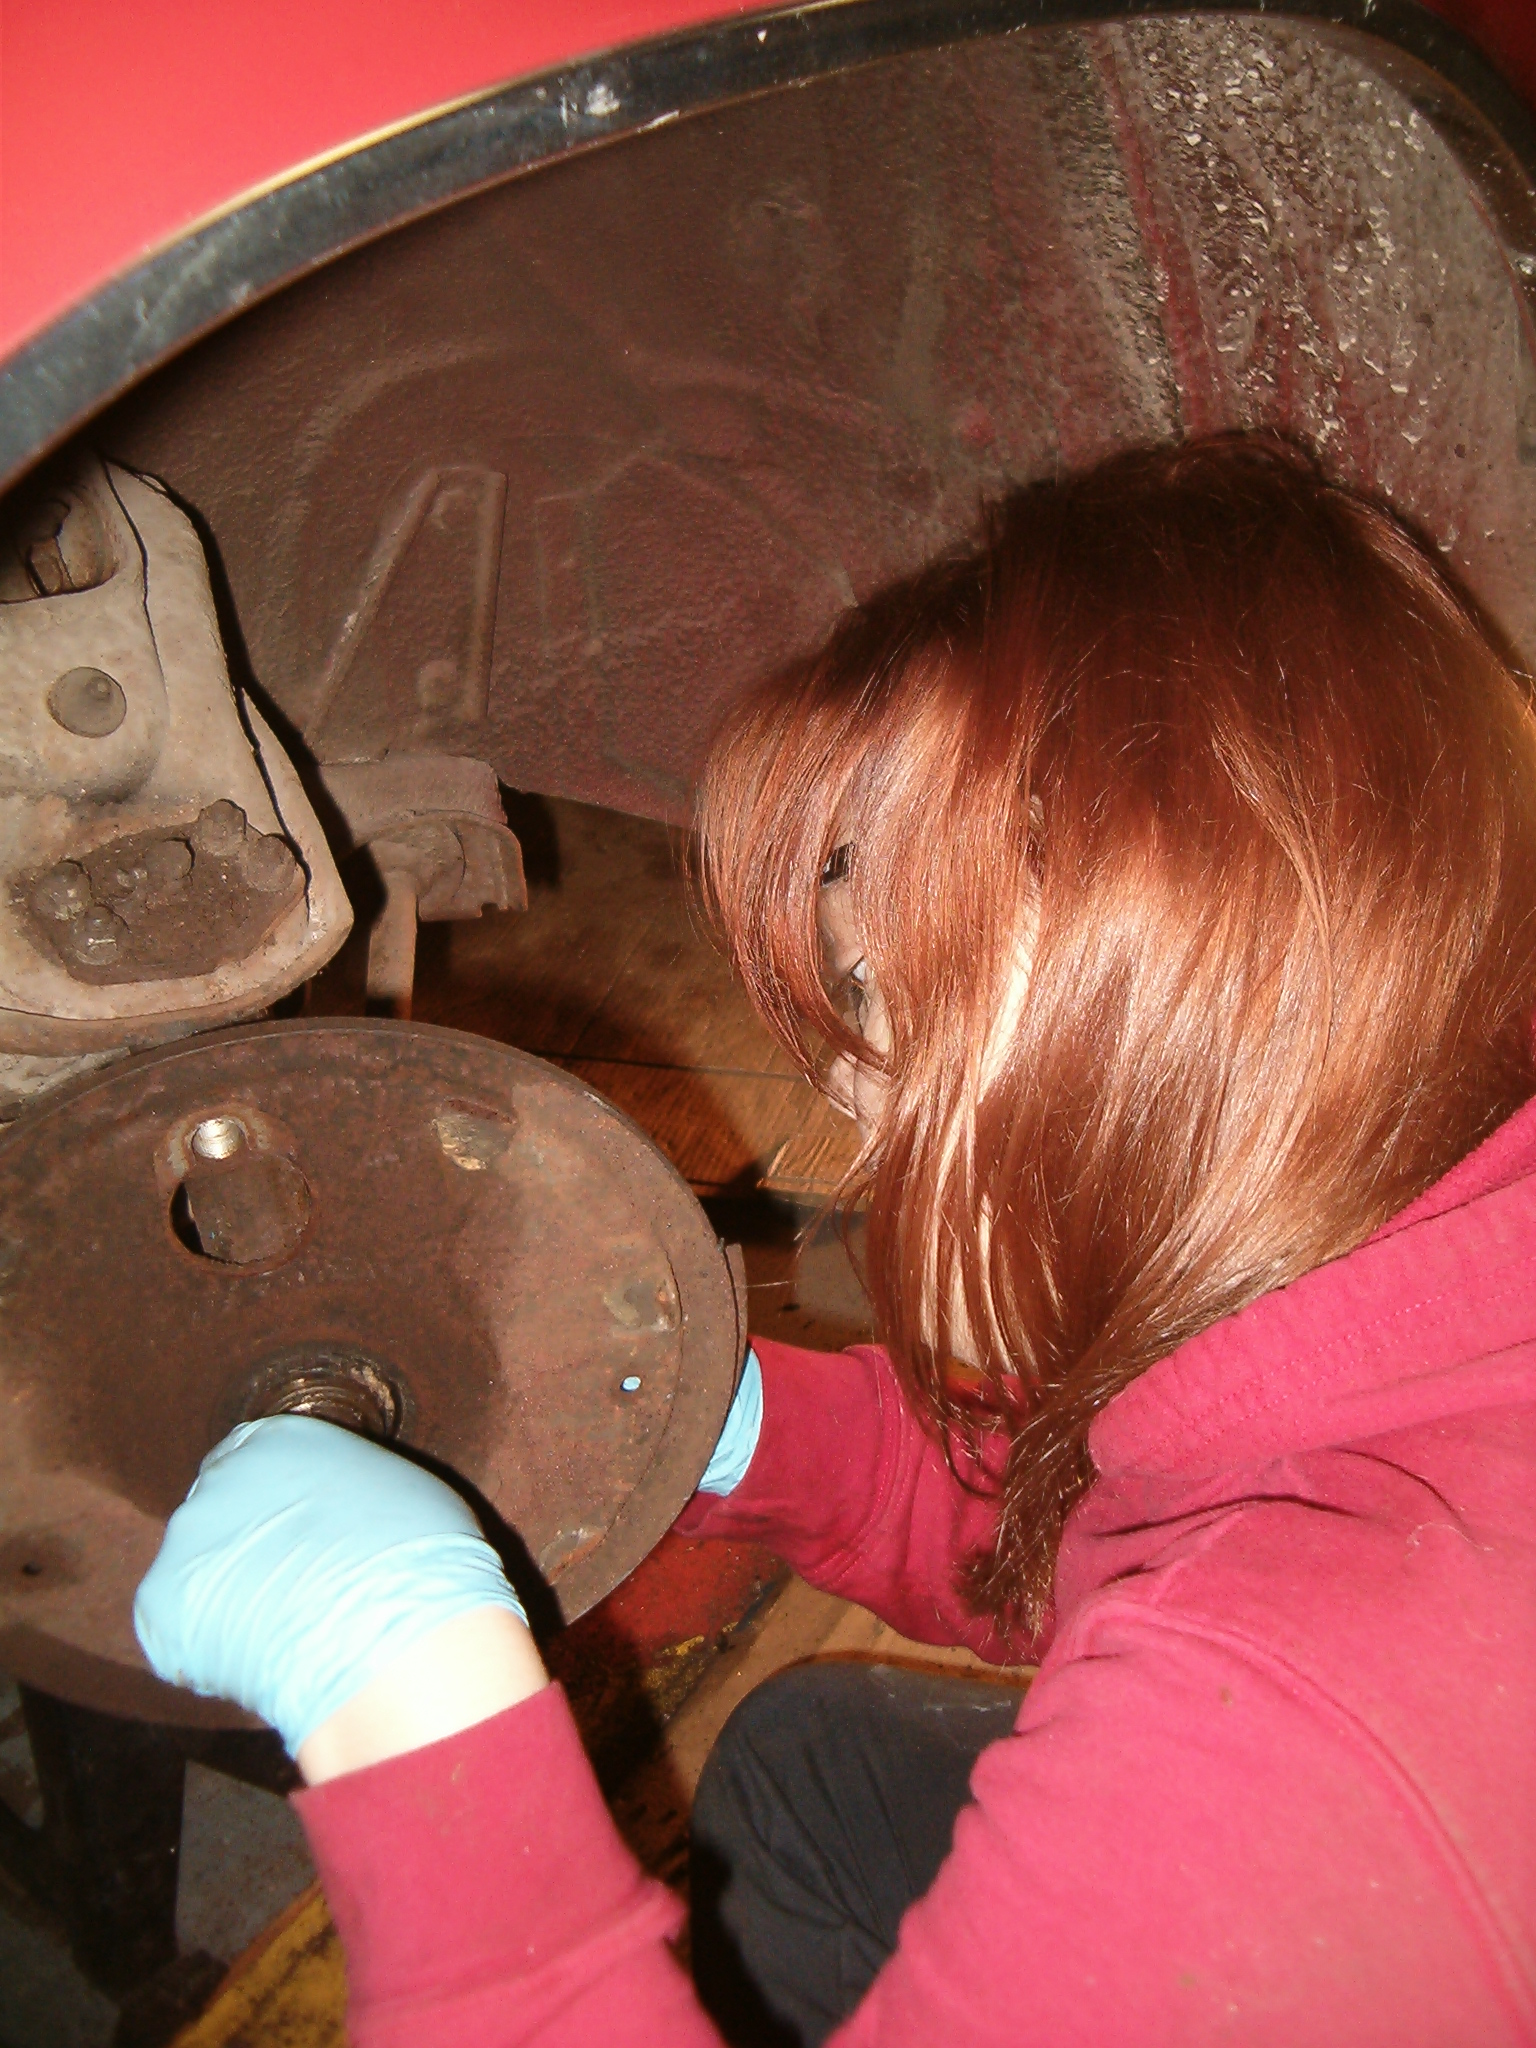
Next, we assembled the two front brake assemblies. The left side went well until we went to bolt on the drum. Once the nut was torqued the drum refused to turn. We concluded the outside ear of the new wheel cylinder is sticking out too far interfering with the drum. Sadly, this is a known possible issue, and we got bit by it. As others have done, I’ll grind down the ear until the drum spins freely.

Speaking of wheel cylinders, we next discovered the wheel cylinder I had in my stash of stuff was not for the right side as I’d originally written down. Therefore, we were dead in the water until I made the call to Clark’s … or were we? I’d saved the old cylinder, so I punched out the used-up innards and inspected the bore. It wasn’t too bad looking, so, after unscrewing the bleeder valve, Mikhaila and I honed out the inside until it was clean and smooth. I cleaned up the two pistons and then handed Mikhaila one of the 7/8ths rebuild kits from the storage box marked RJS. She stuffed the cylinder’s bore with spring, cups, and pistons generously coated with DOT 3 brake fluid. On went the end caps and we could continue putting the right front brakes back together. Since we’d re-used the original wheel cylinder, the drum spun freely once it was installed with freshly greased bearings. The last brake task we undertook was installing the new brake hose. While it easily screwed into the cylinder’s threaded hole, it took some finagling to get the brake line’s fitting screwed into the other end of the hose. It wasn’t until this morning I remembered I’d forgot to insert the new copper washer. Irr.
Our time in the garage ended when we almost completed the rebuilding of Scarlett's second carburetor (the other carb came off Glinda – more on that later).
By that time on Sunday evening it was getting cold and windy – perfect timing for me to leave the heated garage for the brisk driveway where Glinda waited to have a new fanbelt put on and the second modified carburetor reinstalled.
Regarding the fanbelt, I’d blogged back in mid-November how high-rpm escapades had caused Glinda’s fanbelt to come off. Since I wasn’t carrying a new belt at the time, I reinstalled the flipped one and crossed my fingers. Last Friday I had to come in to work, and I decided to drive Glinda forgetting – again – to put a spare belt in the trunk. Well, my lame-ness was rewarded as the wounded belt busted soon after I left my work’s parking lot. Not having a spare, I first tried to nurse the car home with occasional stops. Finally, engine clattering on a hill forced me to give up and call upon the lovely Loriann to come rescue me again. Even though she’d brought me a replacement belt, I’d decided I didn’t want to deal with disconnecting the line feeding the oil pressure gauge in the dim illumination of a streetlight, so we left the car parked in a church parking lot and I returned an hour or so later with the truck and tow-bar and drug Glinda home. In the comfort of my own driveway with plenty of light, I undid the oil line, installed a new Clark’s fanbelt, and reconnected the oil line in a matter of minutes.
Along with a carburetor rebuild kit, my last order from Clark’s Corvair Parts included four accelerator pump cups. I installed one of these on a GUP pump and tested it in the shelved modified carb base that wouldn’t work previously, and the new cup did the trick – nice squirts with each blip of the throttle shaft. I removed Glinda’s right carb assembly (it had the borrowed unmodified base), carefully separated the top from the base preserving the gasket, swapped on the newly tested pump, and mated the racing top (added vent tubes) with the racing base (relocated jets). The assembly was then installed onto the engine and a turn of the ignition key resulted in the wonderful rumble of the Corvair 110 pumping air through the Flowmaster. After both chokes had fully opened, I shut down the engine, disconnected the choke pull-off hoses from each carb, connected the ends of my clear tubing containing a few tablespoons of water to the aforementioned vacuum ports, and re-fired the engine. Minor tweaks of the throttle screws and the water stopped moving. I tightened the fancy linkage and the carbs were synched. After reconnecting the pull-off tubes, Glinda was ready for a test drive. There was still some stumbling around mid-throttle, but, finally, putting my right foot to the floor elicited a grin rather than a grimace.
She's now ready for some sprited commuting - just in time for snow to force me to permanently pull her off the salty roads.
Friday, January 2, 2015
So, How’d We Do?
When last I posted I was hopeful that Mikhaila and I would make significant progress on Scarlet during our ten days of holiday. While we were able to spend some quality time in the garage, we got neither the engine running, nor the salon ready for carpet.
Instead we removed the stabilizer bar (we’ll need to replace the bushings and bolts), the strap retaining the fuel tank (nothing broke), and the fuel tank itself. Since it was above freezing (TYL), we filled the tank with water and watched it escape through a dozen or so tiny rust holes. This tank won’t be reused. Thankfully, I’d kept Two-tone’s tank. I pulled it out of storage and we filled it with water, only discovering one tiny hole. That’ll easily be closed off with the sealant we’ll be using to coat the tank’s interior.
Leaving the tank in the sun to dry, we moved on to the rear bearings. Starting on the left side, we discovered that some of the pieces (guard and deflector) were missing, so I pulled a GUP rear axle assembly from my stash and we proceeded to tear down the bearing. With the bearing exposed, I set Mikhaila to cleaning with brake cleaner while I tore down the left side. This assembly, fortunately, had all its pieces. When both sides were thoroughly degreased, we packed and reassembled using synthetic grease. Getting the retaining rings in were the trickiest (and most frustrating part of the job).
The other big job we completed was taking inventory of my boxes of GNPs and GUPs. I’ve inherited a couple collections of parts as well as parted out a few Corvairs over the years and never did a good job documenting what I’ve actually got on hand. It took a couple hours to go through the boxes with me dictating part names (or Clark’s numbers when they were available on the original packaging) while Mikhaila typed them into a word file. The list (minus a number of big, loose parts like engine block halves, heads, cranks, manifolds, etc. numbered over two-hundred-fifty items. Prior to starting this exercise, I filled a wheelbarrow and a garden cart with parts and pieces I’d never use. These were hauled to the curb and, minutes after posting a “curb alert” ad on Craigslist, were gone.
With a couple significant house projects basically dealt with, I spent yesterday out in the driveway. After installing a couple lowering shackles on the rear of the truck, I turned my attention to Glinda. With the air cleaner off, I did the hand-over-the-carb-rev-the-engine thing and that seemed to help (but not completely fix) the rough running.
Next, I backed her up onto my new ramps and with Mikhaila’s and the lovely Loriann’s help, I made some adjustments to the clutch linkage and got rid of the annoying catch (clunk). Something associated with the clutch fork was dragging up in the bellhousing. It would let go about the same time the clutch would engage. To get rid of it, I moved the two clevises (I checked, the plural of clevis is not clevi) about an inch each on their associated threaded rods. Clunk gone; me happy.
Finally, I installed the carb top spacers that had been floating around since they failed to work right on Lucy nearly four years ago (see photo).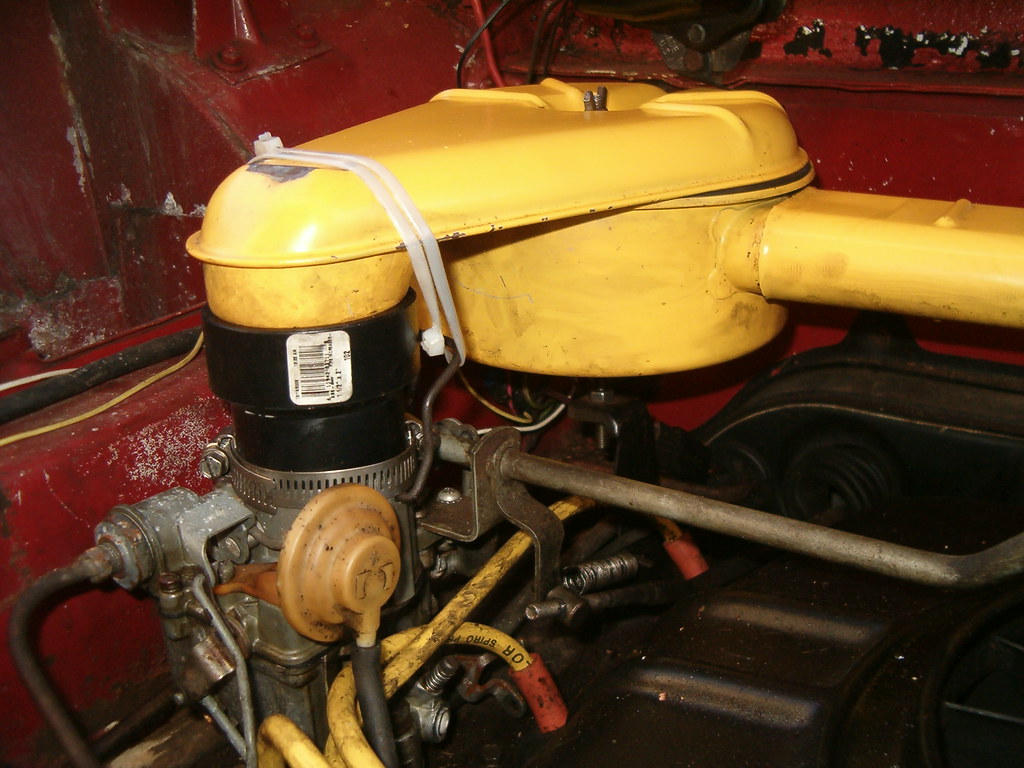 I notched the two PVC adapters to clear the ribs on the carb tops and applied small foam tape to fill in the small gap between the adapter inside diameters and the carb outer diameters. The smaller end of each adapter fit snugly on the bosses at the ends of the air cleaner crossover. Instead of using the J bolts to retain the crossover, I used zip-ties through the same holes. To take up the new gap between the air cleaner’s underside and the mounting surface of the support, I cut a piece of ½ inch PVC. To extend the threaded rod that captures the cleaner’s cover, I welded two ¼-20 nuts together (I love using my welder). The upside of all this is smoother flow of the air coming into the carburetors since the right angle turns have been moved a couple inches above the inlets.
This morning I drove Glinda to work, and the rough running is still there, but not nearly as bad. As I pulled into the parking lot at work and down-shifted, the aforementioned clunk was there again. Irr. Guess a little more adjustment is necessary. Irr again.
I notched the two PVC adapters to clear the ribs on the carb tops and applied small foam tape to fill in the small gap between the adapter inside diameters and the carb outer diameters. The smaller end of each adapter fit snugly on the bosses at the ends of the air cleaner crossover. Instead of using the J bolts to retain the crossover, I used zip-ties through the same holes. To take up the new gap between the air cleaner’s underside and the mounting surface of the support, I cut a piece of ½ inch PVC. To extend the threaded rod that captures the cleaner’s cover, I welded two ¼-20 nuts together (I love using my welder). The upside of all this is smoother flow of the air coming into the carburetors since the right angle turns have been moved a couple inches above the inlets.
This morning I drove Glinda to work, and the rough running is still there, but not nearly as bad. As I pulled into the parking lot at work and down-shifted, the aforementioned clunk was there again. Irr. Guess a little more adjustment is necessary. Irr again.
Instead we removed the stabilizer bar (we’ll need to replace the bushings and bolts), the strap retaining the fuel tank (nothing broke), and the fuel tank itself. Since it was above freezing (TYL), we filled the tank with water and watched it escape through a dozen or so tiny rust holes. This tank won’t be reused. Thankfully, I’d kept Two-tone’s tank. I pulled it out of storage and we filled it with water, only discovering one tiny hole. That’ll easily be closed off with the sealant we’ll be using to coat the tank’s interior.
Leaving the tank in the sun to dry, we moved on to the rear bearings. Starting on the left side, we discovered that some of the pieces (guard and deflector) were missing, so I pulled a GUP rear axle assembly from my stash and we proceeded to tear down the bearing. With the bearing exposed, I set Mikhaila to cleaning with brake cleaner while I tore down the left side. This assembly, fortunately, had all its pieces. When both sides were thoroughly degreased, we packed and reassembled using synthetic grease. Getting the retaining rings in were the trickiest (and most frustrating part of the job).
The other big job we completed was taking inventory of my boxes of GNPs and GUPs. I’ve inherited a couple collections of parts as well as parted out a few Corvairs over the years and never did a good job documenting what I’ve actually got on hand. It took a couple hours to go through the boxes with me dictating part names (or Clark’s numbers when they were available on the original packaging) while Mikhaila typed them into a word file. The list (minus a number of big, loose parts like engine block halves, heads, cranks, manifolds, etc. numbered over two-hundred-fifty items. Prior to starting this exercise, I filled a wheelbarrow and a garden cart with parts and pieces I’d never use. These were hauled to the curb and, minutes after posting a “curb alert” ad on Craigslist, were gone.
With a couple significant house projects basically dealt with, I spent yesterday out in the driveway. After installing a couple lowering shackles on the rear of the truck, I turned my attention to Glinda. With the air cleaner off, I did the hand-over-the-carb-rev-the-engine thing and that seemed to help (but not completely fix) the rough running.
Next, I backed her up onto my new ramps and with Mikhaila’s and the lovely Loriann’s help, I made some adjustments to the clutch linkage and got rid of the annoying catch (clunk). Something associated with the clutch fork was dragging up in the bellhousing. It would let go about the same time the clutch would engage. To get rid of it, I moved the two clevises (I checked, the plural of clevis is not clevi) about an inch each on their associated threaded rods. Clunk gone; me happy.
Finally, I installed the carb top spacers that had been floating around since they failed to work right on Lucy nearly four years ago (see photo).
I notched the two PVC adapters to clear the ribs on the carb tops and applied small foam tape to fill in the small gap between the adapter inside diameters and the carb outer diameters. The smaller end of each adapter fit snugly on the bosses at the ends of the air cleaner crossover. Instead of using the J bolts to retain the crossover, I used zip-ties through the same holes. To take up the new gap between the air cleaner’s underside and the mounting surface of the support, I cut a piece of ½ inch PVC. To extend the threaded rod that captures the cleaner’s cover, I welded two ¼-20 nuts together (I love using my welder). The upside of all this is smoother flow of the air coming into the carburetors since the right angle turns have been moved a couple inches above the inlets.
This morning I drove Glinda to work, and the rough running is still there, but not nearly as bad. As I pulled into the parking lot at work and down-shifted, the aforementioned clunk was there again. Irr. Guess a little more adjustment is necessary. Irr again.
Subscribe to:
Posts (Atom)