It's been aver a month since I last had something postable. Since then, it’s been work, work, work … on a bathroom. Finally, last weekend, the lovely Loriann informed me I had completed the renovation work I was responsible for – she’d do the rest. So with the installation of the marble threshold I was free to work on cars again.
I wanted working with Mikhaila on her car to be the first project I got back to, but that wasn’t to be – she was sick Sunday. Instead, I spent the afternoon re-hanging Glinda’s muffler, replacing an exhaust clamp, installing the Pertronix Ignitor II and Flamethrower II, and adjusting the clutch linkage. Now I just need to get her back on the street and see how much of an improvement those changes made.
In preparation for the holiday time-off I’ve got in a week, I bought some parts from Clark’s and Amazon. I’ve got a bunch of carpet and convertible top samples on their way as well as heater/defroster hoses. Since Clark’s was out of POR-15, I got the quart of semi-gloss from Amazon instead. My hope is that, by the end of the year, Mikhaila and I will have the engine running and the interior ready for carpet.

Friday, December 19, 2014
Friday, November 14, 2014
It’s Getting Better, It’s Worse, It’s Mostly Better
As I walked out of work last evening, I was met with sleet, rain, and snow all lovingly mixed together by the hand of God. I knew this would happen - get Glinda back on the road just in time for the salt to be back on the road. Argh!
The mixed precipitation caused enough drivers to freak out that the commute to pick up Mikhaila from her job turned into a stop-and-go-fest. It did, however, give me ample opportunity to blow out the carburetors to, hopefully, de-chug the engine. A couple dozen full-throttle-up-to-4-grand-followed-by-an-immediate-release-of-the-gas-pedal and the engine had smoothed out significantly. Sadly, Glinda also rewarded those antics by throwing her fanbelt. With the red GEN/FAN light illuminated, I drove into the nearest parking lot and stopped under a light. While I had the requisite 9/16ths wrench and a rag in the glovebox, I did not have a flashlight, but a few minutes later, I had the apparently undamaged belt back in place and was heading on down the road again.
One of the frustrating issues I’d hoped would go away has been the inability to get the transmission to shift into first or second gear upon initial, cold start-up. My assumption had been that the stripped bolt and subsequent misalignment of the drivetrain had been causing the problem, but the issue still exists even after I heli-coiled the hole and the drivetrain is realigned to the shifter rod. Once the gear oil is warmed up, she goes into gear easily. I need to remember to leave the shifter in either 1st or reverse (depending on where I’m parked) each time she sits for any long period.
Mikhaila has a driving test coming up early next month, so I told her if she gets her license, I’d be will to let her drive Glinda to and from work and school. She’d need to keep working on Scarlett in earnest however, or I’d revoke that privilege immediately. Her eyes lit up until I reminded her that Glinda now had a manual transmission. While she’s not a willing self-shifter, she’s capable.
Thursday, November 13, 2014
Update Time
I’ve been very, very busy with home projects so ‘vair projects have been off limits. That changed the last couple evenings when the lovely Loriann’s not-so-lovely daily-driver needed some mechanical attention. Since determining it needed new rear brake pads took no time Tuesday and doing the replacement took no time last evening and I was already in grungies and out in the garage both evenings, I figured, “what the heck, get Glinda back on the road.”
So, I did just that. Tuesday I adjusted the clutch cable and threaded on the retaining nut, unhooked the vacuum advance, set the dwell and timing (more on that later), removed the racing seat and belts, and pushed the front bench back into place. Last night I bolted down the seat, bolted in the factory seatbelts, zip-tied up wiring, and installed passenger door sillplate. That meant that finally, after over two months of being out of service, Glinda came down off the jackstands and was driven down the driveway.
This morning I drove her into work without issue. Well, without issue is a bit of a stretch. While the engine didn’t die and she didn’t strand me on the side of the road, her engine is not running smoothly at all. I don’t know if it’s clogged carbs or something electrical, but it’s not right. That brings me back to the question of timing. The shop manual for 1968 states timing for a manual transmissioned 110 HP engine should be set at 4 degrees BTDC (before top dead center), while Powerglide engines get 12 degrees. I’m not sure what drives this difference, so I decided to go with the higher number and just listen for pinging. Since it’s been cool and will only get colder, engine heat shouldn’t be an issue. In the meantime I’ll search the web for some smart person’s explanation of why there’s a difference.
In hopes that the chuggy running is fuel related, I’ll make sure I do some full-throttle no-throttle runs this evening to try and suck anything that might be clogging the tiny passages in the two Rochesters. It is my goal to install the Pertronix II electronic ignition module and associated new coil, so if the problem is spark related, that will cure it. Just not sure when I’ll get to it.
Hopefully, the snow (and thus the salt) stay away a little longer so I can put some miles on the car.
Tuesday, October 28, 2014
With Thanks to Mikhaila
Sunday should’ve been a work on the bathroom day, but thanks to Mikhaila’s father-daughter project, I went outside to work on cars instead.
She joined me around 1 in the afternoon to work on Scarlett. Since she’d twisted her ankle (Mikhaila, not Scarlett - cars don't have ankles although some have knees), I had to come up with activities that would limit her standing, so I started by taking out the seats, so she could brush, vacuum, and coat the inside floor with POR-15. I decided it would be a while before we’d be able to reinstall so the seats, so a good storage place had to be found. Since I’d planned on reinstalling Glinda’s bench seat, it came off Luna’s engine lid and Scarlett’s seat took its place.
We then pulled Ringo’s battery, dropped it into Scarlett’s engine bay, and hooked it up to the cables so we could determine the state of the electrical system. It was encouraging when the first thing we checked, the ignition switch, resulted in both idiot lights illuminating. The check-out went downhill from there. I had Mikhaila push down on the turn signal stalk – green light on dash, nothing at the front or rear connector, same thing on left turn signaling except no green arrow on the dash. Finally, pulling out the headlight knob provided no electricity to any of the outer connectors. The next step for this will be checking fuses (something we couldn’t do with wet POR-15 on the car floor.
Finally, we oiled the engine. First, though, we removed the distributor after carefully marking it’s location against the engine as well as the location of the rotor. That gave us access to the end of the pump shaft, which she spun clockwise with the drill-mounted special shaft. She kept this up as I slowly rotated the engine through two revolutions. With the distributor back in place, I had her pull the #1 plug and insert the compression tester fitting. Then, with the gauge attached, she energized the starter spinning the engine and causing the needle to rise. We checked all six with the following initial results: one @ 160 psi, three @ 150 psi, one @ 120 psi, and one @ 60 psi). By pumping a little oil in the low cylinder and retesting, we got the gauge needle to point to 80 instead of 60. That gives me some hope this low one will come up after we run the engine a bit. We’ll need to borrow a couple good carbs first but that’ll have to wait until next weekend.
Amongst working on Scarlett, I fiddled with Glinda trying to get her roadworthy again. I pulled back the carpet to find the end of the clutch cable and inserted it back in its place. I hooked up the clutch linkage, fuel lines (with a fresh filter), and battery, and tried to start the engine. The latter activity didn’t go so well as the engine just spun and spun and refused to fire. I pulled out the timing light to check for spark and found there was none. I hooked up the dwell-meter and found there was none. Arghh. After adjusting the dwell, the engine fired right up, but as I revved it, I watched the dwell-meter’s needle jump around – not good. Since this was occurring with the vacuum advance hooked up, I surmised the points’ plate had play in it. Knowing I had the electronic ignition to install which would solve this problem, I didn’t get too upset. On second thought, isn’t this a fairly new points’ plate?
At that point it was time to put the tools away, and call it a day. The only problem was I had a bench seat sitting in the driveway – a bench seat that wouldn’t fit in Glinda while the racing seat was still installed. I lugged the heavy seat into the garage and it’s now sitting on end blocking the path around the back of Scarlett.
Tuesday, October 21, 2014
Wonderful Weekend of Work
It ended be a very car-full weekend for me. Along with changing the oil and filter in the truck and the lovely Loriann’s daily-driver, I got to spend more than three hours of quality time with Mikhaila working on her car Saturday. I had her clean the engine’s sheetmetal pieces; remove the rusted muffler hanger and disassemble it to prep the bracket for painting; clean a set of sparkplugs, gap, and hand-tighten them into the heads; and finish cleaning the seats.
While she was laboring away, I did the minimum repairs necessary to get Ringo roadworthy. I need to take the lovely Loriann’s car off the road to replace a front wheel bearing, so a Corvair must be pressed into daily-driver service. Since Glinda was still many hours of reassembly away from being drivable, Ringo was the best candidate. There were two issues that were keeping him in the driveway – a broken muffler strap and a seized carburetor shaft. I removed his left carb and thoroughly soaked the throttle shaft with penetrating fluid, working the shaft back-and-forth until it moved freely and completely. With the carb bolted back to the head, I went hunting for the replacement strap I’d bought from the Corvair Ranch a couple months back. I could’ve sworn it was in a small box of parts, but after fifteen minutes of fruitless hunting for the package, I decided to check my shelf of GUPs and GNPs, and there it was – in the cubby marked Exhaust. Go figure. I’d actually put it away. A few minutes of fiddling and Ringo’s exhaust system is now properly restrained. Since his starter has been very reluctant of late to function properly, it was quite a surprise when a turn of the ignition key resulted in a spinning engine. It fired up almost immediately and settled into a clanking-filled idle (a lifter bled down). After about fifteen minutes of idling, the noise went away and I took him for a test drive around the neighborhood. It took a few stops before the rust was rubbed off the drums and the brakes stopped grabbing and squeaking. It’s strange to see an EM parked in front of the house – it’s been a very long time.
Sunday it was Glinda’s turn. As I left off in last weekend’s antics, I needed to install a helicoil before reassembly could commence. I cut the new threads using the supplied tap and followed that up with the helicoil twisted in to the prescribed depth. The last step in the repair was knocking off the tang which I accomplished with make-shift punch.
Next, the drivetrain halves (engine & transaxle) had to come together. Amazingly, after installing the input shaft onto the engine, I got the transaxle to slide into place without any problem. The bolts that hold the halves together were then installed and the drivetrain was pushed into position and lifted into place. I had to remove the center rear seal retainer to get the edge of the oil filter housing to clear. It took some jockeying up and down and back and forth, but by lunch I had the back of the engine attached to the rear motor mount.
Next was the front of the drivetrain. The three bolts that hold the transmission to the crossmember went in nicely. I held my breath as I carefully torqued the one bolt into the newly repaired hole, but it pulled the joint together just fine. With the jacks out of the way I moved on to reinstalling the u-joint caps on the differential hubs. Remembering to use the ratcheting strap to pull the wheels together, this task was quickly completed followed by bolting up the brackets at inner ends of the strut rods. That job went quicker than expected, so in not time I was realigning the shifter coupling with the transmission shift shaft. Once centered, I installed the pin, washers, and cotter pin. Next on the list were the throttle linkage pieces. I found the new rubber grommet that I’d bought and popped it into the hole in the transmission pivot plate before poking the ends in and retaining them with the little c-clips (my caution was rewarded by me not having any pop off into oblivion. The clutch linkage assembly was supposed to follow, but, after getting the engine side of the linkage attached, I discovered the pedal end had popped out of place and wasn’t connected to the pedal anymore. That was a show stopped since I’ll have to pullback the carpet, remove the cover, find the end amongst cables and brake lines, and then put back in place. There needs to be a retainer that holds this stupid thing in place if tension is taken off it.
Sliding out from under the car for the umpteenth time, I spent the last half-hour before dinner putting things right in the engine compartment. That included reseating the engine seal; connecting the ground strap, ground cable, and oil pressure switch; putting the fanbelt back on; and installing the air cleaner. All that’s left on the topside is to connect the battery.
Thursday, October 16, 2014
Suspicion Confirmed

As most of my free time over the last couple weeks has been devoted to house projects, there hasn’t been much going on in the garage or driveway. However, I was able to spend a couple hours working on Glinda last Sunday. Previously, I’d removed the starter, disconnected clutch, shifter, and throttle linkages, and unbolted the transmission from the cross-member. That left disconnecting the drive axles, strut rods, fuel lines under the car and disconnecting the electrical plugs in the engine bay which I made quick work of. With the transmission and ATV jacks in place, I removed the two nuts at the rear engine mount and lowered the drivetrain down. At that point, I remembered the exhaust system had to be removed, so back up went the jacks, off came the four nuts and muffler hanger and the exhaust from free. With the jacks lowered again, I unscrewed the remaining bolts holding the trans-axle to the bellhousing. With the help of a prybar, I separated the engine from differential and exposed the clutch area. With the pressure plate and clutch disc removed, my suspicion was confirmed – I had left off the ring that was supposed to be under the heads of the flywheel bolts. I grabbed the ring off the workbench, and, with the aid of air tools, had all the clutch parts properly assembled in less than fifteen minutes.
Now all that stands between me and an installable drivetrain is bolting the trans-axle back to the bell housing and helicoiling the stripped transmission hole. Maybe Saturday.
Monday, September 29, 2014
The Beat Goes On


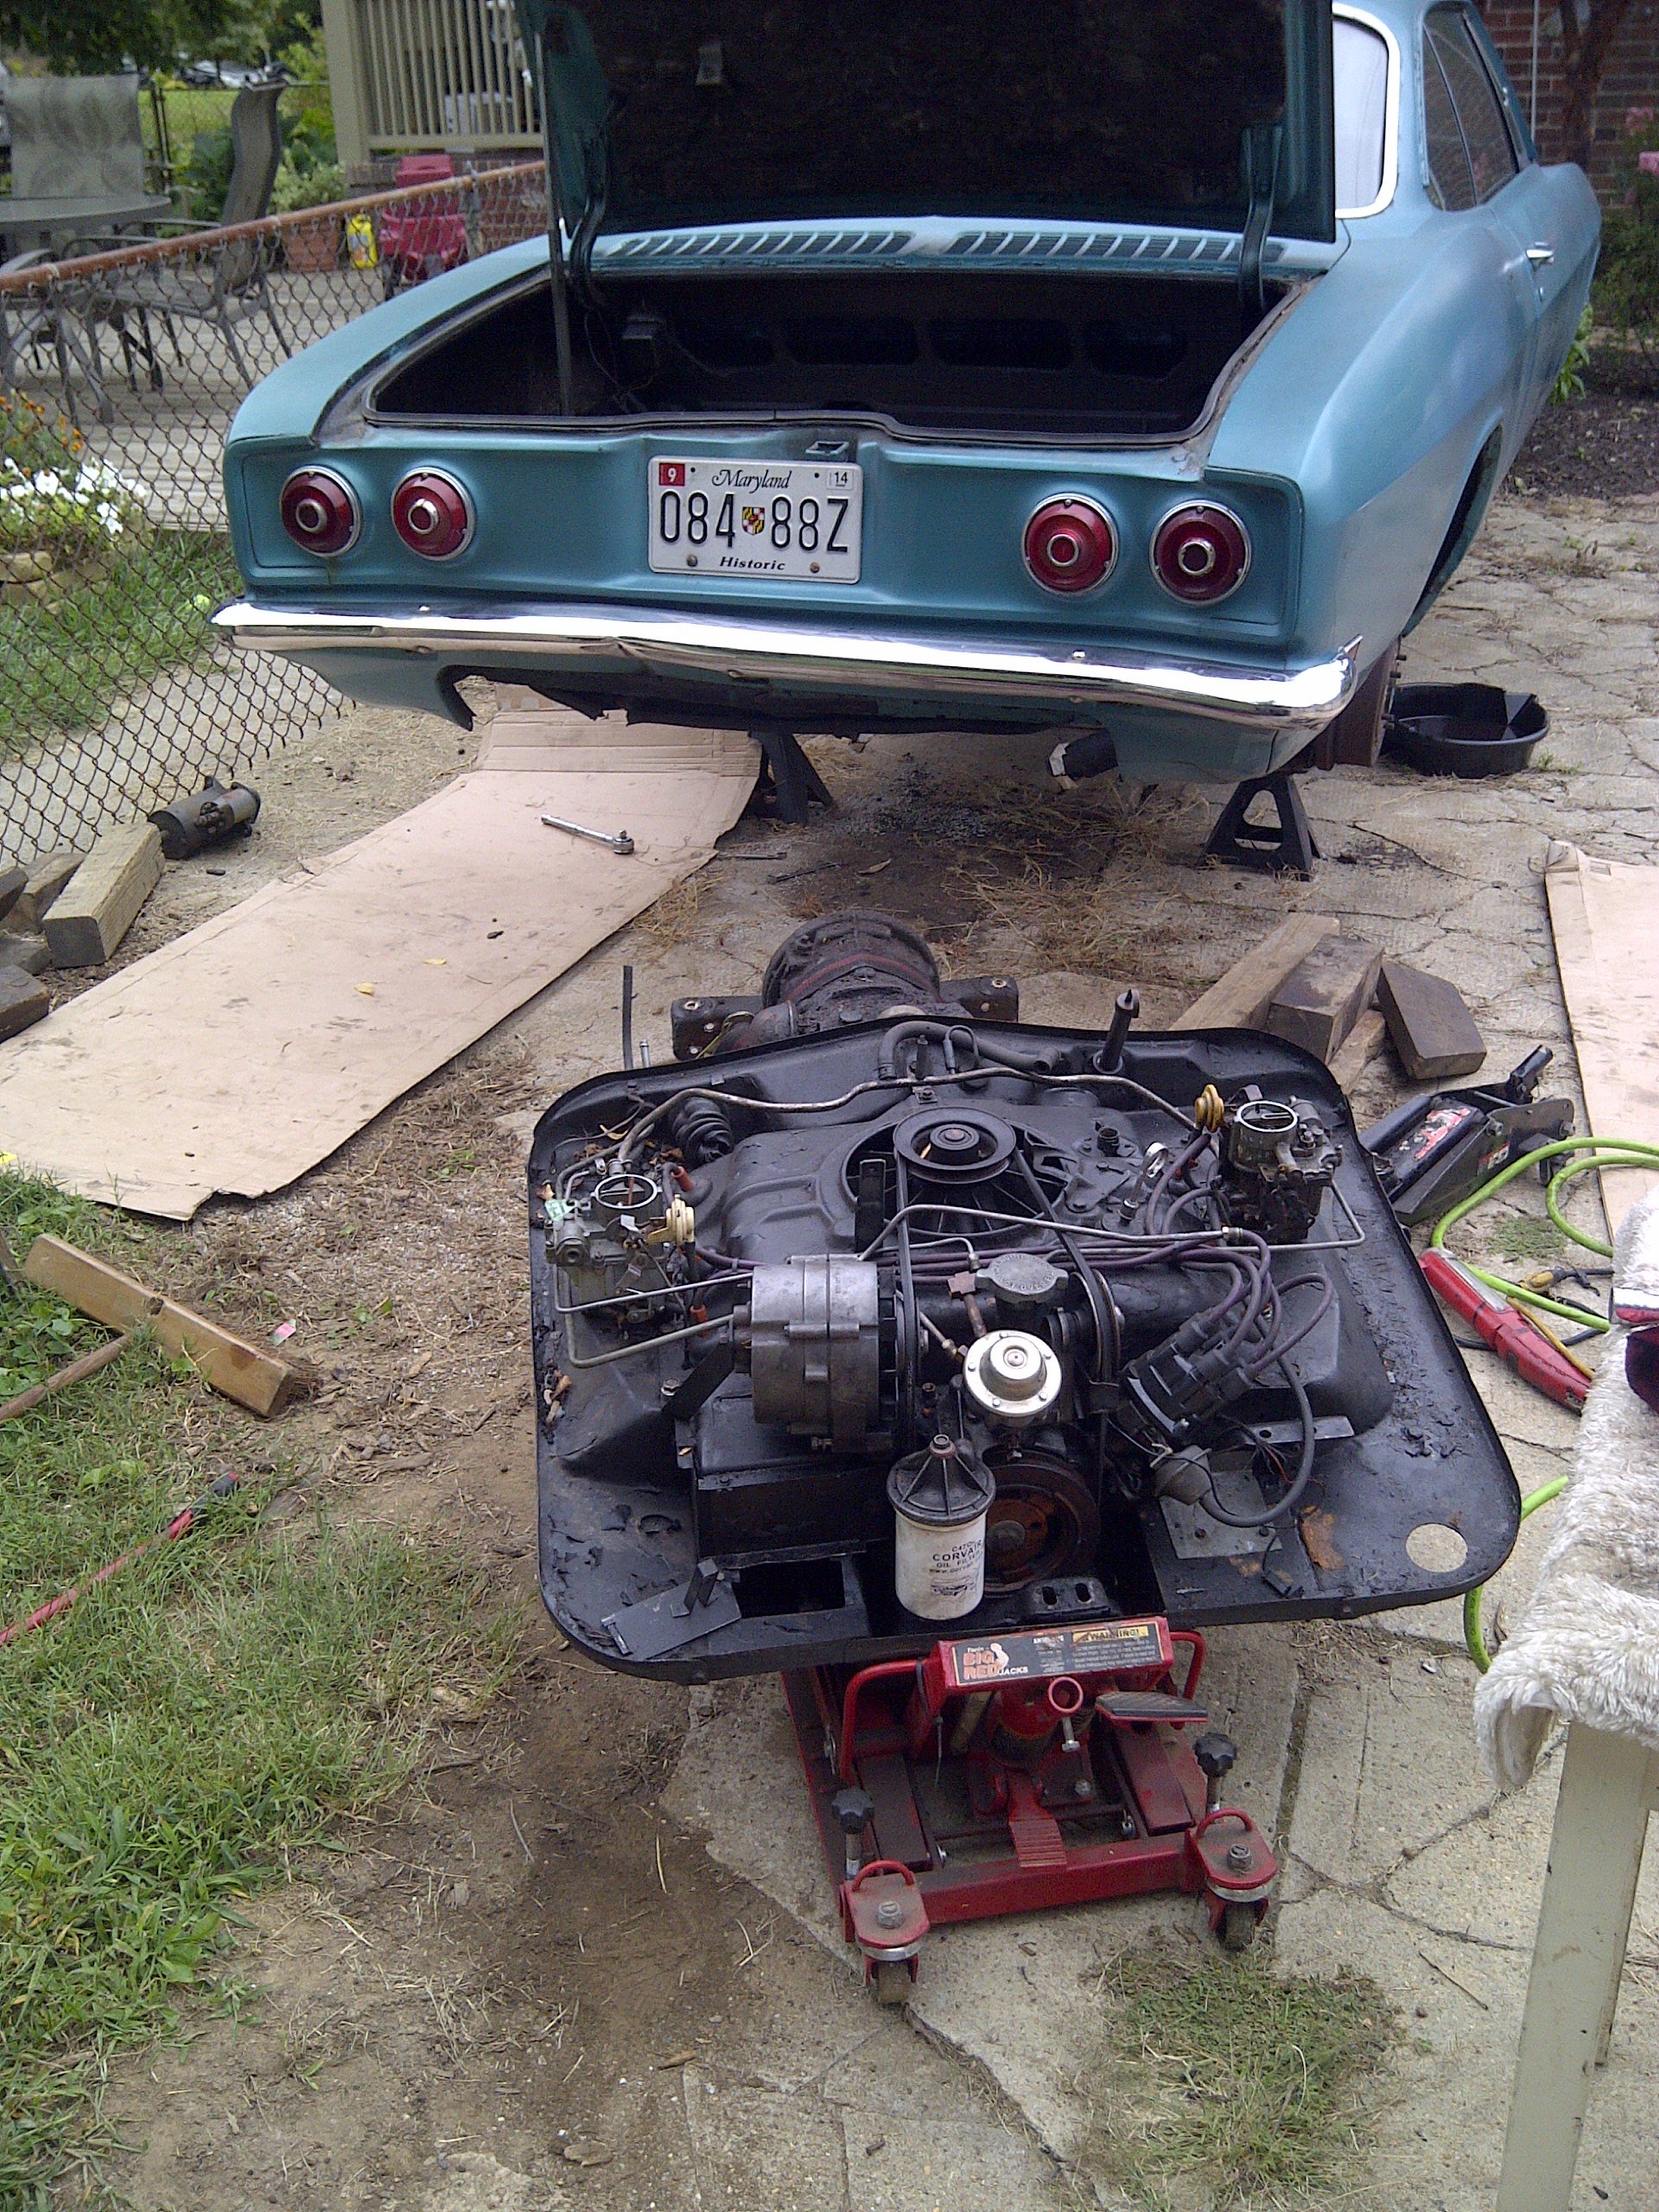
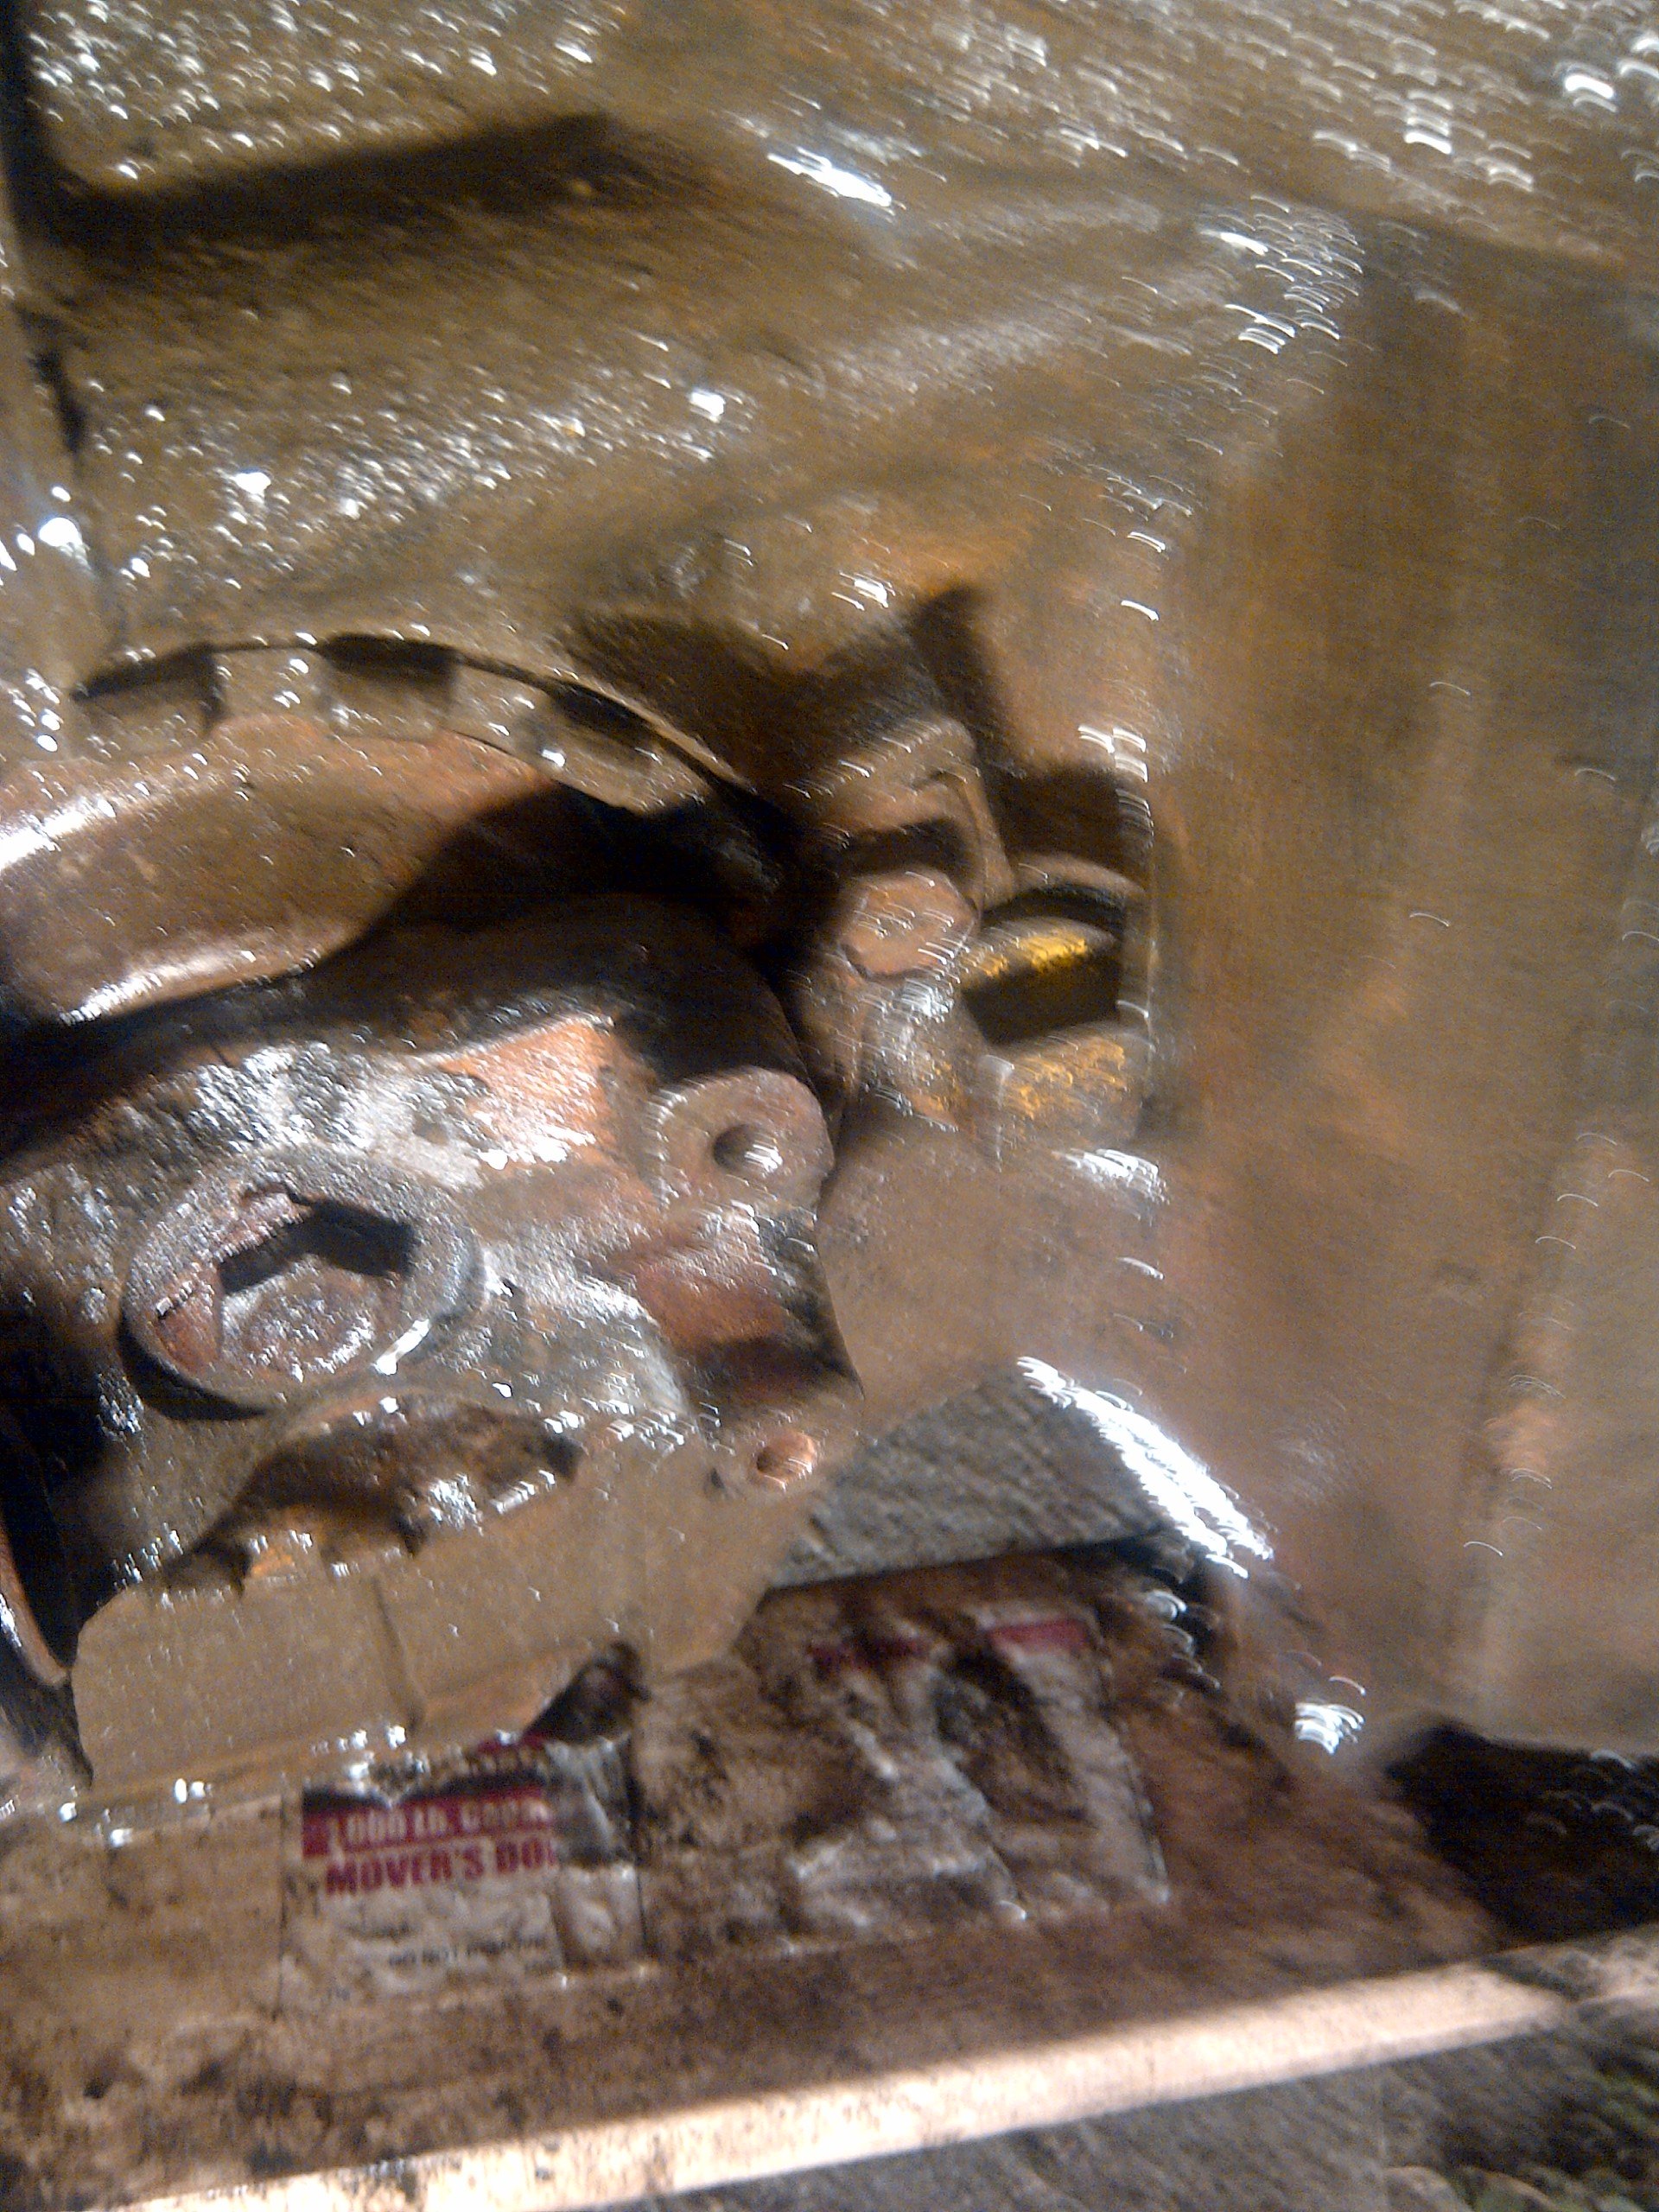
After two hours, the mosquitoes starting biting, so I released her to go inside, and I turned my attention to Glinda. Since I was already dirty and there was a couple hours before dinner, I thought, “what the heck.” After placing her rear up on jackstands high enough to get the tires off the ground, I set the ignition to ON, and shorted the purple starter wire to the positive battery terminal to make the engine spin. As soon as the engine started turning, I heard and felt some clunking that I perceived as coming from the starter/clutch area. After a second or two of slow turning, I decided to pursue investigating that area before starting the engine. I slid under the car and removed the starter and took a series of photos slightly rotating the engine between shots. I didn’t really see anything significant like bits of metal or broken teeth, but I didn’t go more than forty-five degrees or so before moving on.

One issue that I definitely needed to address to rule out as a cause of the banging was the ineffective bolt hole in the front of the transmission. This stripped hole was allowing the drivetrain to shift from its designed orientation. I removed the loose bolt, made a quick trip to Home Depot to buy a replacement bolt one size longer, and then slid back under the car to try out my fix. With the other two bolts still snug, I drove the new screw into the hole. Even though I felt I was engaging more threads than before, the gap failed to close and the bolt failed to tighten.
At this point, I knew the only fix would be to install a helicoil in the failed hole. To prep for that operation, I disconnected the clutch, throttle, and shifter couplings, put the jack in place to support the transmission, and removed the bolts holding the trans to the support. I then lowered the trans to ensure I could get access to the bad hole (which I could). After that I placed the transmission on a jackstand and put all the tools away.
Once I was cleaned up, I went to Amazon.com and placed an order for 3/8-16 helicoil kit. It should arrive in a couple days.
Thursday, September 25, 2014
Money Still Being Spent
While I may be ignoring Glinda and her issues, it doesn’t stop me from I was perusing the entries in the CorvairCenter forum when out jumped one entitled, ‘for sale " Pert 2"’ A Pert 2 (actually called a Pertronix Ignitor II) is an electronic ignition module that fits under a stock distributor cap and replaces the points and condenser, and I was going to buy one with THRaF money, but a change in priorities made that $117 purchase unfeasible. Anyway, I clicked on the link and found the seller was only asking $50 for a slightly used one. Cool! I don’t mind used as testified by my Craigslist tendencies. A quick message to the guy, and I was hooked up. I will, however, need to buy a new coil (a Flamethrower 2), but I was going to do that anyway given Glinda’s rough running at higher rpm.
Monday, September 15, 2014
Done With Racecars For a While

Sunday afternoon Mikhaila joined me in the garage for some quality Corvair time with her car. While I returned to Luna her borrowed wheels, Mikhaila continued cleaning Scarlett's (this post marks the date where she agreed to give her car a decent name in place of RedVert) seats. So far it appears the original upholstery will be usable.
 Once Luna was down on the ground and the jackstands were available, we put Scarlett up in the air and removed her wheels to give us access to the hub ends of the brake system. I had given Mikhaila options as to where we start first on her car: engine, brakes, bearings, fuel. She chose brakes. We’ll be doing this job in stages with stage 1 being inspection of what’s there. From what we could see, the lines and hoses are actually in pretty good shape, but we’ll be replacing the rubber hoses anyway. To improve access to the rear fittings, we undid the outer ends of the heater ducts. While under the car, I noticed the exhaust pipe has rusted through in one spot, so I decided we should also remove the exhaust system which helped with brake fitting access as well. We sprayed both ends of all four hoses before moving on.
I’m anxious to determine the condition of the engine, so Mikhaila and I went to work prepping the engine for starting. After removing the spark plug leads, we discovered mice had moved heater box insulation to the volume under the Upper Shroud (turkey roaster). That meant that we needed to remove that shroud to clean out all the finned passageways of the heads and jugs.
 We accomplished that in surprisingly quick order by removing the alternator (this EM’s been modified), the vacuum balance line between the carburetors, the PCV valve tubing, and all the screws holding the shroud in place. Since the top shroud is sandwiched by the front shroud, the three screws for that piece had to be loosened. With the top now free, we finagled it off the engine. Mikhaila then gave each spark plug a generous shot of penetrating fluid which we decided to let sit and work its magic for a day or so.
Some of the parts Scarlett is missing include the side shrouds. John had allowed me to go through his stash of used parts and I did uncover a side shroud, but it ended up being for a turbo engine, and won’t work for us. The last task for Mikhaila and I before knocking off for the day was to go through my GUPs and see if I had the sheetmetal that Scarlett required. We found side shrouds (with good seals), a rear engine mount cover, and a couple lower shrouds (both with good thermostats). I really need to get rid of all the excess crap I’m keeping on shelves. It makes it very difficult to find the right GUP. Wait, the crap are the GUPs.

Tuesday, September 9, 2014
It Was Fun While It Lasted
My day at the track was fantastic while it lasted. Yesterday morning I pulled into the paddock around 7:30, and, after tightening a wheel bearing nut, got Glinda to pass tech inspection. While waiting for the 8:30 drivers' meeting, I walked over to drool all over a super-cool '68 Model 500 and meet Geoff Flynn and Mike Pietro. I’d been communicating with Geoff on Facebook for the past few weeks following his documenting the work they’d been doing on the car. They, like me, took it to the wire on making some significant modifications to Mike's 27,000 mile, basically original car which they then drove down from Albany, NY for the day. A couple of great guys.
While we were chatting, Smitty Smith walked over to join our conversation. He’s an older gentleman with MANY years of wonderful Corvair experiences. I could stand and listen to his stories for hours, but we were being called over for the driver’s meeting.
I sat down in front of John Egerton, a fast driver with a rare EM racercar. He had to hassle me about “going over to the dark side” (my decision to sell my EM street/track car and focus on racing a LM). After being instructed on how the day would be run, Group A (the non-Corvair cars) racers headed out onto the track for 20 minutes of getting acquainted with the twists and turns of the Thunderbolt circuit. I was in Group C, so I took advantage of the wait by driving around the paddock area to heat up Glinda's transmission. Shifting into first, when she's cold, is almost impossible. I needed to engage third, let the clutch out, and then second and let the clutch out before I could get first gear. Frustrating, but at least all the up- and down-shifts seemed fine between second, third, and fourth.
When I returned to my parking spot, I found my newly arrived neighbors were Brett Aston and his son. I’d met Brett at the 2012 Convention Autocross, where we ran in the same group, so we’d spent a lot of time chatting while waiting for our turns. A really nice guy with the fastest 2-carb ‘vair I’ve seen (I’m sure a good part of that speediness is his skill behind the wheel).
Finally, it was my group's turn to enter the track. I lined up second on the pit lane behind Brett, and, after he was through turn 2, I was waved onto the course. Soon after heading out, raindrops appeared on the windshield, but fortunately it wasn't anything more than a slight drizzle - the track never looked or felt wet. The first two laps were run under yellow flags to keep our speeds down, but after that, they cut us loose. I drove another eight or so laps, braking later and accelerating sooner at each corner. Most of the turns were taken in third gear, while a couple were fast enough that they could taken in fourth. Two annoyances quickly reared their heads. First, hard turning would cause the engine to bog (running only one race-modified carb), and, second, the engine didn't want to pull much higher than about 4500 rpm in third and less in fourth. At the end of the front straightaway, the speedometer's needle was bouncing, but I think I the engine was turning around 4300. That calculates out to about 90 mph.
I actually passed someone on the track – an experience I’m not really used to. Another unusual occurrence for me was that throughout my track time, no one came up behind me.
Way too soon, the black flags came out signaling us to exit the track since our twenty minutes were up. As I coasted into the pit, I heard a racket coming from Glinda’s rear end and saw the tachometer bouncing around. After parking near the truck, I pulled off my helmet, unbuckled my harness, climbed out, and immediately popped the hood of the still-banging engine compartment. Nothing appeared loose, but it was making a metal-hitting-metal sound. As soon as I gave the throttle a little blip, the noise went away immediately only to come back as soon as the rpms dropped back to idle. One of the racers walked by and told me it was just a starved lifter clattering, but I didn't believe him. Brett came over and thought it sounded like a noise his car had made when one of the transmission mounting bolts had come loose. Remembering that one of the three bolts attaching the transmission to the crossmember never really torqued up, I jacked up the right side, lowered it onto a jackstand, and slid under to investigate. Sure enough, the bolt had backed out and there was now an eighth-inch gap. I grabbed a wrench and with only some optimism started tightening the bolt. As soon as the gap started to close, I'd hear a pop and feel the bolt loose its torque - a stripped hole. Brett went through his collection of spare parts, but couldn't find a new bolt. I was sent to the trailer of another racer who, it was thought, would have a helicoil, but he didn't.
Knowing I had to have all four of her wheels spinning to get her home, I made the hard decision to hitch Glinda back up to the truck and go home. I'd been fighting a head cold, and I didn't have a decent camera with me, so I was not enticed to hang around to take any videos or photos. While I was packing, John wandered over to find out what was going on and to share a couple great David and Goliath stories where he and his unsafe-at-any-speed car beat some impressive competition. A nice way to end my time at the track – a reminder that it’s the people, not just the track time that make me enjoy these events so thoroughly.
After a long two-and-a-half hour drive home, I pulled up in front of the house. Later, I unhitched Glinda from the truck and fired up the engine. The noise sounded worse, but I was able to get her backed up the driveway and parked by the garage.
Combining the shifting problems and the noise, I’m more inclined to point my finger at something inside the transmission. I will, though, helicoil the stripped hole and get everything back in line before I go pulling the transmission apart. But NONE of that's going to happen any time soon. I'm done with working on Glinda for the foreseeable future. All my Corvair time is going to be spent working on Mikhaila's car.
Highlights of the day were: spending time with Corvair racers, getting some green flag time while being oblivious to my car’s woes, listening to the awesome-sounding engines as they raced around the track and cruised through the paddock.
It’s All in the Prep

Last Friday night seems like a week ago already; so much has happened since then. I’ll put off my write-up on yesterday’s track event for a second blog post.
Friday evening I had some driveway time available to me, so I took on the task of giving Glinda a tune-up. I’d sprung for the good stuff when I placed my order with Clark’s so I was optimistic that, once done, she’d run smoothly up into the higher revs. The job went surprisingly well. I got the new points and condenser installed without dropping any of the tiny screws – TYL. I got the plugs changed without stripping out any threads - TYL. I got the rotor and cap changed without crossing any wires. With all the new parts in, I adjusted the point gap to an indicated 34 degrees on the dwell-meter and the distributor twisted to an indicated 12 degrees BTDC (before top dead center) on the timing mark. With that done, I cut down and installed the two-and-a-quarter inch tailpipe I’d recently bought. This would ensure that the hot exhaust gasses would exit aft of the car’s body. While I was fitting the pipe, I discovered the bracket I’d clamped to had broken, so I needed to re-clamp – this time grabbing more metal under the clamp.
Saturday, the lovely Loriann posited, “Wider tires means a safer car, right. Well, put the longer studs on.” With that encouragement I dove into the stud replacement project. Starting at Glinda’s right front, I jacked up the right side of the car, supported it on a jackstand, removed the front wheel, followed by the drum, and finally the hub. With a lugnut in place over the end of each stud, I whacked them all out with a hammer and then, using a washer-backed lugnut and my ½ inch impact wrench I pulled each new stud until the knurl was fully seated in the hole. The other front hub went the same way, while the rears had to be done with the hubs still in place.
Once all the studs were in place and the hubs and drums reinstalled, I mounted the IROC wheels and lowered the car back onto the driveway. With some driveway-time still available, I proceeded to install the new throttle linkage kit I bought with THRaF money. It was more of a challenge than I’d anticipated and the end of driveway-time came before it was completely installed. I set the alarm clock for early Sunday morning, and finished the job before the lovely Loriann left the bed.
It took another hour or so that evening to pack parts and supplies in the back of the truck, drive Glinda to the gas station to put fuel in her tank as well as fill two five gallon jugs with hi-test, and, finally, hitch her up to the truck.

Friday, September 5, 2014
Still Trying to Thwart Me at Every Turn
Last evening was supposed to be simple – just bolt on the IROC wheels and take Glinda for a test drive. Instead it ended up being a frustrating evening of Glinda still fighting me on every task.
I should have known that just bolting on cast aluminum wheels in place of stamped steel would not work, but, optimist that I am, I thought the included lug nuts would, like they did on Lucy, accommodate the increased thickness of the wheel. They did not. That left me with a decision; put the stock wheels back on which would, within the next two days, need to be replaced (wouldn’t take them on the track), or remove Luna’s wheels and put them on Glinda as I did when she went to this summer’s convention. The former would require me to buy longer wheel studs, install them into the hubs, and then mount the IROC wheels – all before Monday morning. The latter means I’m good-to-go, just not with the wider, lower-profile tires I’d hoped to go with. Given all the time this project has sucked up, I went with the latter with the option to revert to new studs if time allowed. So an hour later, Luna was up on jackstands, and Glinda was finally wheels down.
At that point, I believed the last required task would be to back the car up on ramps and tighten the stabilizer bar bracket bolts. Sadly, it could not be that easy. Even though I had confirmed a couple times I could shift into all five gears, when it was actually required to happen Glinda said no. I’d pulled forward in the driveway until I was facing Ringo, then when I tried to engage reverse, I got nothing. After ten minutes of struggling, I gave up and got out the jack and jackstands. With Glinda’s rear back up in the air safely on jackstands, I slid underneath and adjusted the shifter by loosening the clamps, slightly rotating the coupler inside the shift rod, and re-tightening the clamps. That did it. With that small adjustment, reverse was available, as were all the four forward gears.
Next, I backed her up on the ramps to do the aforementioned bolt torquing. At this point, since I was already deep into the evening, I decided to quickly deal with adjusting and swapping back on Glinda’s right-side racing carburetor. I pulled the top off the carb, bent the float’s tang so it would shut off the needle-and-seat sooner, and, after removing the borrowed carb, bolted the tweaked one on to the head. Finally it was time for a test drive. It went well, other than the issue with that one carb is still there. I was able to shift through gears, although it will take some practice to always smoothly engage first thru fourth.
Back in the driveway, I added to my euphoria by emptying the rest of the gas jugs’ contents into Glinda’s gas tank and joyfully watched the needle climb towards ½ full when I turned the key to ON.
Being’s it was then nearly bedtime, I called it a day on the high note.
This morning I was on the CorvairCenter forum to find a wheel stud part number (Dorman 610-157), and then on the phone with Napa trying to find twenty of them. I succeeded in that it only took trips to the two nearest stores to round up the four wheels worth.
Regarding the still misbehaving carburetor, I’m going to first install the new plugs, points, rotor, condenser, and cap, and set the dwell and timing before I go any farther. I read somewhere that ninety percent of fuel issues are electrical. If that doesn’t solve the poor acceleration, I’ll try swapping the top from the borrowed carb onto the racing carb and see what happens. If it’s still a fail, I’ll revert back to the borrowed carb even though high-speed turns may cause a partial cut-out.
Thursday, September 4, 2014
No Duals for Glinda
After a prolonged battle, I had to give up on installing the dual exhaust. When I test-fitted the left-side Flowmaster muffler, It sat right next to the valve cover – not even enough room to fit a heat shield. I’m not sure what this pipe was designed to do, but it can’t be used with a muffler. Once that decision was made, I grabbed the nearest usable stock exhaust pipe and was thrilled to find it had two reasonably useable gaskets on the input ends and an adapter on the output end. So, only one more adapter was needed to go from two-and-an-eighth to two-and-a-quarter. One pipe clamp later and the inlet was done.
The outlet end of the muffler needed to restrained, and, stock-wise, this is done using a metal strap attaching the muffler body to a hanger bolted to the engine. Sadly, I then found out the stock strap is too short to go all the way around the fatter Flowmaster, so I ended up using a hose clamp run through an opening in the hanger’s flange and then around the muffler’s output tube. Stock, non -turbo Corvairs all have ninety degree elbows on their muffler outputs to aim the exhaust to the side. With the smaller diameter stock pipes, the elbow turn is pretty tight, but with the two-and-a-quarter inch Flowmaster outlet, the elbow on the shelf at Advance Auto had too large a radius to allow it to fit between the end of the muffler and the car body. That meant the outlet of the muffler pointed straight at the rear grill. So off that came. Looks more racy.
I then fired up the engine to check for exhaust leaks, and, while it’s not totally sealed, it’ll do for racing. It would be in better shape If I’d spent the hour to remove the old gaskets and use the new ones in Clark's kit, but this condition will have to suffice for now. By the way, while not nearly as cool sounding as Jonathan’s Corsa, the single Flowmaster is a great aural improvement over stock. I need to take a video and post it. As soon as the engine had started, I noticed that the TEMP/PRESS light stayed illuminated. Since the engine was cold and the oil pressure gauge was reading nearly 50 psi, I knew there was an electrical problem. With the engine off, it took only a minute of sleuthing before I found the exposed connector in the engine compartment grounding on the alternator. With the connector moved to a safe location, the light went out as soon as the starter started cranking. Speaking of lights being out, the left taillight wasn’t working. It only took some bending of contacts to put that right. Next, I wanted to feel how close the clutch’s adjustment was. Still up on jackstands and with no wheels mounted, I made sure the rear drums were in place and the parking brake fully on. With engine running, in went the clutch, into first gear went the shifter, and then out came the clutch slowly. About halfway in its travel, the engine rpm started to drop. Wow, that seems just about right. I tried all the other gears and, happily, was able to engage all. TYL for everything.
At that point it was nearing 9 PM, so I called it a night.
All that’s left is mounting the wheels (having gotten the leaky front wheel repaired this morning) and droppin the car off the jackstands before hitting the road. After the test drive, I still need to get the car up on ramps to tighten the stabilizing rod ends (they need to be torqued down with the suspension at ride height).
I’m hoping I’ll also be able to get to adjusting and reinstalling the racing carburetor, mounting the new throttle cross-shaft, and doing the tune-up.
I will definitely need to pack for the track before Monday morning early rolls around.
Wednesday, September 3, 2014
Pipe in Place

Last night I got to do some welding, which I really enjoy (even though I’m not that proficient at it). My task for the evening was to attach the correct flange to the new dual exhaust pipe and then to weld the two halves of the pipe weldment together. Thanks to a buddy at work, I knew how best to align the unwelded part to the rest of the assembly – screw both flanges to a single 2X4. Using another exhaust pipe for the spacing dimension, I did just that. Next I laid a series of beads around the two joints being careful to fill in all the holes. I then took the still-hot piece over to the car and gave it a test-fit. It was not quite aligned, so I pulled it off and gave the longer leg a bit of tweak with the help of a five foot long pipe. As I was lying under the car fitting the pipe into place, the rain started. Fortunately, I’d already put away the welding equipment which I’d using in the driveway, but the falling drops still signified the end of my work day.
Tuesday, September 2, 2014
Could It Have Been Any Harder?
First, I need to get the complaints off my chest. Here are the top twenty hassles I had to overcome during the three day weekend to convert Glinda into a manually shifted Corvair. There were plenty more, but my selective memory has already forgot them.
1. I have the habit of doing the hardest, longest projects - be they house or car – on the hottest, muggiest weekends. This weekend held to that tradition.
2. I had to sand and wire brush most of the paint I’d put on the shifter rod, after confirming Clark’s instructions with their shifter tube bushing kit “if you painted you shift rod, remove the paint.” Arghhh! An hour down the drain.
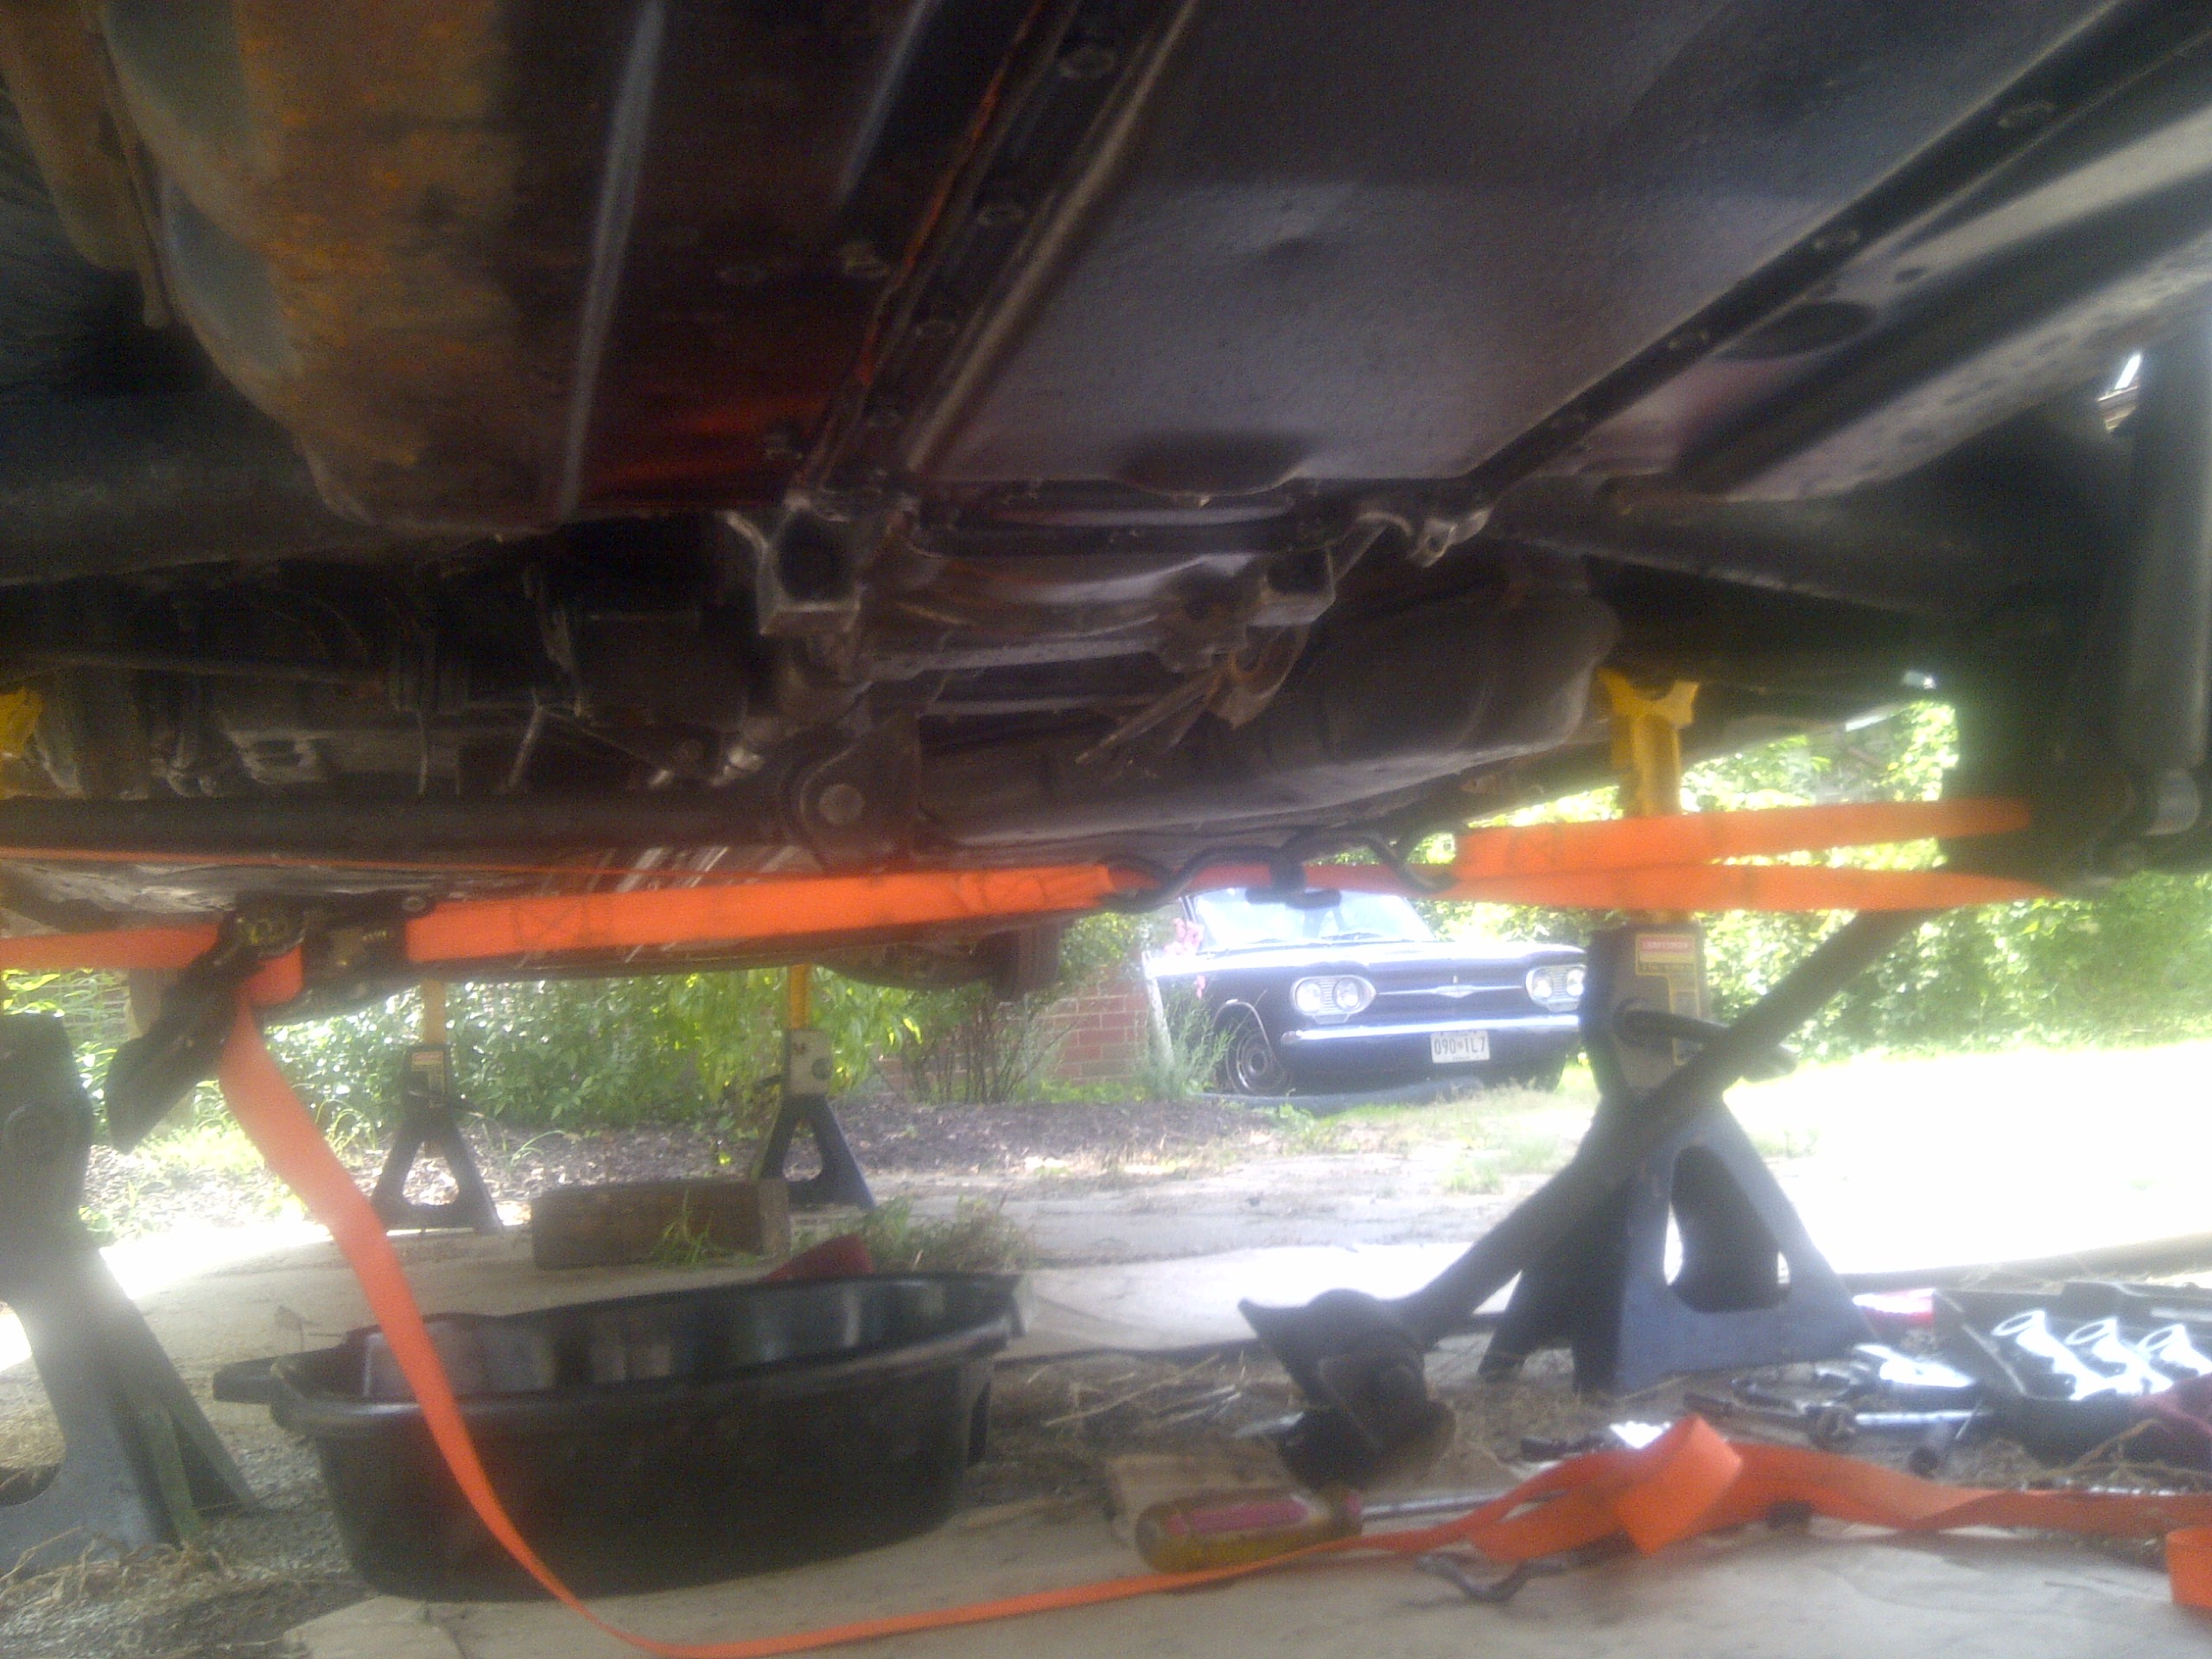
3. It was very depressing to lie on the ground and look up at the rusty underside of a car I’m about to commit my long weekend. I know I won’t even have time to get out the POR-15.
4. Regardless of where I placed my face, rust fell in my eyes.
5. I was reminded that forty-six year-old bolted joints really want to stay bolted. Breaking loose the u-joint bolts carefully enough to not twist off a bolt head is challenging.
6. The plywood I’d planned on using to give me a smooth surface to roll the jacks on being about two inches shy of wide enough, so I was left with rolling smallish wheels over old, heavily cracked concrete.
7. I missed the fact that the generator sticks up enough to catch the perimeter seal while rolling the disconnected and lowered drivetrain out from under the car. Thirty minutes of loosening the retainers and reinstalling the rubber.
8. I found out that a transmission from a ’66 Corvair will not mate to a differential from a ’65 Corvair after bolting the differential to the engine is bummer. I won’t be getting back those three plus precious hours of cleaning, inspecting, and reassembling.
9. I discovered the 5/16 diameter bolts that came out of the ’68 differential will not go into the ¼ diameter threaded holes of the ’65 differential. Overcoming this issue required two trips to Home Depot and two trips to Lowes (don’t ask).
10. I further discovered that normal ¼ bolt hex heads preclude using anything other than an open-end wrench.
11. And I further discovered the ’65 diff yokes are not threaded deeply enough to accommodate the same length strap bolts as the ’66 (hence the additional trips to the hardware store).
12. I realized that new bushings in the shift tube make dead-nuts alignment of the tube to the transmission a must. Now I understand why the stabilizer rod I just straightened needed to be bent.
13. I forgot the differential also bolts to the oil pan. An oily bummer ensued because of that.
14. I noticed the fuel line rubbed on the stabilizer rod unless I installed the sheetmetal piece I neglected to harvest from the ’65 at the Corvair Ranch. At least a half-hour of quality (not) cut-off wheel work on the automatic piece I’d pulled off and I was good-to-go.
15. It took me over an hour of struggling and swearing before I finally remembered I could use a ratcheting strap to pull the rear wheels inboard enough to install the u-joint straps.
16. I spent another hour plus just to get the left side strut rod bolted to the diff after the right side only took fifteen minutes.
17. I forgot to put the clutch rod on top of the strut rod after the last bolt is driven home. Another twenty minutes to undo and re-do.
18. I had the new clutch cable fall off the pedal arm twice.
19. I had to remove the throttle rod pivot four times to provide access for routing the shifter tube, adjusting the shifter tube, tightening the u-joint strap bolts, and installing the bushing that I found lying on the driveway after the previous removal.
20. I did not finish after three days.
Now there were some positive things that occurred through all this, so I’ve created a top twenty of these as well.
1. I have a VERY understanding wife willing to tolerate a bathroom in disarray while I “play” with my car.
2. There are great guys in the Corvair world (thanks Gary, Jeff, and John).
3. Mikhaila was a willing assistant.
4. Physically I can still do this kind of work.
5. Financially I can afford this hobby (thanks Loriann and Dad).
6. The rain held off.
7. I’ve got a nice fan.
8. Nothing fell on me.
9. I didn’t break any bolts.
10. I cut the hole in the carpet in the correct location.
11. Everything eventually fit.
12. I ran the car with the transmission in all gears and there were no squeals or moans (from either the car or me).
13. I happened to still have the early transmission I was supposed to return to my ‘vair buddy John.
14. I happened to have the correct trans-to-diff gasket in my collection of GNPs.
15. Both Home Depot and Lowes were open on Labor Day.
16. Cardboard, zip-ties, and cans of fasteners are indispensable.
17. It’s so nice to have the right tools…
18. …and the right manuals...
19. …and lots of spare GUPs and GNPs.
20. God answers prayers.
With those out of the way, I’ll dive into some details. Friday evening I had hoped to have everything prepped for installation, but was immediately jammed up by the task of installing the new bushings in the shifter tube. That sucked up that night.
Here are all the photos from this swap.
Still left to do. Finish welding, assembling, and installing the exhaust. Find and install a cap over the differential fitting that was used for the now non-existent dipstick. Fire up the engine and adjust the clutch if necessary. Get the leaking front tire re-mounted and install all tires. Drop the car off the jackstands and drive.
Thursday, August 28, 2014
A Draining Evening
Yesterday’s car-time, of which there was plenty, centered around two of the non-fleet vehicles. First, I needed to address the dead trailer lights connector. Unlike the Suburban, the trailer lights have their own circuits and accompanying fuse. This discovery courtesy of the internet (what did we do during the pre-web days). All three fuses (TRLR STOP RT, TRLR STOP LT, and TRLR PRK) were blown. There must have been some issue with the wiring on the U-Haul trailer I rented last month. With the fuses replaced, my voltage checker indicated all pins are go and the truck is ready to tow Glinda to New Jersey.
Next, I prepped the lovely Loriann’s car for this weekend’s trip. She and Victoria are hitting the road for North Carolina. I topped off the air in the tires, coolant in the reservoir, and fluid for the power steering.
With the modern cars dealt with, I was able to draft Victoria into helping me drain the gear lube from the new-to-me differential and transmission. I also opened up the boxes that arrived yesterday - two mufflers from Amazon and a transmission cover and convertible top parts from the Corvair Ranch. According to the USPS and UPS the final two packages from Clark’s (tune-up kit) and Amsoil (synthetic gear oil) respectively are supposed to arrive today. I should now be all set parts-wise to do the swap.
Wednesday, August 27, 2014
Still Finding Time
In the midst of my work and home responsibilities, I am still able to carve out an hour here and an hour-and-a-half there prepping for a big three-day weekend. Last night I looked thought my myriad of parts boxes and cubbies, but could not find any differential output seals. What I did find, however, were GNP engine crankshaft seals. Swapping out old for new on Glinda’s original 110 is now on the to-do list.
For a bit of peace of mind, I did remove one of the differential yokes and closely inspect the seal. It’s in good shape – pliable and the edge is unbroken. As I bent back the tang on the locking washer, I noticed that there was a missing tang. This, I believe, indicates the seals have been replaced since the differential was put into service.
Since this diff had sat around for a number of years, I needed to clean out the grime in the threaded holes. I’d bought some thin wire brushes and one of these was perfect for the job. Once I drain out the old gear oil, it’ll be ready to install.
The final automotive activity of the evening was to find the leak in one of the front tires that’ll be going on Glinda. A spray bottle applied soapy water all over the wheel and bubbles appeared at the tire-to-wheel inside rim joint. Since it’s such a low-profile tire, I’m not going to risk repairing it myself, but will take it to the local Goodyear shop.
Tuesday, August 26, 2014
Big Balance Issue
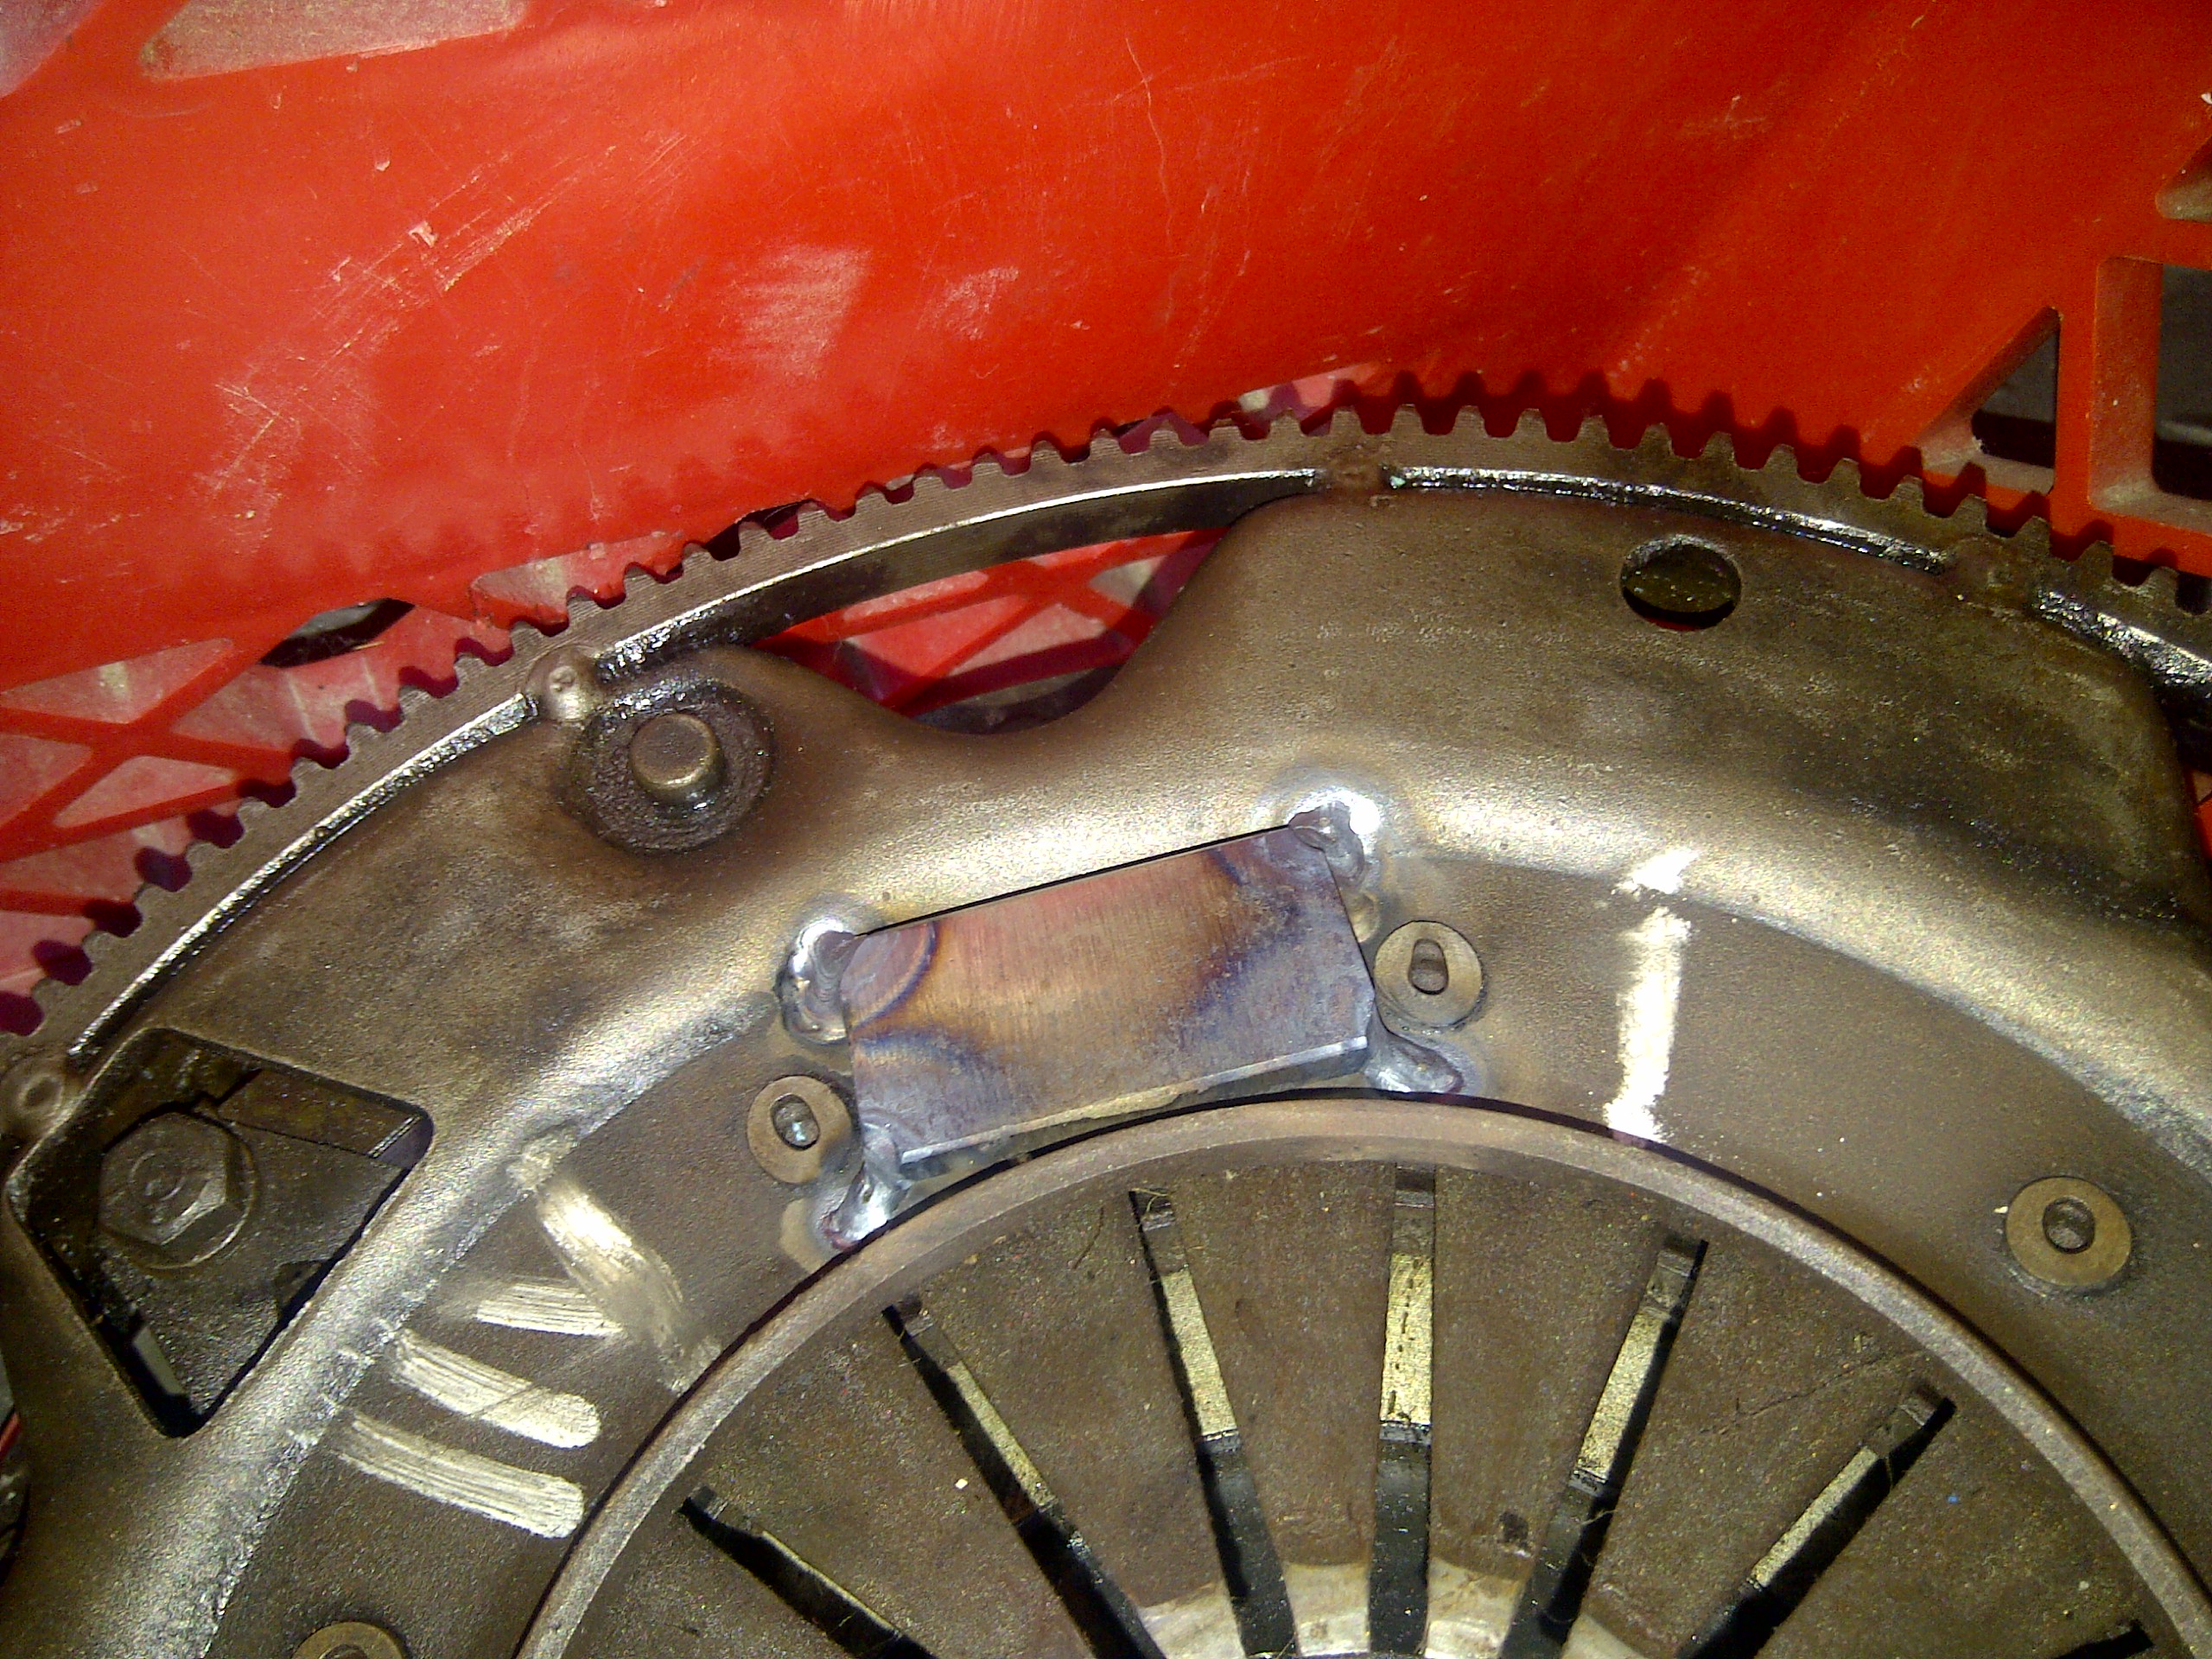
I’m so glad I decided to have the flywheel/pressure plate assembly balanced before installing it into Glinda’s drivetrain. The House of Balance had to weld on a pretty significant chunk of steel to bring the assembly into equilibrium. I’m slightly leery about such a big chunk, but I don’t have a way to check it, so I’m going to trust it was $70 well spent.
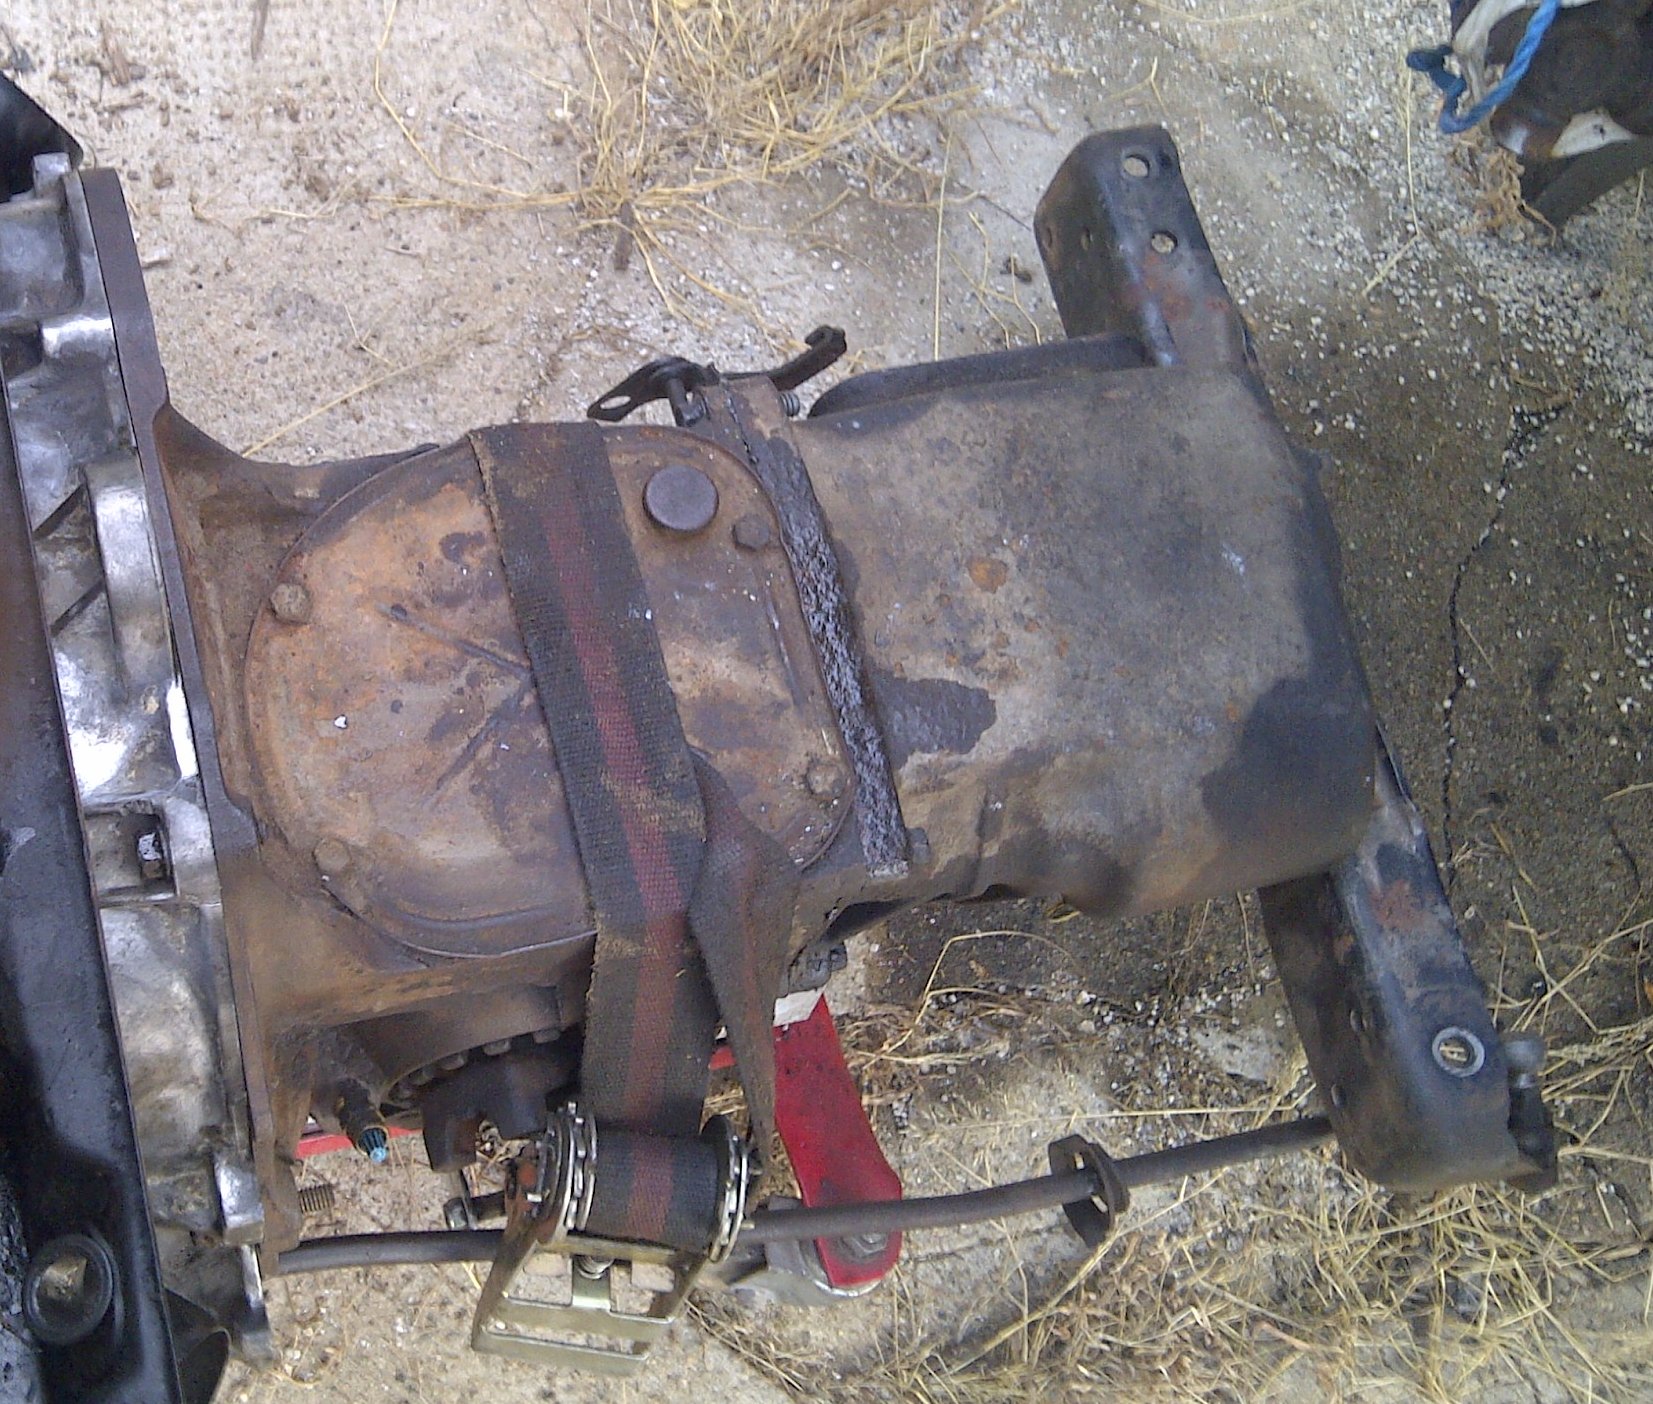
Last night I rolled the differential I’m going to use out into the driveway for a cleaning. This lump had been sitting on the floor of a fellow CORSA member’s garage for who knows how long, but it spins smoothly, so I’m full of optimism. An indication that it’s probably a fairly low mileage unit is the relatively small amount of grime on its outer surfaces. After some scraping and wire brushing, I applied Engine Brite and attacked the surfaces with a nylon brush. Some rinsing with more brushing and the diff was clean enough for me. I’ve got a new gasket, so I’ll pull the cover off and look for broken teeth or untoward wear. My worry with this unit and the transmission is one is going to leak. While I’m replacing gaskets, I’m not touching the seals of which there are three that could weep or worse. Again, fingers crossed on this because I won’t be able to fully test the assembly under temperature and at running speeds and loads until after everything is installed in the car. I need to wait for the arrival of the replacement transmission cover coming from the Corvair Ranch before I can bolt the two together with their covers, fill them with gear oil, and check for leaks. Even if they pass this test, once shafts are spinning and hot, leaks could appear. As I write this, I think I may have a couple of these lying around, and, if so, I may replace them just to be safe.
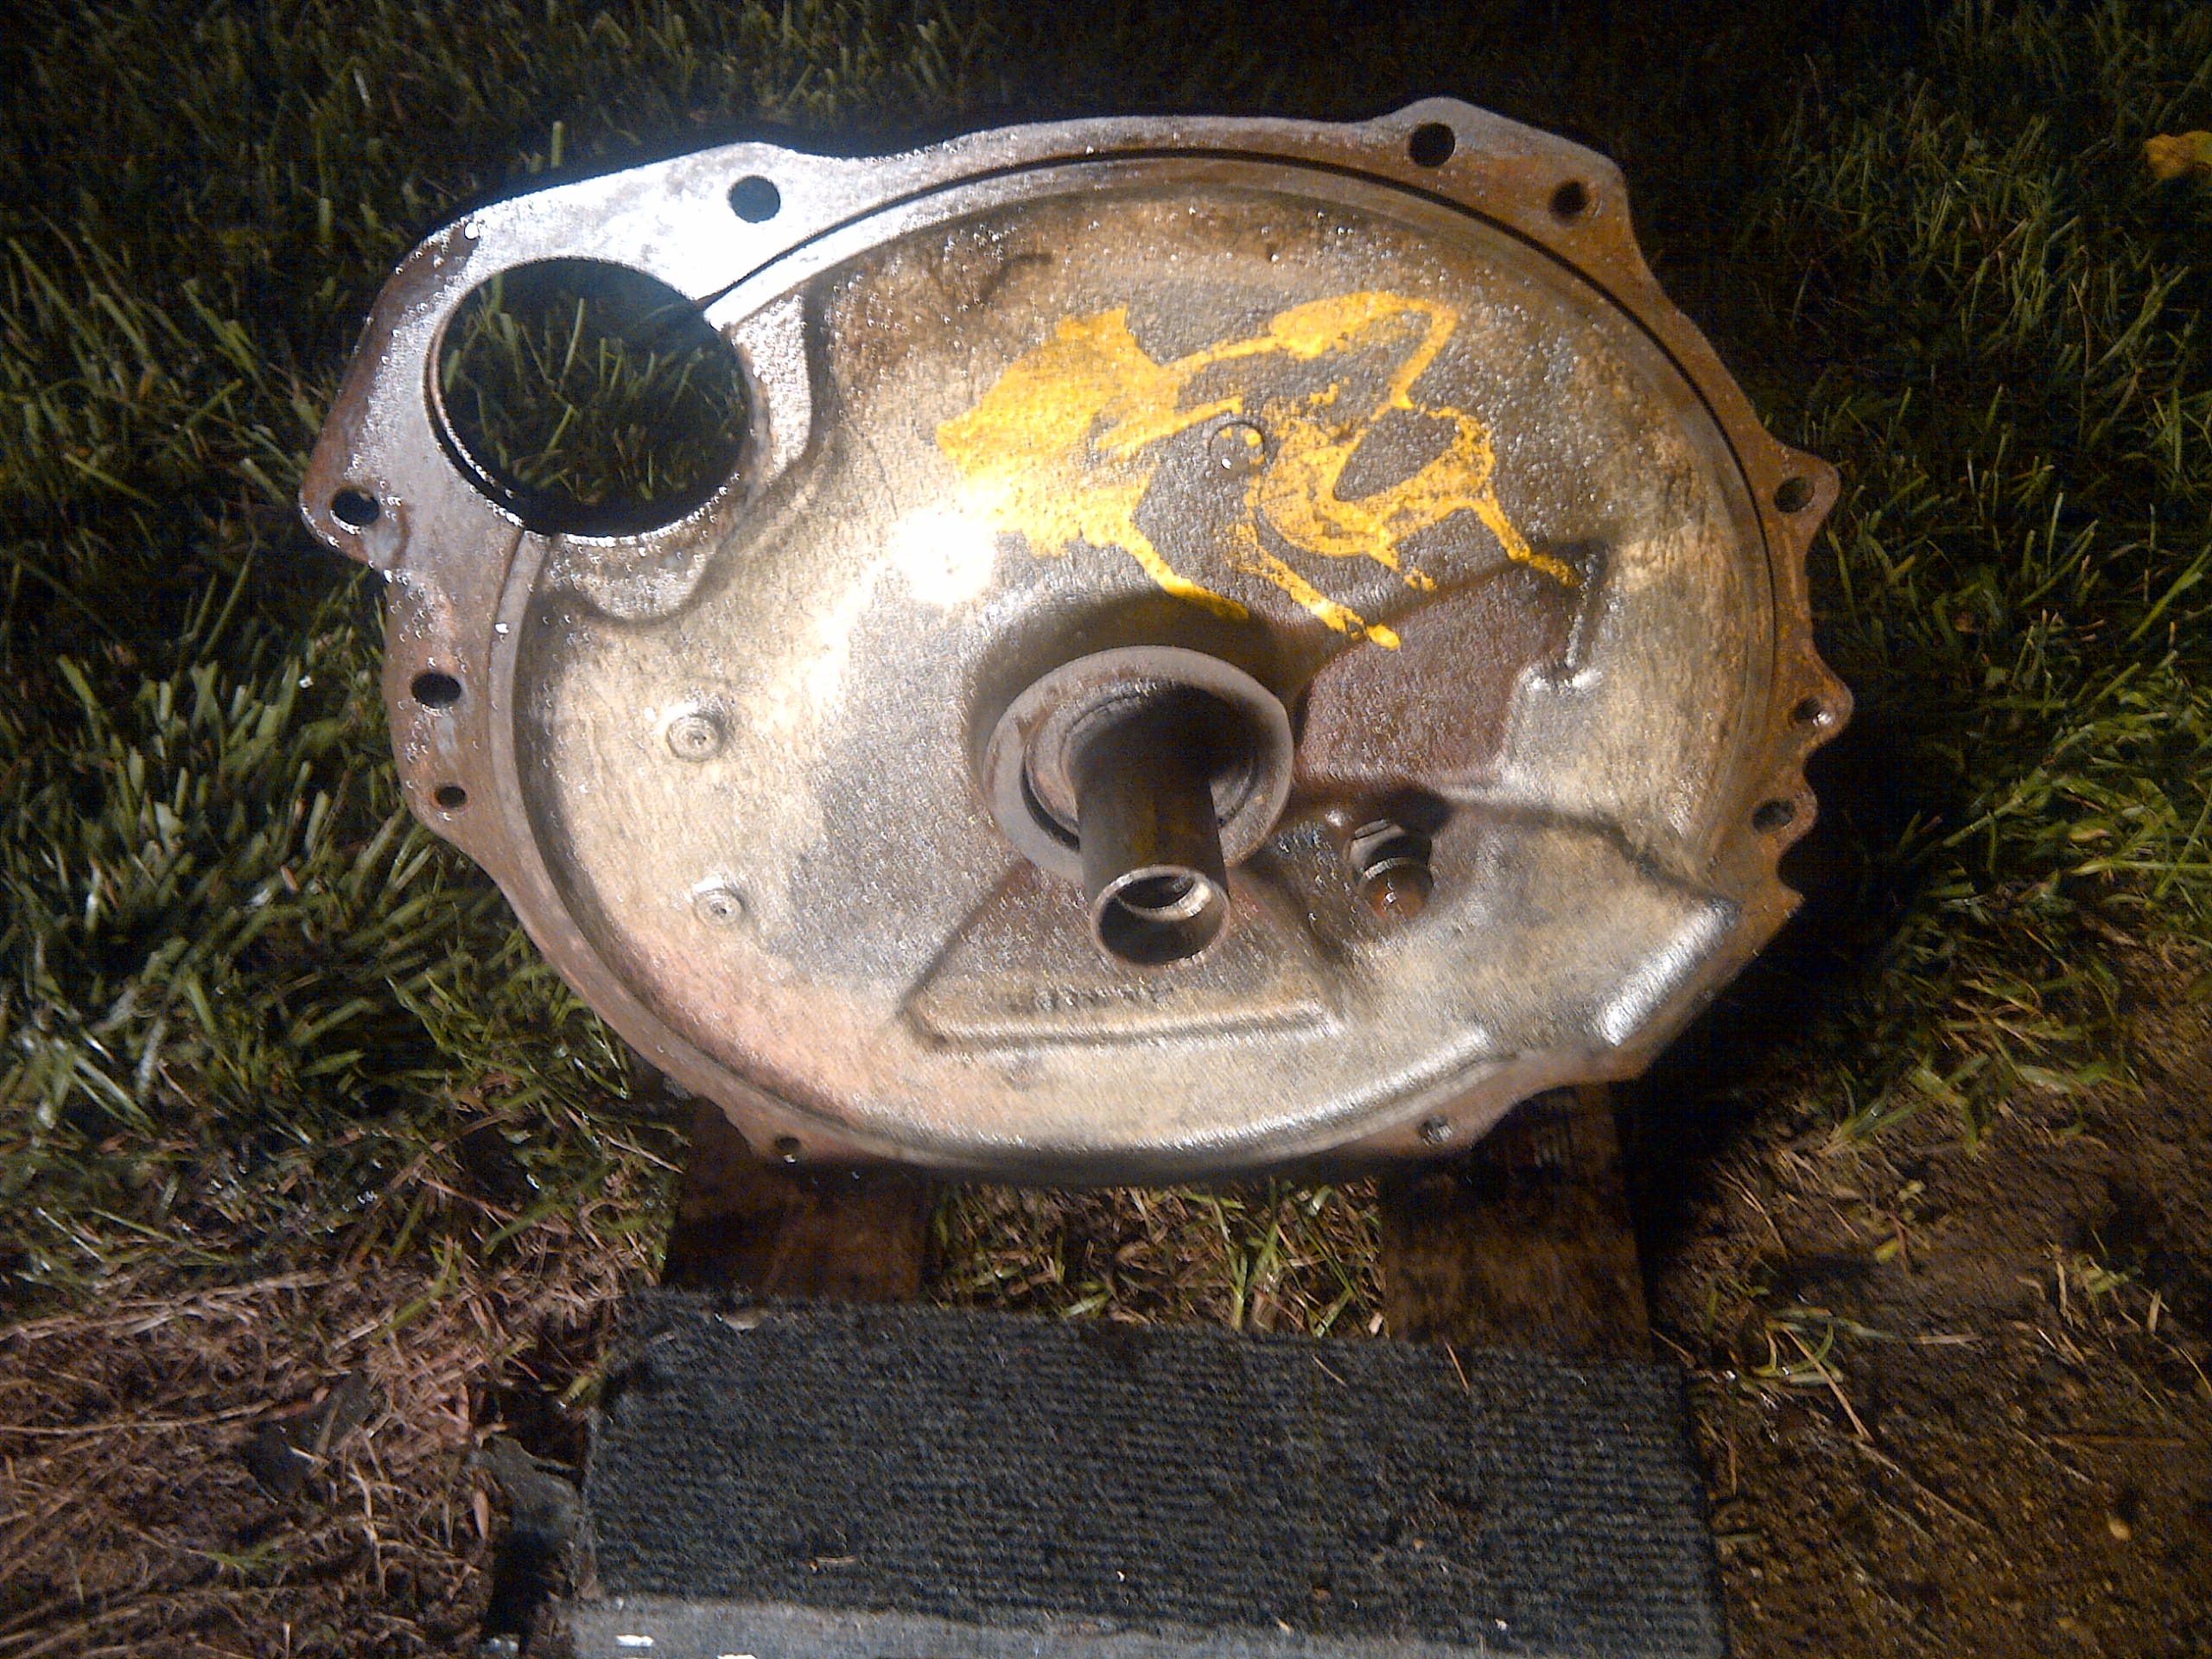
I noticed some yellow paint on the differential as seen on the fill plug and the rear face in the above photos. While I’d bet these indicated the diff had posi-traction, Google couldn’t confirm or deny this. Just for grins I confirmed that this unit has the expected (and desired) 3.55:1 ratio. I believe this was the typical ratio installed in the LMs.
Monday, August 25, 2014
Lots of ‘Vair Time
 Starting where I ended on last Friday’s blog, I’ve done some research on the exhaust pipe. An issue that’s popped up is one of the flanges on the exhaust pipe that I got from Rich’s stash of parts has one inlet flange configured for a ’60 Corvair (flat-faced flange). If I want to use this pipe, I’ll need to cut off this flat flange and weld on a standard post-’60 flange.
While I’m on the subject of exhaust, my buddy Jonathan came through with a part number for the Flowmaster mufflers he has on his Corsa. This morning I placed an order on Amazon for a couple of the same ones - Series 40 Deltas with 2.25” center inlet and 2.25” offset outlet. Since I don’t plan on ever driving this car during our season of salt again, I figure I’ll get plenty of years of aural enjoyment from my investment.
Now on to the weekend work. Saturday morning Victoria came over and she and I attacked Luna’s top installation. It took a WHOLE lot of blood, sweat, tears, and one bent wrist (sorry Victoria), but by the middle of the afternoon we finally had the well cover, back window, and top pieces all stapled to the trim sticks in the best-guess locations and all three trim sticks bolted to the body. Sadly, we lost a few of the rubber spacers and were short some to begin with, so we’ll have to go back and sneak them into place after the package from the Corvair Ranch shows up.
As we got back into it yesterday afternoon, I told Victoria that the hard part was done. I was wrong. The first task was to attach the rear side window weatherstrip pieces. At one point there were eight hands working at once as I drug Ariel in to stretch the front of the top forward and Loriann to stretch and hold the flap in place, while Victoria held the weatherstrip and poked an awl through each hole while I attempted to follow the awl’s withdrawal with the point of the screw. Finally, we had all eight screws in and torqued. Sadly, the right rear corner of the top has a nasty furl where it should be smooth. Hoping we could make some adjustments later on, Victoria and I continued. We did the best we could and we did finish, but neither of us is real happy with the results. We do have the option to take Luna to a professional and have them do the tweak(s) necessary to smooth out the one corner.


Once we completed the top work, we tried starting the car. The battery had plenty of charge on it, but it again it seems like the tank is empty since a number of cycles of me pouring gas down the carb throats would not get the car to run longer than it took to burn off the tablespoon or two that was sitting in the intake manifolds. Ironing out this issue needs to be the next task we deal with. Other Corvair activities of the weekend included spending some time Saturday working on Ringo. My initial intent was to only put the battery charger on his batter, but I noticed that his throttle linkage had seized. I isolated the problem to the left carb, so I sprayed some Deep Creep penetrating fluid on both ends of the butterfly shaft and let it sit to, hopefully, work its magic. Yesterday, during one of the breaks, I was able to finally work the shaft loose. I re-attached all the linkages and cranked the engine. After a few seconds, it started up and, as expected, there was some clanking from deep within the block where the lack of running had caused at least one lifter to drain down. I let the engine idle for about ten minutes and the nasty noise abated.
The work on getting Glinda a four-speed setup continues as well. Saturday evening I was in the garage giving the prospective transmission a close inspection. I removed the side cover, gave all the sychros and gears close scrutiny, and, fortunately, saw nothing amiss. I moved the internal shifter parts around until I was sure I’d be able to engage all four forward gears and reverse. At that point, I went to install my fancy new transmission pivot, but found the existing rod had been welded into place – it was supposed to be screwed in. A GUP cover from the Corvair Ranch would have to be added to the shopping list. All-in-all, a ‘vairy nice weekend.
Friday, August 22, 2014
Almost Ready for the Drop
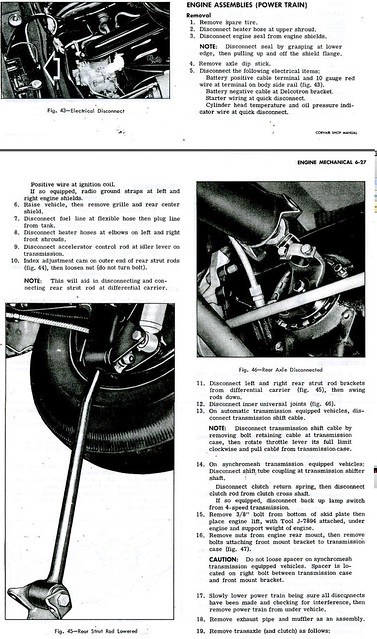
With the fuel gauge issue considered put to bed, I turned my attention to completing steps one through sixteen under ENGINE ASSSEMBLIES (POWER TRAIN) Removal in Chevy’s 1965 Corvair Shop Manual. Just before nine the raindrops began falling on the bodyparts not lying under the car. At that point, I crossed off every pertinent step except for 3, 7, 15, and 16. While not instructed to completely remove the strut rods, I did so. Also, I removed the exhaust system (Step 18) and, since I need to replace the front transmission mount, I unscrewed the nuts and bolts retain the left and right stabilizer rods.
This weekend Victoria and I have a date to install Luna’s top. I made a visit to Harbor Freight to purchase an electric stapler to aid our assembly. I also picked up a tarp to cover up the rips in the portable garage cover.
While on the subject of buying stuff, I‘ll share the status of depleting the THRaF. After recent orders with Clark’s (Shifter Boot, Tunnel Pan parts, and gaskets for the Diff and Trans covers) and the Corvair Ranch (right side muffler hanger and a couple muffler straps), it’s now sitting at $261. $50 of that is already committed to the House of Balance (they promised the flywheel and pressure plate would be ready early next week) leaving a little over $200. I want to give Glinda a tune-up, so a tune-up kit from Clark’s will leave me with roughly $120. With that I need to buy a couple mufflers.
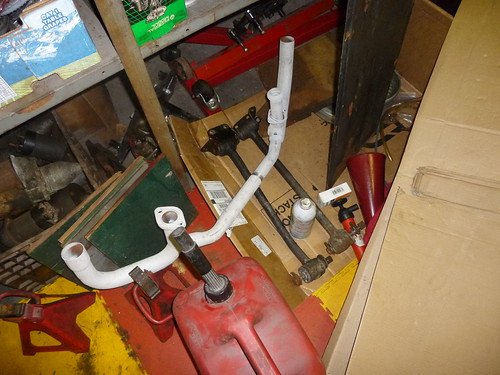
One of the items I bought during Rich’s big part’s sale was a dual exhaust pipe with crossover. This should allow me to use fairly loud mufflers without the 60 MPH drone I dreaded when I was running duals on Lucy. I’ve always loved the sound from my buddy Jonathan’s Corsa equipped with Flowmasters but they run about $90 apiece. Next down in price are the Thrush Cherry Bombs at $46 each (within my budget). Finally, I could go cheap with Flowtech Raptors like I had on Lucy for less than $30 each. I’ll sleep on it.
Wednesday, August 20, 2014
I Hate the Smell of Gasoline in the Morning
As I posted yesterday, Monday evening was spent replacing the leaky float in Glinda’s gas tank. Yesterday afternoon I bugged out of work at 4 and was pouring gas into Glinda’s tank by 5. After putting about three gallons in, I turned the ignition key to ON and watched while the gas gauge needle did … NOTHING. I had it in my head that the capacity of the tank was twelve gallons, so a fourth of that should at least move the needle above E. As a check of the gauge, I disconnected the sender and measured resistance across it - about 3 ohms – the same value I got for a completely empty tank.
Thinking the new float was bad or I'd put it on backwards and it had stuck to the wall of the tank, I siphoned out the fuel in the tank and removed the sender - the float was dry and empty; measured the resistance across the sender while manually moving the arm – it went from about 3 ohms to about 90 ohms; plugged the sender back in; grounded the sender's black wire; and had a friend watch the gauge as I manually moved the arm with the sender in the same orientation as it would be in the tank - the needle moved just as it should. By the way, as soon as I disconnected the sender, the gauge needle did go to well above F. I then flipped the float around (even though it now disagreed with the manual), reinstalled everything, poured about three gallons in - needled didn't move from E.
Okay, everything checked out as functional, but the stubborn donkey-esque needle wouldn’t be budged. My next step was to go whining on the internet and see what stupid error I was making. Responses came back that four gallons was not enough to move the float. GM meant it to be that way. Since the tank holds 14 gallons (not 12), once the needle reaches E, you’ve still got three to four gallons of reserve fuel.
Excellent – I spent three precious hours solving a non-existent problem. I guess gas fumes do have a long-term, detrimental effect on brain activity.
Tuesday, August 19, 2014
Will It Continue?
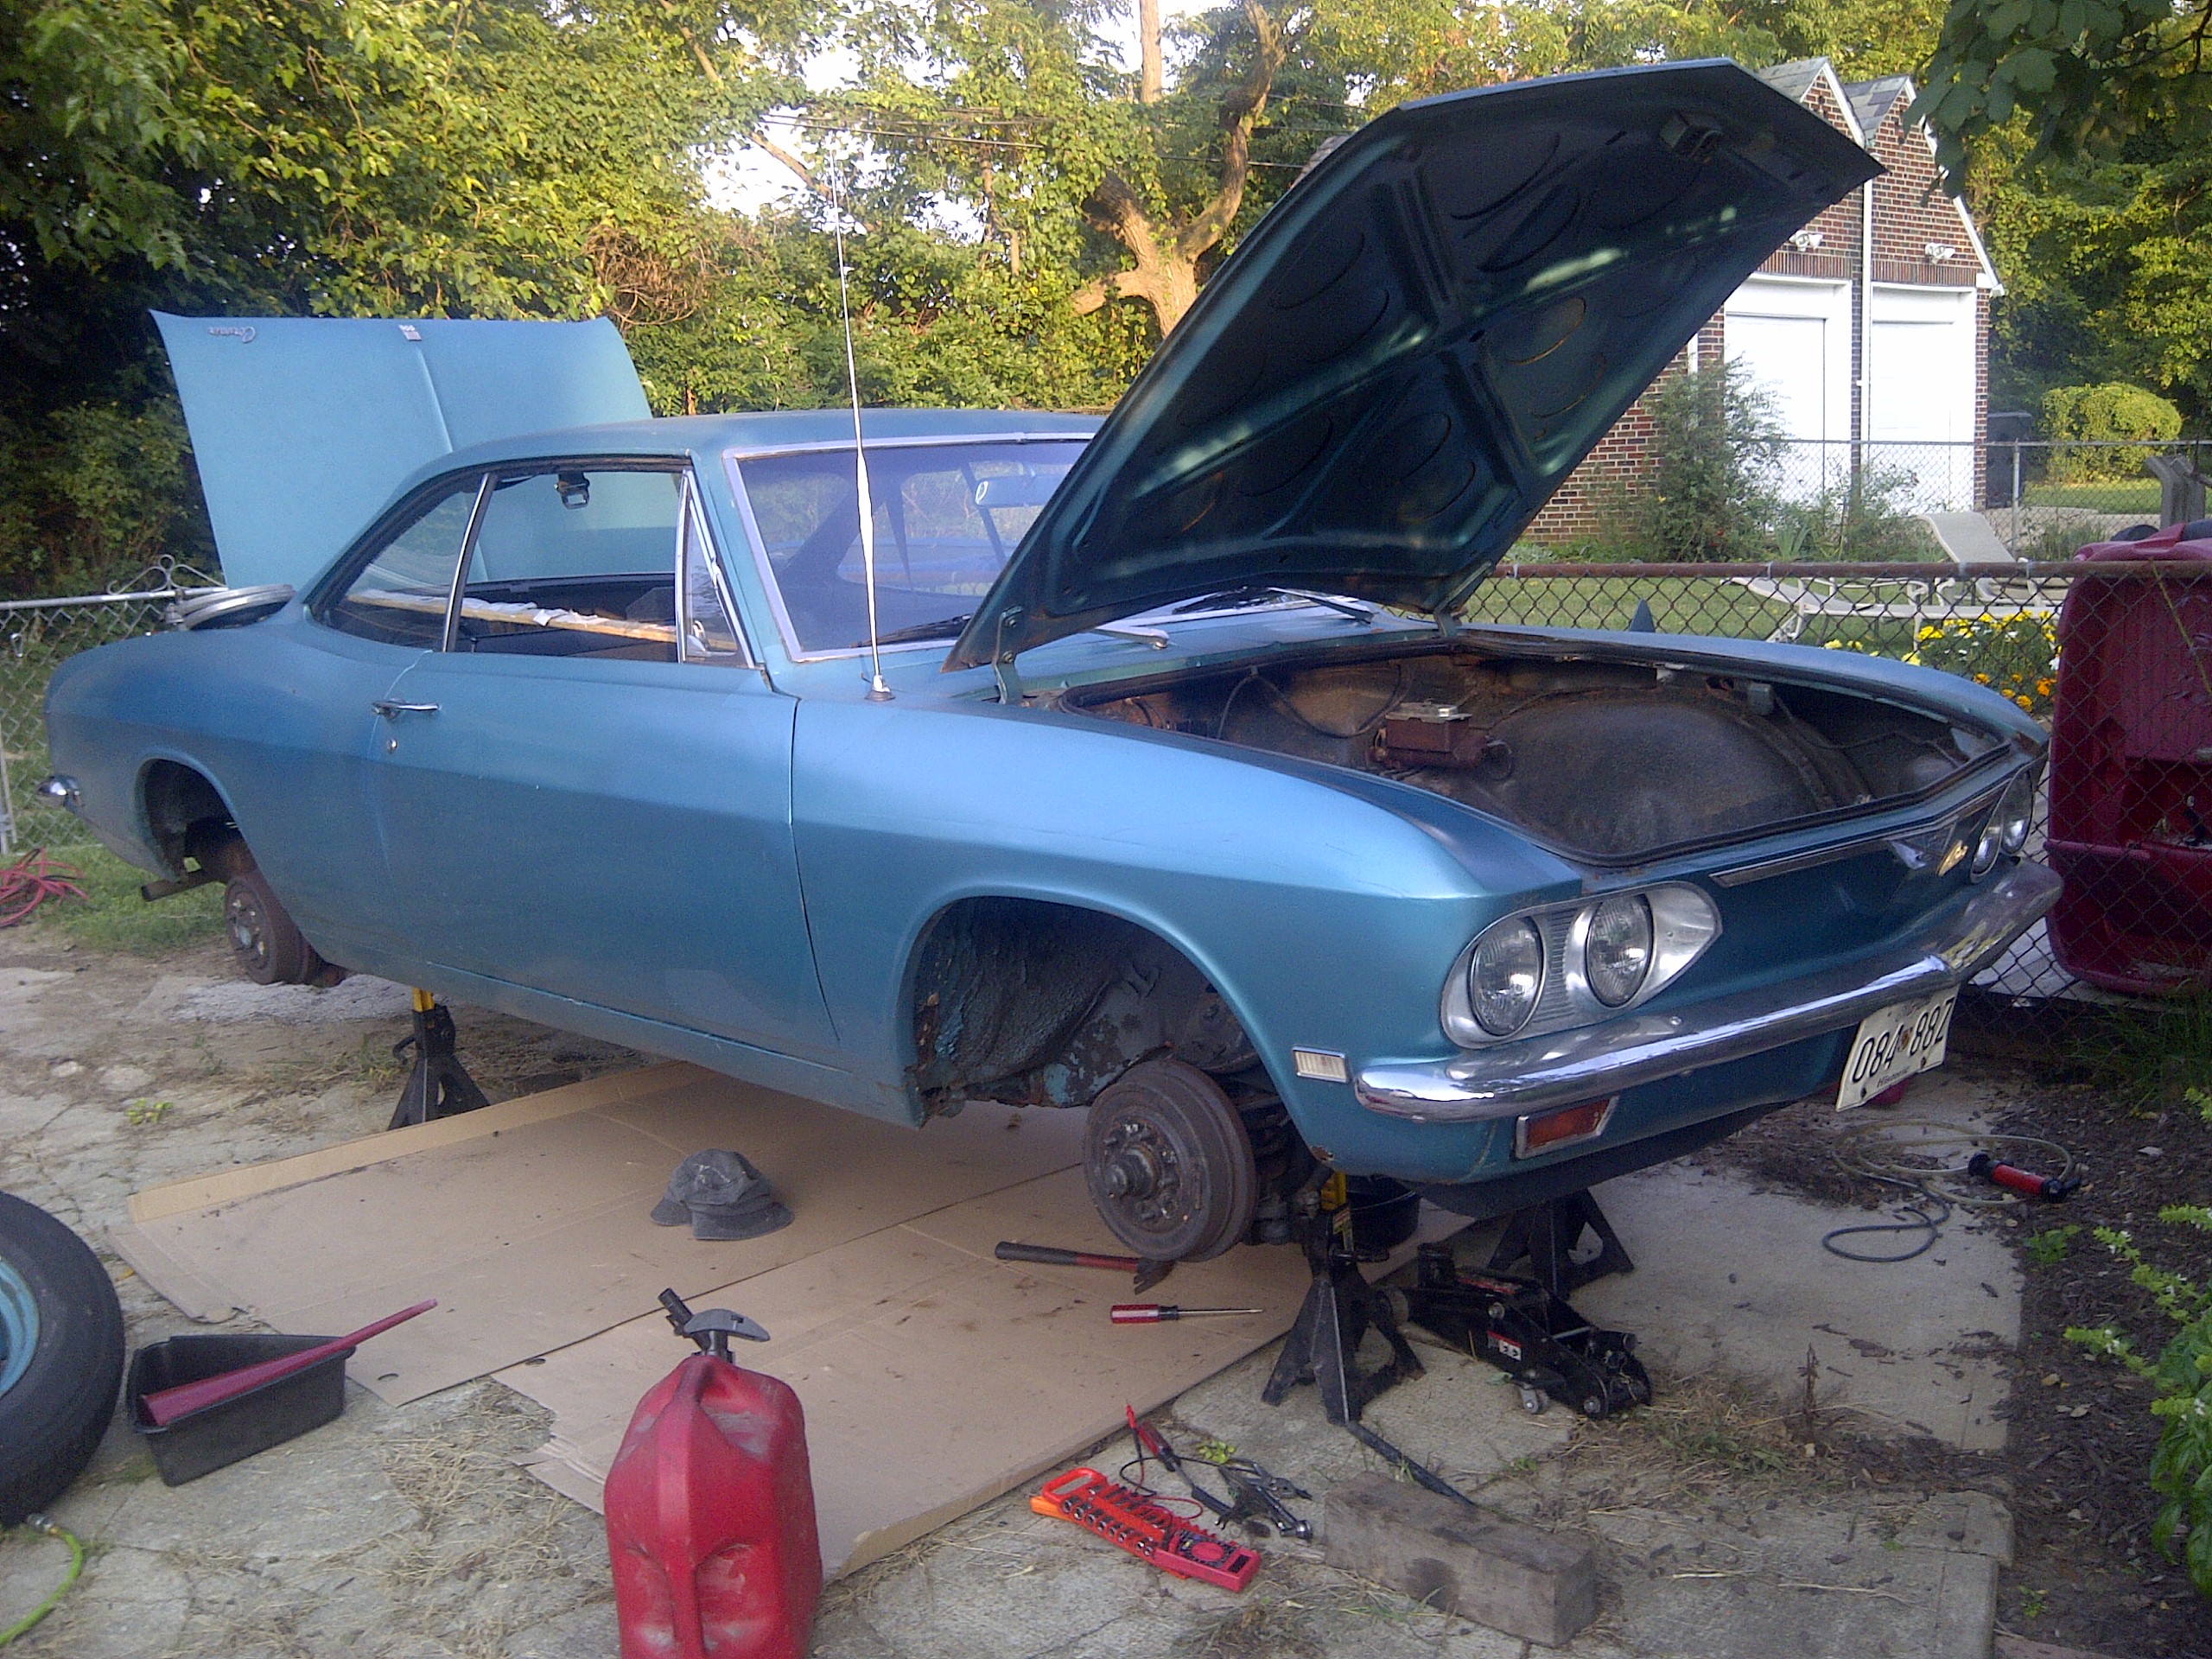
Late yesterday afternoon, I had a meeting at a location about 4 miles closer to home than my desk. At the meeting’s end, instead of driving back to the office, I continued on home and went to work on Glinda. After donning grungies, I put the car up on jackstands and, with great determination, attacked the faulty fuel gauge. After a number of electrical tests, I concluded the problem must be with the sender. To the chagrin of the lovely Loriann, I drained the fuel from the tank releasing a cloud of fumes to pollute her air. With the gas safely stored in containers, I removed the ring retaining the sender at the bottom of the tank and removed the assembly. The heavy float emitted a fine spray of 93 octane as I turned it over. Problem detected. Fortunately, I had a new float and a new sender sitting on the shelf, so taking the chance that it’s a good sender, I installed it. At that point, the dinner bell was ringing, so I quit for the night.
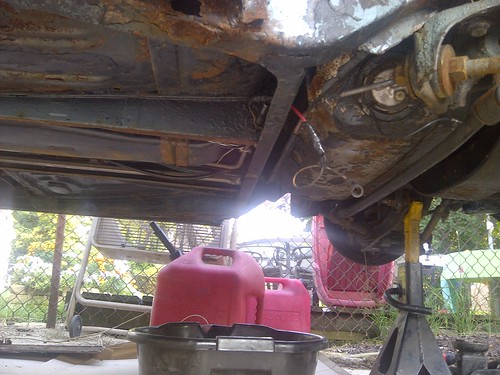
While I’d been waiting for the gas to siphon into the gas containers, I began preparing parts for the pulling of the drivetrain. I removed the two tunnel covers, the fuel pump, the oil gauge tube hookup, and the air cleaners. I disconnected the fuel lines and the connectors at the alternator.
Now I need to keep the momentum going since I just signed up for the event and spent $25 on a used helmet. I’m really going to New Jersey Motorsports Park!
Wednesday, August 13, 2014
Keeping in Touch
“Sold the Corvair today. Thanks for all the help with questions we've had. The experience of owning it was one I won't forget.” I received this text from one of the guys that bought Lucy from me about a year ago. Out of the seven Corvairs I’ve sold to other people, I’ve only been contacted after the fact by three of them. Wilma’s buyer and I met up at the 2012 Corvair convention; YellowVert came by and bought some seats from me about a year after buying the car, and Lucy’s buyers texted me a handful of times asking for help with a few easy issues. When I sold Heidi, I was given the new owner’s name and address. I really should get in contact with her and see how things are going. Other than Heidi, I’m fine not knowing the current status of any of the other ‘vairs that have passed through the fleet.
Twenty-five days until the NECC time trial event at NJMP. While there are four weekends within that span, two are already booked. That leaves me quite the challenge to get Glinda To-Do list whittled down to nothing. Here’s what’s left.
Play musical cars with Glinda ending up in the garage on jackstands
Get the flywheel/pressure plate assembly balanced at House of Balance
Get the leaking front tire fixed
Fix the busted gas gauge (I’m hoping it’s just a short)
Drop the drivetrain
Swap PG/differential for 4-speed/diff including new pilot and throw-out bearings
Swap the clutch and shifter linkage parts including the new tunnel pivot
Reinstall the drivetrain and top off the fluids
Adjust and install the racing carb with the new linkage
Swap the bench seat out for the racing seat
Install the racing harness
Get a helmet
I estimated I’ve still got at least 25 hours left of work. An hour a day. That’s not asking too much, is it?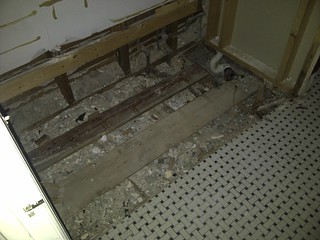 There is an issue with devoting time to cars, and it’s illustrated by the photo to the left. This void in one of our bathrooms was recently created by yanking out the tub. There's a similar void where the sink and vanity used to reside. By the end of this weekend, radiator and toilet removal will add a third and fourth void. These voids in my house will certainly cause voids in the spare time I have to work on a car.
Twenty-five days until the NECC time trial event at NJMP. While there are four weekends within that span, two are already booked. That leaves me quite the challenge to get Glinda To-Do list whittled down to nothing. Here’s what’s left.
Play musical cars with Glinda ending up in the garage on jackstands
Get the flywheel/pressure plate assembly balanced at House of Balance
Get the leaking front tire fixed
Fix the busted gas gauge (I’m hoping it’s just a short)
Drop the drivetrain
Swap PG/differential for 4-speed/diff including new pilot and throw-out bearings
Swap the clutch and shifter linkage parts including the new tunnel pivot
Reinstall the drivetrain and top off the fluids
Adjust and install the racing carb with the new linkage
Swap the bench seat out for the racing seat
Install the racing harness
Get a helmet
I estimated I’ve still got at least 25 hours left of work. An hour a day. That’s not asking too much, is it?

Friday, August 1, 2014
Empty Handed
Since the THRaF is still flush with funds, I headed over to Crazy Ray’s to see if I could find a pair of bucket seats to bolt into Glinda. I wove my way around the lines of both imports and domestics for about forty minutes. Since access to the back seat is still required, I was able to walk by more than eighty percent of the candidate cars - seatbacks of four-doors don’t tilt far enough forward. While I found a pair of light gray seats in a Cobalt that I came close to getting, all the other coupe and convertible seats were too beat, worn, and nasty to even be considered. One of the Cobalt seats had a small hole in the fabric of one bolster. Since they were actually clean enough to sit in, I tried it out to verify it’s acceptable. While it’s not nearly as effective as my racing seat at restraining side-to-side movement, I’ll remember it’s there in case all other avenues are exhausted. It appears what I really want are the Cobalt SS seats in black (see below photo). Now I’ll just have to find them. Could be tough – and pricey.
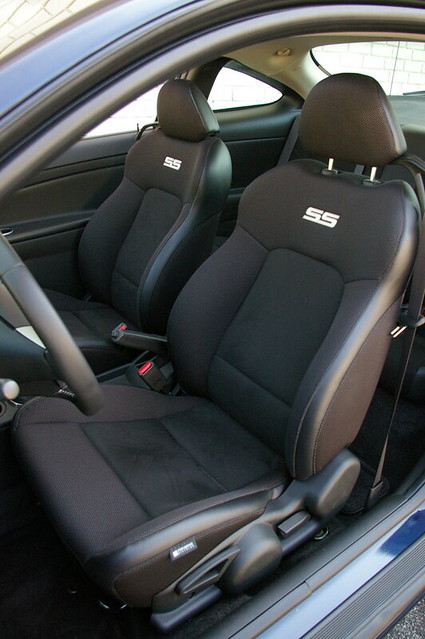

Thursday, July 31, 2014
A Lot and a Little
There’s been a lot going on fleet-wise, but only a little to show for it. The “lot” that’s been going on includes a couple of just-say-no’s, a that’s-so-awesome, and one thank-you-very-much that’s led to quite a bit of shopping and dreaming.
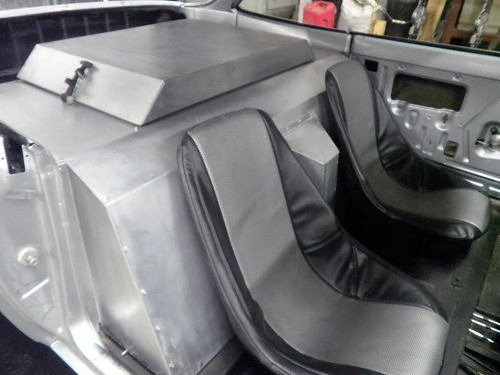
The first just-say-no was my passing on the V8 ‘vair. While the seller is offering an exciting beast of a Corvair for a VERY fair forty-nine hundred dollars, the situation just isn’t right for me to pull the trigger. Even though replacing the built 302 Chevy smallblock that currently resides in its back seat for something tamer would net me a couple grand and selling Glinda should get me a couple more, there’s just too much time and money that would be tied up in the deal – there’s that two parts of that dreaded TTT again. This car, by the way, is still available. In addition to the JPEG, you can click here to see a bunch of photos that were taken a couple years back by the car's builder before Earl (the seller) purchased the car and did a lot of finishing work. Earl can be reached at 410-705-8823 or earlbirdman@yahoo.com.
I still struggle with all the time and money I’m putting into Glinda, a car that I’ll always have to be doing rust repair on. It would be such a time-saver to have a solid, rust-free LM coupe as my track car/street car. That brings me to my second just-say-no. I was using the SearchTempest website to torment myself this morning and came across a listing for a 65 corvair 140 prodject(sic) with no price. Not one to ever pass on a misspelled Corvair ad, I clicked on the link and was rewarded with a number of photos of a very solid-looking primer gray coupe with its rear-end sitting high in its drivetrain-less-ness.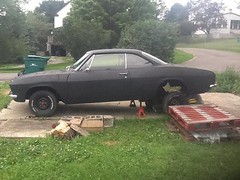 I shot the seller an e-mail asking about the condition and what he (or she) was asking for this prospective replacement to the rusty Glinda. I received a reply rather quickly telling me the car’s as solid as the jpegs show. The seller told me to, “Give offer if u want to come see it.” The response is still in my inbox, but even if I could get the car for a few hundred dollars (seller says, “need to get this car gone”), and even though I could easily borrow a trailer and make the roundtrip to Youngstown, OH for about $150, and even though this car’s already got all the manual shift and clutch parts in place, and even though I’ve though I’ve got a tranny and diff that’ll bolt right in, I don’t have a running engine. Because of that I haven’t really given it much more thought (yeah, right). Here are the photos that were in the ad.
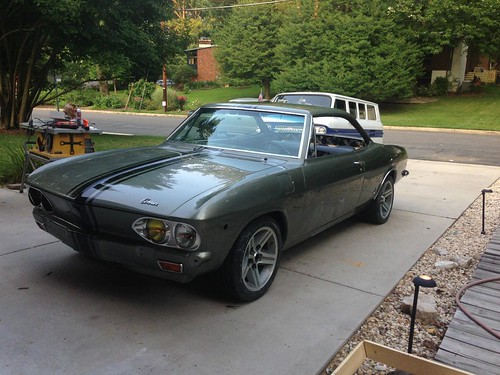
The that’s-so-awesome occurred last evening when I received a photo-text from the guy that bought Rich’s Corsa. He’s in the final stages of reassembling the car after its new paintjob is finally finished. It is one really cool car now. It’s wonderful to see that he’s gotten so excited about it, and I really appreciate the frequent updates he sends me.
That brings me to my thank-you-very-much. The other day I got a phone call from my folks. My generous dad started the conversation by telling me he’d just sent a donation to the Tom Hughes Racing Fund (I’m calling it THRaF). He’d been reading between the lines of one of my Facebook postings, and decided I needed a fund and he needed to be the first contributor. Since finding his $500 check in my mail a couple days later, I’ve made a list of luxuries I’m going to get with the fund:
- Flamethrower Coil - Mufflers - Shifter Boot - Bucket Seats - Throttle Linkage Kit - Tunnel Pivot
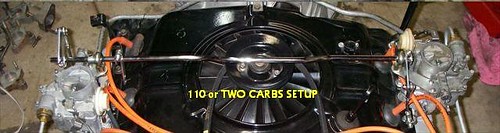

The first just-say-no was my passing on the V8 ‘vair. While the seller is offering an exciting beast of a Corvair for a VERY fair forty-nine hundred dollars, the situation just isn’t right for me to pull the trigger. Even though replacing the built 302 Chevy smallblock that currently resides in its back seat for something tamer would net me a couple grand and selling Glinda should get me a couple more, there’s just too much time and money that would be tied up in the deal – there’s that two parts of that dreaded TTT again. This car, by the way, is still available. In addition to the JPEG, you can click here to see a bunch of photos that were taken a couple years back by the car's builder before Earl (the seller) purchased the car and did a lot of finishing work. Earl can be reached at 410-705-8823 or earlbirdman@yahoo.com.
I still struggle with all the time and money I’m putting into Glinda, a car that I’ll always have to be doing rust repair on. It would be such a time-saver to have a solid, rust-free LM coupe as my track car/street car. That brings me to my second just-say-no. I was using the SearchTempest website to torment myself this morning and came across a listing for a 65 corvair 140 prodject(sic) with no price. Not one to ever pass on a misspelled Corvair ad, I clicked on the link and was rewarded with a number of photos of a very solid-looking primer gray coupe with its rear-end sitting high in its drivetrain-less-ness.

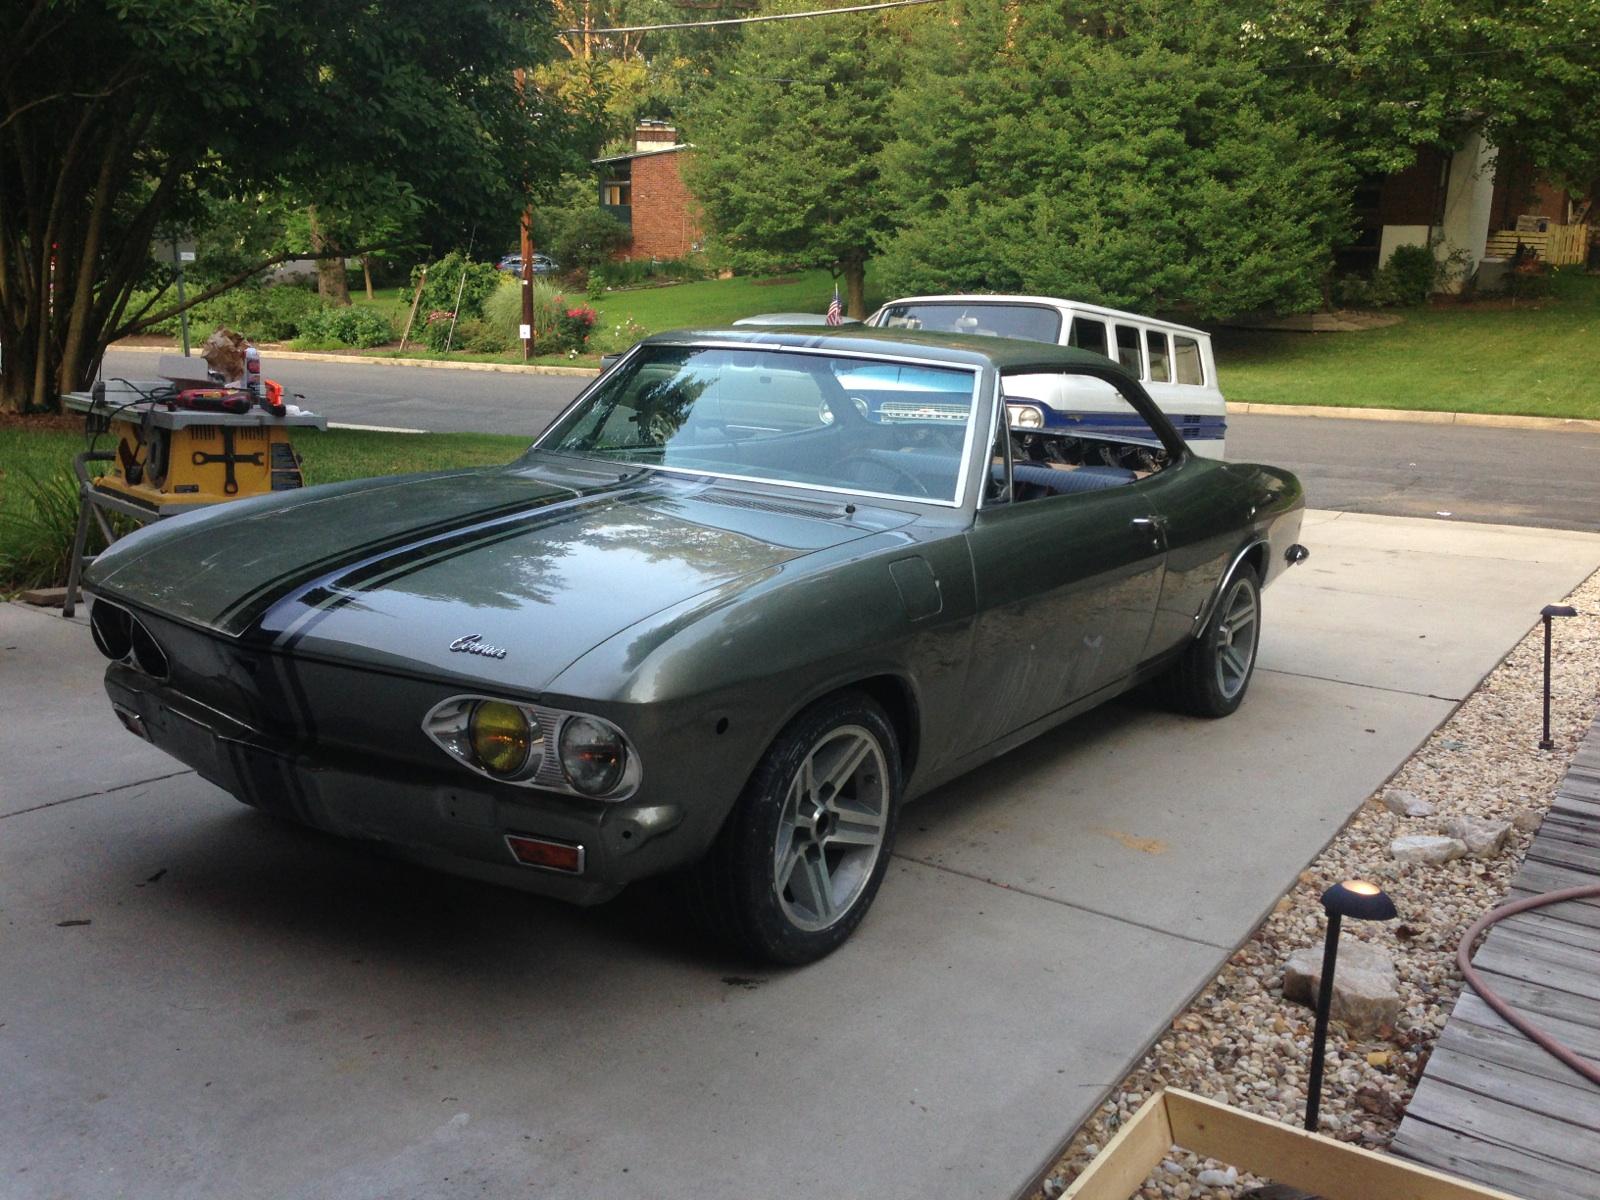
The that’s-so-awesome occurred last evening when I received a photo-text from the guy that bought Rich’s Corsa. He’s in the final stages of reassembling the car after its new paintjob is finally finished. It is one really cool car now. It’s wonderful to see that he’s gotten so excited about it, and I really appreciate the frequent updates he sends me.
That brings me to my thank-you-very-much. The other day I got a phone call from my folks. My generous dad started the conversation by telling me he’d just sent a donation to the Tom Hughes Racing Fund (I’m calling it THRaF). He’d been reading between the lines of one of my Facebook postings, and decided I needed a fund and he needed to be the first contributor. Since finding his $500 check in my mail a couple days later, I’ve made a list of luxuries I’m going to get with the fund:
- Flamethrower Coil - Mufflers - Shifter Boot - Bucket Seats - Throttle Linkage Kit - Tunnel Pivot
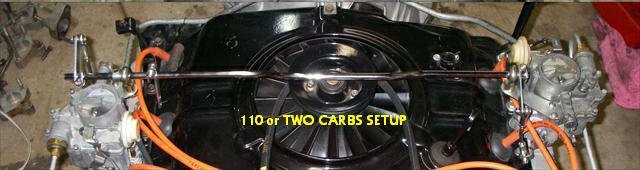
Monday, July 28, 2014
Lucy’s For Sale…Again
I was perusing Craigslist today using SearchTempest, and discovered a listing for one of the ex-fleet cars. Lucy is available for $2600 in Woodstock, VA.
Doesn't sound like the sellers have done anything to her since they bought her from me.
Doesn't sound like the sellers have done anything to her since they bought her from me.
Tuesday, July 22, 2014
The Entire Fleet Is Grounded Until Further Notice
For the first time since November 27, 2005 no member of my family is relying upon a Corvair for transportation. Let me repeat that. The run of over eight years where I HAD to have at least one Corvair roadworthy has come to an end. See the Car Status sidebar.
About a month ago, I told Ariel that Ringo was not roadworthy anymore. She was granted temporary usage of the truck, while I pressed Glinda back into daily-driver duty. Two weeks later Ariel bought a Honda CR-V. Her life has already dramatically changed – no more “creepy, old guys” approaching her at gas stations; no more people yelling at her at stoplights about their mom owning one of those; and, most importantly, no more dreading the impending (and inevitable) Baltimore Beltway breakdown.
While it was nice to experience normal throttle performance again, Glinda’s failing transmission was utterly annoying. Left-hand turns of any magnitude prompted a downshift. This was really upsetting when I was doing 50 on an offramp. It got to the point where I had to pop the shifter into Neutral before coasting through and then put it back into Drive once we were straightened out.
With all four members of the fleet congregated in my garage and driveway, it’ll be interesting to see which one will be first to make its way back onto the road.
Coincident to the V8 Corvair e-mail, I also received the announcement of an upcoming track day. This one just two hours away at the New Jersey Motorsport Park. All (and I emphasize “all” in a significantly sarcastic way) I need to do before then is finish Glinda’s 4-speed swap and get a helmet. I have all the way until September 8 to do what needs to be done.
Speaking of the V8 Corvair e-mail, I received a follow-up e-mail, so I’m convinced it’s not a hoax. However, while the seller said things like, “I don't expect anywhere near my original purchase price” and “LET’S TALK,” I can’t believe he’ll entertain the kind of offer my savings and the lovely Loriann would allow. Also, buying it would necessitate selling Glinda, and she needs work before that can happen. Oh well, time will tell.
Probably a Hoax Not A Hoax
I received two intriguing e-mails late last night offering to sell me a ’66 V8 Corvair. Here’s the body of the ad:
I HAVE A 66 CORVAIR V-8 AVAILABLE. I WOULD LIKE TO KEEP IT IN THE "FAMILY", (CORSA MEMBERS}. WELL DONE, SOLID CAR, VERY FAST. MY NAME IS EARL GRAY, MEMBER # 03113. HARD TO FIND PARTS, AND LOT'S OF LITERATURE GO WITH CAR. I LIVE IN PARKVILLE MD 21234. LET'S TALK
In both cases the sender went on to include a phone number and a reply-to e-mail address – the same in each e-mail.
Initially, I was skeptical of them, but some sleuthing this morning has given me some hope that it’s on the up-and-up. A few Google searches on the e-mail addresses and sender’s names turned up that sender #1 was, indeed from Parkville. So, I replied to the included e-mail address and am now waiting for a response.
Regardless, the words, “WELL DONE” and “VERY FAST” indicate to me that this vehicle will be out of my price range unless the seller really wants to sacrifice $$$ to ‘KEEP IT INT THE “FAMILY”’.
The following photo is one I pulled off the web just to illustrate the insanity of how close a V8 ‘vair’s engine is to the driver.

UPDATE: I just received the following e-mail:
I will try to get some pictures sent to you sometime today; this was a spur of the moment decision. I paid $8500 for the car several years ago, and had it shipped here from Texas. It was basically a shell and a motor. I spent a lot of time getting it "street" legal. Except for the 302 Z-28 motor in the back seat area, and the Chevy 14" rallys it looks stock. Sounds good too. It's silver with stock black interior. It has a stock am/fm radio, and optional stereo multiplex these I did not get around to testing or wiring up, a stock Corsa dash and glove box with original paint. I also have a complete telescoping steering column and steering box, I did not get around to installing. It has drum brakes, I have the disc brake conversion brackets. The radiator is under the rear deck lid with two puller fans, I don't care for the front mounted Kelmark version. I have a lot of other parts and a whole bunch of literature, everything I have will go with car. As far as price goes, I don't expect anywhere near my original purchase price. So I say, LETS TALK. Feel free to call me.
I HAVE A 66 CORVAIR V-8 AVAILABLE. I WOULD LIKE TO KEEP IT IN THE "FAMILY", (CORSA MEMBERS}. WELL DONE, SOLID CAR, VERY FAST. MY NAME IS EARL GRAY, MEMBER # 03113. HARD TO FIND PARTS, AND LOT'S OF LITERATURE GO WITH CAR. I LIVE IN PARKVILLE MD 21234. LET'S TALK
In both cases the sender went on to include a phone number and a reply-to e-mail address – the same in each e-mail.
Initially, I was skeptical of them, but some sleuthing this morning has given me some hope that it’s on the up-and-up. A few Google searches on the e-mail addresses and sender’s names turned up that sender #1 was, indeed from Parkville. So, I replied to the included e-mail address and am now waiting for a response.
Regardless, the words, “WELL DONE” and “VERY FAST” indicate to me that this vehicle will be out of my price range unless the seller really wants to sacrifice $$$ to ‘KEEP IT INT THE “FAMILY”’.
The following photo is one I pulled off the web just to illustrate the insanity of how close a V8 ‘vair’s engine is to the driver.
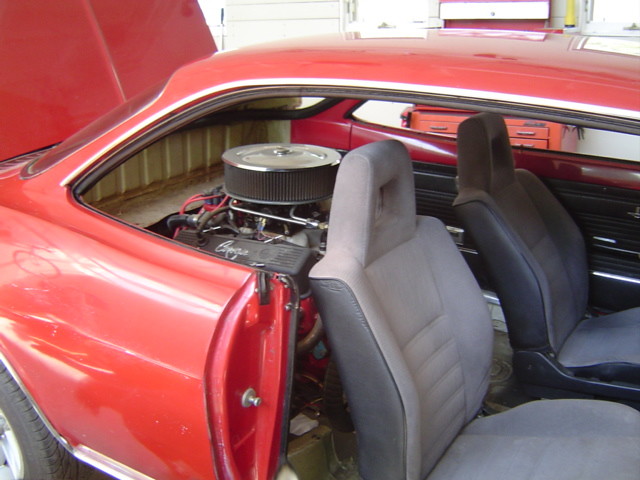
UPDATE: I just received the following e-mail:
I will try to get some pictures sent to you sometime today; this was a spur of the moment decision. I paid $8500 for the car several years ago, and had it shipped here from Texas. It was basically a shell and a motor. I spent a lot of time getting it "street" legal. Except for the 302 Z-28 motor in the back seat area, and the Chevy 14" rallys it looks stock. Sounds good too. It's silver with stock black interior. It has a stock am/fm radio, and optional stereo multiplex these I did not get around to testing or wiring up, a stock Corsa dash and glove box with original paint. I also have a complete telescoping steering column and steering box, I did not get around to installing. It has drum brakes, I have the disc brake conversion brackets. The radiator is under the rear deck lid with two puller fans, I don't care for the front mounted Kelmark version. I have a lot of other parts and a whole bunch of literature, everything I have will go with car. As far as price goes, I don't expect anywhere near my original purchase price. So I say, LETS TALK. Feel free to call me.
Monday, July 14, 2014
Two-and-a-Half Hours to Fix a Switch
Actually, it only took a half-hour to fix switch, but it took two hours to finally decide that that was the problem, remove it, and then reinstall it after the rebuild. When both the gas gauge and the wiper stopped working, I jumped to the conclusion that GM’s construction of the switch uses a pot-metal (soft) housing retaining the plastic, copper, and steel of the switch’s internals, contacts, and connectors. The basic function of the switch is to connect combinations of blade connectors to the housing, and, thus, to ground. This completes different 12 volt circuits running through the wiper motor causing it to spin slow or fast. As I posted before, when I was installing the clutch pedal, I had to undo all the wire bundles under the dash. I surmise, then, that I yanked on the wires going to the switch, causing the contact-to-housing connection to fail. I ended up removing the switch from the dash, disassembling it, cleaning the contacts, coating them with di-electric grease, stacking all the pieces back into the housing, and then crimping the housing to the insulator making sure I caused the housing to touch the correct contacts within the switch.
With the switch back in place and the wipers wiping again, I turned my attention to the other dash-mounted failure – the gas gauge. I removed the screws retaining the heater controls and pulled it out of the way to give me access to the back side of the gauge. I then pulled off the connector, turned the key to ON, and measured the voltage at the tan wire – 12.4 V which just happens to be the reading on the voltmeter that’s bolted under the dash. Therefore, the sender is still connected to the gauge, but providing no resistance to the electron flow, indicating – to me – the float is on the bottom of the tank even though the tank is full of gas.
Given all the time I wasted on these two projects, I didn’t have time to do anything more on the car that evening.
Thursday, June 26, 2014
Ungrounded?
The lovely Loriann’s daily-driver had a breakdown the other day, so while I wait for parts, she’s driving the truck, and I’m behind the wheel of Glinda. Swapping the right-side carb from Ringo onto Glinda (replacing the one with a noticeably higher fuel level) has pretty much erased the quick-throttle bogging issue. With that problem solved, it’s been difficult not to use the loud pedal more exuberantly. With that, I’m not sure I’m doing my fuel mileage test any good.
It appears that I’ve messed up the grounding of the dashboard when I was installing the new clutch and brake pedals. I first noticed that the wiper switch wasn’t working, and then the fuel gauge is now stuck on E. Monday evening I tried finding the disconnected, wayward wire, but struck out. After some web research, I found the ground strap in an assembly diagram, so that’ll be my next inspection point.
Of course it could also be a coincidental failure of both items, but I deeply doubt it.
Monday, June 23, 2014
Ringo’s In Rough Shape
Sadly, the tire un-treading incident has left Ringo in a bad way. I’ll take and post some photos in the near future, but the list of bent and busted sheet-metal include: wheel well (some actually torn out and missing, lower back edge of rear fender, wheel opening trim, spare tire shelf, and muffler hanger. These, by themselves, don’t render Ringo un-roadworthy, but added to the other items of issue (driver’s door won’t open, starter won’t energize reliably), and he needs some serious attention before I can let Ariel drive him again. So, for now, he’s taking up driveway space.
Saturday, on the suggestion of a Facebook friend, I drug a bag of tools out to the curb to inspect Glinda’s carburetors. I pulled the lids off both carbs and compared the float fuel levels. The one on the right was noticeably higher (by at least a quarter of an inch), so I removed the pin that holds the float so I could see if the float had some fuel in it. It was dry. While reassembling the float to the lid, I clumsily dropped the small spring onto the pavement. As it fell, I carefully watched its trajectory, but, hitting my foot, it bounced under the car and promptly disappeared from the face of the planet. I crawled around and searched for five minutes, but to no avail – the tiny, gray piece of metal was nowhere to be found. It’s not the end of the world, I thought, since I’m sure I can pull another one from my can of carb parts. Another five minutes was wasted pawing through linkages, clips, floats, springs, and screws without spying a single helper spring. Argh.
At this point I now had an unusable carburetor. Knowing that Ringo’s carbs worked fine, I decided to pull his right-side one and use it in place of the one I’d just screwed up. I started her up to let her get warm and have the carb chokes open. In the meantime, I installed one of the carbs Mikhaila and I had rebuilt for TwoTone onto Ringo’s open intake flange. Back to Glinda, I shut off the engine, connected my clear plastic tubing (with a couple tablespoons of oil in it) to the vacuum ports, and restarted the engine. Three turns of the left carb’s adjustable linkage and the two side were back in balance.
Now I just need to fill the tank with gas and drive her for a bit to see if I’ve affected fuel mileage.
Tuesday, June 10, 2014
Could’ve Happened to Any Car
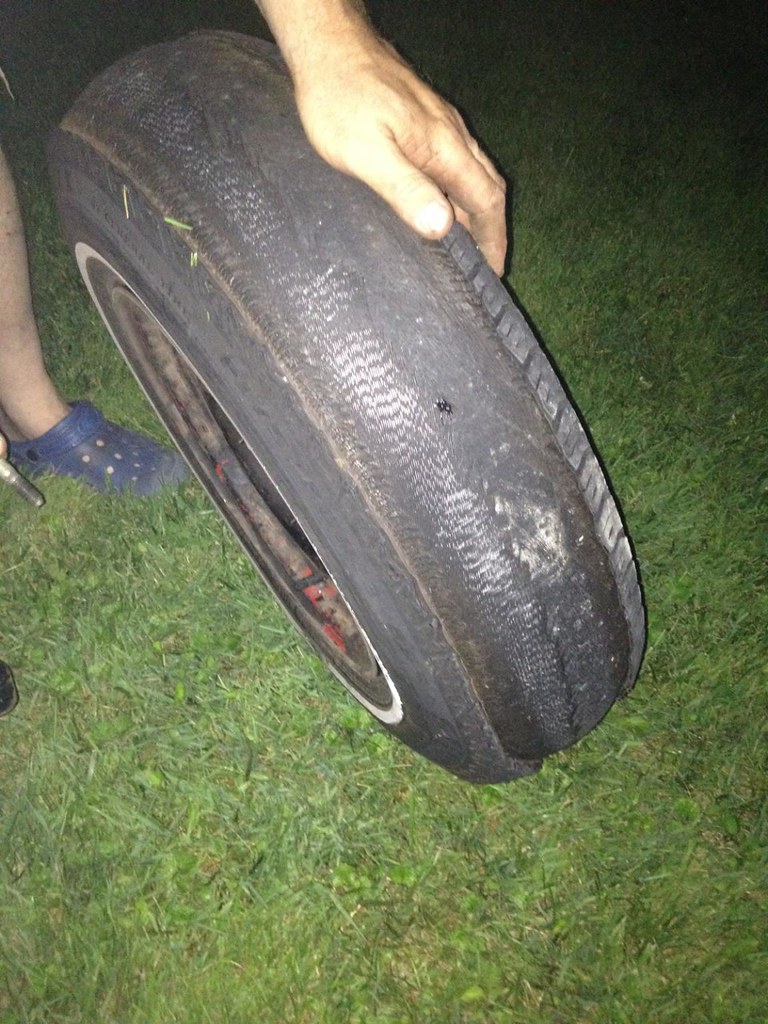
Yesterday evening I got a call from Ariel – yes, that kind of call. She was sitting on the side of the beltway since her car was “making terrible noises above 40 mph.” When the noises first started, she immediately pulled over, got out, and checked to make sure all the tires were okay (they appeared fine), and then checked the oil and transmission fluid (both above the ADD mark). At that point she then decided she wouldn’t drive Ringo any farther. Victoria just happened to be close by and getting off work at the time, so she was able to come pick her up. After dinner Ariel and I went back to the car with the truck and tow gear, and I looked everything over and nothing appeared amiss. Since the Baltimore beltway is no place to diagnose a car issue, we hitched Ringo up to the truck and began the trip home. About four miles after setting off, we started here some really nasty banging noises coming from behind us. I immediately pulled over and Ariel jumped out to see what was going on. She discovered the right rear tire was now missing most of its tread. We did a quick tire change (fortunately the spare was in good shape and had air) and were home twenty minutes later. I like the easy ones.
However, I wasn't to get off that easily. As she drove away, I noticed that Ringo's right taillight is not working (nor is his right brake light). I'm thinking the grounding wire has failed. I texted Ariel later in the evening that she needed to come by the house the next evening so I could fix that problem and keep her from getting a ticket.
Needless to say, that sucked up my evening, so I didn't get to do any fuel issue sleuthing on Glinda. Maybe tonight.
Monday, June 9, 2014
I Am So Frustrated
All is not rosey with the fleet right now. No work has commenced on Scarlett, Victoria is uninspired to work on Luna, Glinda’s fuel mileage woes continue, and Ariel just reported that Ringo’s driver’s door won’t open. Argh!
As mentioned, Glinda’s mileage keeps dropping (we’re down to less than 11 mpg), but I still can’t find why. While it does look (slightly sooty tail pipe) and smell like her engine is running rich, I find it hard to believe that the #52 jets are responsible. These are the same jets that, on the stock carburetors, gave nearly 20 mpg, but on these rebuilt ’66 vintage carbs the mileage keeps dropping. It’s that last bit of information that makes me believe something is leaking and the leak is getting worse. I need to find the source of that leak and fix it. Regardless, I still need to swap in the smaller #51 jets I got from the Corvair Ranch to treat the bogging under quick throttle issue.
It appears I’ll be buying a used door latch from the Ranch and installing it in Ringo’s inoperable door. That won’t be fun. At least it failed in the closed position. Ariel says she’ll finally be a serious car shopper come early July.
Wednesday, May 28, 2014
Gone, but Not Forgotten
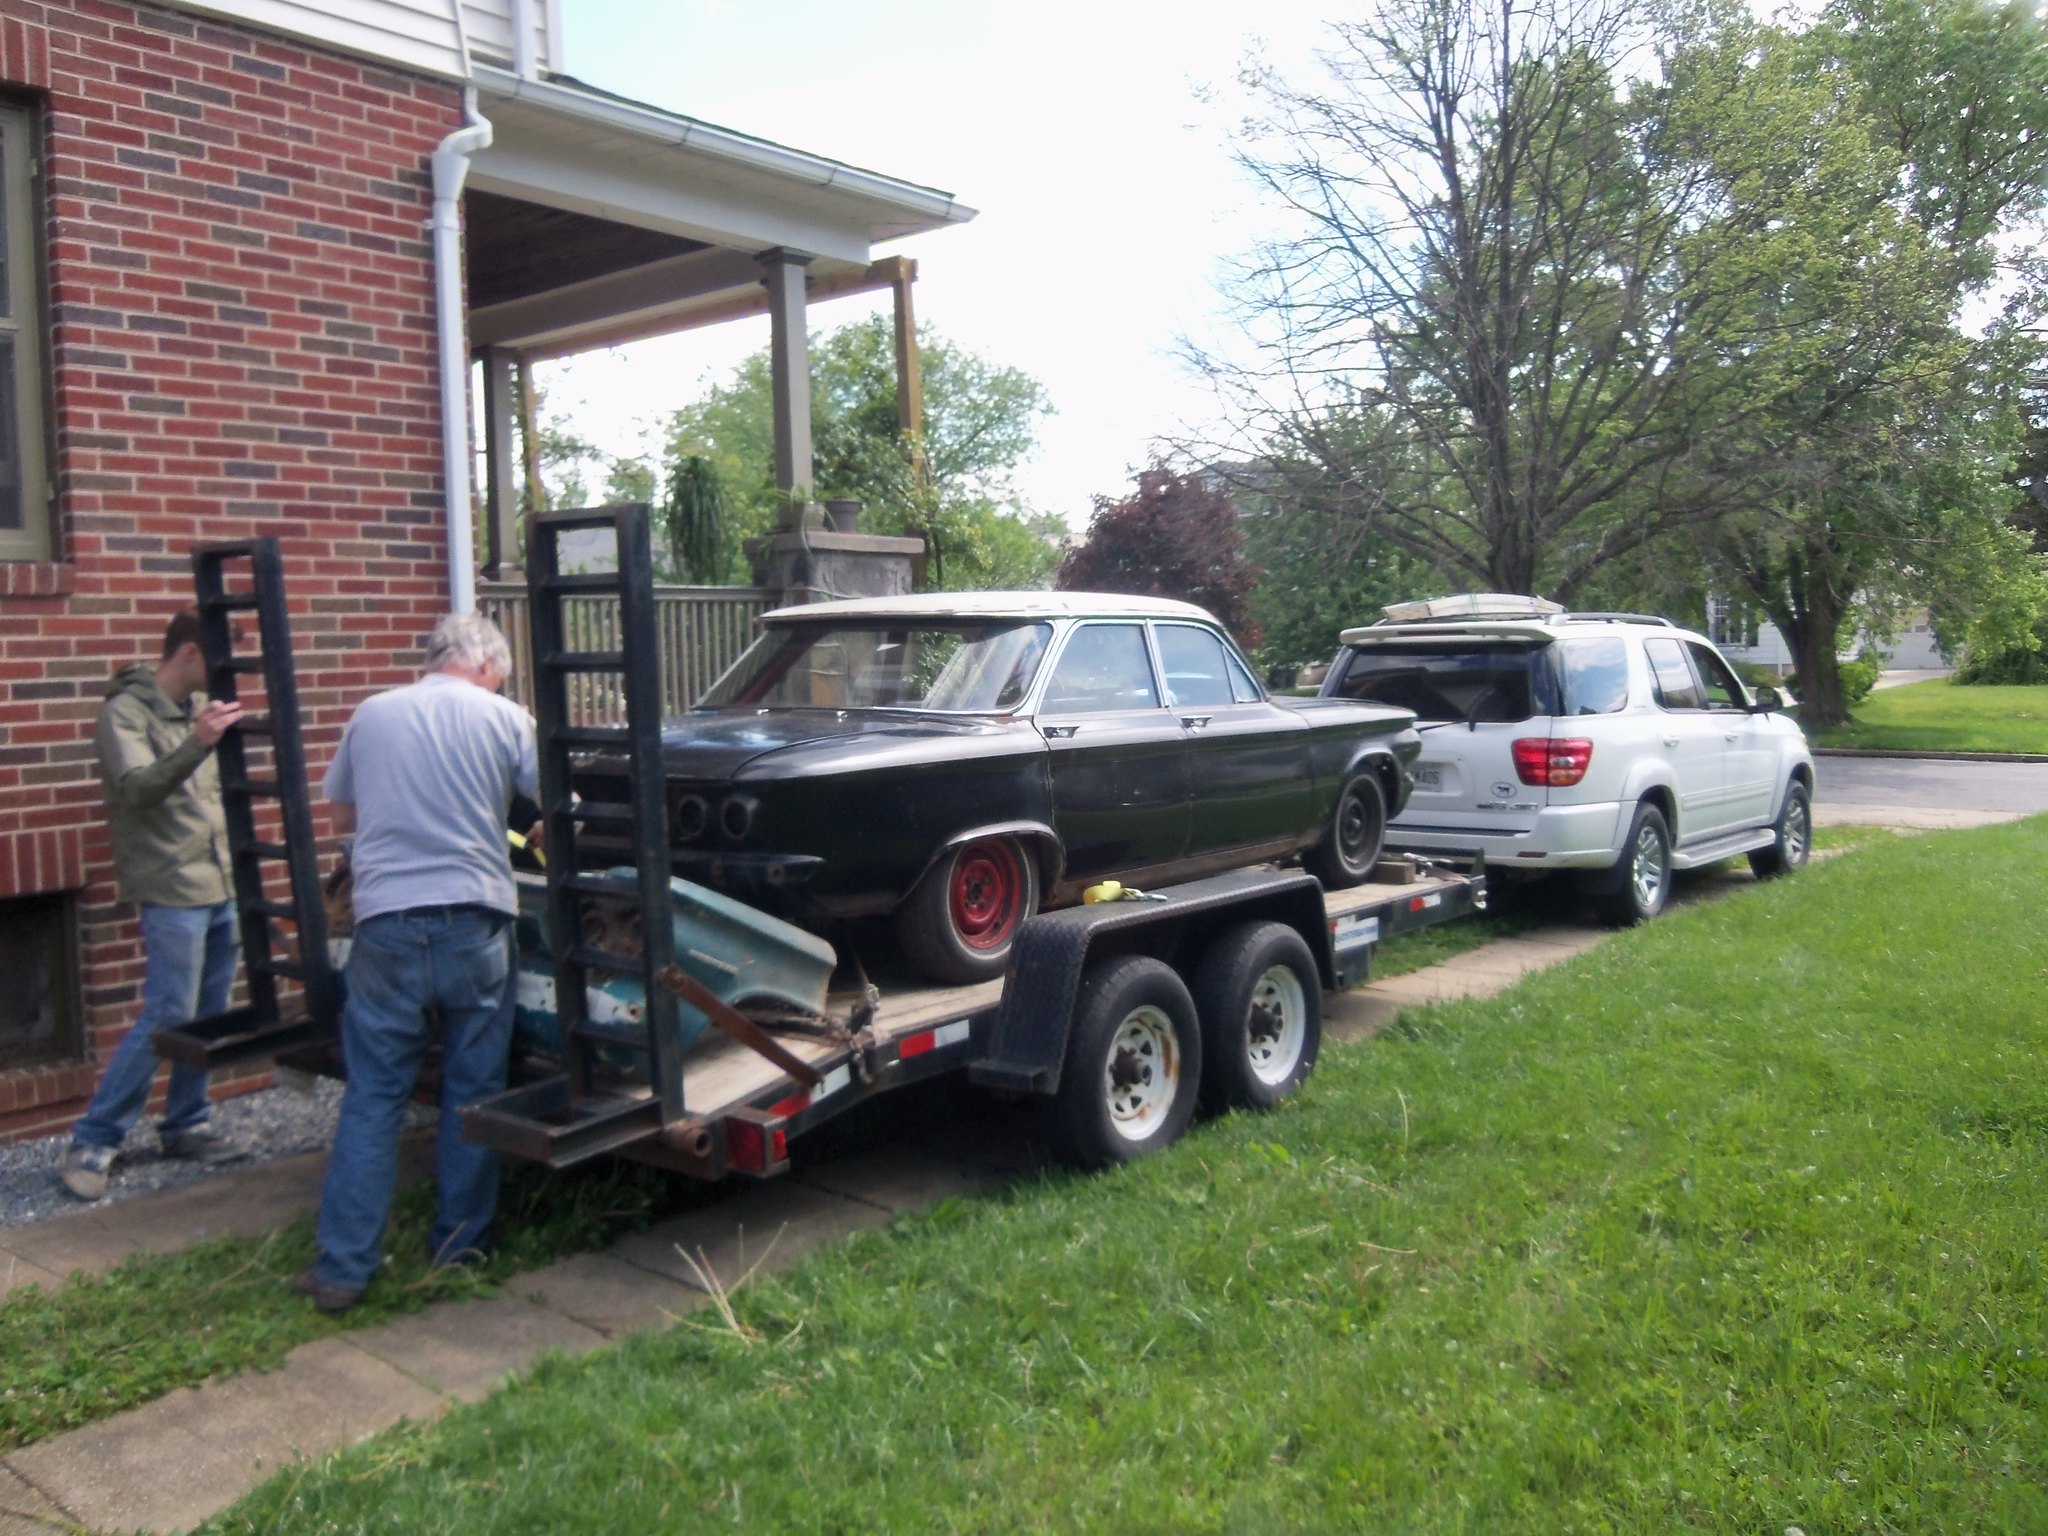
I told the lovely Loriann, there’s a space in my driveway and a hole in my heart. I’m always saddened when I sell a car; Saturday was no different when TwoTone was hauled away. I can take comfort in the knowledge that the new owner, a really nice guy and his teenage son, will probably have her back on the road faster than Mikhaila and I would have. ‘Vair buddy, John’s, free ’64 coupe sealed the deal. They’ll be converting TwoTone to a 4-speed. It’ll be too cool.
What else is happening with the fleet?
There’s no change, sadly, with the ongoing battle with Ringo’s driver’s door. Even after adjusting the door, it’s back to needing to be slammed. Irrr. It’s nice to report, though, that Ariel’s only needed to use the ignition bypass once.
I spent some time on Glinda last weekend. Saturday afternoon I decided to install the new clutch and brake pedal assembly. When I first started planning to do this swap, I researched what I’d need to do, and had been led to believe that the large support bracket was different to accommodate the clutch, so I bought a used version along with the pedals and pertinent parts. Over the last few weeks I’d cleaned up the used parts, primed them, and shot them with a couple coats of Rustoleum gloss black. With them ready to go, I crawled under the dash to determine the best path of attack. It didn’t take long for me to figure out the bracket that was in the car looked exactly like the one I’d bought. Okay, the hardest part of the job didn’t need to be done. Yay. The existing brake pedal came out once I’d popped off the clips that held the two shafts (pivot and master cylinder rod) in place, slid the shafts out, and dropped the pedal straight down. Getting the new, longer clutch pedal shaft into its pivot hole required me to remove the defroster duct; which required me to remove the glovebox; which required me to remove the new radio housing. With all that stuff out of the way, the clutch shaft slid into the hole, through the brake pedal, out the other side of the bracket. The clutch pedal slid over the end and was retained with a washer and nut. It took a while to convince the duct it needed to go back in, but it finally succumbed, and the rest of the reassembly went well. An adjustment to the brake pedal switch completed the pedal swap. The other task I undertook was repairing the failing vinyl on the driver’s seatback. I’d purchased a repair kit a while back. Step 1 was to glue a backing cloth to the backside of the vinyl surrounding the hole. Since it required a four hour cure, that was the end of Glinda work for the weekend.

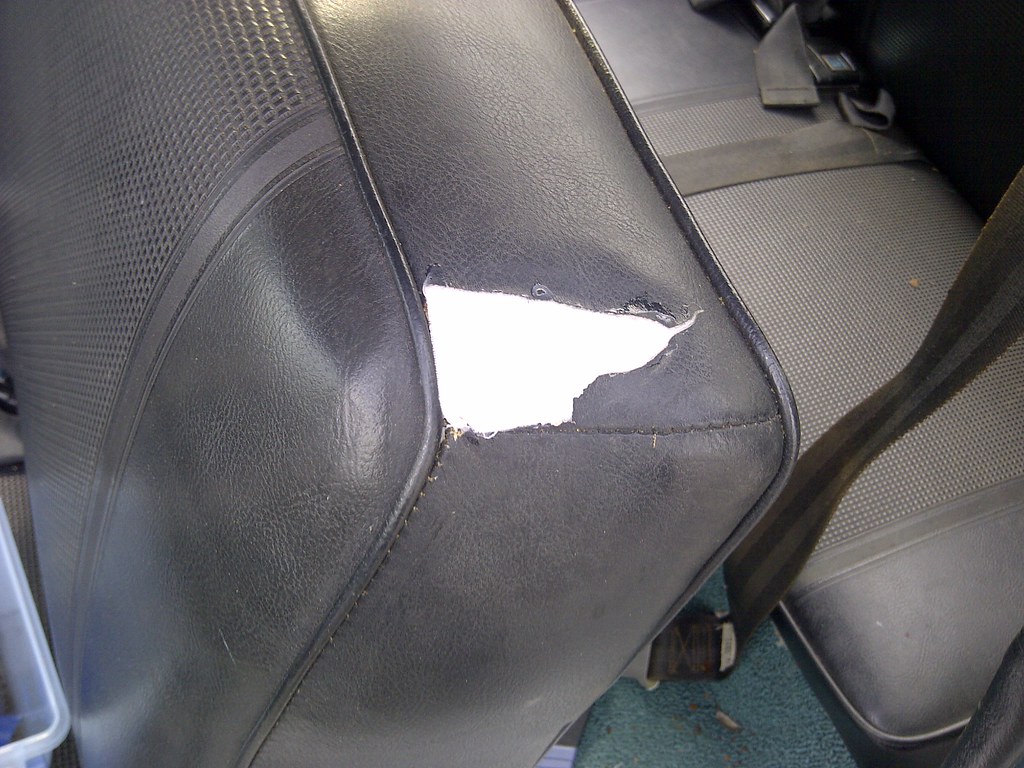
Sunday was Luna day. Yes, the car that hasn’t moved in months got some attention. Victoria and I decided it was time to tackle installing the convertible top. With the sun beating down on us, we fought with the attaching the rear window piece to the trim sticks for a couple hours. Finally, we had to give up since the baking black vinyl and cloth were getting too hot to handle. While we made some good headway, it would have been nicer to finish the job. Well, they’ll be other weekends. While she (Luna) was out in the driveway I fixed the tie-rod problem I’d discovered when we did a lube job soon after bringing her home. A previous mechanic had adjusted the joint in such a way as to bind the balljoints. I needed to turn one end relative to the adjusting sleeve, but that entailed some doing. First, I needed to loosen the two clamp nuts from there associated bolts. This was done with great trepidation since these guys are known to just torque right off due to being seized. Well, God was looking down on me since both came off cleanly with only penetrating fluid and careful wrenching. The threaded connection of the tie-rod end into the sleeve took the aggressive application of flame to get it to the point where, with me standing on the end of a pipe wrench, I could get it to move. It only took a few degrees of rotation to free the tie-rod centering it in its travel. After cleaning the bolts on the wire wheel and generously applying anti-seize, I reassembled the clamps, dropped the car off the jackstands, and called it a day.
Friday, May 16, 2014
Such a Deal I Have for You
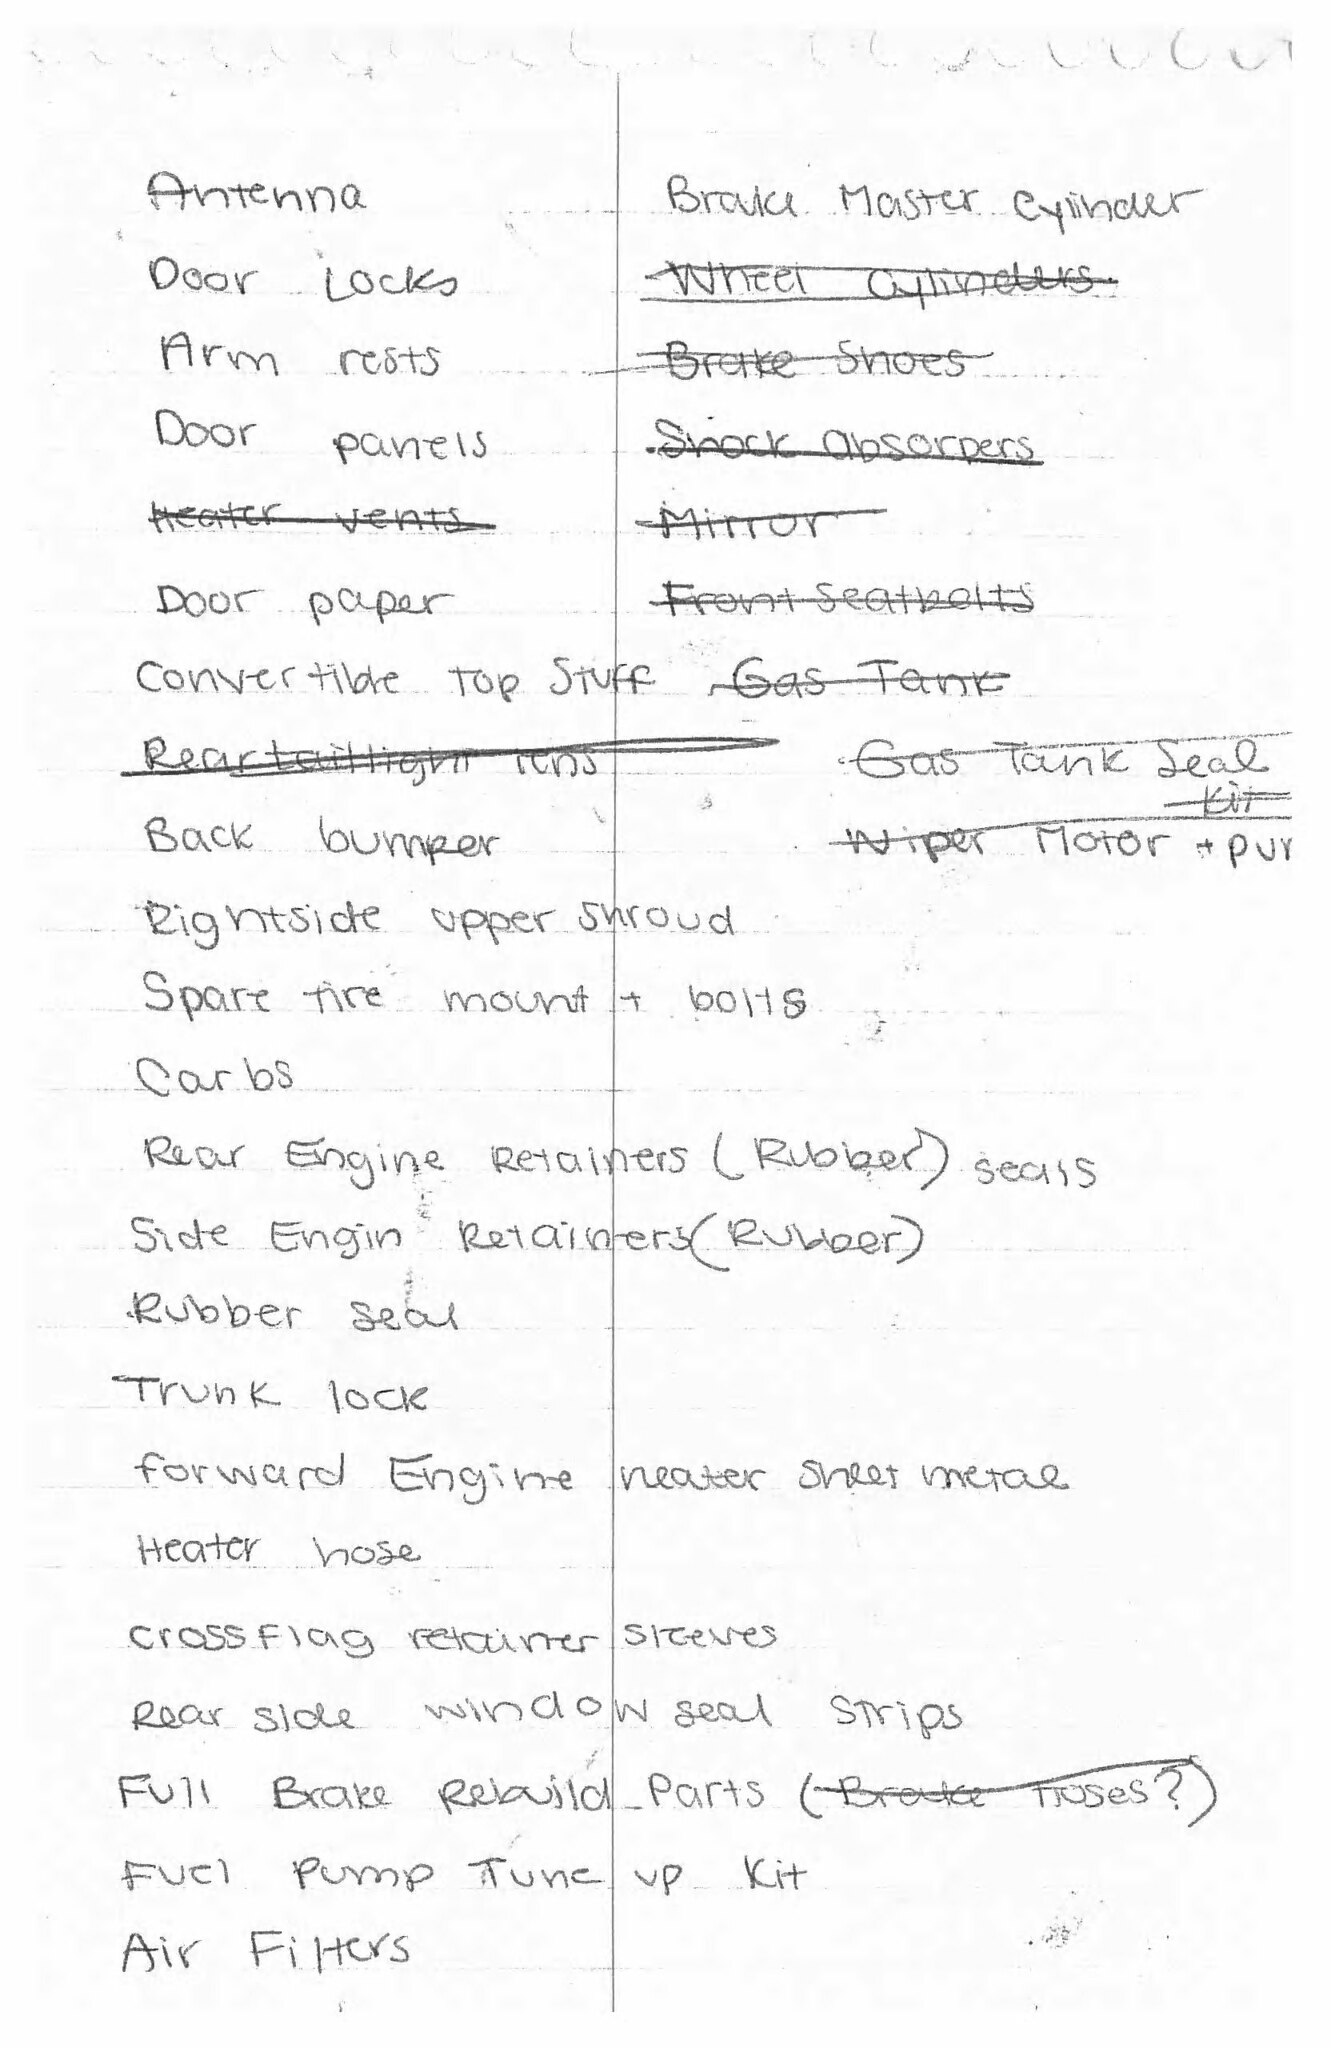
With the acquisition of Scarlett, I find myself needing to rid myself of TwoTone to get fleet membership back to four. I could part her out and probably make back the $500 I paid for her, but she deserves a better fate. As I mentioned a few posts back, the guy who sold us Scarlett (John) also offered me his rusty, ’64 coupe complete with a 4-speed transmission and a 110 HP engine. The key word in that last sentence is “complete.” FYI – here’s a link to the Craigslist ad.
Since John never finished reassembling Scarlett after her new paintjob quite a while back, some parts have gone missing over the years. Last night Mikhaila and I did a quick inventory of Scarlett and compiled a list of items that she needed. We then raided the stash of parts we’d pulled off TwoTone for suitable replacements. We snagged the parts I’d purchased from Clark’s like brake hoses and the fuel tank install kit, the parts I’d purchased online like the dual master cylinder, and even parts that came with Wilma like shock absorbers. The only items we took that had come off TwoTone were the sideview mirror, rear taillight lenses, heater vents, and the gas tank. Hence the aforementioned “complete” since TwoTone is now not complete.
Subscribe to:
Posts (Atom)