I’m not sure that averted is the proper word here, unless it was my guardian angel that prevented me from ruining Ringo’s new paintjob last night. It started with the decision to use POR-15 on the headlight buckets. After brushing off the loose rust from the slightly deteriorated metal, I grabbed the glass canning jar containing the last of my POR-15 supply and attempted to spin off ring holding the lid on. It wouldn’t budge. To get a better grip, I used my big channel-lock pliers on the ring. The next thing I know the glass jar is in pieces, black paint is splattered on the floor and the front of my jeans, the rubber glove on my left hand is sliced as are a couple of my fingers, and the exposed skin is coated in REALLY un-removable paint. All of this happened a scant few feet from Ringo’s left rear quarterpanel. My initial reaction was to grab a rag and start wiping, but the reality was I needed to get out of my pants and I wasn’t going to do that in the garage. I took the rag and nearby gallon of paint thinner and headed for the basement door. Once inside, I shucked my shoes and pants and began to wipe away the black spot from my left thigh, knee, and shin. All the while staunching the flow of blood from my index finger. Thankfully I was able to get most of the blackness off my skin. Even more thankfully, subsequent inspection of the Ringo’s skin showed no signs of splatter. TYL.
Other than doing stupid things last evening, I did make some progress on reassembly. I installed the stainless windshield trim pieces and antenna, and cleaned and lubricated the speedometer/odometer drives. Tonight I should get the gage set reassembled and the dash put back together. Might even put in the seats.

Wednesday, November 30, 2011
Tuesday, November 29, 2011
Assembly is a Beautiful Thing – Painting Not So Much
As outlined in my last post, I had high hopes and big plans for the long holiday weekend. How did I do? Pretty well, but a cheap paint gun held me back from checking off all the tasks I’d listed.
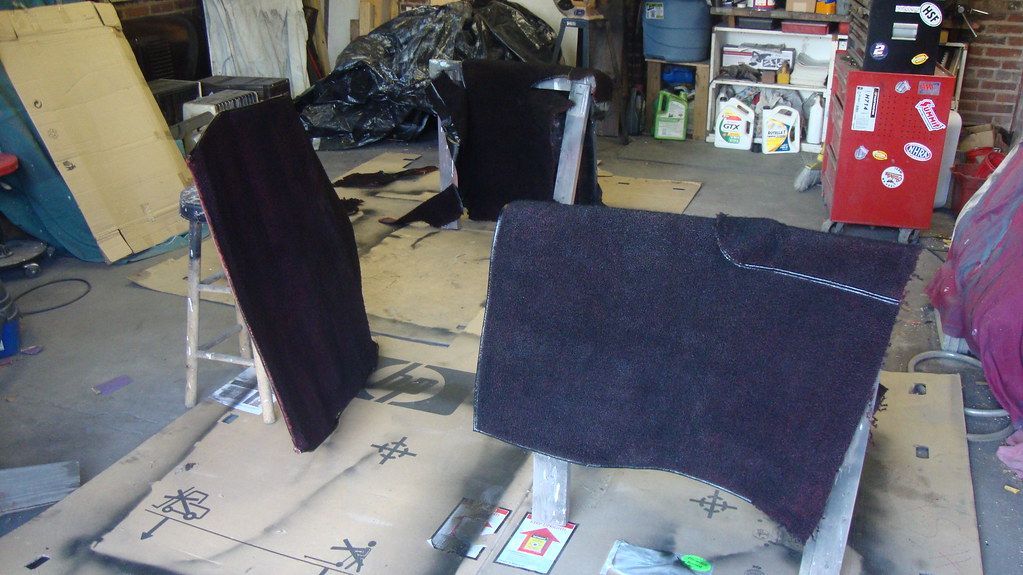
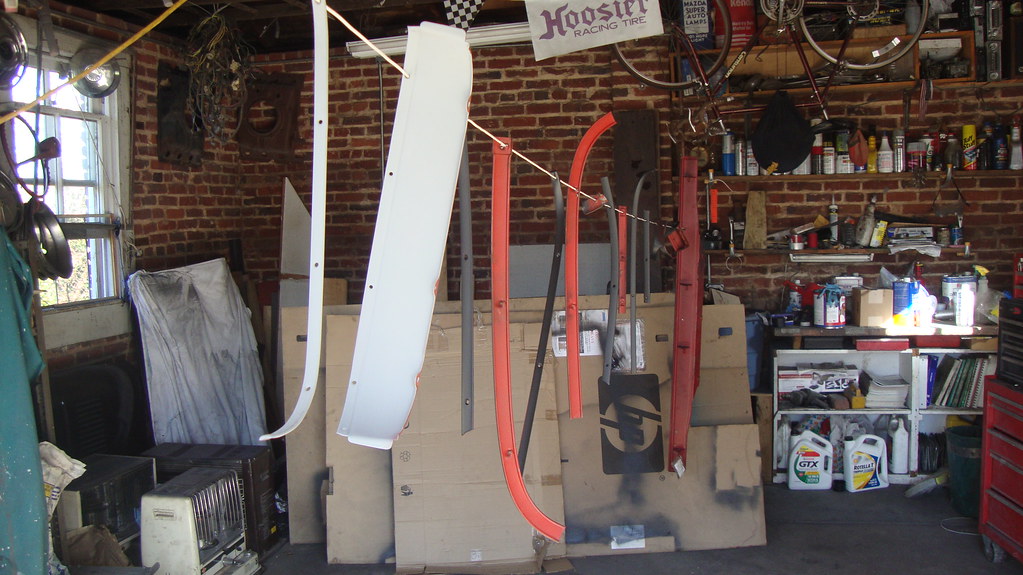
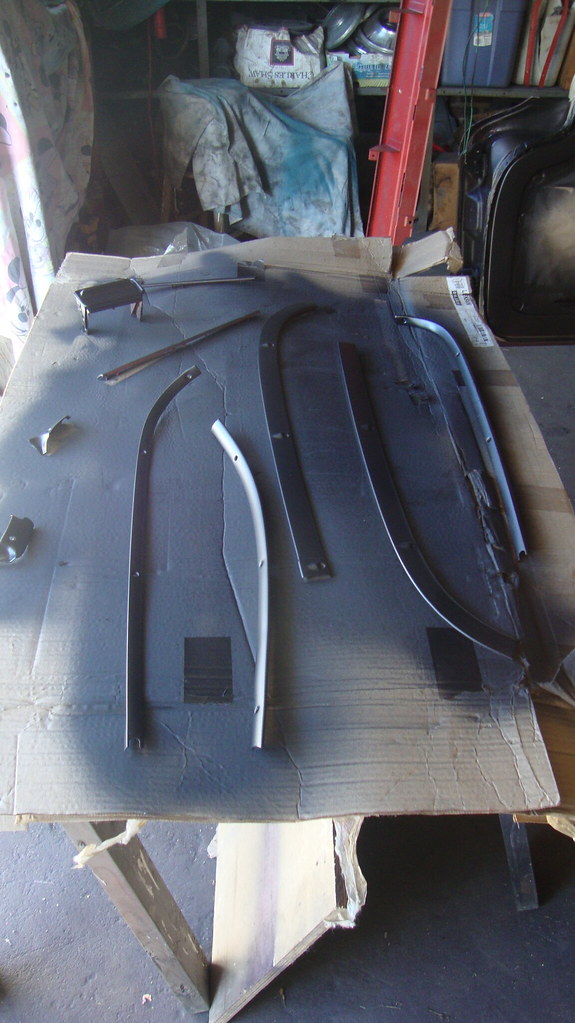
Thursday I rolled Ringo out of the garage and primed the last two sheetmetal parts by first hanging them on a wire strung across the garage. Then, I emptied five cans of vinyl dye onto the carpet pieces.
Next, out came the door and onto the sawhorses – deja vu is not a good feeling. Using my last sheet of hook-and-loop 80 grit sandpaper, I removed the fish-eyed paint from about half the door’s exterior surface before switching to 120 grit and hand-sanding. Soon after lunch, it was ready for primer so I hung it from the rafters, donned my painting apparel and mask, mixed a batch of urethane primer and gave the skin three good coats. After an hour of curing, I moved the door to the driveway and hung up all the interior bits of sheetmetal for the shooting of the satin black. A couple coats and they looked like new. The lovely Loriann convinced me that brushing the paint on the interior would look like crap, so I spent the time in between coats masking. With that finished, it was time to roll Ringo back into the garage and shoot the interior surfaces with the same rattle-can Rustoleum. All that went better than I’d expected and I was able to get three coats down on every exposed area of primed metal before dark. That was it for the day.
Friday I pulled off all masking and started some reassembly while I waited for the air temp to heat up. In went the nearly-black carpet pieces and the rear package area covers followed by the speakers to hold the latter pieces in place.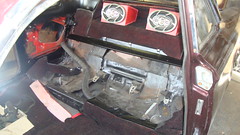 With the carpets in I was able to see a screw-up – I’d matched Lucy’s seatbelt mounting hole locations when drilling into Ringo’s floors, but sadly, the holes in the carpet did not match up with the new mouting holes. I’ll just make new holes in the carpet since I don’t want to deal with filling in holes in the sheetmetal flooring. Since the loose interior trim was fully dried, I proceeded to install all of them into their homes.
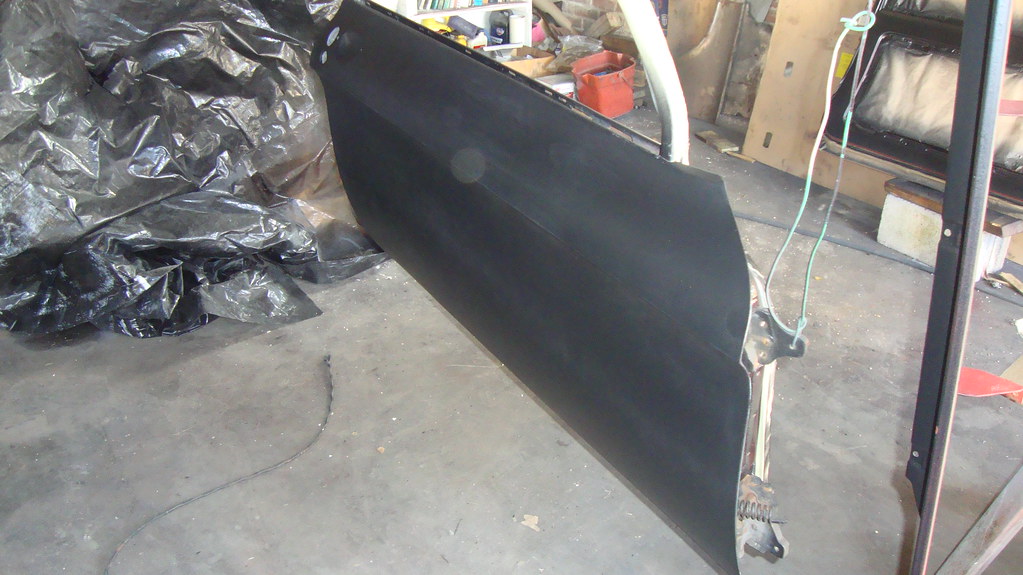
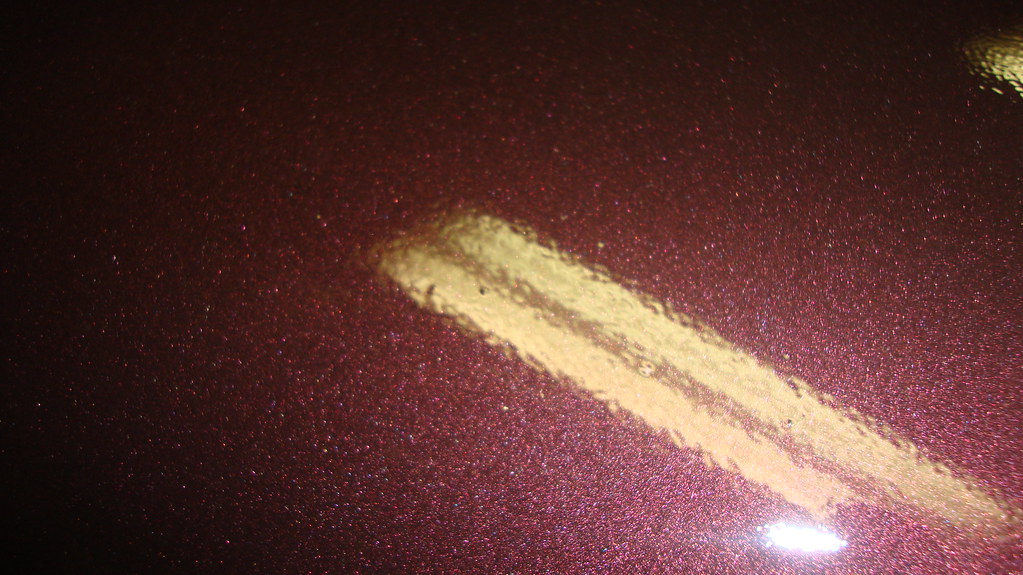
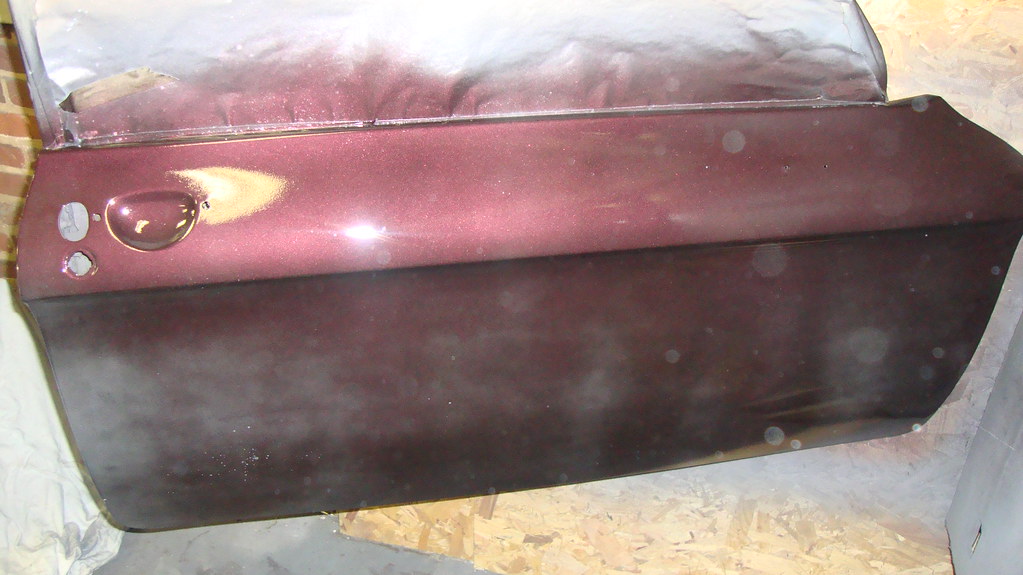
  Next, it was time to deal with the door. Back on the sawhorses so I could smooth out the primer and rinse off the residue. Then back up into its hangin position before wiping it down completely with Wax and Grease Remover. Finally, I was able to mix a batch of Black Cherry Pearl to lay down some layers of paint. Having made as many precautions against fish-eyes as possible, I felt confident that I’d end up with a nearly perfect job, but I was sadly mistaken. The day before I had cleaned the primer out of my Harbor Freight gun, disassembled it, and blew out the passages as best I could with dry, compressed air. So, after test shots on cardboard and my anniversary engine lid anniversary engine lid that both looked fine, I laid down a light coat onto the door. I was shocked and mightily pissed to see an array of tiny gray dots forming on the door. Since there were already some fish-eyes in the rest of the paint job, I continued on resigned that the door would also sport the spots, but at least it was the passenger door. After four coats of paint, it actually wasn’t too noticeable. With the paint on, I cleaned the gun rigorously again disassembling and blowing out the passages before mixing and loading clear into the cup. While spraying the first coat of clear, the fish-eyes grew before my eyes and immediately I just stopped what I was doing, threw away the rest of the clear and decided I needed a new plan. It was apparent to me that I had been unable to get all the thinner out of the gun and some was mixing into the coatings as they were being sprayed.
Time for plan B. I’ve got three guns, so I’ll be using all of them the next (and darn well better be the last) time I do the door. My oldest, largest tipped gun will shoot the primer, I’ll be returning the Harbor Freight gun for a new replacement and that one will lay down the color coats, while my touch-up gun with its 1.8mm tip will do clearcoating duties. This way no thinner will ever get in any of the guns before they are used.
Not being in ANY mood to continue working on cars, I knocked off for the day.
Saturday I swapped steering wheels and pinchweld trim with Lucy and installed taillight assembly. The latter activity was time consuming since I had to find the four sockets and lenses and all the hardware and then rewire them to the car since they were not cautiously removed a year ago. One of the repairs I had to undertake was the replacement of one of the contacts. Somehting I hadn’t done before, but it all went well.
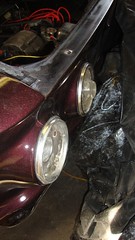 I still need to replace a couple lens gaskets with new ones and connect the ground wires when I install the shroud seal strips, but I’m calling that significant first step in the exterior reassembly complete. The last thing I did on the weekend was screw on the chrome trim pieces around the windows. This car is going to look awesome when I FINALLY get it all back together.
Thursday I rolled Ringo out of the garage and primed the last two sheetmetal parts by first hanging them on a wire strung across the garage. Then, I emptied five cans of vinyl dye onto the carpet pieces.
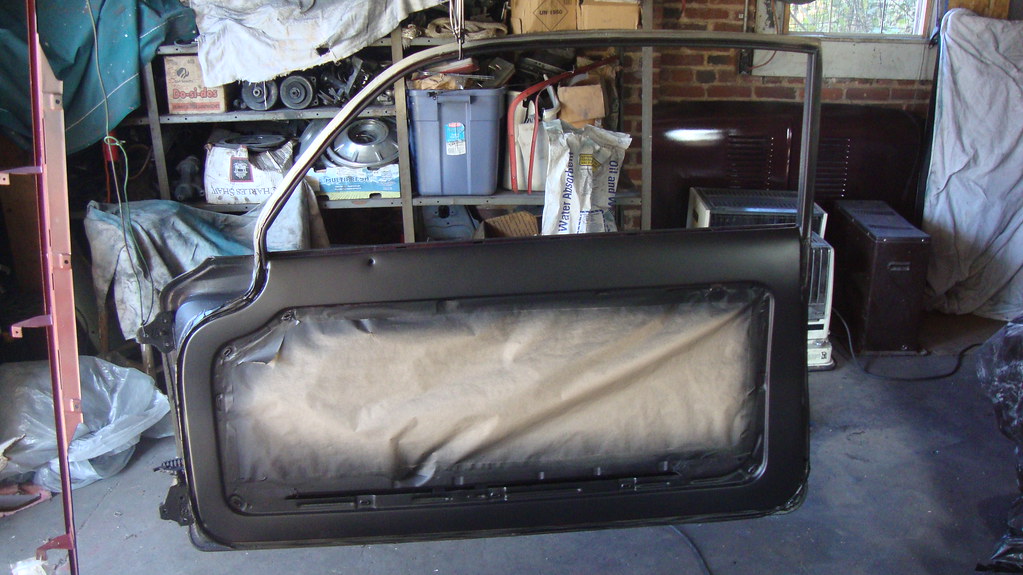
Next, out came the door and onto the sawhorses – deja vu is not a good feeling. Using my last sheet of hook-and-loop 80 grit sandpaper, I removed the fish-eyed paint from about half the door’s exterior surface before switching to 120 grit and hand-sanding. Soon after lunch, it was ready for primer so I hung it from the rafters, donned my painting apparel and mask, mixed a batch of urethane primer and gave the skin three good coats. After an hour of curing, I moved the door to the driveway and hung up all the interior bits of sheetmetal for the shooting of the satin black. A couple coats and they looked like new.
 The lovely Loriann convinced me that brushing the paint on the interior would look like crap, so I spent the time in between coats masking. With that finished, it was time to roll Ringo back into the garage and shoot the interior surfaces with the same rattle-can Rustoleum. All that went better than I’d expected and I was able to get three coats down on every exposed area of primed metal before dark. That was it for the day.
Friday I pulled off all masking and started some reassembly while I waited for the air temp to heat up. In went the nearly-black carpet pieces and the rear package area covers followed by the speakers to hold the latter pieces in place.
 With the carpets in I was able to see a screw-up – I’d matched Lucy’s seatbelt mounting hole locations when drilling into Ringo’s floors, but sadly, the holes in the carpet did not match up with the new mouting holes. I’ll just make new holes in the carpet since I don’t want to deal with filling in holes in the sheetmetal flooring. Since the loose interior trim was fully dried, I proceeded to install all of them into their homes.
 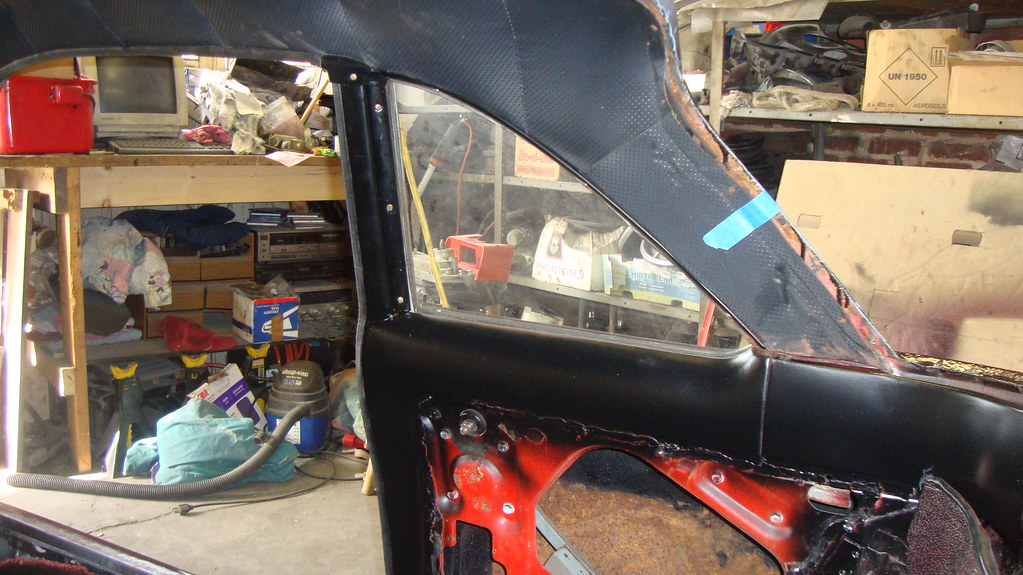 Next, it was time to deal with the door. Back on the sawhorses so I could smooth out the primer and rinse off the residue. Then back up into its hangin position before wiping it down completely with Wax and Grease Remover. Finally, I was able to mix a batch of Black Cherry Pearl to lay down some layers of paint. Having made as many precautions against fish-eyes as possible, I felt confident that I’d end up with a nearly perfect job, but I was sadly mistaken. The day before I had cleaned the primer out of my Harbor Freight gun, disassembled it, and blew out the passages as best I could with dry, compressed air. So, after test shots on cardboard and my anniversary engine lid anniversary engine lid that both looked fine, I laid down a light coat onto the door. I was shocked and mightily pissed to see an array of tiny gray dots forming on the door. Since there were already some fish-eyes in the rest of the paint job, I continued on resigned that the door would also sport the spots, but at least it was the passenger door. After four coats of paint, it actually wasn’t too noticeable. With the paint on, I cleaned the gun rigorously again disassembling and blowing out the passages before mixing and loading clear into the cup. While spraying the first coat of clear, the fish-eyes grew before my eyes and immediately I just stopped what I was doing, threw away the rest of the clear and decided I needed a new plan. It was apparent to me that I had been unable to get all the thinner out of the gun and some was mixing into the coatings as they were being sprayed.
Time for plan B. I’ve got three guns, so I’ll be using all of them the next (and darn well better be the last) time I do the door. My oldest, largest tipped gun will shoot the primer, I’ll be returning the Harbor Freight gun for a new replacement and that one will lay down the color coats, while my touch-up gun with its 1.8mm tip will do clearcoating duties. This way no thinner will ever get in any of the guns before they are used.
Not being in ANY mood to continue working on cars, I knocked off for the day.
Saturday I swapped steering wheels and pinchweld trim with Lucy and installed taillight assembly.
 The latter activity was time consuming since I had to find the four sockets and lenses and all the hardware and then rewire them to the car since they were not cautiously removed a year ago. One of the repairs I had to undertake was the replacement of one of the contacts. Somehting I hadn’t done before, but it all went well.
 I still need to replace a couple lens gaskets with new ones and connect the ground wires when I install the shroud seal strips, but I’m calling that significant first step in the exterior reassembly complete. The last thing I did on the weekend was screw on the chrome trim pieces around the windows. This car is going to look awesome when I FINALLY get it all back together.
Wednesday, November 23, 2011
Perspective can be Painful
I’ve been cruising along here with only the normal negative influences of the TTT, so not that many demands have been placed on my time (or bank account) by the house or the other cars (thank You Lord). All that changed last week when a litany of issues began to invade my staid little life. First, the house’s hot water heater sprung a leak, then the lovely Loriann was sideswiped by an impatient idiot, and finally, Ariel contracted appendicitis and had the offending organ removed Monday night (thank God she was smart enough to have the intense abdominal pain checked out before said sack burst). All that has put a real wrench in my getting good Ringo-time.
Well, the replacement water heater has been installed and is functioning properly, the lovely Loriann and insurance companies will deal with getting the PT Cruiser’s mirror replaced, and Ariel is home recovering, so I’m ready to knock out some serious Ringo progress.
With the four day weekend only hours away and sunny, sixty-degree days on tap, I can plan the tasks I hope to complete by the end of Sunday. First will be to roll Ringo out of the garage and do battle with the passenger door for hopefully the last time. The initial skirmish will be sanding smooth the mess that’s currently on it, followed by cleaning and a few coats of high-build primer. I’ll need to be careful to not sand through the epoxy primer so I’m not required to shoot a protective coat or two of that stuff. While letting that cure, I’ll move on to spraying primer on the last pieces of loose interior (gage and glovebox domes) in preparation for their final coat of satin black. Next will be the dying of the carpet. Mikhaila just moved the box filled with cans of VHT’s black vinyl die to ensure they’re warmed up and ready to go. After that the primer should be dry enough on the loose interior bits for me to lay down a couple coats of rattle-can Rustoleum. Included in that paint work will be the inside surfaces of the two doors. Next, I’ll be sanding the interior surfaces I’d brush-primed the other night. With those ready for paint, I’ll need to make the hard decision about how I finish coat them. Given the major pain it would be to properly mask, I’m still very much inclined to paint the hard-to-reach areas with a brush and save the spray for the dash and maybe the areas under the rear side windows. We’ll see how ambitious I am. Finally, I’ll move on to putting the finish coats of color and clear on the outside of the passenger door. I’ve purchased a new in-line dessicant dryer, so I’m confident the fish-eyes will not be the issue they were before.
I’m excited about making some significant headway towards the light at the end of this roadification tunnel.
Thursday, November 17, 2011
Out With the Red
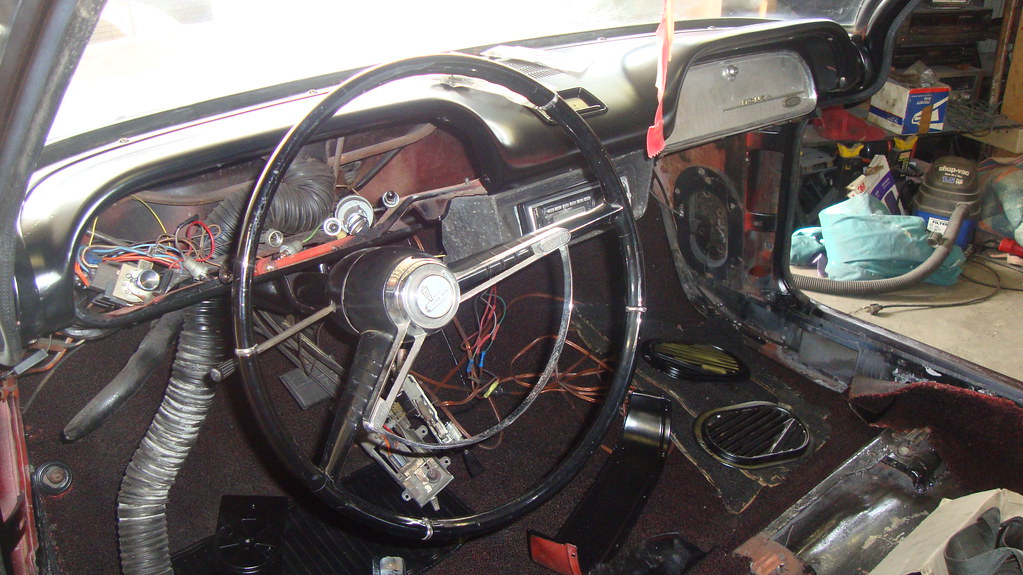
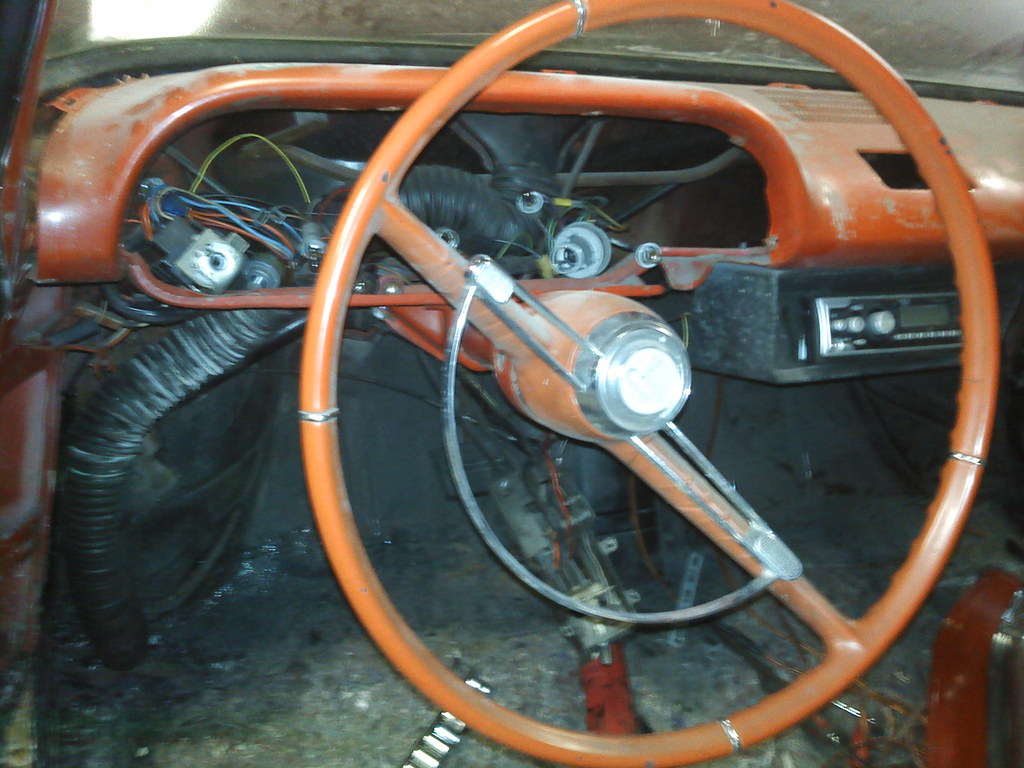
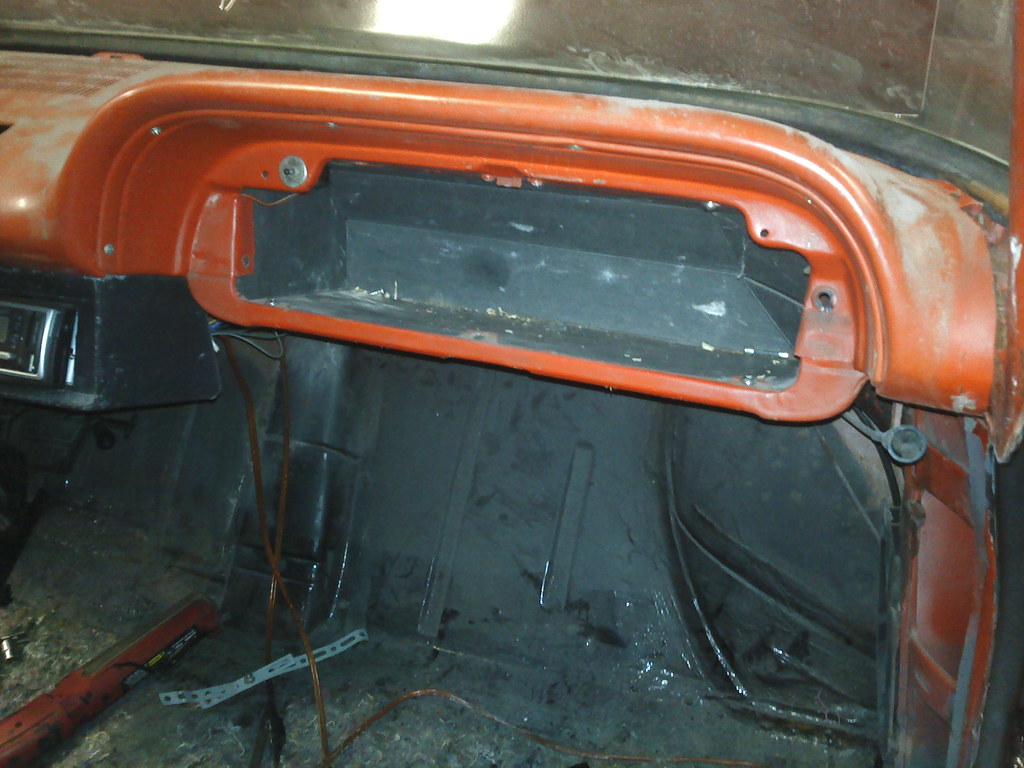
After last night’s vacuuming, wiping, and priming, Ringo’s interior is almost devoid of red. Some patches here and there will be covered by panels, carpet, and the back seat. There will, however, still be a bit of visible crimson if one peeks under the dash – a reminder of past times.
Tuesday, November 15, 2011
Prepping Ringo's Interior Metal
Last night I spent some time sanding all of Ringo’s interior red surfaces in preparation for priming. I’ve decided I’ll use Rustoleum rusty metal primer and apply it with a foam pad. My hope (and prayer) is that I’ll be able to lay it down smoothly enough to preclude any sanding before spraying the finish coats of satin black Rustoleum. My real hope (and REAL prayer) is that it goes down so nicely with the pad that I’ll be able to put on the finish coats with the pads as well. The masking required to prep for spraying is probably as bad as what I had to do before painting the outside. I truly don’t want to go through that again.
Typical Weekend
I’d love a weekend of consistent ups, but I’m destined to always have some downs. This weekend held true to form.
On the car-front the ups included finding a suitable GUP starter/solenoid to replace the failing Glinda’s assembly, getting some of Ringo's interior bits primed for changing to black, and running Ringo's engine for a good twenty minutes. The latter exercise required trying out five different failed fuel pumps before I gave up and borrowed the one off Lucy's engine. Looks like I'm adding fuel pump to Ringo's shopping list. The choke butterfly on the right carb never opened up all the way, so I think there's still a problem with that carb. It's one that I tried sealing the throttle shaft to housing gap with o-rings and springs, so I'll borrow again from Lucy and see if things change.
The downside was a bad inline air dryer that resulted in a totally botched repaint of the passenger door. A myriad of fish-eyes contaminated the entire spray. That means I get to sand, prime, and paint AGAIN! Arggghhh! No photos of this mess.
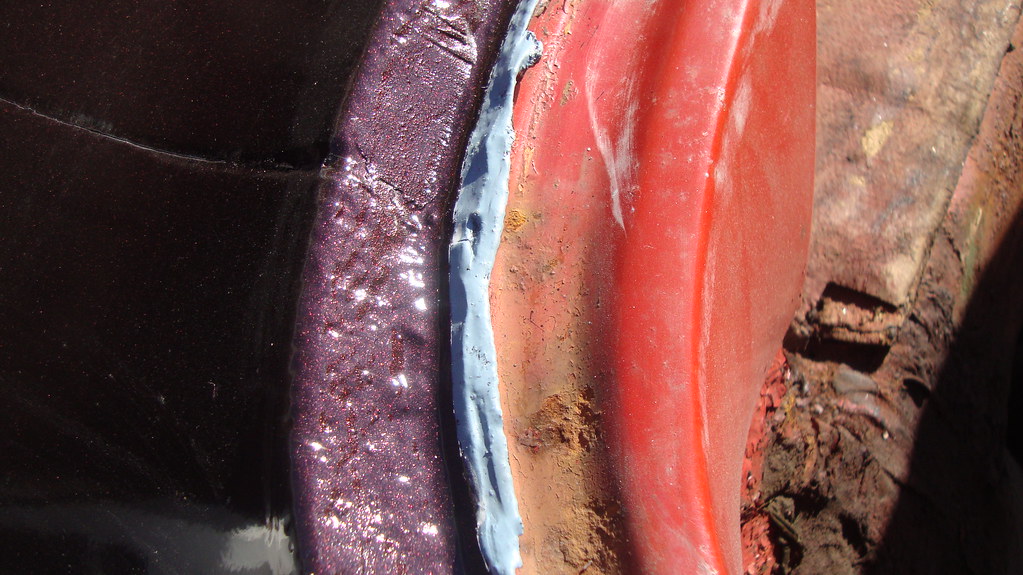
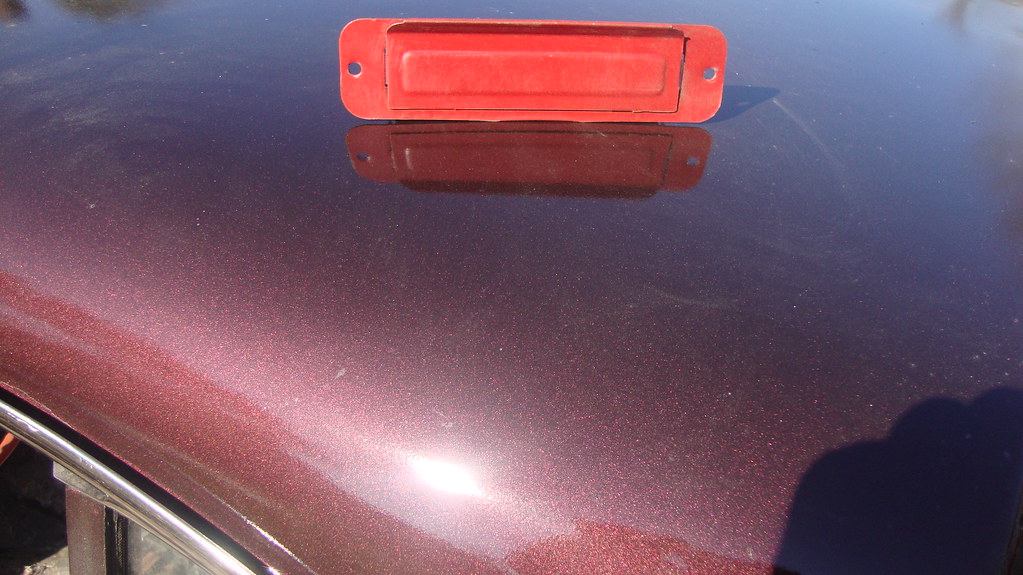
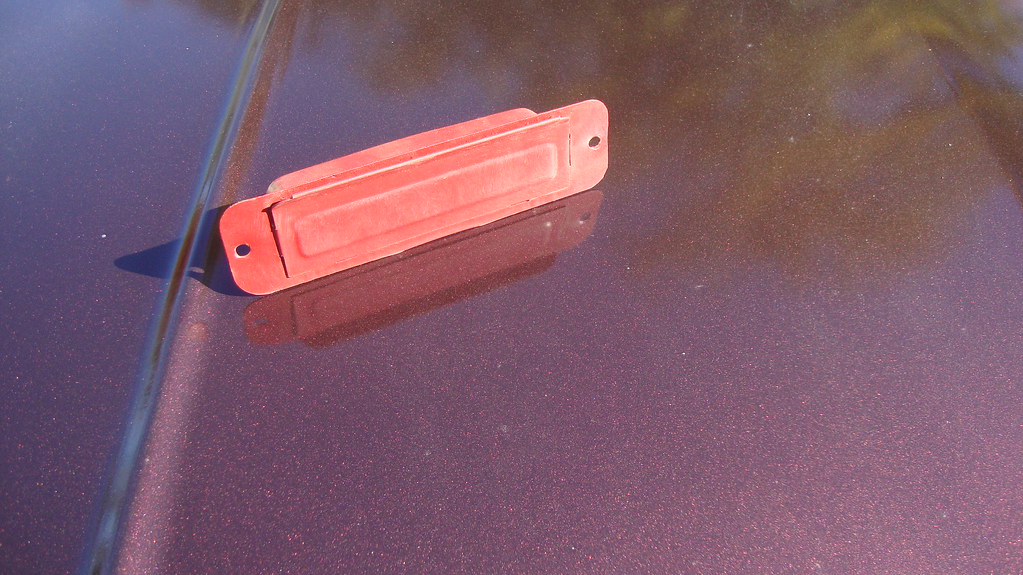
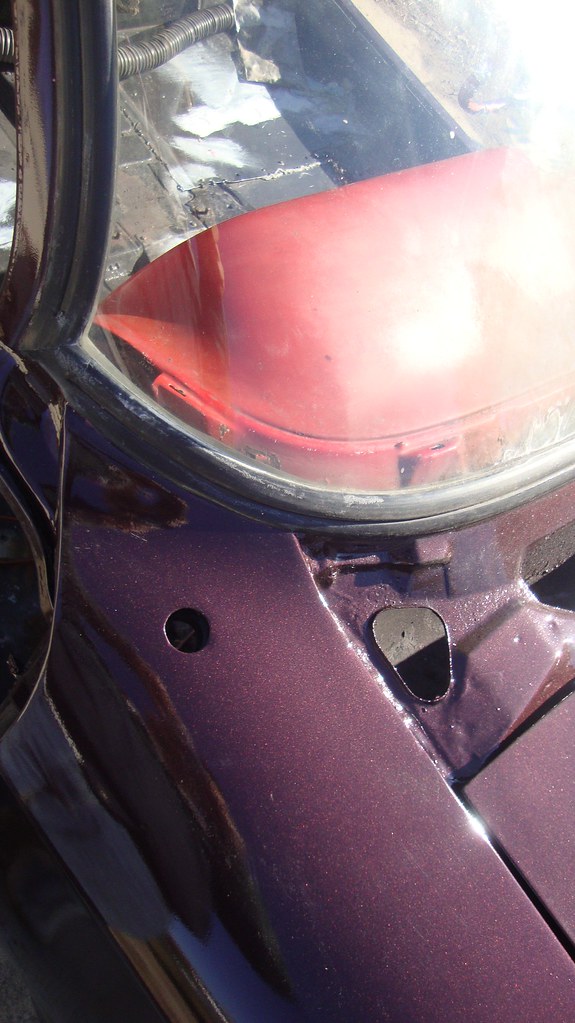
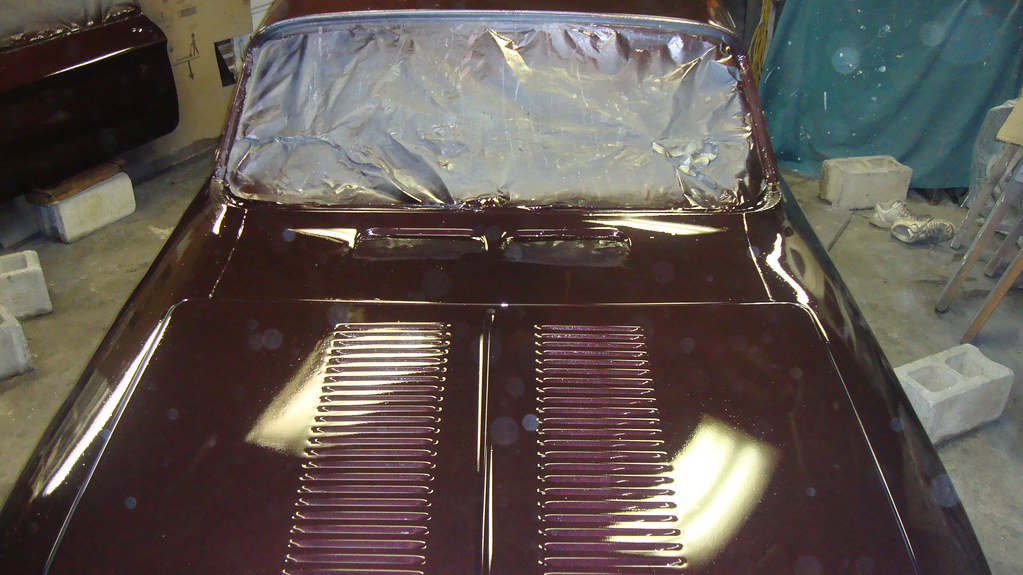
I did take a few more photos of Ringo in the light of day.
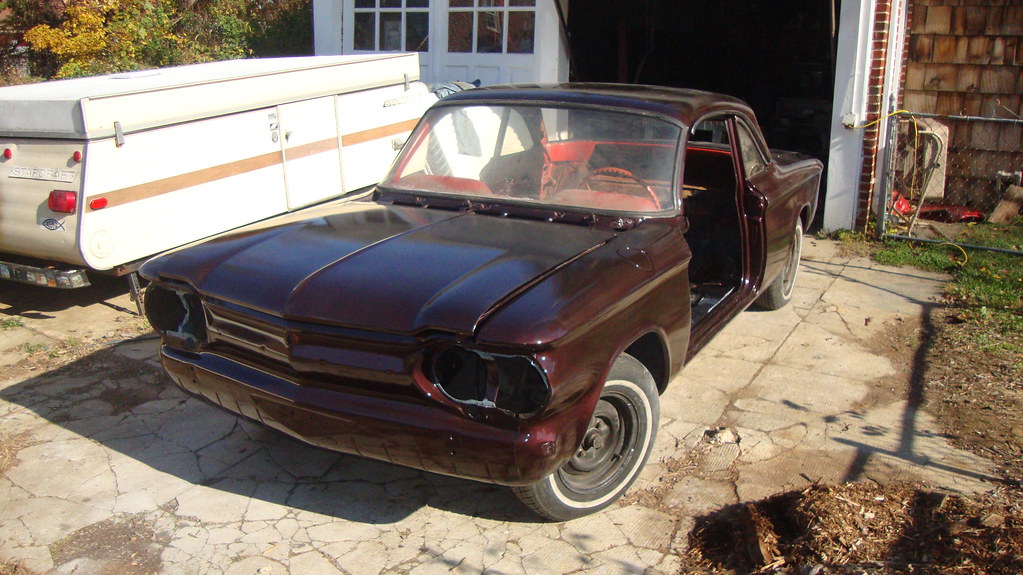
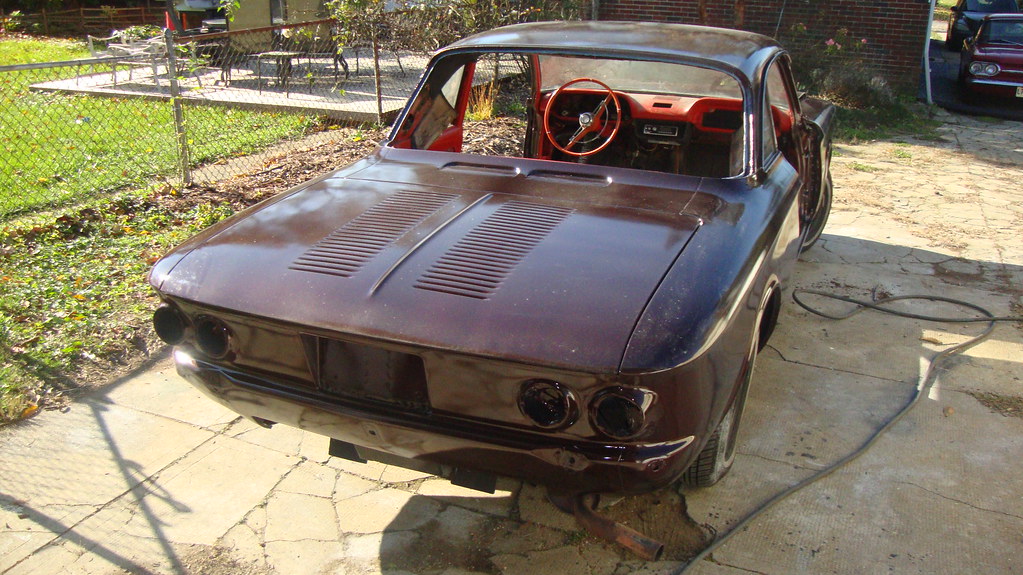
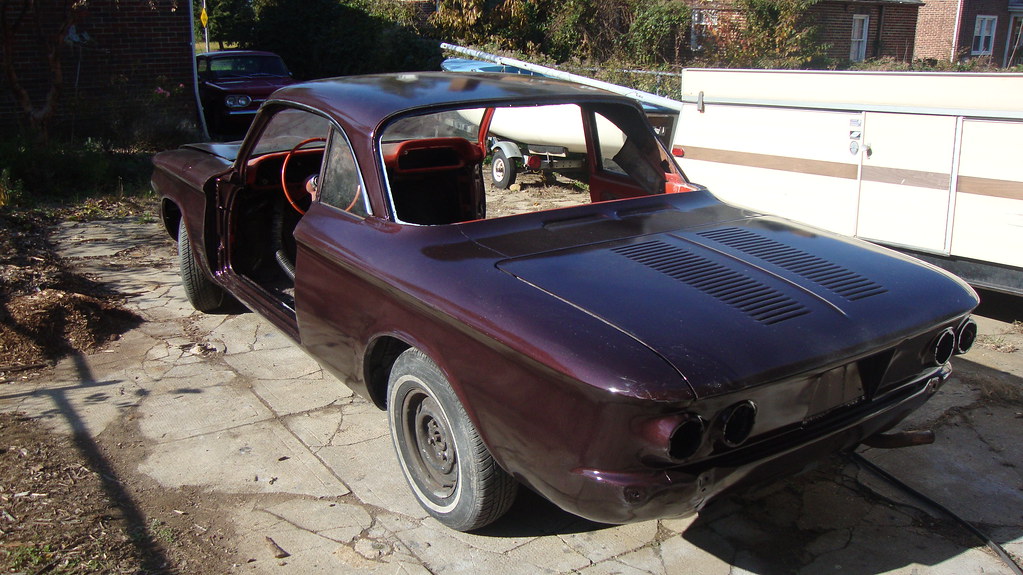
They also illustrate the ghastly clash of the red interior color with the exterior’s new coating. Black will look so much better.
Friday, November 11, 2011
You Must Tear Down, Before You can Build Back Up
Sounds like a mantra from the Marines – appropriate on this Veteran’s Day, and by the way, a huge thank you to all those who’ve served in our armed forces. I know I only have my freedoms because of the sacrifices you made.
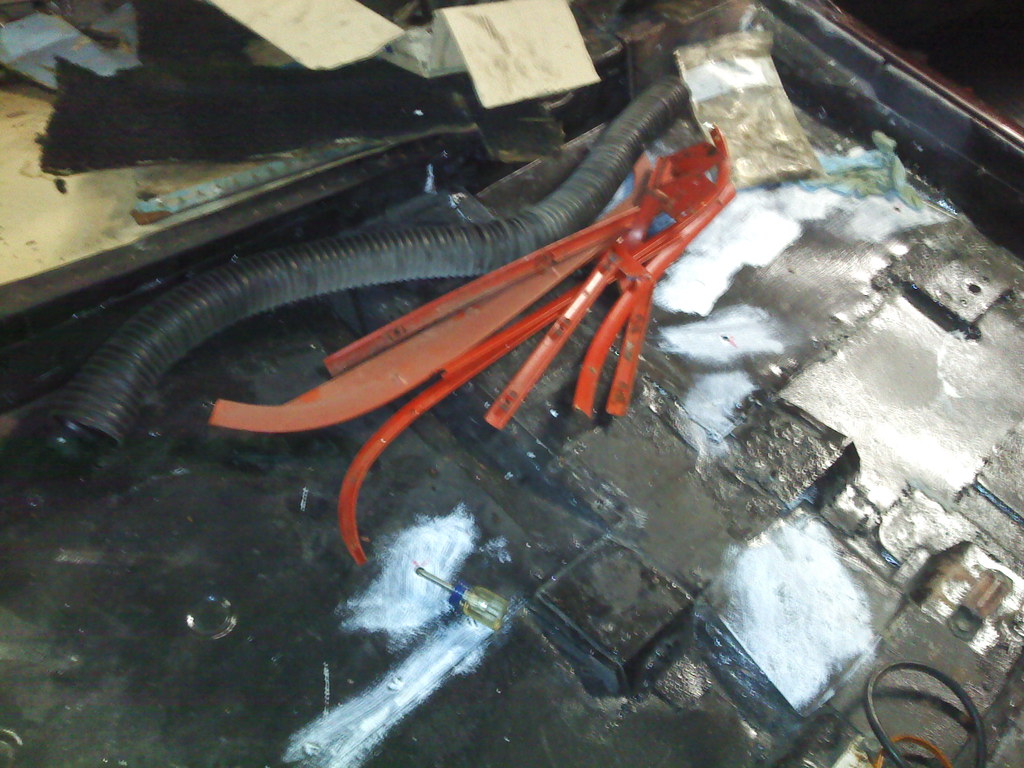
The tearing down I’m referring to in the title of this post is the disassembly of Ringo’s interior to prepare it for the imminent color change. I pulled off all the red trim sticks around the windows, as well as the glovebox door and gage set. There are a lot of red metal surfaces that will have to be transformed.
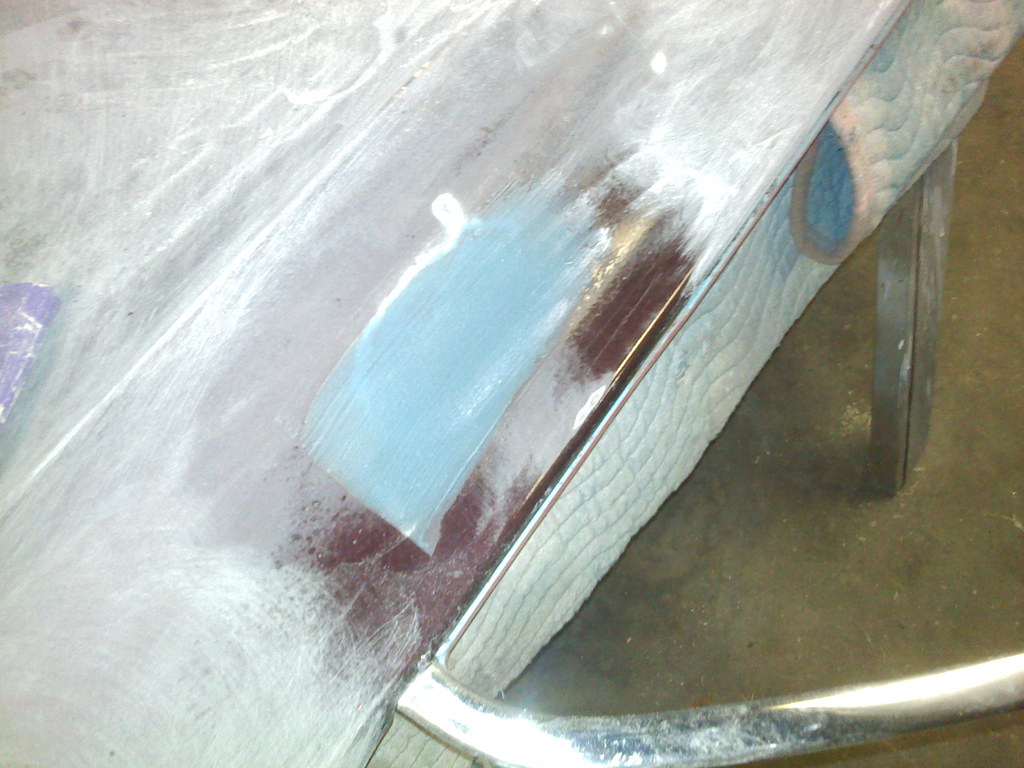
All that effort came after I attacked the passenger door with sandpaper. This was the part with crappy color coverage. While I had the door all scuffed up, I decided to fill in the two side-view mirror mounting holes since Ringo didn’t originally have a mirror on this door. Amazingly, the welding gas tank still had some of its contents left, so I was able to fill the holes correctly – with weld. After grinding things smooth with the flapper wheel, I laid down a skim coat of filler that will be sanded smooth prior to getting a coat of epoxy primer which I’m hoping to lay down tonight. That will allow me to spray high-build primer tomorrow morning and, hopefully, sand and paint Sunday. Thankfully, the weather looks like it was accommodate my schedule.
Thursday, November 10, 2011
The Swapping Continues, Plus Lucy is Becoming Flintstone-Worthy
Last night I was back out in the driveway (since the garage is packed) swapping the last seat tracks. The pocket making to clear the latch went well, and I had the passenger seat installed in Lucy in about a half-hour. I then began swapping the fresh air vent grills, kick panels, and heater registers and grills. Somehow the passenger kick panel from Ringo is missing. I think it’s buried in the basement, but a cursory search did not turn it up. I did, however, get the driver’s side bits all swapped. The ones coming out of Lucy are quite dingy and will need a sandblasting, priming, and paint job before they’re suitable for installation into Ringo.
Since today was payday, I put my order in with Amazon for 5 rattle cans of VHT satin black vinyl dye for Ringo’s carpet transformation. They might arrive Saturday which would be nice. Before I can install carpet, though, I want to paint the interior metal surfaces satin black. That project will require significant sanding and masking, and a few cans of Rustoleum primer and paint.
The Flintsone allusion is due to Lucy’s failing flooring. While installing the front seats, I found the metal around the bases to be solid, but just about everywhere else the consistency is tissue paper thin. With that in mind, I asked Brianna if it was alright if Ariel used Heidi until Ringo is back on the road. I was not comfortable putting any more miles than necessary on the wounded Lucy. Brianna graciously agreed to the loan, so the lovely Loriann is driving Heidi up to PA this afternoon and will return at the wheel of our stalwart Suburban. With the days shorter, my commutes are done in the dark, so top-down motoring opportunities are pretty much gone for the year.
Wednesday, November 9, 2011
Black is Right and Red’s All Over
As soon as I laid eyes on Ringo’s new paint, I knew his red interior would be gag inducing next to the purple pearl. So my text to Ariel yesterday was, “What do you think about Ringo getting a black interior?” Her reply was, “That would look good.” To which I typed, “Better than the red. I’m looking into the possibility of swapping seats and door panels with Lucy.” “Ok, cool!” she responded. With her approval I logged into the CorvairCenter forum to ask if the swap is possible. The only helpful response I got was someone informing me the seat track mounting is different.
Last evening after another delicious dinner prepared by the lovely Loriann, I moved Lucy into the driveway and yanked out her seats and driver’s side panels. Only had one bolt break – the upper left one holding the back of the rear seat. There are five other bolts, so I’m not worried. My first install was the rear panel from Ringo into Lucy. I discovered Ringo’s are not factory – they’re held in by wire clips instead of the stock serrated nails. Seven quarter inch diameter holes had to be drilled in the sheetmetal and the panel popped right in. There is relatively thick padding in the panel that precluded the easy installation of the window crank. I’m going to try and remove the foam donut from the back and that should allow the crank to snap into place. Moving on I installed the rear seat back and bottom without issues and then vacuumed the carpet before attacking the driver’s seat swap. My air wrench zipped off all the bolts holding seat tracks to both seats and some WD-40 lubricated the slides. I installed the inboard track, but when I placed the outboard one (containing the latching mechanism), it was painfully apparent there were differences that needed addressing. Specifically, the ’63 latch needed room to move that the ’61 seat didn’t accommodate. Out came the grinder and a small one inch square pocket was cut in the seat base to clear the latch. After that, installation of the track onto the seat and the seat into the car went off without a hitch.
It was getting late, so I moved the black seats into the garage, put away the tools, rolled the chest inside, and shut the door for the night. This morning’s drive into work was strange sitting on a new-to-me seat and no door panel. Hopefully, tonight will afford me the opportunity to get the other seat and panels installed.
Touched Them All
Normally a baseball term for a homerun, thus a reason to celebrate, “touched them all”, in my case, meant having to work on all four in the fleet; thus, not a reason to celebrate.
The fun and games began with Victoria’s late-morning Monday call informing me Glinda would not start. She was at a gas station north of Baltimore having just filled the tank with fuel. A turn of the key produced nothing – no turning, no noise, nothing. I had her find someone with jumper cables, but that only elicited a slow, weak spin of the starter. Fortunately, the lovely Loriann works less than a mile from the station, so she was able to rescue Victoria. After Victoria got off work, she and I returned to the scene where I cleaned the terminals and connectors, hooked up jumper cables, and let the battery get some juice from Heidi’s generator for about ten minutes. I spent the wait adjusting the idler wheel to get the fanbelt a little tighter. With that adjustment completed, Victoria turned the key and Glinda started right up. I started to close the engine lid, but stopped when I saw sparks coming from the idler wheel area. I had Victoria turn the engine off and I saw I’d not properly adjusted the belt guard. Five more minutes of fiddling, and all was good. She started right up again and the drive home was uneventful. Within five minutes of being shut off, the battery still read above 13 volts. Victoria hasn’t driven her since then because I left too much of a temptation – that being Heidi as backup while I drove Lucy to work yesterday.
Speaking of Lucy, before I could drive her I had to break off the dangling bit of rusted flooring and hook up the speakers. While trying to connect the right speaker, I found the wire had broken at the point it bent around the edge of the rear carpet. That fix would have to wait.
What was wrong with Heidi? Well, as I was driving home from dealing with Glinda, I glanced into her sideview mirror and noticed it was vigorously shaking. I rolled down the window and grabbed it only to have it come completely loose from its mounting. Thanking God I caught it in time, I placed it on the floor. When I got home, I reinstalled it, but had to pull a GUP gasket from the shelves. I also found the door pull was missing a screw, so a replacement was located in my can of screws and installed.
Finally, Ringo. My intention had been to spend the majority of the evening installing his interior, but that was thwarted by all the other activities. As a token gesture, I removed some remnants of masking tape from around the trunk opening.
Monday, November 7, 2011
Painting is Always About Experience
Here’s what I learned about painting yesterday -in order of their occurrence:
1. Cheap spray guns need more attention. My $9.99 Harbor Freight gun leaked at the cup-gun fitting until I put Teflon tape on the threads. At that point there were already dripped on the roof.
2. When parts don’t seem to fit right, DON’T use them. The inline air-dryer didn’t want to screw on to the end of the regulator tightly, but I used it anyway. Well, I used it until it popped off and the end of the air hose went all writhing-wild-snake on me. Thank God (and I’ll be using that line again) it didn’t hit the car.
3. There’s going to be one bug that didn’t get the keep-out-of-the-garage memo. After the second coat of color, I discovered a stink bug stuck in the middle of the roof after he’d gone for a nice little 2 foot walk (tiny footprints in the paint). I picked him off and I think the subsequent coats erased any evidence of his existence.
4. Don’t close the trunk lid by slamming it; physics comes into play. The air being forced out will cause a flap of masking paper to flip over and onto the wet paint causing you to scream obscenities as you carefully peel it off. That one hurt.
5. Never, never, never grab the paint gun without first putting the lid on the paint cup. Thank God (told you I’d need that again) I hadn’t put the doors on before painting because the masking paper in the driver’s door opening was splattered. And so was the bottom of the door opening and part of the side of the car behind the opening. I carefully wiped off the excess paint and then wiped the tears from my eyes (not with the same rag fortunately). I was so angry I was nearly crying.
6. You can never have enough lighting. Bad lighting caused me to miss spots on the lower front and rear valances. Fortunately, I caught them in time and was able to fill in. what I didn’t catch was how badly I’d shot the passenger’s door. This didn’t come to light until I was removing the masking. I truly don’t know how this could have been so badly missed. As it is, I need to let it cure fully, sand off the clear, re-shoot primer, sand, and reshoot color and clear. Who knows how well the door will match the rest of the car now. A real pisser, but a door is smaller than a hood.
Backing up a little, Saturday afternoon was spent sanding the primer and that went well. I also prepped the garage before rolling Ringo back into position for the next day’s spraying. That included staging the tool chest and some other larger items by the door. Sunday morning, as soon as I got home from church, I moved all the staged stuff to the driveway, closed the doors, and lit my three kerosene heaters. I knew the ventilating air coming in the from the outside would be about five degrees shy from the 60 degrees I wanted, so the heaters would hopefully heat up the car and walls so radiant heat would make up the difference. By the time I’d changed into my painting togs, wetted the floor, and wiped down the car, it was quite toasty. So, with the fan in place and running, I donned my stylish hood, respirator, and gloves and mixed up the first batch of Black Cherry Pearl.
That’s when the learning experiences began as described above.
I started shooting around 1:30 and finished around 5. Then, after a few hours wait, I pulled off the masking. Having to sand and re-shoot the door will set me back a couple days, but hopefully I can pull it off in a few evenings.


Friday, November 4, 2011
The Gang’s All Here
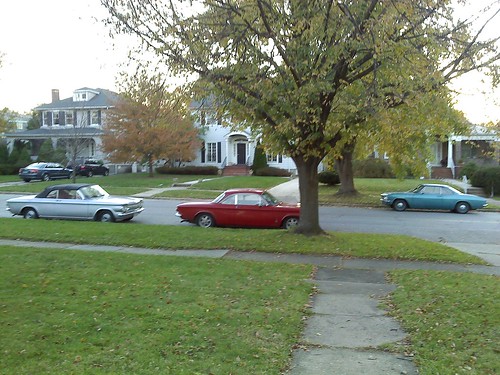
Not since before Brianna and Nich drove off to Blacksburg in Heidi have there been three Corvairs parked in front of our house. With Ariel’s arrival at the wheel of Lucy, all of the fleet now resides at our house. Ariel is now piloting our Suburban around Lancaster and Millersville since she needed to move a futon up to her apartment. We’ll make the trade back for Lucy (or maybe Ringo, but I’m not holding my breath) when we celebrate Thanksgiving at her place.
Speaking of Ringo, reassembly and painting prep continued last night. I completed the installation and lubrication of the driver’s fresh air vent and then re-masked the trunk opening. The other day I was looking for my coveralls to use for a Halloween costume and thought they may have been stuffed into Ringo’s trunk. That forced me to tear back the masking over the trunk.
While out in the garage, I gave the can of Summit Racing paint a shake, popped the lid, and dipped a stirring stick into it. Ringo is gonna’ be PURPLE! It truly is an awesome color, but there’s very little about it that’s black. I called Ariel out to the garage to see what she’d selected, and she got quite excited. I pray it looks nice once I lay it on Ringo’s body. Speaking of which, the lovely Loriann purchased the last of the supplies needed for this weekend: the 600 grit wet/dry sandpaper for smoothing the primer, the measuring cups for the getting the paint and clear mixed correctly, and the inline air dryer to ensure there are no fish-eyes in the finish. It’s not going to be quite as warm Sunday as I’d hoped, but I’m shooting paint anyway. I’ll just have to add some minutes to the flash time.
Wednesday, November 2, 2011
Heidi and Ringo Update
Since she’s become my daily-driver a couple weeks back, Heidi’s been a reliable ride. With her second thankful of gas, I calculated 22 mpg for mixed driving – better than Lucy and certainly better than Glinda. Since Ringo was probably burning as much oil as gas, I never bothered to track his fuel mileage.
As reported in prior posts, Heidi has had some tune-up work done to her engine. Sadly, this did not cure the high-speed, high-load miss condition. Last night I swapped on another coil, but after this morning’s commute, I found that didn’t fix it. Next up I’ll turn my attention to fuel deliver and do some carb swapping. Not a priority, so that may wait a while.
Also last night I did some more assembly on Ringo’s interior. I pulled the driver’s seat out from the basement and did a test fit to ensure the bolt holes lined up. The outer rear pad was welded in place, so I was happy to see everything in sync. I measured and drilled the four 3/8ths holes for the seatbelt bolts, and then I installed the GUP defroster cable I’d bought from the Corvair Ranch. Finally, I began the installation of the fresh air vent on the driver’s side.
Subscribe to:
Posts (Atom)