Friday, February 26, 2010

CPotD #53 (Ringo is Worthy)


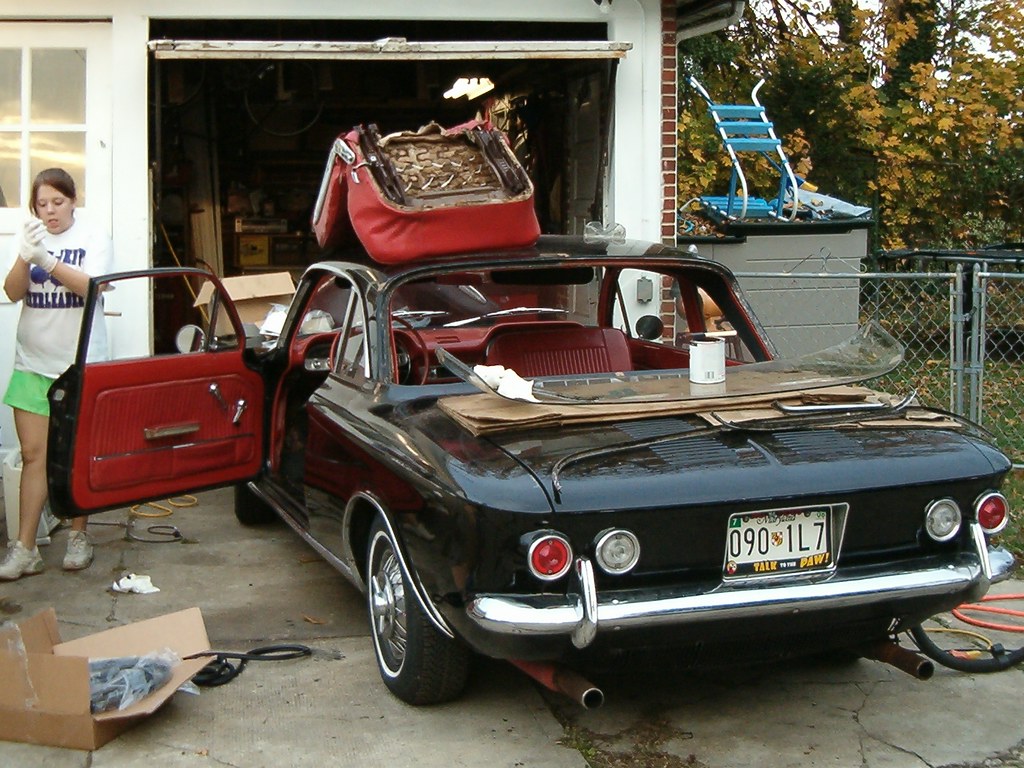
Ariel drove Ringo home from college last night, and made it without incident. I am so very thankful to God when my Corvair-driving daughters make these trips and I don’t get a phone call midway. With his good behavior, Ringo has earned the honor of being today’s CPotD. This photo brings back nice memories of working with Ariel fixing the backlight (rear window) area. She’s all gloved up to put down the bead of sealant in the grooves of the seal. We had removed the backlight to repair the rusty track in the body and stop the leaks. We were partially successful. This was my first attempt at backlight installation using the rubber seal and it has been a failure. Even though we followed all the directions and recommendations, the darn thing still leaks. On the positive side, there’s no more rust in that area.

Thursday, February 25, 2010

CPotD #52 (Elegance and Beauty)


A concours d’elegance is defined as, “a public exhibition and competition in which automobiles or other vehicles are judged, chiefly on the basis of elegance and beauty.” It is refreshing that a reputable event such as Hemming’s New England Courcours d’Elegance has a special class for Corvairs this year. This honor puts our affordable compact in some heady company – Bentley, V-12 Lincoln, Buick Roadmaster, Citroen, AMX, and Indian motorcycle.

Wednesday, February 24, 2010

CPotD #51 (Nice Price, Not Crack Pipe)


One of the blog sites I peruse runs a fun, frequent feature called, “Nice Price or Crack Pipe.” The premise is to post pictures and the history of a vehicle currently for sale on the web (typically eBay or Craigslist), and then poll readers as to whether the price is reasonable (Nice Price) or outrageous (Crack Pipe). One day they made the ’64 Spyder convertible shown in today’s CPotD the subject of their feature. The eBay Buy-It-Now price was $14,000 – a lot of money for a Corvair in my opinion. The blogger did a fairly good job relating the design and history of Corvairs until he got to writing about the infamous Ralph (“the Mouth”) Nader. Here’s the link, so I’ll let you judge for yourself.

Bottom line is that 75% of the voters felt fourteen grand was a Nice Price. I was surprised, and NO, I didn’t vote more than once.

Tuesday, February 23, 2010

CPotD #50 (Interior's - A Juxtapostion)


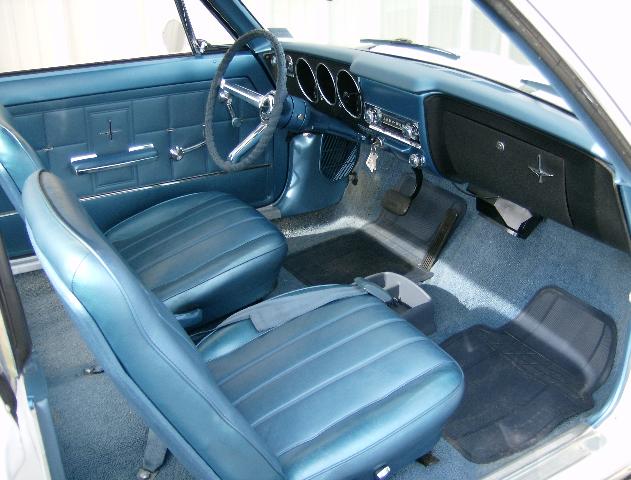
Just to illustrate the blockiness of earlier bucket seats that I’d mentioned yesterday, today’s CPotD is of a ’66 Monza interior. The picture came from a scan of that year’s Corvair brochure I pulled from The Old Manual Project. I’ve mentioned that site before, but it’s worth linking to again.

Monday, February 22, 2010

CPotD #49 (Interior Inspiration)


As I mentioned in my previous post, the past weekend was filled with car work. A big portion of the two days was spent working with my buddy, Bill, on his ’64 Tempest. Now I’m really inspired. Unfortunately for the fleet, my motivation is not to spend hours wrenching on Corvairs. What I’m really inspired to do is drive my ’65 LeMans convertible out of its storage lean-to and into the garage forsaking all other cars. Lucky for Lucy, Glinda, and PartsCar, there’s still a foot of snow on the back lawn so the LeMans isn’t going anywhere.

To re-focus my inspiration, I found a photo of a restored ’67 Monza interior and I’m making it today’s CPotD. One of the nicer surprises that came with PartsCar were the bucket seats. I like the slimmer, tapering look that started with ’67 over the squarer, blocky seat backs of previous years.

An option in ’67 was headrests. This picture shows them installed on another ’67. While I think the seats look cleaner without the headrests, they sure would be a nice safety addition. I imagine they’d be quite difficult to hunt down.

Successful Traveling Mechanic

My weekend was a kaleidoscope of car care. After driving 300 miles to Brianna and Nich’s apartment Friday night and spending the night on their couch, she and I took her car to her future in-law’s garage. We blocked the wheels and put the right rear up on a jackstand. It was an easy diagnosis of a bad rear bearing, with scraping noises as the wheel turned and an eighth-inch or so of axial play where there should have been none. That meant the entire axle assembly had to be replaced since the bearing is pressed on. After removing the wheel and hub, we were able to get the four nuts off that hold the bearing retainer and pull the axle out of the differential. The next part of the axle replacement was what I’d feared would be a show-stopper. That was pulling the u-joint hub off the splined end of the axle. My previous experiences with this joint was that it took a lot of heat and a lot of torque on the puller bolt to get it off, so I’d packed a propane torch fully expecting to use it. As I lay prone on the garage floor attaching the puller to the hub and turning the bolt against the shaft end, I looked at all the drivetrain parts and wondered I was going to keep the flame on the hub and off everything else. All that worrying was for naught since the socket wrench kept turning the puller bolt and the hub kept moving down the spline until it fell off the end of the axle. With the hub off, I climbed out from under the car and did a little dance and said a bunch of “Thank You, Lords.”

We weren’t totally in the clear however. I’d discovered that when the bearing wore and the drum moved out a little it took the brake shoes with it. This side load pulled out one of the wheel cylinder retaining screws stripping the outermost threads of the hole. I asked Brianna to run to the store to buy the next longest screw.

I kept myself busy while Brianna was off bolt shopping by trying to improve the brightness of Heidi’s left side brake light. I figured it was poor grounding, so I loosened the socket housing screws and jiggled the housing. This was supposed to scrape off any corrosion between the sharp tangs of the housing and the car body. This didn’t appear to work at first, but then all of a sudden the light got bright. Thinking I had the problem solved I screwed the lens back on and called the repair a success.

By this time Brianna had returned with the new fastener. With a couple washers under the head of the screw, the wheel cylinder was tightly attached again.

With that hurdle crossed, it was time to install the rebuilt axle assembly I’d brought with me. The hub-less axle end slid easily through the opening in the brake plate. With anti-seize applied to the splines, I tapped the u-joint hub on and installed the retaining bolt and washer. As Brianna guided the bearing retainer flange over the four studs, I slid the u-joint spline into the differential. Four washers and nuts later the axle replacement was complete. I put the drum back on, mounted the wheel, and took Heidi off the jackstand. After tightening the wheel lug nuts and tapping the wheel cover back on, Heidi was good-to-go.I followed Brianna and Nich as we drove to lunch and watched how nicely the brake lights and turn signals worked. At least until the right side got dim again. Irrrr. Since the light was working, I told her she shouldn’t get pulled over. The next time I see Heidi I will have a new socket with a ground wire that I’ll replace the current one with. That should solve the problem.

We finished our nice lunch of BBQ and I headed down the road to my buddy, Bill's, house. The rest of my weekend was spent working with him on his 1964 Pontiac Tempest. The tie-in to Corvair Fleet Management is that I watched as decisions were made and panels were fabricated to fix the car's rusty, right rear sheetmetal. I learned skills and techniques that I'll put into practice when repairing Glinda.
Friday, February 19, 2010

CPotD #48 (A Very Nice Blue)


As promised I took a picture of the inside of PartsCar's trunk-lid where the paint was not faded. It's a really nice color, so I made it today's CPotD.

Traveling Mechanic’s Preparation

This weekend I’ll be traveling down to Blacksburg to work on Heidi. Brianna’s been telling me of an intermittent scraping noise she’s hearing (and sometimes feeling) coming from the right rear of her car. My initial thought was a rear wheel bearing needing to be greased, so I packed the tools and grease required to do the clean and re-pack job. However, it could be something different, so I tried to prepare for all possibilities last night. In case the bearing on her car is too damaged to continue using, I rebuilt the bearing in one of the axle assembly I’d removed from the rusty, red ’64. I made sure the splines on the driven end of the shaft were cleaned and greased to facilitate the reinstallation of the u-joint hug. In case the noise is coming from a failing u-joint, I cleaned up and greased one of the u-joints that the aforementioned car had donated to my parts pile. To change out an axle assembly, the u-joint hub needs to come off the current axle’s spline. In order to do that, I’ll need penetrating fluid, a hub puller and a propane torch so all that went in the back of the PT Cruiser as well. I then added coveralls, rags, jack, jackstands, and wood blocks.

I’m quite fortunate in that Brianna’s future in-laws have offered the use of their garage. My main goal is to not make a mess on their floor, so a piece of cardboard went in the back of the PT Cruiser as well.

It’s going to be interesting weekend.

Thursday, February 18, 2010

CPotD #47 (EM Interiors)


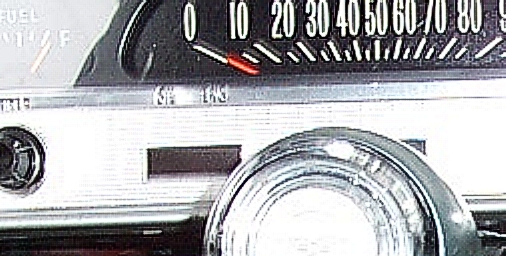
I’ve been remiss in not posting some CPotDs of interiors. Here’s a picture I took soon after I got Lucy and cleaned up the interior. Even though EMs have the same basic interior, Chevy made subtle changes during the five year run. For example the pattern on the dashboard brightwork is different for each year. I’ve put together a montage of photos of the patterns for ‘60 through ‘64. Having never owned a ’60, the photo I found on the web is a little lacking, but I think you’ll get the gist of the differences. They are in order '60 to '64. Click on the photos to go to larger JPEGs.

Tuesday, February 16, 2010

CPotD #46 (PartsCar's Blue?)


I need to take a picture of the underside of PartsCar's trunk lid. It's a nice blue unlike the faded outside paint. Since the '65 paint chips don't show a color blue like it, I'm thinking it's not the original color of the car. Today's CPotD of Pat Paldino's awesome '65 convertible is the blue I remember seeing under the trunk lid.

Monday, February 15, 2010

Glinda Meets Mr. Grinder

Yesterday, the stars aligned and there were no excuses so I ventured out through the snowy expanses to find the side door of my garage. I fired up the kerosene heaters and forty-five minutes later Victoria and I went to work on her car. We removed the window molding from the windshield and backlight and dug out the hefty bead of silicone caulk from the groove between the glass and the side of the channel. She also took my grinder with wire wheel and attacked all the rust spots and bubbles on the car. That allowed us to assess the extent to which I’ll be utilizing my MIG welder. Finally, she coated all exposed metal with rusty metal primer to protect it.

Thursday, February 11, 2010

CPotD #45 (All Dug Out)


I took this picture Sunday night after digging Lucy out so I could drive her to work Monday. Tuesday the snow started again and another blizzard later she's buried again. :-(

Monday, February 8, 2010

CPotD #44 (Yes, There's A Corvair Under All That)


Today’s CPotD was taken Saturday afternoon after the blizzard ended. As I promised in the last CPotD, it is a Corvair. This is Lucy under more than two feet of snow. I got her dug out yesterday and drove her to work this morning. Tomorrow more snow is predicted. Since she sits so low, I’ll probably be driving the Surburban.

Friday, February 5, 2010

CPotD #43 (Anniversary Gold)


In 1962, Chevrolet celebrated their golden anniversary by offering Anniversary Gold paint on their line of cars. Again Google let me down finding an image of a Corvair painted this color. I did, however, find photos of a number of other Chevrolets painted this one-year-only color. So, to end my mini-series on one-year-only paint, today’s CPotD is of an immaculately restored 1962 Impala stationwagon. I promise this will be the last non-Corvair CPotD for a while.

Wednesday, February 3, 2010

CPotD #42 (Rare Royal Plum)


The special one-year only color for 1967 was Royal Plum. I’ve never seen one in this color, so I spent a little time Googling Corvair “Royal Plum”. Came up empty. The best I could find was today’s CPotD - a nice 1967 Camaro in this elusive hue. If someone out there has a Royal Plum Corvair, I’d love a photo.

As an aside, “Elusive Hue” sounds like a great name for a band.

Tuesday, February 2, 2010

CPotD #41 (Kevin is UNSAFE)


There's a thread going now on Virtual Vairs about one year only Corvair colors. In a previous CPotD, I showed an Evening Orchid convertible. Today's CPotD is up for a couple reasons. First of all, it's the best photo I've seen of Kevin Willson's absolutely gorgeous Aztec Bronze Monza in action. This color was only offered in 1966. Second of all, it was about time I had a CPotD of a Corvair autocrossing. I still want to try my hand at parking lot racing. Someday.

Monday, February 1, 2010

CPotD #40 (Drivetrain Envy)


With snow on the ground and temps in the teens, it’s difficult to find enough inspiration to get me to go out and work on cars. This weekend I was inspiration-challenged. Had I looked at today’s CPotD, however, I may have braved the elements. It is from a thread on the CorvairCenter’s forum called, “Post Your Engine Pics!!!” It’s a Corvair drivetrain (engine, differential, and transmission – right to left) all ready to be lifted back into the engine bay of one lucky Corvair. Oh how I wish I had the time, talent, and tools to create this masterpiece from the grungy masses I have to start with.