Monday, January 31, 2011

Glinda’s MPG Update

And it’s not good news. Victoria just filled her tank and the verdict is …… 15 mpg. Crap!!!!!

I’ve submitted a post to the Corvair Center Forum hoping someone can shed some light on this issue. I still need to more closely check for gas leaks.

Ringo’s Rust Removal - Part 1


With his engine rebuild on hold, I decided to dive into dealing with Ringo’s rust issues. Yesterday, I removed the seats, seatbelts, doorsills, speakers, and rear carpet and began ripping and cutting out the rotted metal. I put him up on jackstands and surveyed the underside. It’s going to be some work, but fortunately it appears that the important structural elements (rocker panels) are still fairly solid. Click here to see more photos.

Tuesday, January 25, 2011

Live and Learn – AGAIN!

Sunday, with my indoor housework completed, I’d run out of excuses not to install Glinda’s recently rebuilt original distributor. With Ringo still parked in the garage, I had to deal with single-digit wind chills. So I bundled up and got her done. The job should have been fairly straightforward and completed in about an hour, but a screw-up turned it into a two hour affair.

Can you spot the difference between my assembly on the left and a proper assembly on the right?
Here’s a hint. After installing the rebuilt distributor and cranking the engine to check the dwell, the distributor shaft was not turning with the engine.

That’s right; the drive gear was installed upside down. What a moronic maneuver on my part. Instead of verifying the orientation with one of many references I have, I looked at the shaft and assumed the orientation based on the marks on the shaft. Oh well, live and learn – AGAIN.

It only took me about twenty minutes to remove the distributor from the engine, press the pin back out, reverse the gear, and reinsert the pin. Next came the harder part. Since the engine had turned, I now had no idea where the rotor needed to be pointing. Using a wrench, I rotated the crank until the timing mark sat at top dead center (TDC). Know it was a fifty-fifty chance I was out 180 degrees, I installed the distributor with the rotor pointing at the number one plug contact in the cap. In order to get the shaft fully seated, I needed to crank the engine slowly with a wrench until the rib in the end of the shaft fell into the slot of the oil pump. Next, I needed to set the dwell by cranking the engine and adjusting the point gap until the meter read around 32 degrees. With my fingers crossed and the rotor, cap, and wires in place, I cranked the engine. Of course my bad luck held out and the engine wouldn’t start, so I had to re-remove the clamping hardware, pull the distributor out again, rotate the shaft a half a turn, drop it back in place, and re-reinstall the clamp, retainer, and nut. After that the engine fired right up. Thank the good Lord for small miracles. I checked the dwell and it was rock-solid at 34 degrees; right at the spec’s. limit. After letting the engine warm up enough to get the carbs off high-idle, I set the timing to the highest mark on the engine case - 16 degrees BTDC. This is above the 12 degrees the manual states, but I decided to push it based on the cold temperatures and 93 octane gas we’ve been putting in Glinda’s tank. I knew I’d be driving her the next day on the interstate and if the engine pinged, I’d back down the timing accordingly.

Within 36 hours of this task, I’ve driven her exclusively, putting around 60 miles of mixed driving including 70+ mph romps on I-70 up hills. No pinging! And when I filled the gas tank yesterday afternoon, the mileage was over 17 mpg from the 15 she’d been previously getting. Bearing in mind, half the tank had been burned before the distributor and timing change, I expect even better gas mileage in the future. When the weather warms up again, I'll see if I need to retard the timing some. It also appears putting the stock distributor back in has mostly fixed the bogging at 65 mph. It’s still there, but not nearly as bad as before.

Thursday, January 20, 2011

Distributor Rebuild Complete


Coming home to an empty house after work gave me the impetus to get my long-john covered butt out to the garage. The order of parts from Clark’s had shown up, so I completed the distributor rebuild by installing the new roll pin and spring; then attaching and adjusting a set of points; and topping it all off with a dust cover and rotor. It’s all ready to drop into Glinda’s engine this weekend.

Next I moved on to Ringo’s engine rebuild project. I went through the six piston assemblies removing and individually storing each bearing for inspection and, hopefully, reinstallation in the same rod. All the piston rings were then removed followed by a thorough wire brushing of the piston tops to remove the built-up carbon. Next will be cleaning out the ring grooves and a close inspection to assure there are no cracks in any of the pistons.

Monday, January 17, 2011

110 HP Distributor Rebuild Update

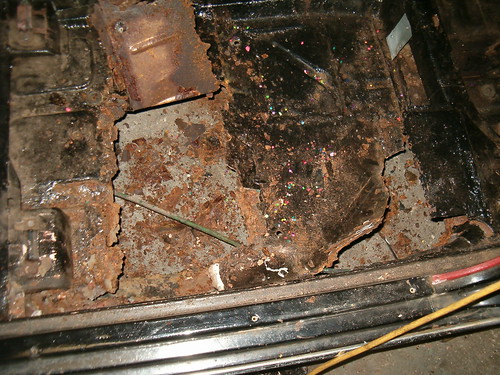
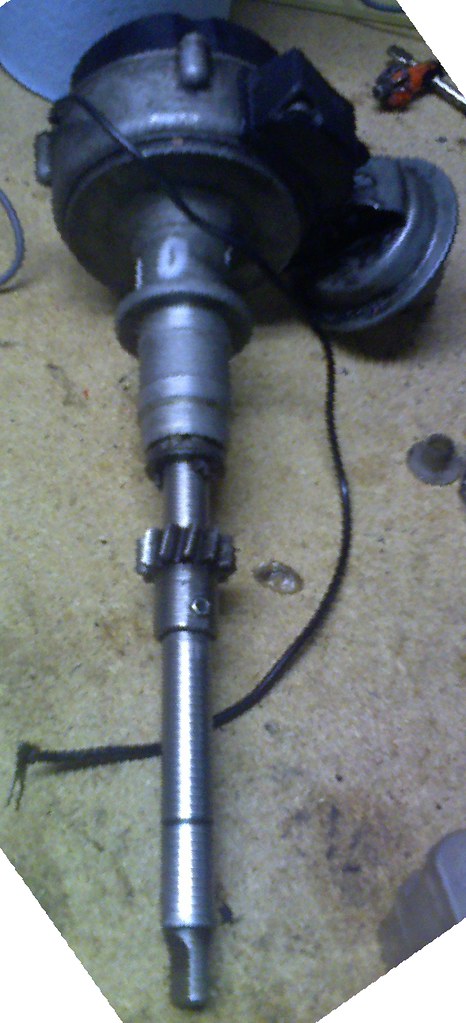
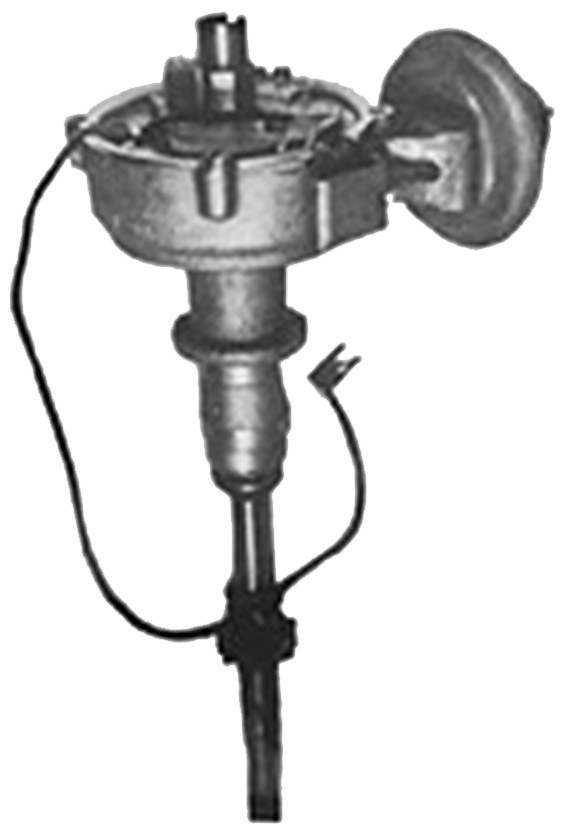
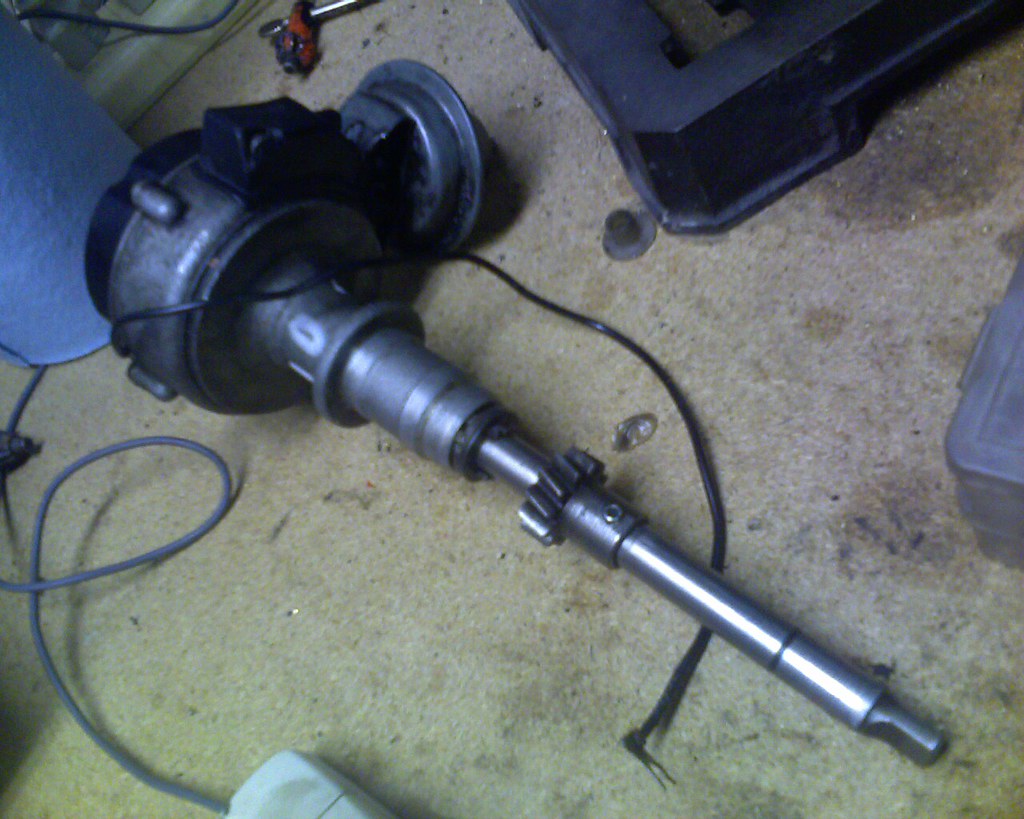
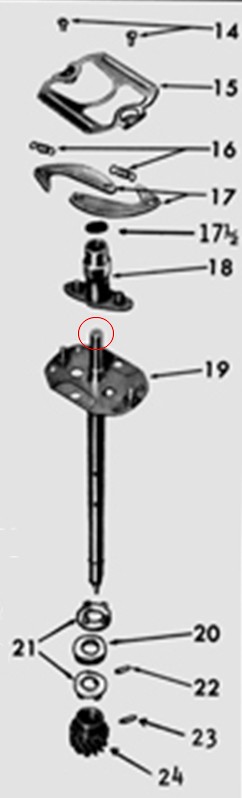
I was out in the garage a couple evenings last week trying to complete the rebuild of Glinda’s distributor. I got the new oilite bushing pressed into the housing easily enough, but the next step stymied me. The cam (18), after being pressed over the end of the shaft, would not turn freely. After some online assistance and very close inspection, I discovered the end of the shaft (circled) had been dinged. I chucked the shaft into my drill press and filed a small chamfer onto the end. With shaft spinning, I also took some emory cloth and polished the cylindrical surfaces. Lo and behold, the cam plate would now turn freely after installation.

The next step of the assembly was to install the weights and springs. Sadly, I could find one of the springs – it’s amazing what goes missing when far more time elapses between disassembly and reassembly. I knew I needed a new rollpin (23) to hold the gear on, so I made a call to Clark’s Corvair Parts. My new parts should be delivered tomorrow. Once the distributor reassembly is complete, it will go back in Glinda and we’ll see if the bogging down issues at 65 mph go away.

Glinda’s Exhaust Woes Continue

My repair didn’t last very long, and I wasn’t too surprised when Victoria called Friday to inform me the muffler had come loose again.

So Saturday, I had Glinda’s right rear back up on a jackstand and the wheel off giving me access to the misbehaving exhaust joint. To finally do the job right, I removed both the muffler and exhaust pipe from the car. Since my exuberant clamping had deformed the muffler’s inlet pipe, I needed to use tin snips to open it up. I made four slices along the pipes axis and peeled back the segments. That allowed me to slide the exhaust pipe end completely into the muffler’s inlet. The exhaust pipe went back on the car and muffler was installed with plenty of engagement before the clamp was put in place and the nuts torqued down. Next the wires went back just in case. Finally, I started up the engine to listen for leaks. While the joints I’d just re-made were quiet, the welded joint where the pipe from the right-side exhaust manifold met the exhaust pipe had cracked. It was too late in the day to get out the welder.

Yesterday afternoon, I was luck in that the wind was rather light. So, after the wire-brush attachment on my grinder exposed lots of bare metal, I was able to lay down enough metal with my MIG welder to seal up the crack. This should keep Glinda’s exhaust in running order for quite a while now.

Monday, January 10, 2011

Belt, Suspenders, and ?

A few days back I got a phone call from Victoria informing me that Glinda’s muffler had come loose from the exhaust pipe again. It wasn’t dragging, but the car was certainly much louder. I had not yet gone into work, so I packed my thermal coveralls, knit cap, baling wire, and wire cutters into the Suburban and drove to the school parking lot. As a temporary fix, I slid the end of the muffler pipe over the exhaust pipe and retained it by wiring the pipe clamp to the car body. She made the drive home without issue. The next day it was too cold to work on the car, but Victoria drove it anyway. By the time she’d returned, my temporary fix had failed.

Yesterday, I jacked up Glinda’s right rear, pulled the wheel, and found that I couldn’t slide the muffler on far enough to get the proper clamping force. At that point, I decided to get out the welder and try to make this joint a little more permanent. After thoroughly cleaning off adjacent surfaces, I laid a bead of weld down that bridged the joint. Then I reinstalled the clamp as close to the edge as possible. Finally, in anticipation of this failure happening again, I added some wire attaching the joint to the top of the shock tower. Now when it slips apart, at least the end won’t fall dragging on the ground.

Victoria had also complained that, when on the highway, Glinda started to feel like the engine was missing around 65 MPH. She asked me to drive it to work today to see what I thought. I did, and she was right. I believe the culprit here is the distributor I put in a couple weeks ago. This evening I’m going to drag myself out to the COLD garage and try and put together the original distributor with the new bushing.

Tuesday, January 4, 2011

A Pretty Empty Holiday

It’s been a while since I posted, so this update should be a lengthy one. The only problem is I haven’t done much Corvair work since my last post. Even though I’ve been off work nearly two weeks, houseguests, cold weather, and mostly laziness all conspired to keep me out of the garage. The upside was there were no breakdowns that forced me to get greasy.

What did I accomplish? Well, with the help of my father-in-law, I got the 95 HP engine out of Betty and tested it for compression. After bolting on a starter using lug nuts for spacers and spinning the oil pump for a minute or two with a drill mounted shaft, I proceeded with testing all six cylinders. The first two got me quite excited when they pumped up to 150 psi. Sadly, three of the last four were under 100 psi, so the engine was not usable as-is. I pushed Betty back out into the driveway, moved the 102 engine pieces all to the front corner of the garage, shoved Ringo back into the garage, and tore down the 95 engine. So soon after disassembling the 102, it was like déjà-vu. With the cylinders, piston and rod assemblies removed I called it a day. Yesterday, I took the cylinders up to the Corvair Ranch with hopes they’d be acceptable to just hone and use with stock pistons and rings. The machinist inspected them and we found porosity in a couple and excessive wear in others. So it looks like I’ll have to come up with the $300 dollars for new oversize pistons to go in Ringo’s engine.

I did make the decision to rebuild the 95 HP engine for Ringo instead of the 102 HP engine that we got him with. My reasons are: 1) the rebuilt engine can run on 87 octane without the timing retarded, and 2) the engine will have more low-end torque which matches better with the Powerglide transmission. When I told Ariel this, all she cared about was that the new engine retained the pink air-cleaner assembly.

My next task will be to gather all the “right” parts and then decide what to do with the “extra” pieces. I’ll probably take advantage of the change and swap the generator for an alternator while I’m at it.

While I was at the Ranch, I talked with proprietor Jeff about the rust repair Ringo requires. His recommendation was to clean up and neutralize as much of the rust as possible and just weld in enough new metal to make the structure stiff again and seal off the leaks. As long as the rust is not worse than I can currently see, I should be able to do that with cut and formed pieces from flat stock sheetmetal. I shouldn’t have to buy entire new floor pieces. This is all pending the removal of seats and carpet and evaluation of what’s there.