Monday, November 25, 2013

Time and Money Spent on TwoTone

My time with the fleet actually started Friday night with Glinda, but Saturday afternoon was mostly consumed by working with Mikhaila on her car, TwoTone.

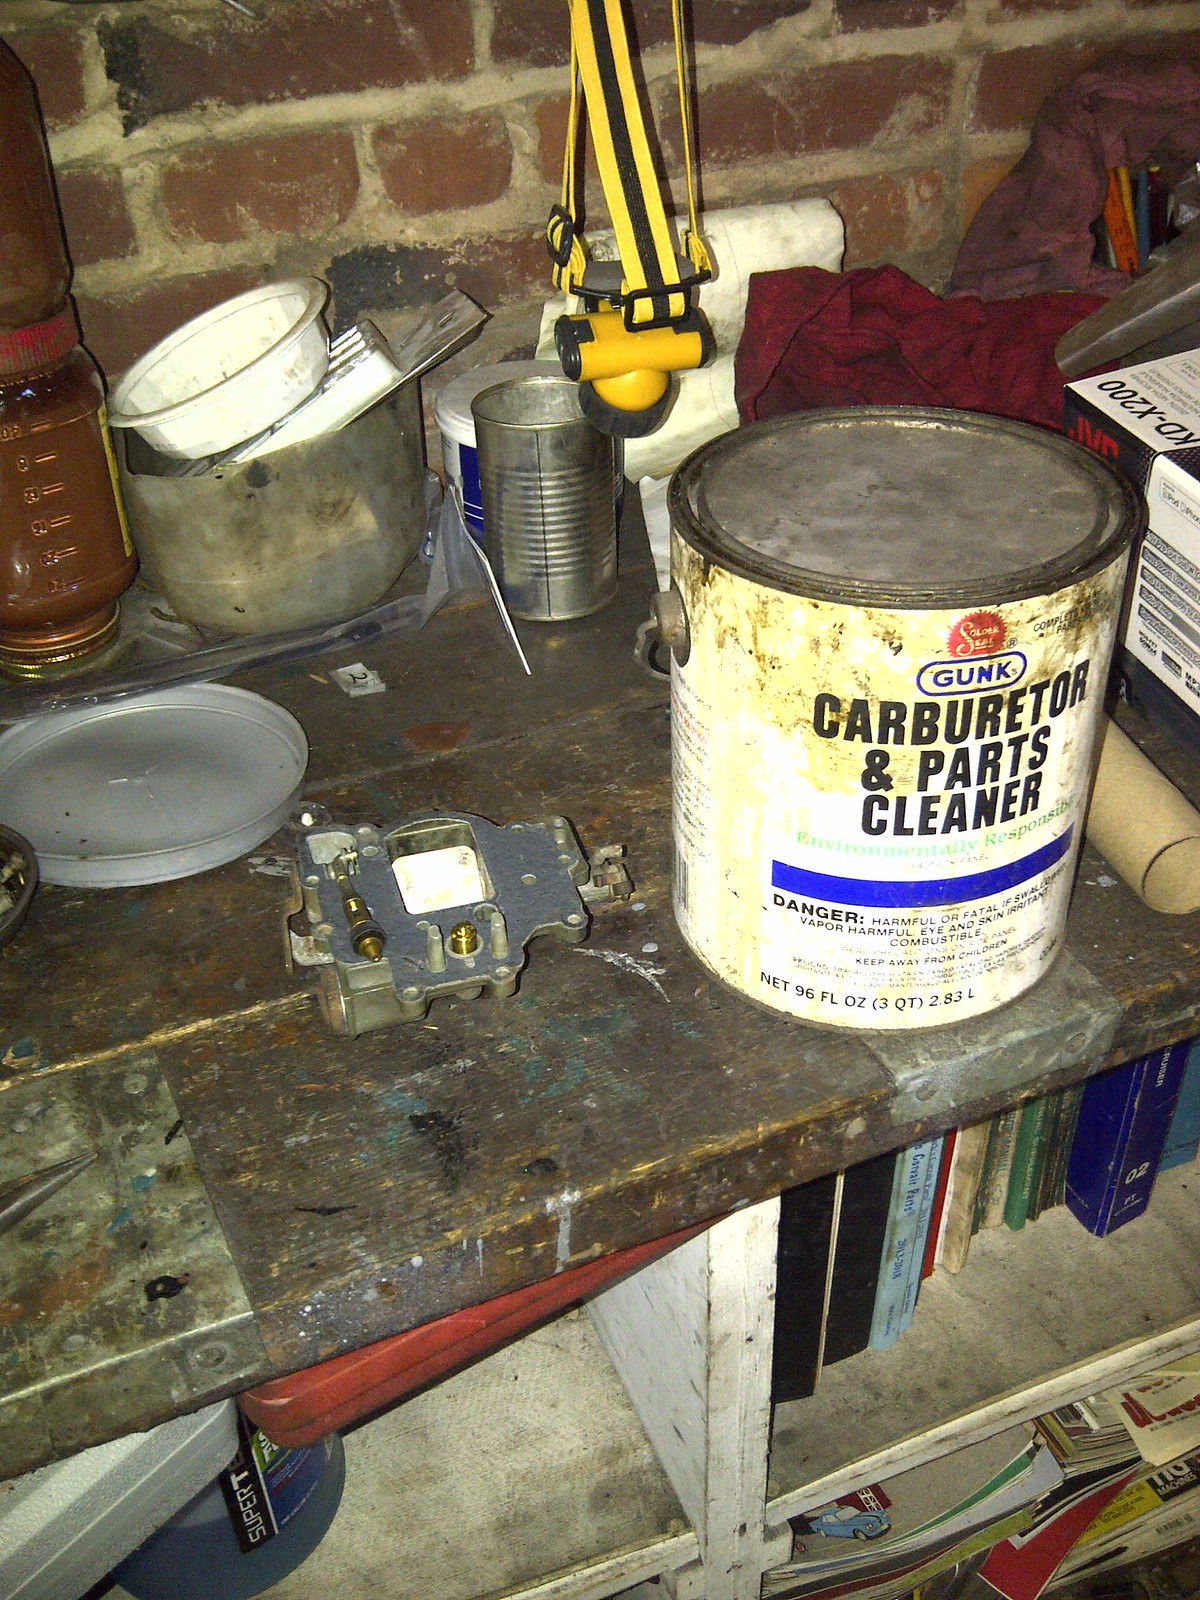
The Glinda work consisted of using her engine to determine which subassembly of TwoTone’s rebuilt carburetors is bad. As I posted last week, one carburetor assembly appeared to function properly, while the other wouldn’t work right when bolted to the Glinda’s left head. So, on Friday I created a table like the following (yeah, I am an engineer):

Wouldn’t Work Seemed to Work
Bad Top Good Top
Bad Cluster Good Cluster
Bad Bottom Good Bottom

With the assumption that only one portion of the bad carb was causing the malfunctioning, I swapped both the Bad Top and Bad Cluster onto the mounted Good Bottom. While the engine started and ran fairly smoothly, the right side would not heat up telling me it wasn’t getting the proper flow of fuel. Off came the Bad Top and back on went the Good Top. This time the engine ran nicely and soon after the restart, the choke opened up all the way. With the engine fully warmed up and shut off, I hooked up my length of clear tubing with some water in it to the vacuum ports on the two carbs. With the engine running again and the left carb disconnected from the throttle shaft, I turned that carb’s idle screw in until the water was static in the tube. I then turned the small linkage rod until its end lined up with the hole in the throttle shaft. The new carb was now balanced with Glinda’s old carb. Before quitting for the night, I disassembled the presumed bad top and dropped it into the carb cleaner for a good soak. Referring back to my table, the two carbs now looked like this:

Installed & Working Unproven & Soaking
Good Top Bad Top
Bad Cluster Good Cluster
Good Bottom Bad Bottom

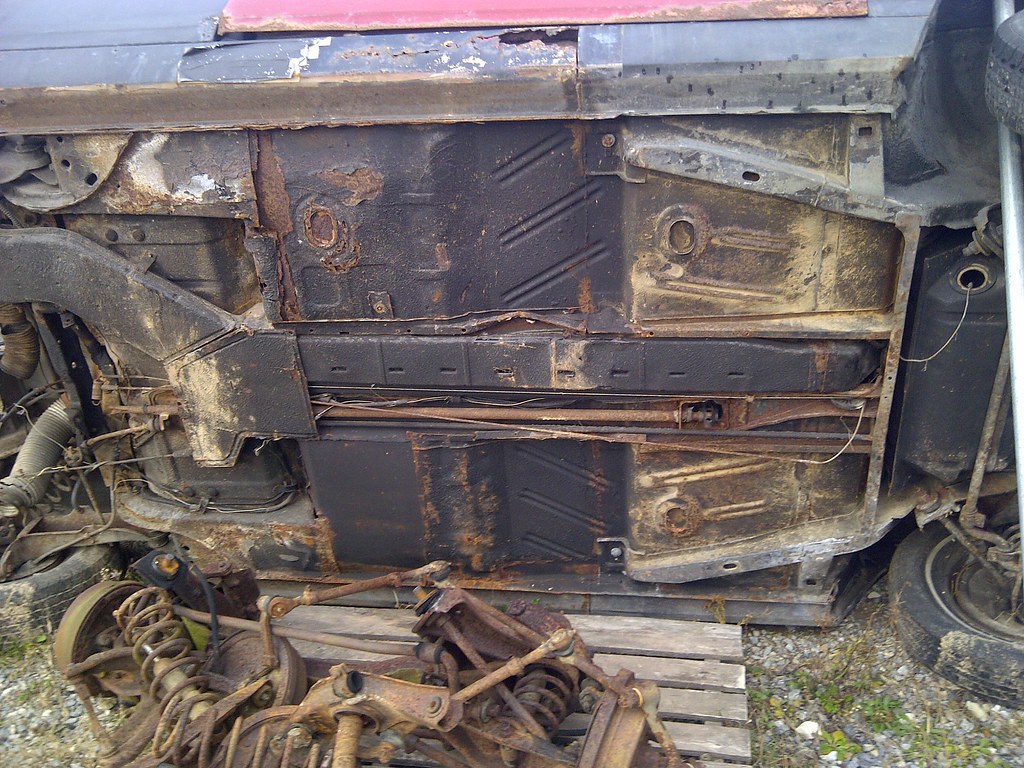
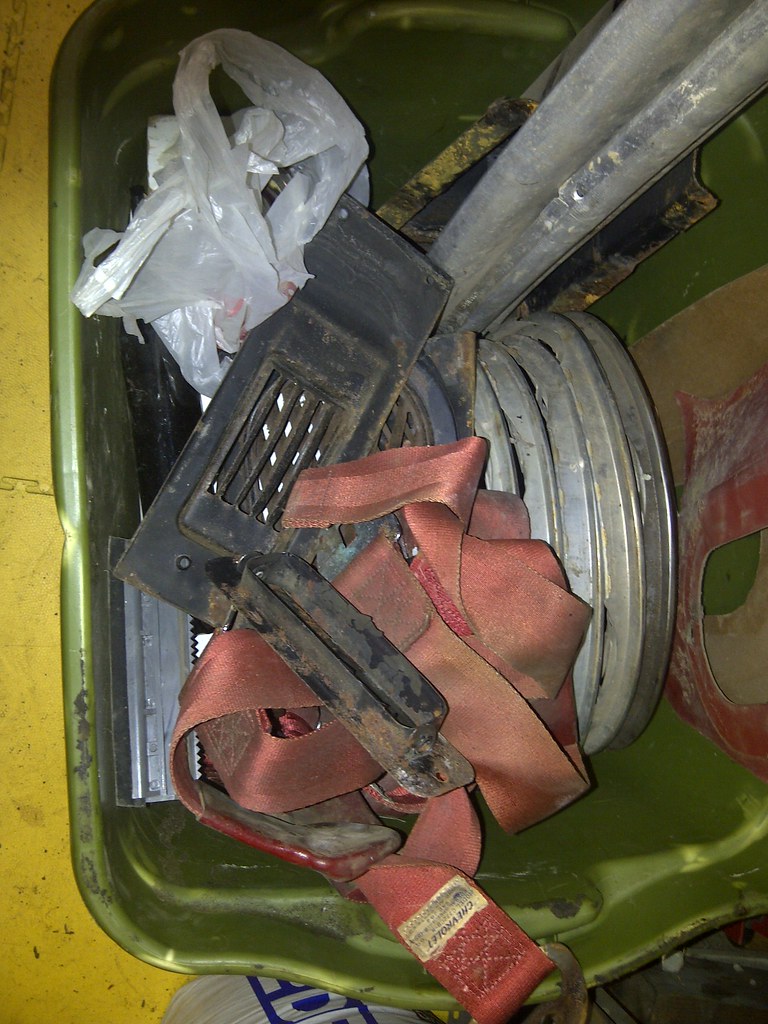
Saturday afternoon, both Mikhaila and I had finished our house chores and we headed to the warmed-up garage (I’d gone out about an hour earlier and fired up two of the kerosene heaters). She started by spraying gloss black Rustoleum on the front brake backing plates while I emptied out a bin to collect TwoTone’s removed parts. We then worked together to empty out the salon (interior space) of all the loose pieces I’d stored there. We found some new parts that will be used in the roadification. Next, we moved on to removing the seats. All the fasteners but one were cooperative. I slathered the stubborn nut with the magic elixir of 50/50 acetone/transmission fluid. We’ll let that one sit a while. The final actions for the day were removing sill plates, vent grills and covers, and the seatbelts. Once that last nut is loose, we’ll finish exposing all the floor and Mikhaila can have fun with the wire brush getting rid of any loose rust.


Speaking of rust, I can’t say it too many times - disassembling this car has been quite a treat compared to previous projects. As mentioned before, only one threaded joint out of a couple dozen was seized. We’re quite fortunate to have landed another barn find (Heidi was the other one and more accurately they were garage finds).


Finally, this morning I got on the phone with Clark’s and placed an order for POR-15 for coating TwoTone's floor, a bunch of carpet, paint, and upholstery samples (more on that later) and three wheel cylinders (there was a brand new right front cylinder assembly amongst the parts we pulled out of the salon). Not wanting to pay the nearly $100 for a rebuilt master cylinder, I hopped on Amazon and bought an aftermarket dual master cylinder for $33. I’ve decided I’ll do the conversion to dual from single (1964s only came with a single master cylinder). I’ll need to buy some fittings and a couple short brake lines, but I’ll do that once I have the master in hand. The running expense tally on the sidebar has taken a hit. Won’t be long before we’ve topped a grand.

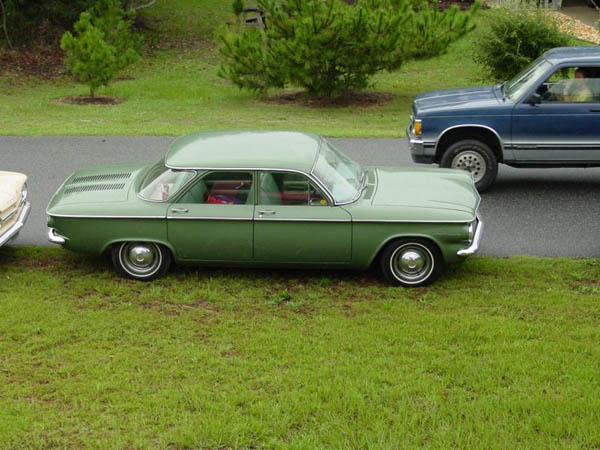
I mentioned samples – it looks like Mikhaila has a color scheme for this car. She shared with me that she likes a darker green for the body with a white top. For the interior she’s thinking white seats and door panels, black carpet, and a flatter version of the exterior green for the exposed interior metal (dash, doors outside the panels, etc.). I pulled up a photo of a 1960 Corvair in Jade Green, and she liked it so one of the samples I ordered was for that color. The other was for a Fathom Green from 1969. Much darker, but not nearly as 50s as she mentioned she was going for.

Friday, November 22, 2013

What A Way to Start the Weekend

This morning, after dropping Mikhaila at her bus-stop, I made the hour drive up to 1079 Bon-Ox Rd – the Corvair Ranch. A couple months back, I called Jeff there and asked him if I could come and harvest shifter and clutch parts off a LM. He was kind enough to tip a convertible on its side for me, and this morning was my first chance to get up there. It was a good thing I chose today since it’s predicted that this is the last day with sixty degree temps until next Spring.

I arrived around 8:30 and got right to it. Off came the rear tunnel cover followed by the heater duct (the forward tunnel cover was already off). The mount nuts holding the rear crossmember in place were challenging to remove, but with the aid of my largest prybar, they succumbed. The rest of the removal went well, and Jeff supplemented the parts I pulled with the missing clutch rod and fork. I think there are a couple other shifter parts I’m missing, but now I’ve got an excuse to go back there.

I always enjoy my visits to the Ranch – the great conversation (keeping Jeff from his job) and the seeing so much Corvair. Jeff tried to sell me a ’64 Monza coupe (running 110HP with a 4-speed transmission) telling me it would be a good solid start to a project even though it needs all the brakes redone and new floors. I checked it out, and he’s right – it is nice and solid other than the floors. It will also need its front valance replaced and a patch welded into the dogleg portion of the left front fender and a new interior and a paint job, but hey, that’s what a project is. He’s willing to let it go for $800. I should’ve taken some photos of it, but since I’m not adding to the fleet, it didn’t happen.

Click here to see the set on Flickr of the photos I took this morning.

Wednesday, November 20, 2013

Let the Swap-a-Carb Game Begin

Now that I have the truck on the road, I haven’t been too inclined to spend any cold evenings out in the driveway, nor has much happened with TwoTone of late. I really thought I’d be able to get Mikhaila out into the garage over the weekend, but that didn’t happen – too much going on in her social life.

I did, however, don some grungies last night and went out to the driveway to play swap-a-carb with Glinda. I pulled off the current left side carburetor and bolted on the recently re-rebuilt carb of TwoTone. Sadly, the engine would not run right and the entire left bank of the motor stayed cold, so that carb is still non-functioning. After yanking that one off and replacing it with the TwoTone’s other carb, the engine went back to normal – at least normal when defined as “the engine idles smoothly, revs easily, and doesn’t send copious amounts of dark exhaust into the night sky.” I need to put some miles on the car before I determine if the left carb caused the gas guzzling. Before I do that, I’ve got to balance the new carb to the existing left side one. That’ll wait for another evening.

An additional exercise will be to swap the internals and lid from the still non-functioning carb over to the working one on Glinda’s engine’s left side. Not as critical to Glinda’s problem, but I do need to figure out what’s causing TwoTone’s other carb to malfunction – my bet is there’s still a clog in a passage of the carb’s base.

Now onto the paragraph Corvair purists may choose to skip – the paragraph where I regale you, gentle reader(s), with the story of my conquering the truck’s rear end (gee, that sounds dirty). Anyway, last Friday I was lying under the truck on the cold concrete of the driveway and all went amazingly well. The forward bearing was liberally lubricated with gear oil and place into its race. The seal was greased and installed with the gentle persuasion of a hammer via a 4X4. The balance of the pinion assembly was slid home from the back of the pumpkin. The yoke’s spline was greased before being engaged with the pinion’s front end. The washer and old nut were used to apply just enough torque to crush the crush sleeve with only about ten foot-lbs of effort to turn the pinion. The old washer and nut were replaced by the new washer and locknut with liberal amounts of Loctite on the thread to give added insurance against the same problem reappearing. The differential assembly with ring gear and bearings were rolled into place. The spacers filled the gaps on either side. The axles were shoved into engagement and c-rings installed followed by the diff pin and locking screw. The cover was bolted into place with a new gasket. About two and a half quarts of gear oil were squirted in until the level came up to the bottom of the fill hole. The plug was reinserted and it was test-time. I turned on the engine, put the shifter in D, and walked to the rear to listen for any untoward noises. All was quiet, so I bolted on the wheels and dropped her off the jackstands. The next morning’s drive to and from the dump was uneventful – in fact she has no vibrations from the rear at all (surprise, surprise). A big TYL that that project’s behind me.

Thursday, November 14, 2013

Must Make Her Rollable


Last night, at the dinner table, I blurted out that Mikhaila and I had to spend some quality time with her car. I went on to explain that, with all the bad luck I’ve been having with the fleet and the onset of brrr-cold nights, I needed to be able to roll TwoTone out of the garage to make room for the next daily-driver that craps out. In order for that happen, I went on, she and I needed to finish the work we’d started on the front end. Loriann asked how long that would take, and I replied three hours of Mikhaila’s wire-brushing, priming and painting the brake backing plates would be her commitment, while I would then rebuild the brakes, pack and install the wheel bearings, and bolt on the hubs and wheels before lowering her off the jackstands.

Mikhaila offered to go out to the garage that night and get started, so right after dinner, I fired up a couple of the kerosene heaters. Thirty minutes later she and I were hard at work – her wire brushing the right front backing plate while I disassembled the brakes on the left. By the end of the evening, all the priming was done. A couple coats of gloss black Rustoleum and some cleanup on the seal surfaces is all that’s left to do before I bolt up the mix of GNP and GUP brake components.

Yesterday I blogged about unreliable my memory is. Well, it’s not quite all gone. As I gathered up the recently cleaned front wheel bearing parts, I inspected the front seals and pronounced them unusable. I actually remembered seeing new Clark’s replacements in a box, so I went to the shelves, opened the box I thought they were in, and pulled out the package with C319A written on the outside. There were, in fact, EM wheel bearing seals. Inventorying all the GNPs I’ve got in assorted boxes is still on my general to-do list.

Since the garage was warm and my clothes were grungy, I moved on to other projects. I took apart TwoTone’s left side carburetor and dropped the body into carb cleaner. This was the carb that seemed dead when it was bolted onto Glinda’s guzzling engine a few days back. It’s my hope to prove out both carbs before they’re used to fire up TwoTone’s long-dormant engine. At the same time, installing them onto Glinda’s engine should prove or rule out her current carbs as the cause of abysmal gas mileage she’s currently getting.

Finally, I unpacked the Amazon.com box that had showed up earlier in the day. Out came the carpeted speaker boxes which were immediately filled with my new 6X9 speakers. Not sure why I’m spending time and money on a car that I’m really disgusted with right now, but I started down this path of going beyond AM before Glinda began misbehavin’.

Wednesday, November 13, 2013

Doing Some Digging


When I started blogging waaayyy back in April of ought-two, I had a number of reasons to record the highs and lows of the Corvair portion of my life. One of them was I knew I wouldn’t be able to trust my memory to dredge up every swap and adjustment I’d made over the years. “When, if ever, did I replace Heidi’s generator; or did I just rebuild the one that came with her?” “Is Ringo still running the same set of sparkplugs that went in when I rebuilt his engine, and when was that?” “Have I ever done anything with Glinda’s distributor?” The only way I would find the answers to questions like those – questions I really wanted answered – was to write (or in this case type) it all down as it happened.

This morning I was messing around with my all-inclusive Corvair spreadsheet and discovered I’d created another graph at some point showing Glinda’s advance versus rpm curve. That prompted me to search this blog using the keywords Glinda and distributor to see what I may have posted using the graph. Over a dozen posts popped up including the one dated February 3, 2011 where I discussed that old graph. At that time she was Victoria’s daily-driver and I was – surprise, surprise – trying to improve her gas mileage. I wrote that I’d gotten a list of things to check in reply to a CorvairCenter posting one of which was to verify that the proper distributor was being used since Chevy supplied different distributors with different advance curves depending on the engine/transmission combination. Not being able to find the number, I, instead, measured and plotted advance versus rpm. Take a look above where I've put up a new graph showing advance then and now compared to a revised spec curve. The interesting thing was the curve I plotted nearly two years ago does not match the curve I generated yesterday. Even more compelling is the old curve shows more advance than Chevy intended. With these anomalies, I went searching through the other posts to determine when, if ever, I’d replaced Glinda’s distributor.

Here’s a distributor time-line for Glinda. 12/9/2010: replaced original distributor with one from the shelf. 1/17/2011: rebuilt original distributor. 1/20/2011: finished rebuilding the original distributor. 1/25/2011: installed rebuilt original distributor. 2/8/2011: noticed dwell movement. 2/11/2011: made graph. 5/17/2012: rediscovered changing dwell. 6/21/2012: replaced points plate. 11/6/2012: noticed fuel improvement, attributed to "rebuilt distributor".

So where do I go from here? Well, first I’ll open up the distributor, remove the points plate, and thoroughly clean and lubricate the weights and springs with the hope that more advance will kick in. More is better unless it results in pinging. Second, I still believe the carbs are running rich, so I’ll try to get TwoTone’s rebuilt carbs corrected and swap them on to Glinda to test my theory. Finally, as a buddy of mine at work is urging me to do, I’ll “just get the 140/4-speed project done and installed.”

Feel free to bypass this paragraph regarding the ongoing truck saga if you are only here to catch up on Corvair activities. As I reported yesterday, the seal I’d gotten hadn’t fit correctly. I decided to bite the bullet, pay the big bucks, and go to the Chevrolet dealership to get the “right” parts. After calling the parts department and giving them the truck’s VIN, the parts counter-person looked up the yoke kit (which includes a seal) and lo-and-behold they came up with a part number different than the one I’d bought online. They had the kit in stock, so my VISA card took a $160 dollar hit, but I was still happy to walk out of there with “right” parts. I got home and immediately walked to the truck to compare the “right” parts with those I’d pulled off the truck. To my IMMENSE disappointment, the “right” parts I’d bought were not right. The yoke was much significantly larger and there was no way it would work. A phone call this morning to the dealership, with a different counter-person on the line, and I now have a different part number for the “right” kit. Of course, he had no idea why my VIN spat out the wrong part number yesterday. Today I was smart enough to bring the old parts in with me so when I went there at lunch, I was able to set new and old side-by-side and it appears they are the same this time. The part’s guy did a little research and discovered the VIN he’d heard me tell him over the phone yesterday had an E, rather than the Z it should have – he misheard me. To add insult to injury, the right yoke is smaller than the wrong yoke, yet it cost me an additional $19.

Tuesday, November 12, 2013

My Head Hurts

Since the parts I’d ordered to get the fleet’s tow vehicle (the truck) back on the road showed up in yesterday’s mail, I decided to ignore Glinda’s gas guzzling issue and reassemble its differential. That did NOT go as planned since the cheap Chinese seal included in the yoke kit did not fit correctly into the front end of the axle housing. Instead of having to press it in, the darn thing just slid into the bore. With no interference fit to hold it in place (and seal the outside diameter), the part is useless and must go back. That means at least two more days of the truck being out of commission.

With that roadblock firmly in my way, I chose another path and grabbed work light, dwell meter, timing light, notepad, and pen and headed out to the curb where Glinda sat. In response to yesterday’s blog post, I received a comment that I should check the centrifugal advance of Glinda’s distributor since a lack of advance at higher rpms would be detrimental to her fuel mileage. I hooked up the timing light, disconnected and plugged the vacuum advance hose, and fired up the engine. With the light aimed at the timing marks, I revved the engine and watched with a little sadness as the timing climbed with the rpms. Okay, it’s moving, but is it moving enough? I hooked up the dwell meter and flipped its switch to tachometer mode. After begging Mikhaila to come out and “drive” the car for me, I had her press and hold the gas pedal at different engine speeds while I measured the timing. The following graph shows the different advances I measured plotted against the spec’s straight line values.

The differences are probably just due to not being able to hold the rpms perfectly steady. Regardless, the centrifugal advance weights seem to be doing their job inside the distributor.

On to vacuum advance. The spec says I should be seeing 24 degrees of advance when the carburetor port is sucking air at a level of fifteen inches of mercury. I hooked up my vacuum gauge and determined Glinda’s engine hits this mark at around 2000 rpm. With the vacuum advance tube reconnected to the advance on the distributor, I turned the engine back on and noted the advance due to vacuum was about 8 degrees. When I revved the engine up to the aforementioned 2000 rpm, it jumped up to 17. Bear in mind, gentle reader, that part of this jump was due to centrifugal advance. If I back out the centrifugal advance at 2000 rpm, I end up with only 10 degrees instead of the required 24.

Thinking this was an aha moment, I awoke this morning with hopefully simple task of swapping out Glinda’s current vacuum advance with one from a distributor on the shelf. I did that, but it doesn’t look like it’s made much difference. Only time (and miles) will tell. One other thing I’ll check (thanks to a Facebook post from a ‘vair guy) are a plug from each bank. If one is sooty, then that carb is running rich and I’ll swap it out for the one good rebuilt carb from TwoTone.

Monday, November 11, 2013

Glinda’s A Guzzler

I didn’t expect that fixing the gas starvation issue would just create a gluttony issue. Once I replaced Glinda’s fuel filter, she’s been going through 93 octane like a camel after a couple months in the Sahara. Friday, with the needle just above E, I filled the tank. Since I use fuelly.com to track gas mileage, my reply to the text to them told me her gulp-rate was 14 mpg. Ouch! My first thought was a leak somewhere, so as soon as I got home I put my nose to the ground and then in the engine compartment. Nothing smelled like gas.

That night, I needed to first deal with the leaky exhaust before going further with her thirty ways. The crux of the exhaust problem was a bad gasket (donut, packing) between the left exhaust manifold and the exhaust pipe. As is nearly always the case, the fasteners at this joint were a rusty mess barely resembling a nut and stud. Knowing there was no way I’d be able to cleanly undo that joint, I was prepared with replacement GUP manifolds complete with stainless studs and brass nuts as well as a set of GNP gaskets. As expected it didn’t take much effort to wring off the nuts and the associated portion of each manifold stud. With the pipe disconnected, the six nuts holding the manifolds were far more cooperative and the old manifolds were free in no time at all. With new gaskets the replacement manifolds were bolted into place followed by reattachment of the exhaust pipe with its new gaskets. With the car still up on ramps to listen for leaks, I turned the engine on and my efforts were rewarded with a much quieter condition and no leaks detected. A silent CO monitor will be the final proof, so I'll only know after I put some miles on the car with the heater on full-blast.

Back to the mileage issue. I decided to try swapping out the current carburetors for the set Mikhaila and I recently rebuilt for TwoTone. Once everything was hooked up it took a few cranks to get some gas into the bowls, but the engine eventually fired up. Sadly, one of the carbs was not working. Something must be clogging the jet or an inner passage. With that disappointing discovery, I got to remove those carbs and bolt back on the old carbs.

The next morning I drove down the interstate and was able to seemingly watch the needle descend - an indicated quarter tank burned in about 40 miles of driving. That’s about 13 mpg. Arghhh! The next fix I tried was replacing the fuel pump while not hooking up the vapor return line. If the leak is in that line, I wanted it out of the equation. Sadly, more driving yesterday showed apparently no improvement.

While I was still in grungies, I spent some time later that day clearing out more parts I’ll never use. They went into the bed of the truck freeing up some shelf space in the garage. With that done, I turned my attention to TwoTone. I first cleaned all the bearings and stuff we’d removed from the front hubs. Then I finished disassembling the right front brake system. It’s now ready for Mikhaila to wire brush clean and then coat with Rustoleum rusty metal primer and black paint. Then we’ll be able to put the brakes and hubs back together and drop the car back to the floor.

Oh yeah, I almost forgot. I worked on Luna too. Whilst putting Ringo back on the road I needed to borrow a couple items off Victoria's car - the alternator and the choke tripper. Clark's came through with a new tripper and I tore down Ringo's loose alternator, inspected everything, and put it back together without any of the slop there was there before. Not sure what I did, but I hope I did it right. With those parts put back on the engine, it’s back where it was a year ago. Victoria and I have had some conversations about Luna. She is soooo busy I can’t imagine her ever having time to take a weekend off to help me install the convertible top on her car. She promises she’ll turn down some nanny jobs and will be able to get the top on early next spring. With that in mind, I told her I would squeeze some Luna-time into my schedule. That car, while able to stop and go, has a number of issues that should get corrected before it can be considered reliable transportation. It too, seems to have a gas issue. The few times we’ve tried to take it out, we’ve ended up having to put about three gallons of gas into the tank in order to get it to start. Since the gauge doesn’t work, all we know is that it won’t start, we pour in three gallons, and it starts. Anyway, that needs to be resolved (I’ve got a couple gauges of suspect condition I’ll swap in before pointing my finger at the fuel sender in the tank - although I even have a GNP for that).

Monday, November 4, 2013

And On We Go

I’m sure, gentle readers, that you’ve been on pins and needles in anticipation of my next posting. “Did the new fuel pump fix Glinda’s woes?” “Did Ringo, once back in the control of Ariel, crap out again?” “How bad is the truck?” I hear (or is it see, or not see, or… oh hell I’ll get on with it) all your unwritten questions, and I will now address them. Be forewarned, however, plowing through this missive may raise more new questions than answer existing ones. Let’s start off with the easy things. By Ariel’s silence on the subject, Ringo behaved himself during the couple days she drove him before she went off on a mini-vacation in South Carolina. I pray I gave him enough attention that he provides, at the very least, a trouble-free, safe fall and winter’s worth of transportation.

A brief paragraph on the fleet’s main support vehicle, the truck, and the nasty noise emanating from its rear end (typing that brings a childish smile to my face). I never made it to the dealership. Instead, I put the backend up on jackstands, pulled off the rear wheels, and had Mikhaila “drive” (operate the gas pedal) while I looked and listened for the source of the VERY nasty sound. It didn’t take long to discover the rear portion of the driveshaft start to bounce around as the truck’s indicated speed slowly climbed. After Mikhaila stepped on the brake and put the shifter in Park, I slid farther underneath and jiggled the u-joint. The sloppiness in the yoke indicated that, at best, I needed to replace the differential’s pinion bearings. The dealer only wants $1300 to do the job. Seriously????!!!! The price for new bearings, seals, and gasket was, online, less than $100. Since then, I’ve read a couple online descriptions of the work, and while tricky, it certainly wouldn’t warrant my forking out the price of one-and-a-half Corvairs. So, once I verified the ring and pinion are still in good shape, I’ll be visiting RockAuto.com and ordering their Differential Overhaul Kit.

Finally, on to Glinda and her frustrating fuel delivery issues. Last Wednesday it only took me about thirty minutes to R&R the fuel pump with a GUP. A subsequent short test drive that included a full-throttle blast up the highway proved the fuel pump was not the issue. To me that’s a good news bad news thing. Good that I’ve still got a spare fuel pump. Bad that I need to dig deeper to get Glinda reliably roadable again.

On the way home from work the next day, I stopped by CarQuest and bought another inline fuel filter. Once I put Glinda’s right rear up on a jackstand and removed the wheel, I liberated the old filter and immediately thought to myself why didn’t the manufacturer make the filtering medium a different color than rust. Just moving the still fuel-filled filter created a cloud of rusty particles giving the part a snow-globe appearance as I peered through the transparent plastic housing. The new filter went in smoothly, but before the test drive, I took advantage of the raised rear and installed the two lower shrouds so Mikhaila and I could have heat during our morning commute (her to the bus stop, me on to my work). With all wheels back on pavement, the moment of truth was here. The sixty-five mile per hour blast that had brought the car to its knees only yesterday had no negative effect on her this time. TYL – another issue eradicated. An additional item was also crossed off the to-do list. For quite a while, stomping the gas pedal resulted in the engine dying. I’d been attributing this adverse behavior to bad carburetors, but the problem all along had been low fuel levels in the carb bowls.

Friday morning, fifteen minutes after I cranked up the heat during the morning commute, the carbon monoxide detector began to let me know that fixing the exhaust leak needed to be moved to the top of the to-do list. So that’s what I’ll be doing this evening. It’s always something.