Friday, July 30, 2010

CPotD #135 (Is There Anything an FC Can't Do?)


As a child, I would refer to tow trucks as hooker trucks. I used this term since the towing member of my Tonka collection used a large hook to attach to the front axle of the “broken-down” vehicle. At the time I never understood why uttering that moniker always brought a smile to my parent’s face.

To come up with a suitable CPotD for today’s FC Friday, I again made use of Google. On a whim (and not expecting success), I typed in “corvair tow truck” and clicked the search button. Lo and behold the second photo on the page was today’s image. While this creation could also be suitable for Wacky Wednesday use, there’s nothing wacky about this impressive transformation.

Thursday, July 29, 2010

CPotD #134 (There’s Some Silver Left)


With well over a quart of silver paint left after transforming Heidi, my frugal self began to ponder painting part of Betty silver. A silver and orange two-tone might look quite fetching. I googled “Silver Corvair” hoping to find a photo of a two-tone LM coupe, but came up empty. I did, however, find a nice photo of Ned Madsen’s ’66 Corsa for today’s CPotD.

Ned’s handle is AeroNed and he’s applied his knowledge as an Aeronautical Engineer to help the performance of Corvairs. Bryan Blackwell has a webpage detailing some of the work Ned’s done to improve the ‘vair’s slipperiness.

Reassembly Commences

Last evening I pulled all the masking off Heidi, stepped back, and took a long look at the car. As I basked in the glow of my accomplishments, Loriann came out and offered to help knock out some tasks from the To-Do list. I handed her the tub of Armor-all wipes and she went to work on the dash pad while I mixed up epoxy and reinstalled the loose vent window glass. What a difference the Armor-all made – the dash is black again instead of dirty-gray. That transformation prompted us to move on to the convertible top. It too now looks brand new and the glossy black really looks sharp against the shiny silver of the body. While we were wiping, I reminded her that it was five years ago she and I had installed this top. In reply, she told me, “You are amazing: doing all this for Brianna again and doing such a good job.” You guys out there know how inspirational a compliment from your significant other can be. All of a sudden the list and the hours still ahead of me didn’t seem so daunting.

There are plenty of bits and pieces that need to be reinstalled, but since Brianna put “Polish Chrome” on the To-Do list, I need to spend some quality time with the buffing wheel on my grinder motor before any pieces can be screwed back on. So, after replacing the wire wheel with the cloth buffing wheel and getting out a stick of buffing compound, I shined up the front grill bar and the rear taillight chrome (see photo). Just so I could say I started reassembly, I mounted the grill bar. She’s sure gonna’ look nice when everything is back on.

Wednesday, July 28, 2010

CPotD #133 (The Volt's Not a New Idea)


Chevrolet’s impending release of the Volt has prompted a lot of discussion on the Corvair forums about electrifying our favorite automobile. GM has been developing electric vehicles for many years. In fact, they created Electrovair I in 1964 and Electrovair II, the subject of today’s CPotD, in 1966. There’s a great writeup on this unique car at Gary Aube’s Corvaircorsa website. There’s also some more info over at the CorvairForum.

Tuesday, July 27, 2010

CPotD #132 (A Racer From Down Under)


Look closely; the racecar in this vintage photo really is a LM Corvair. The Yahoo group, Fastvairs, uses a different photo of this car as its homepage image. There’s a great story about this highly modified Corvair racer at V8Racecar. Read on in wonderment of what racing used to be like.

The List Revisited

Since I knew the paint job task would consume the lion’s share of my time on this list, I’ve been remiss in dealing with any of the other issues. Now that the paint job is basically finished, it’s time to focus on the balance of the list. Here’s a revised version with time and dollars left to completion.

Monday, July 26, 2010

CPotD #131 (An EM Gets An LM Engine)


The four-carb 140 HP engine wasn’t available until the LMs debuted in 1965, but fortunately it doesn’t take a lot to transplant one of these potent powerplants into the engine bay of an early. Currently, there’s a thread on the CorvairCenter’s forum call Painted Engine Pics and today’s CPotD was taken from a post by shortstrokevair. I can only hope that someday I’m able to get Lucy’s engine upgraded so beautifully.

Heidi Days of Blue are Over

After hours and hours of prep including welding, Bondo’ing, priming, and sanding Heidi was ready for paint yesterday evening. Since I didn’t want to rush through the painting and clearcoating, I decided to get up early this morning and do the shoot in the cool of the day. I truly wish I had the opportunity to paint a car more frequently than every five years. It's really a lot of fun when everything's going down right.

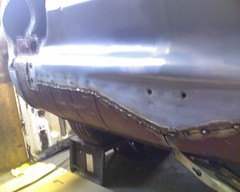
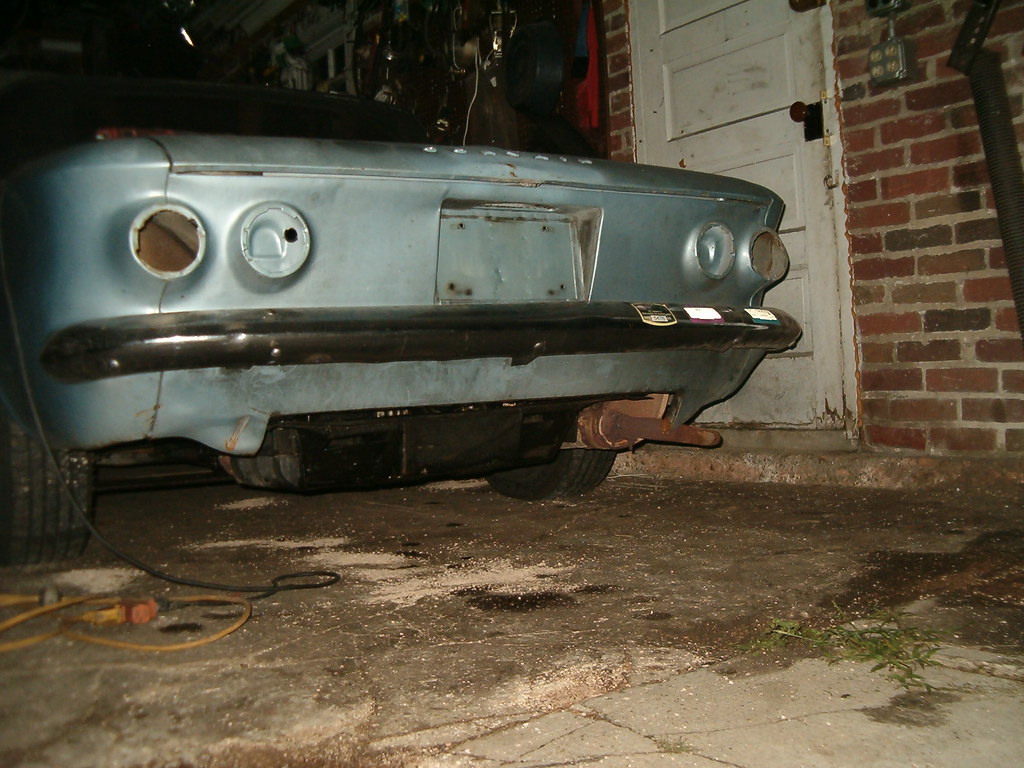
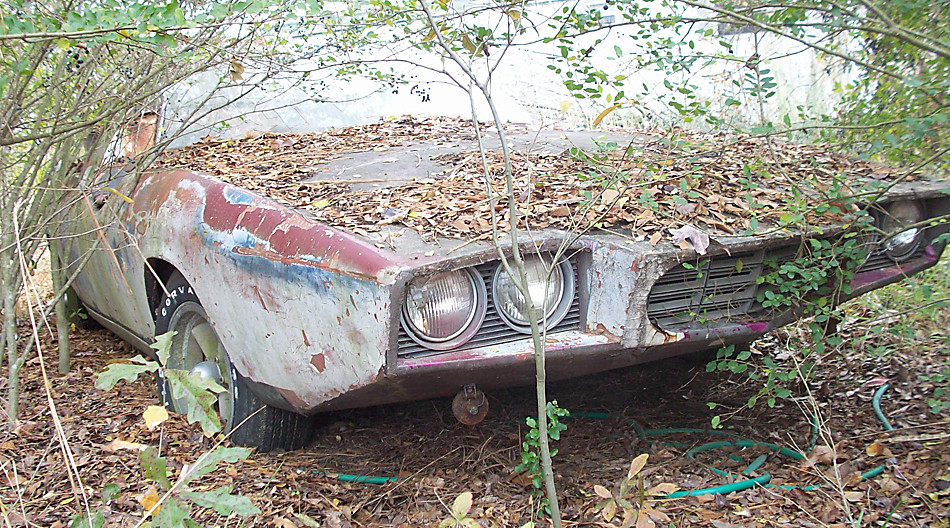
Wait - back up a second. Actually four days. Given all the adventures of the prepping process, I must do some event elucidation. Thursday, with Heidi’s front up on ramps, all her rusty exterior spots received two coats of POR-15 followed by an application of their Tie-Coat primer. The inside of the patches and the cavity the patches enclose were also hit with the POR-15. After fitting the passenger side patch into place using vise-grips and the headlight bucket, it was time to break out the MIG welder. First, tack-welds every inch or so and then filling in between the tacks. The process was 
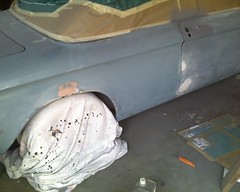
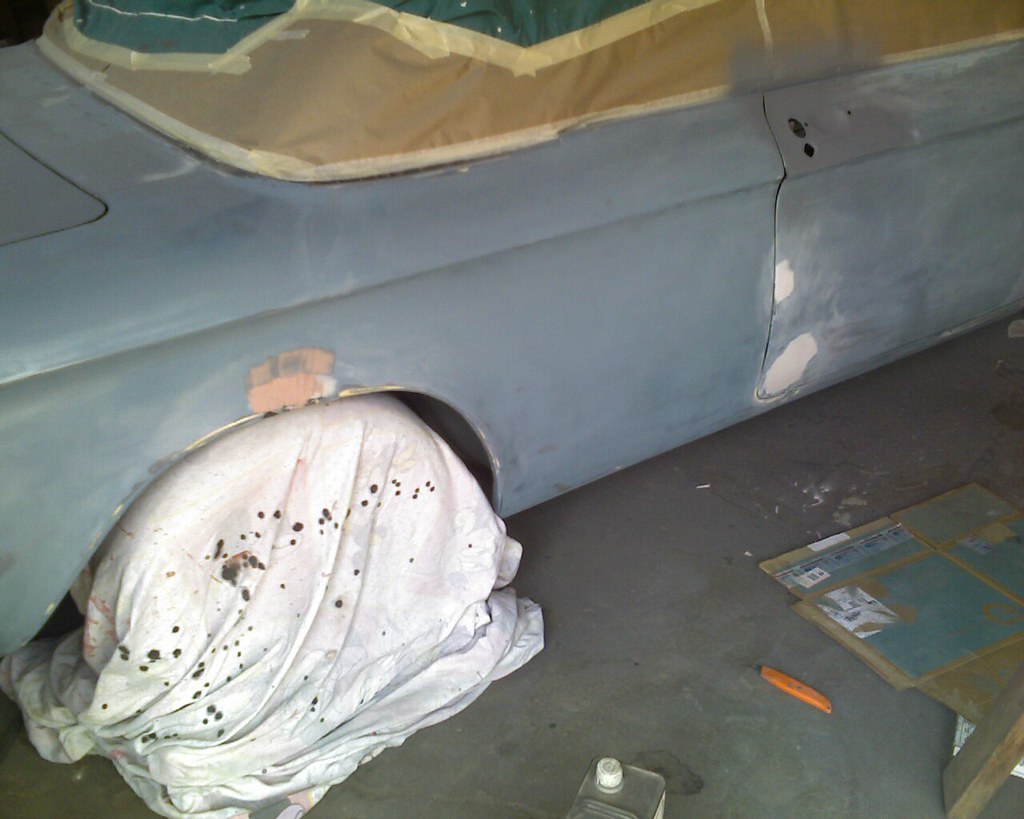
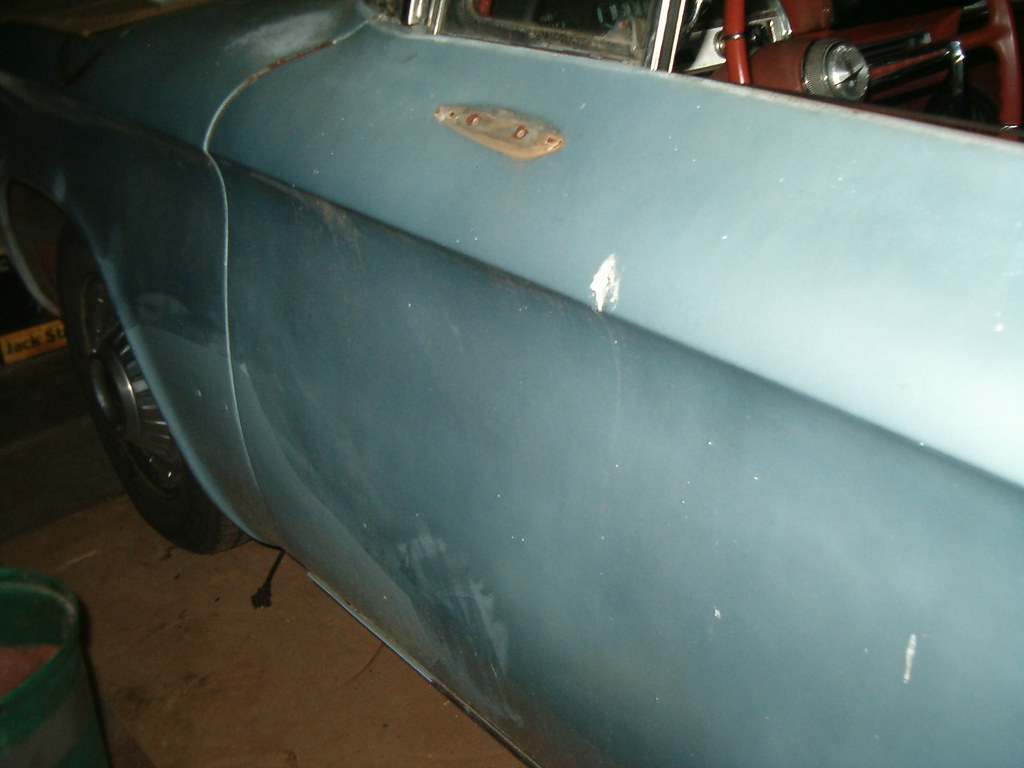
repeated for the other two patches. Next the flap wheel on the grinder smoothed out the welds followed by a complete wipe-down and epoxy primer sprayed over all the exposed exterior metal. I had just enough Bondo in the can to smooth out the welded areas and a few other rusted out places. After some serious Bondo sanding, I spot-sprayed some more of the epoxy primer to seal the bondo and cover any metal I may have exposed with my sanding. Once that had cured, I laid three coats of urethane primer.

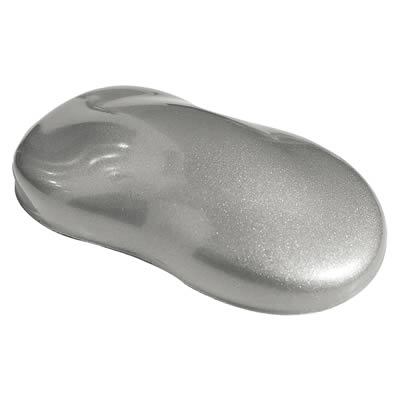
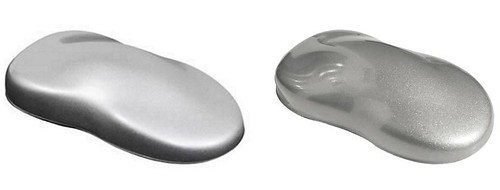
After letting the primer cure overnight, I spent the better part of Sunday afternoon wet-sanding every square inch of the Heidi's now blue-grey body. That was followed by two rounds of rinsing off all the residue. Finally, this morning I was up with the sun and out in the garage. Another wipe-down with a surface cleaner and it was do-or-die time. I mixed up the first batch of metallic silver and poured it through a filter and into the gun’s reservoir. A large piece of cardboard was my initial target. I wanted to make sure the setting I’d used for primer would be okay for the paint. It looked good, so I commenced shooting. Foolishly, I started with the trunk lid and laid down the first coat too heavily by not moving my hand fast enough. Irrrr. Even worse was the sagging I got on the passenger door. The three subsequent coats were more properly applied and covered up most of my initial errors. With four coats of color applied, I moved on to the clearcoat. Three light-medium layers finished off the job. I’d post some pictures, but Brianna prefers to be surprised in person. She’ll be up early next week, so I’ll put the photos in my Flickr Heidi set then and link to them from here.

Is it perfect? Heck no, but then it didn’t cost me five figures. It needs some wet sanding and buffing to be as nice as possible, but that will wait for another day. On a positive note, the new air system performed flawlessly – no fish eyes.

Thursday, July 22, 2010

Garage Air - Installed

I finally got around to posting the pictures I took the other day of the installed air system in the garage.

Here's the bucket of fittings prior to installation.


Here's the connection coming from the compressor in the new shed.


Here's the outlet showing the copper coil in the bucket waiting for a nice, iced, fill up of water.

Ringo Horns In – Schedule in Jeopardy

As reported yesterday, Ringo started running like crap and was undrivable. Last evening I got a late start on my car-time because I had to fix a PC. I pulled all his plugs out and a few were pretty sooty looking. I think the racing carbs that are currently mounted on his engine are too rich. I need to rebuild his original carbs and swap them back in. Anyway, with all the plugs cleaned, re-gapped, and installed, he started right up and idled nicely. Problem solved. I took him for a quick spin around the neighborhood to make sure nothing else was amiss and, other than a slight pull to the left under braking, he ran, stopped, and idled fine. As I was backing into the driveway to reinstall the air cleaner, I noticed the right brake light seemed weak. By connecting the ends of the leads at the brake switch, I had the lights stay on while I inspected. Sure enough, there was a problem. I pulled apart the taillight assembly and then cleaned and reattached the ground wire to the socket. Another problem solved. He’s good-to-go until the plugs need cleaning again.

All that, however, shot my evening, so now I’ve had to adjust the painting schedule. Here it is now:
  • Thu - POR-15 and Tie-Coat Primer Rust Spots
  • Fri - Weld In Valance Patches Grind Patches, Bondo, Sand
  • Sat - Clean, Mask, Spot-Shoot Epoxy Primer, Shoot 2k Primer
  • Sun - Sand Primer, Clean, Shoot Paint and Clearcoat

Wednesday, July 21, 2010

I Just Keep Plugging Along

Last evening my buddy and brother-in-harms (races a Corvair, hence the harms – get it?), Jonathan Kendig, stopped by. He was out on a shakedown drive in his track car after installing thermal spacers under his engine's Weber carbs. Previously, he’d had issues with gas boiling in the carb reservoirs due to their getting too hot. With the spacers, his hope was to keep the carbs at a temperature much lower than the hellishly hot heads. The test drive and associated stops indicated his fix was successful. He brought with him the Tweety award I’d received at the last track event. The picture to the left is not the actual award; mine looks the same, but has a “FAST” AND UGLY nametag affixed to its chest. He’s now proudly on display in my cubicle at work. Much thanks to the LeVeques.

After chatting cars, tools, and racing for a while, the lovely Loriann reminded me I was on a tight schedule, so I had to knock off the tongue wagging and put sandpaper to paint. About an hour later, I had completed scuffing Heidi’s exterior paint and exposed all the rust spots that will get POR-15 tonight.

While I was sanding Ariel arrived home and told me Ringo was running like crap. He would die at stops and only chug down the road even with her foot pushing the pedal to the metal. I did the pull-the-plug-wires-one-at-a-time test and found that at least three of the cylinders weren’t really contributing. She and I discussed the fact that she’s been driving him nearly every day and it’s probably time to clean the oily deposits off the spark plugs. We made other automotive arrangement for today, but she said she’d try to tackle the task this morning. She got called into work early, so she wasn’t able to, but I can deal with it this evening. This little additional job won’t kill my current schedule.

After cleaning up, it occurred to me I’d forgotten to sand the door jams. Hopefully, I can squeeze that in this evening’s agenda as well.

Tuesday, July 20, 2010

She’s Mostly Roughed Up

Last evening, between thunderstorms, I rolled Heidi out of the garage and, with my electric DA sander, roughed up as much of the paint as possible. I also hit the replacement engine lid with the sander. From sitting out in the, there’s some surface rust that I must make sure is neutralized before the coat of primer goes down. The flat disc was not real effective on all the inside curves, so this evening I’ll finish the job by hand :-(.

I created a schedule to see if the tasks I have left to do can be finished. Lo and behold, in all my optimistic-ness, I believe I can have the car painted by the end of this weekend. Yeah, it’s probably a dream, but it’s a dream I’m chasing. If I can get it done, then the paint has a week to cure before I reassemble trim. During that week I can tackle the rest of the items on the To-Do list.
  • Tue - Finish Sanding Current Paint & Mark for POR-15
  • Wed - POR-15 and Top-Coat Primer Rust Spots
  • Thu - Weld In Valance Patches
  • Fri - Grind Patches, Bondo, Sand
  • Sat - Clean, Mask, Spot-Shoot Epoxy Primer, Shoot 2k Primer
  • Sun - Sand Primer, Clean, Shoot Paint and Clearcoat

Monday, July 19, 2010

Stripped Down and Ready

Heidi (the car) that is, although as hot as it’s been there were quite a few times this last weekend that I gladly would have stripped down and hopped into the kiddy pool my daughter’s cruelly put out on the back lawn to torment me.

I got up early Sunday morning to beat the heat and pulled the rest of Heidi’s trim off including the two fake air vents just behind the rear window. I had assumed they were screwed down so stuck my hand through the small opening in the engine firewall and felt the ends of the retaining prongs sticking though, but no nuts. With a metal scraper, I was finally able to work each piece off the car. I’ve actually removed more on this repaint than the first time Brianna and I did this.

With everything removed, I gave the car a thorough cleaning. Next on the schedule is sanding all the paint. Only the clearcoat needs to be removed; the rest of the paint just needs roughening up to give it some tooth for the primer. The progression of the next events is now set. Following sanding is an application of POR-15 over all the spots that show some semblance of rust, then a coat of their POR-15 primer. After that, I’ll prep and weld the patches in, grind down the welds, apply Bondo where necessary, sand, clean, shoot primer, sand again, clean again, shoot basecoat and clearcoat. Will I beat my 8/7 deadline? God only knows.

As you can see by the attached image, the primer and paint will be here tomorrow. Wish I was ready to shoot it.

Twenty-Six Joints; Lots of Sweat

Saturday I completed installing the copper pipes of my new compressed air system. Given the high temperatures Baltimore is enjoying, I’m surprised I even had to light up the torch to sweat the joints. But light I did, and when I pressurized the system, I only found one joint that hissed with leaking air. A simple re-sweat and all was quiet.

I filled the rope bucket with water and dropped in three blue ice packs to cool it down while I extracted my sandblast cabinet from storage. With it all set up and plugged in, I began to remove the paint and primer from the valance patches. I say “began” because all my efforts, while vastly drying the air, did not fix the sandblaster problem. Sand would be blown out the nozzle for a couple of seconds, then stop. If I jiggled the tank, the sand would blow for a couple seconds before stopping again. The air flow is continuous throughout all this. So, in order to keep the sand flowing, I had to become a contortionist. Right foot on the ground, both hands shoved inside the sandblasting cabinet, and my left foot resting on top of the tank rocking it back and forth. After blasting the perimeters of each part, I gave up this silly little one-man band business. I'll do more research and try different settings, but for now the sandblaster will stayed put away. The upside is that I do know the air coming out of the hose is nice and dry, so fisheyes while painting will not be a problem.

CPotD #130 (The Other Supercharger)


Last week's Motor Monday CPotD was of a Paxton supercharged Corvair engine. To give equal time to the other major supercharger, I googled “Corvair Judson” and turned up this posting by Andrew on the CorvairCenter’s forum with today’s CPotD. Don’t know what vehicle this engine’s going into, but it sure looks cool.

Friday, July 16, 2010

Garage Air: Design on the Fly

Yesterday evening I drove out to the Baltimore ‘burbs to meet a guy about some pipe. Copper coils to be exact. I ended up coming away from that meeting with a 25’ long coil of ¾ inch soft copper tubing and some excellent plumbing advice. Armed with that wisdom and my sketch, Mikhaila and I headed to Home Depot so that I could spend an hour in their plumbing aisle redesign my system a couple times. I ended up going with all copper pipes because, 1) I’ve sweated pipe joints and have the torch, flux, and solder for the task, 2) the overall assembly will be much lighter than a galvanized iron one and thus easier to install by myself, and 3) I can cut the pipes to exactly the lengths I need to get them to run nicely along my garage walls.

The first item we selected was not from the plumbing aisle, but from the garden section. The coil I’d just bought could not feasibly be wound tightly enough to fit in a 5 gallon bucket as originally planned, so I needed a container with a larger diameter. We found a rope bucket that will serve my need perfectly plus it was a great receptacle for all the fittings I subsequently selected. Into the bucket went an assortment of elbows, tees, adapters, and valves and a three foot long coil of reinforced hose. Finally, with three ten foot long pipes sitting on my shoulder we headed to checkout and then home.

The first part of the installation was to run the flexible hose from the compressor into the garage. It needed to be flexible to handle the movements of the compressor in the shed. A one inch hole drilled through the window frame made a path with the only issue (and there had to be at least one) being the disconnected window weight that had to be shoved over while the hose was pushed through. A couple fittings and a hose clamp and I had connection at the compressor’s outlet. Next I had to pull stuff off shelves and take down two bikes hanging from the rafters to give me access to complete the layout. An hour later and it was time to knock off for the night. Final score for the day: 8 cuts down, roughly a dozen more to go plus all the sweating and mounting. Irr – there’s still a good ways to go.

CPotD #129 (Let's Go Somewhere Cooler)


As the weekend nears, and the heat index climbs towards triple digits, I’m thinking a getaway to the mountains or beach would be a God-send. Today’s CPotD for FC Friday would be a great vehicle in which to do just that. Imagine being all packed up with everything you need for a quick trip to a cooler climate. All you have to do is fill the tank and head on down the highway.

I’ve featured this Greenbrier with the camper package before, but felt that the interior deserved CPotD honors. These photos were taken at NECC's Oshawa car show back in 2006.

Thursday, July 15, 2010

CPotD #128 (A Wow of a Wagon)


After yesterday’s CPotD, I wanted to find a CPotD for today that showcases the beauty of a Corvair wagon. Sam Russell has a gorgeous ’62 Monza wagon and fortunately he shared a bunch of photos on the CorvairForum. Here’s one of the few artsy shots. The others can be found by clicking here.

The color, Honduras Maroon, is also the color of the ’64 that sacrificed its front end for Heidi’s valance repair. That year, however, it was called Palomar Red. When I removed the front headlight buckets from the chopped off front panel, I was stunned by the new-looking condition of the paint that had been hidden for nearly fifty years. Ah, so many colors, so few cars.

Freeing Up Space

Last evening the focus was on getting the compressor and garden stuff out of the garage, and I was successful. I first built some shelves in the new shed and promptly filled them with bags of potting soil, gloves, trash bags, and all the chemicals we have accumulated for keeping unwanted flora and fauna at bay. That cleared off two shelves in the garage. Then I rolled out the compressor and inserted it in the back corner of the shed. The moment of truth for the evening was rolling the lawn mower into its new parking spot and finding it fit just as planned - nicely nestled between the rototiller and the compressor.

With the compressor in place, I made measurements for pipe runs and completed my diagram and shopping list. Today, I’ll swing by Home Depot on my way home from buying the copper coils. I’ll be in the garage again this evening installing everything.

Wednesday, July 14, 2010

CPotD #127 (A Wacky Wagon for Wednesday)


I’ve actually seen the subject of today’s CPotD in the flesh, irr, metal. It made an appearance at BeaveRun last year for the NECC’s track day. The air cleaner peeking through the hole in the hood is the giveaway that things are not as Chevy intended. The father-son duo found an old full-frame G-body GM car, pulled off the 80s vintage body, and dropped on the wagon’s uni-body in its place. These guys from north of the border didn’t even need to alter the wheelbase.

Last Patch Nearly Ready

No other vehicle troubles kept me from appointed duty last night – working on Heidi’s bodywork. I got the second valance patch cut out and fitted. I’m not really happy with the fit, so I’ll need to trim a little off to get it closer to perfect. I tried taking the paint and primer off with the wire wheel on my grinder, but didn’t make a lot of headway. After about ten minutes, I said, “Forget this frustration, I’m gonna’ sandblast these.”

Before my sandblaster can be effective, however, I need to take the time and money to install decent plumbing that will completely dry out the compressed air. Air directly from the compressor tank is too damp to use for sandblasting, or painting for that matter. My plan, shown in the photo for this entry, includes moving the compressor out to the new shed. I'll then connect the galvanized iron pipe to the compressor using a flexible hose. The pipe will come through the garage window, up the wall, along the top of the wall to a point near the center of the back wall. Then down the wall into a coil copper tubing that will sit in a five gallon bucket that I’ll fill with ice-water when I need the dry air. Out of the bucket the line turns back pipe and ends in a quick coupler to snap a hose into.

So, starting this evening, I’ll be moving things around, making measurements, finalizing the layout, and creating a Home Depot shopping list. Tomorrow, I’ll be buying copper tubing that I found on Craigslist.

Tuesday, July 13, 2010

CPotD #126 (Not Enough Racing Corvair 4-doors)


Since I’ve taken to the track in an early model, I’ve always admired the other EM racers. All of us love a challenge. It would be so much easier to start with a LM and its improved, Corvette-like suspension. Geoff Flynn has taken this challenge to a higher level with his ’64 Sedan. That’s right, a 4-door track car just like the NASCAR guys have to run! I’ve never seen another one. According to my 1961 shop manual, the 4-door only packed an additional thirty-two pounds, so starting with a “family” car isn’t really a penalty. I wonder if the cool overhanging roof helps or hurts the aerodynamics.

Today’s CPotD is the best of the NECC-posted photos of Geoff’s car. He and his car were also the subject of a feature article in Hemmings Muscle Machines. Here are some other shots of this unique racer.

Heidi’s Deconstruction Continues


Yesterday afternoon I got a phone call from the lovely Loriann informing me her car would not shift into reverse. For some reason I did not fear the worst – busted transmission. Instead I assumed an issue with the linkage. After confirming the bushing I’d replaced a couple months ago had fallen out, I had to burn nearly two hours coming up with and installing a suitable bushing replacement. I finally MacGyvered a piece of tubing over a fuel line pressed into the linkage end and over the pin of the shifter.

With that complete, I was finally able to get some more work done on Heidi. I removed the sideview mirror, taillight assemblies, rear license plate and associated light assembly, and the rear grill. I started to remove the trim pieces that frame the rear of the salon, but the screws holding it in place were too stubborn. I’ll have to make another attempt with my impact screwdriver. I also investigated what it would take to remove the two fake air vents just forward of the engine lid. It appears that I’ll need to pull off two access covers in the engine compartment’s firewall, insert my chubby, little hand through each opening to wrench off the nuts that retain the pieces to the car. All the while being careful not to add to my current assortment of lacerations.

To attempt to address the list’s item “triangle window,” I also pressed in the pin that holds the driver’s side wing window’s catch to the shaft. This didn’t seem to tighten things much, but the catch does seem to hold the window closed snugly enough. This evening I’ll be back at the bodywork.

Monday, July 12, 2010

CPotD #125 (A Different Way To Cheat)


Starting with the Spyder in 1962 and ending with the Corsa in 1966, you could buy a turbo-charged Corvair from your local Chevy dealer. Matt Nall, a prolific poster on Virtual Vairs and the CorvairCenter forum, refers to turbo-charging and super-charging Corvair engines as cheating. So while you could get your exhaust-driven (turbo) cheater straight from the factory, those that opted for belt-driven (super) cheating required the help of the aftermarket. Paxton Automotive and Judson Company to name the two most known manufacturers. Today’s CPotD for Motor Monday is a ’64 engine equipped with the Paxton supercharger. Note the airtight box required to enclose the carburetor. This kept the pressure relationship balanced between the air flowing through the venturi and the gas in the bowls - while more air was forced through the carburetor, the proper amount of gas was added to the flow.

This reminds me of a story of how I almost landed a used Corvair supercharger last year. A guy in a nearby town posted an ad for a couple v8 ‘vairs he wanted to sell plus a bunch of parts. I got there a few days after the ad was posted, and he had a yard-full of stuff. I pawed through what was there, asked if he had any Corvair parts, and all he could point me to was a Corsa dash with gages that he was asking too much for. I found out later that he’d had a Judson setup, but had sold it the day before I’d gotten there. The guy that had bought had immediately put it up for sale on the web for five times what he’d paid for it.

Silver Metallic It Is


Just got an e-mail from Brianna. The paint chip chart from Summit Racing showed up at their apartment Saturday. She’s settled on Silver Metallic, and had this comment. “I know it's less glittery (compared to the other silvers), but I like the darker color.” Gals and their glitter.

Deep Into Heidi’s Bodywork


Saturday I successfully installed the new radiator into the Suburban and everything checked out. Now that I have a reliable daily-driver, it was time to take Heidi off the road. After using the ramps to raise her front, I pulled the bumper off. All the bolts came out easily thanks to the anti-seize I’d applied when last they were installed. My drill made short work of the rivets that retained the two flashing patches. With the openings in the valance exposed, I found the rust had spread. No problem, I’ve got a complete front end to get patches from. So I cut away a big chunk of the valance. Click here to see more pictures. Sunday afternoon I proceeded to layout the patches using the cutoff pieces as patterns. By the end of the afternoon I had the patch for the left side of the opening trimmed to fit with the right side of the patch ready to cut out. In the midst of all this I disassembled the front end parts including removing the trunk gasket. I’ve decided that all rust areas will be thoroughly wire-brushed, followed by a coat of POR-15 and their top-coat primer. The groove where the gasket fits is notorious for rusting since water likes to puddle there. I’ll also put POR-15 on the backside of the sheetmetal where I can get to it. This should prevent any future bubbling. I just ordered the primer, but I’m praying it’ll be here by the weekend.

Friday, July 9, 2010

CPotD #124 (The Holy Grail Obtained)


I found it! A photo of a restored example of the rarest production Corvair – the ’62 Loadside. Only 369 were built that year. The next rarest model is the ’69 convertible at 521. The scene of today's CPotD is the economy run at this year’s CORSA Convention and again I must thank Scott Trunkhill for his photographer and webmaster skills. This one is a beautiful example for FC Friday and it’s not the only time it’s been featured.

Even though it's not nearly as practical (you can't even sweep the leaves out of the bed), I actually like the uniterupted lines of the Loadside's bed over the Rampside's. Will Mikhaila and I be able to produce a truck as stunning? Time will tell.

Thursday, July 8, 2010

CPotD #123 (Sensational Silver)


Five years ago, when Brianna was deciding what color she wanted Heidi painted, she initially wanted silver, but was very concerned that Heidi’s chrome would then fade into the background. I struggled to find a picture of an EM with a red interior painted silver. I posted my request for photos on Virtual Vairs and the CorvairCenter forum, and finally received the photo I shared in a previous blog entry. Today, in a follow-up to my previous post, I went looking on Flickr for a silver Corvair to feature as today’s CPotD. Immediately, this photo of a ’62 coupe with a red interior popped up. What a difference five years has made to the scope of the internet.

Paint Job Ponderings


Five years ago, almost to the day, Brianna and I sprayed three coats of Glacier Gray PPG Delstar paint onto Heidi’s exterior. It looked good for a couple years, but without a clearcoat, constant exposure to the elements has really taken its toll, so it's time for a re-paint. I want this one to last longer than the current one, so I’ll be using better materials and including three layers of clearcoat. I’ll not whine about fleet management on a budget, but I am trying to find a good balance between quality and affordability. I believe I’ve found that at Summit Racing.

The other day I visited their site to buy some K&N filter cleaner and oiler for Loriann’s car. While there, I remembered that they now sell paint, so I did some searching and turned up some nice deals on some nice paint. I bought their paint chip board and had it sent to Brianna. She needs to approve the silver before I buy it.

Additionally, I did some research to see if anyone’s had a problem with Summit’s paint. All I found were glowing recommendations, so I’m sold.

I've also been researching the best process for this repaint and have come up with the following. First, I’ll fix the front valance, welding in patches from the front piece I recently bought. After putting Glinda out in the driveway, I’ll maneuver Heidi into the garage for maximum access and pull off all the exterior bits like bumpers, doorhandles, and trim. Then I’ll roll her into the driveway, weather permitting, and sand the old paint also removing the clearcoat from the right side door and quarterpanel. Back into the garage and epoxy primer will be sprayed onto any exposed metal surfaces. Bondo work is next followed by a coat of sealer/primer. Wet sanding the primer will be the final step before laying down three coats of color followed by three coats of clear. Here’s my shopping list:

  • Epoxy Primer, 1 quart, $20 (UP232)
  • Epoxy Primer Catalyst, 1 quart, $17 (UP233)
  • 2K Primer/Surfacer, 1 gallon, $48 (UP220)
  • Activator, 3 quarts, $64 (UP101)
  • Basecoat, 1 gallon, $82 (UP300)
  • Clearcoat, 1 gallon, $52 (UP201)

Total is $283 before shipping. Let the games begin.

Wednesday, July 7, 2010

CPotD #122 (A Corvair For Cassius?)


This highly modified LM has an interesting tale to tell. There's a rumor it was built for Cassius Clay. Then it was stolen after the article appeared in the paper. If you’re interested, check out the following links:

The Birmingham News
CorvairCenter Forum Thread
Hemmings Blog Entry
More from The Birmingham News

Everyone loves a great mystery.

THE List

Brianna is getting married four weeks and three days from today. I know she does not want to be reminded of this since she and her fiancé are doing their own wedding planning and it’s quite stressful. I know my lovely wife does not want to be reminded of this since she is in the midst of sewing dresses, including the one for the “center of attention.” Now I get to join the group of those with 8/7 as an ominous deadline.

Yesterday morning Brianna and Nich drove off in Lucy while leaving me Heidi and her to-do list. Here it is:


Will I be able to check off everything? I hope and pray so. I got a good start last night by crossing off a couple items - low hanging fruit as it were. The intermittent stereo problem (speakers-wires) was fixed by doing a better job zip-tying the harness to the radio bracket. The brake lights issue required cleaning the two screws that ground the socket to the car body and the respective mating surfaces and then applying a conductive grease to prevent future corrosion.

Not on the list was the heater control. I noticed during yesterday’s commute in near-100 degree heat that the heater wasn’t completely shut off. Since my feet don’t need hot air blowing on them, that needed to be addressed. While I was under the dash for the radio fix, I detached the actuator cable from the control bracket and pulled hard on the cable end. This morning’s drive was heater-free.

Tuesday, July 6, 2010

Lucy’s Valance Work is Complete


Saturday morning I bought another can of BRIGHT RED spray paint and put a couple coats of its contents on Lucy’s front valance. Then Sunday Brianna’s fiancé, Nich, and I bolted her bumper back in place and reinstalled the horn guards. Yesterday morning I reattached the Velcro strip to Lucy’s interior using 3M weatherstrip adhesive. This is the Velcro that holds the carpet over package tray area behind the back seat. I also pulled out all the racing harnesses and replaced them with normal seatbelts. Finally, I washed the Summit Point mud from her insides surfaces. Ah, good memories.

Friday, July 2, 2010

CPotD #121 (First FC Friday)


For a while I'm making the last work day of the workweek FC Friday. All you C95 fans can expect the CPotD for this day to highlight your favorite Corvair. We’ll kick it off with this hi-res image Google uncovered showing a Corvan in the midst of what appears to be a comprehensive restoration. It looks like most of the interior is out and much of the exterior bits have yet to be re-installed. Interestingly, the chrome rear bumper and back Chevrolet script have been attached. I like the classic 50’s color and the chromed stock-looking wheels.

Bondo On, Bondo Off

A couple nights ago I finished grinding down the welds on Lucy’s valance patch and then laid down some layers of Bondo. Last night I rolled her front up the ramps, got out my straight line sander and went through about ten feet of sandpaper. It’s not perfect, but for the location, it’ll do. I shot a couple coats of gray primer followed by a light coat of BRIGHT RED – the closest rattle-can color available. The second and third coats will have to wait until I make another trip to Pep Boys.

Thursday, July 1, 2010

CPotD #120 (Let's Take a Trip, Part Two)


After the bad press I may have given FCs the last week or so, I wanted to find a wonderful example of all that’s great about Greenbriers. Conveniently, Scott Howey, forum-master of Corvairforum.com, posted that today’s CPotD garnered the most votes for that forum’s Corvair of the Month competition. To quote the owner, Allen Bristow, it’s a “1964 Greenbrier factory camper package, TurtleTop pop top, custom roof rack 110 4speed.”

Takes me back to my childhood when my folks took my sister and I camping all over the western United States and Canada in a 1968 VW transporter we called “the bus.” I remember one trip into Canada where we traversed the Forestry Trunk Rd. There was, I recall, only one gas station roughly halfway down this isolated gravel track. We got a flat tire on the road, and the best the station could do for us was to put in a tube. Ah, very nice memories.