Monday, February 28, 2011

Sockets and Inspiration

Last week a passer-by informed me that Lucy’s right rear brake/turn signal light was not working. So Friday afternoon I spent some time supposedly fixing the problem. Friday, for Baltimore, was a horribly windy day – no fun to work outside at all. Regardless, I pressed on checking things and trying to find where the disconnect was. I determined the bulb was fine and thought I’d verified that there was grounding at the socket. Then I made sure the 12V blinking voltage was getting out of the switch under the dash – it was. Finally, I verified the blinking voltage was getting to the contact in the bottom of the socket – it was. Irr. Nothing appeared amiss. I re-checked ground at the socket, and now it was NOT working. Double-irr. So I removed the assembly from the car and found the ground wire I’d installed a while back was not properly contacting the socket’s body. It was time for a more reliable fix. I cleaned the wire, made sure it’s other end was still connected to ground, crimped on a ring terminal, drilled a hole in the socket, and attached the terminal to the socket with a tiny screw. With a reliable ground established, I reinstalled the assembly, inserted the bulb, and verified all was good. After putting away the tools I ran into the house to thaw out. After changing back into clean clothes so I could swap Lucy for the lovely Loriann’s PT Cruiser (that vehicle was my Saturday morning project to get its power steering functioning again), I went outside. I decided to double-check my lights before moving Lucy out of the driveway and found that the right rear light wouldn’t work again. At that point, I decided I’d had enough fun working on cars, and gave up for the day.

The next morning, I got up early and donned my grungies. After removing the lens, I found the bulb was loose in the socket. I pulled the assembly apart, slightly crimped the socket, and pulled on the contacts with a needle-nose pliers. After reinserting the bulb it worked. Hallelujah. So everything went back together again, and it’s still working.

On to the other part of today’s posting. Inspiration. Maybe that’s not the right word. Maybe it should be “fear”. I need to make some significant repairs to Ringo’s body. Repairs that affect his structural alignment, and frankly I’m concerned about the end results. I’m going to cut out and replace both rocker panels – these are the main structural elements that keep the car in shape. I’m planning on doing lots of measuring and I’m prepared to do some pulling and pushing to keep the door openings square. This is still a major undertaking, and I really need to get off the stick and get going. I feel badly that Ariel has been without her car for so long, and I want to move on with other projects. I just need to DO IT! Hopefully things will get rolling tonight.

Thursday, February 24, 2011

My Engine Shelf Overfloweth


I’d always thought it made sense to have a spare engine lying around, even if it was in pieces. When Heidi was going through roadification, I removed her seized engine, disassembled it, and bagged and boxed the parts. When she inherited a running engine out of the white 4-door, those parts became spares, and I’ve used a few of them since then. Most helpful were the cylinder heads since both Heidi and Ringo have dropped valve seats during the last few years.

Soon after the second spare head had been pressed into service, I came across a Craigslist ad selling a LM engine for less than $100. Even though there were no LMs in the fleet, I bought it with the knowledge the heads could be used on EMs. After verifying that engine did not have good compression due to ring issues, I tore it down and bagged and boxed the parts. When I went to put the boxes and bags on the shelf, it was apparent some stuff needed to go to make room. I made the hard decision to scrap Heidi’s ’64 engine block. EM engines are not very popular since most everyone redoing an engine wants the larger, more powerful LM engines.

I’ve recently changed plans again. I’ve decided to use Lucy’s engine (a known entity) in Ringo instead of the traded-for engine (an unknown entity). This means if I want to be at the Corvair Olympics in June, the traded-for engine needs to run strong as-is or I need to do a fairly quick rebuild. Now, after tearing down both Ringo and Betty’s engines AND having negotiated for a running LM engine in trade for Betty, I have way too much drivetrain stuff lying around my cramped garage.

So, with all that in mind, some parts and pieces have to go. Now to decide what to keep and what to scrap? All heads will be marked LM or EM and retained – an easy call. The EM block assembly will go – another easy call. Everything unique to the EM from Ringo’s former engine has to stay so I can use it when I refit a LM engine to go into Lucy. Starters, generators, alternators – all keep. Engine covers – keep. Do I really need three spare torque converters? I don’t think so. When was the last time I broke a bellhousing? Do I really need multiple ones taking up space? Nope.

Once I take a complete inventory, I’ll post a list of free stuff available on the usual sites. Good to help the hobby when I can.

Tuesday, February 22, 2011

Heidi is Awakened

Heidi has been in hibernation for the last couple months. Thanks to living on a free bus route, Brianna and her husband, Nich, only need to use one car. His (much) newer vehicle is the one that’s been experiencing the salted roads of southwestern VA while Heidi has been patiently awaiting the arrival of spring and the resumption of fun, topdown motoring.

Her hibernation, however, came to an end this weekend due to a clunking from the front end of Nich’s car. Before starting her up, Brianna requested some guidance about how best to awaken her. I gave her the following instructions:

1) make sure the battery is fully charged - you can do this via the jumper cables hooked from Nich's battery to Heidi's and running his car for about 15 minutes at idle
2) check the oil and make sure it's well above ADD
3) unplug the middle cable into the distributor cap and place the disconnected end near something metal so it can spark
4) crank the engine until the TEMP/PRESS light goes out, but only crank for 5 seconds followed by a couple second of rest so you don't overheat the starter
6) reconnect the cable to the distributor cap
7) she should start right up with just a slight blip on the gas pedal.

This Saturday was the day, and while driving back from the NJ auction, I did a little coaching. Lo-and-behold, she started right up and idled smoothly. I told them to take her for a drive of at least twenty minutes before turning her off. That would make sure she was fully warmed up and her battery fully charged. The last text I got from Nich was, “It idled really well. Fluids were still high. And it drove smoothly.”

TYL

Monday, February 21, 2011

What’s New in the World of Ringo

When last I posted regarding Ringo, I’d received a replacement seat cover from Clark’s. The next day, a new lower fender was dropped by UPS. Then Friday another box from Clark’s showed up on my doorstep. This box contained new rocker panels.

Saturday morning, a 6:00 AM alarm put an end to another night of tossing and turning. Why had I drug my flu-ravaged body out of bed so early? The NJACE chapter of CORSA was holding their annual auction in Flanders, NJ, and I needed to be there. Not that I was planning on spending any of my precious budget on parts that might come across the block, I did have a date to meet a man about a door. A week earlier I’d found a Craigslist ad from a guy selling Corvair parts. He had a solid EM door to replace Ringo’s rotted one and he was planning to attend the auction. Figuring the savings in shipping would pay for the gas I told him I’d be there too. He also had some rocker panel pieces he’d cut from a 4-door, so I had them included in the deal.

My ‘vair buddy Jonathan had agreed to join me on this adventure, and after picking him up at the prescribed meeting place, we were Jersey bound by 7:30. Google maps predicted a three-and-a-half hour drive to our destination and it took every bit of that as we arrived only moments before bidding began on the first lot. By the lunch break, I’d only bought a set of head nuts for $6, but I’d also figured out who the door seller was. He and I completed our transaction and I loaded the parts into the back of the lovely Loriann’s PT Cruiser.

The rest of auction, while enjoyable, was also frustrating in that there were a few items I really needed (LM turn signal units) and some others I REALLY wanted (Spyder dash with a very cool Stewart-Warner 160 mph speedometer) that I bid on, but was quickly trumped by others with deeper pockets. One of the auctioneers, Bob Marlow, did a really nice thing during the morning session. He paused the proceedings to ask how many had heard of the blog, Corvairfleet, where a guy and his daughters worked to keep a fleet of ‘vairs on the road. I don’t anyone raised their hand in response, but he went on to explain that the writer, me, was sitting in the front row. I waved my hand, thanked him, and the auction went on. Since I’ve disabled the counter on this blog, I won’t know if his announcement will garner me any more readers or not.

So that we’d get home by dinnertime, Jonathan and I left the afternoon session early without winning any more parts. The drive home seemed shorter than the drive there, but due to an unplanned tour of downtown Wilmington, it took the same 3.5 hours.

I now should have all the metal I need to rid Ringo of all his rust-eaten-ness.

Have I Found The Root of All Evil in Glinda?

In my line of maintenance work, when one waits nearly a week to post an update, one has a lot of catching up to do.

Glinda first. Last Thursday morning, while on their drive to school, Glinda threw her nearly new Clark’s fanbelt. I had decided to sleep in after a sleep-challenged night due to the flu, so I was in bed when the dreaded call came in. The lovely Loriann and I drove out I-70 to meet them. I’d grabbed some nitrile gloves and another fanbelt, and I knew there was a 9/16ths inch wrench in Glinda’s glovebox. While the lovely Loriann transported Victoria and Mikhaila the rest of the way to their school, I installed the replacement belt and soon thereafter Glinda was parked in her assigned spot in the school parking lot.

This is the second time in less than three weeks she’s tossed her belt. In my mind the only thing that’s recently changed that could have caused this is I greased the fan bearing on top of the engine. It is possible I applied too much pressure and moved the pulley causing a misalignment.

Victoria drove her around the rest of that day, and as she neared the end of her commute, Glinda started running roughly again. She had to floor the accelerator pedal just to hold 50 mph. I was feeling too ill when she got home to look at things, so I didn’t run right out and investigate. In the meantime, I asked Victoria to drive the Suburban until I could get this problem resolved.

I then went on to ask her to carefully describe exactly what happened when Glinda’s performance plummeted. She related that Glinda was running fine, then right after the lights flickered, she ran roughly. “The lights flickered?” I asked her. “Yep,” she replied. So the rough running may be the result of an electrical issue? As the misshapen wheels in my mind continued to turn, I formulated the following theory.
An intermittent failure in the alternator causes a high load on the fanbelt sucking power from the engine and stretching the fanbelt to the point that it just flopped off. The excessive alternator load is also causing the fuel mileage reduction. Could a simple fix to the electrical system really solve all Glinda’s ills?

Late Friday I was able to investigate my theory. Sure enough there were electrical problems. The nut that retains the positive connection at the back of the alternator had stripped so the ring terminal was not being held tightly in place. This could certainly cause a high resistance and, under load, the alternator would have to work much harder to overcome this. Then I found the crimped connection of the main positive wire from the battery had failed. It was probably just barely in place when all my moving stuff around caused it to come completely apart. A new, slightly smaller nut solidified the positive connection, while some quick cuts and a new crimped connector made good that path of ions.

I’ll be following the tension on the fanbelt daily now to ensure it’s not still be stretched.

Wednesday, February 16, 2011

Gas Mileage Update

Here's the latest report. Last night Victoria filled her tank and we calculated a mileage figure of 16 mpg. That's the best it's been since we got the car on the road. This is with Seth's wires (borrowed from an EM) installed to each plug, but not to the coil. The right set for this car showed up a couple days ago, so we'll put them on tonight.

The next thing I'll try is replacing the muffler since she told me the car ran better when the muffler had slipped off a few weeks ago. Then I'll try installing a Pertronix I unit I've got sitting on the shelf. Finally, I'm rebuilding a pair of 95 HP heads, I may install to replace the '68 smog ones that are currently on it.

On the Ringo front, no work’s been done since last weekend, but I’ve spent plenty of money on parts. Recently received is a new seat bottom cover for the driver’s seat. Ordered and scheduled to arrive by the weekend are a new lower piece for the right front fender and two rocker panels from Clark’s. Finally, I’ll be heading up to NJ Saturday to pick up a replacement passenger door and some more rocker panel pieces. I’m hoping to do some welding Sunday.

Monday, February 14, 2011

Three (Laborers) Against One (Corvair)

Ariel, her boyfriend Matt, and I spent nearly five hours working on Ringo Saturday. The two of them did most of the work, while I directed/supervised/prodded. Ariel was focused on part removal, while Matt wielded my grinder with a cutoff disc and wire wheel alternately installed.

By the end of the day, the only chrome left on the car was his driver’s door handle and lock and the trim around the windshield and backlight. Additionally, we completely gutted the passenger side door in preparation for replacement with a solid shell I’ll be buying next weekend.

On the sheetmetal side, Matt made a whole lot of Bondo dust which uncovered a whole lot of missing metal. The result of all that is that I’ll be buying two new rocker panels and lower fender pieces to replace the swiss cheese that’s currently there.

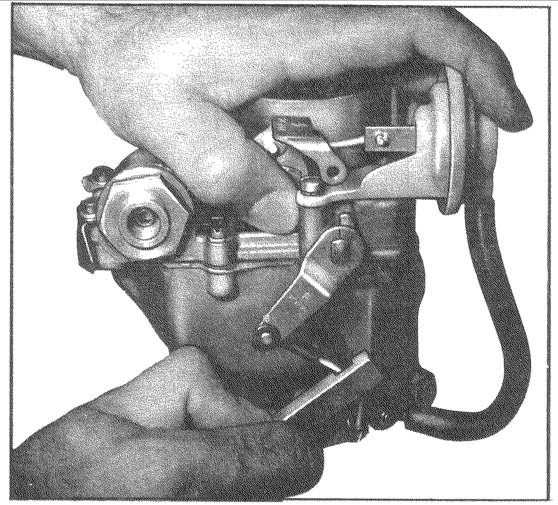
While they were busy, I was disassembling and evaluating the pair of 95 HP heads. Using the valve spring compressor I’d borrowed from my FLAPS, I removed (the photo on the left shows how it's done, but the head in the picture is not a Corvair) and cleaned all the valves, marking and storing them for reassembling. I found that most of the valve guides have worn so they’ll need replacing before the heads can be reassembled. Other than that, the heads appear usable.

Thursday, February 10, 2011

The Big Turnover


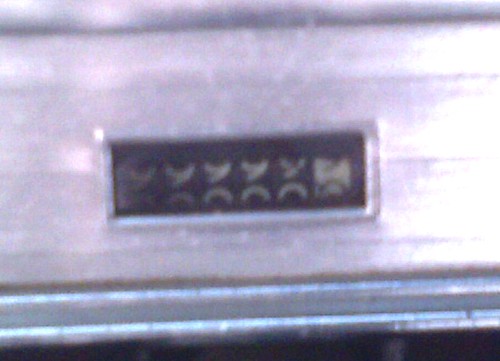
Well, I was actually paying attention when Lucy’s odometer turned over to all zeros. It was on a smooth part of the Baltimore beltway, so I was able to shoot a quasi-clear photo with my cameraphone. There actually wasn’t any hurry since it stuck at this point for about three miles. Turning all those little wheels is hard work and her speedometer cable had to work at it a while before it was up to the task.

Wednesday, February 9, 2011

The Unexplained Recovery

In yesterday’s posting, I reported that Glinda’s Monday evening test drive resulted in frustration. Mentally prepared to spend last night swapping ignition components to solve her rough running, I first took her for a quick spin around the neighborhood to see if, when cold, there were still problems. Wouldn’t you know it; she ran fine. Seeing how long this would last, I drove her to the gas station and filled the tank with 93 octane. Pulling away from the station, the acceleration was smooth and normal. Now I’ve got to keep going. Out onto the interstate I went, gathering speed easily until the needle was well beyond 70. No hesitation, no stuttering. All’s good. Remembering that Victoria had said that sometimes the symptoms didn’t appear until after she’d left the freeway, I pulled over and sat for a couple minutes before proceeding. Back up to 70 was a piece of cake, but I was noticing some buffeting from the winds. Back home again and bundled up against the frigid winds, I decided I had to do something. I chose to install the front spoiler knowing it would help Victoria keep Glinda in her lane. While it was uncomfortable lying on the ground in the wind, it didn’t take me too long to get the part attached.

With that complete, I shut the garage door and pulled out the recently arrived floor panels for Ringo. With them approximately placed, it was obvious I was going to have to get some more sheetmetal to fill in the rusted out areas the panels would not extend to. I’m formulating a plan for Ringo’s re-flooring and here’s the current list:

  • Remove the heater duct tubes from inside the rocker areas.
  • Cut away the rotted metal of the inside walls of the rockers.
  • Coat the inside of the rockers with POR-15.
  • Close up the rockers by welding new 16-gauge sheetmetal across the openings tying itinto sold metal at the top and bottom edges.
  • Cut away the rest of rotted metal.
  • Weld 18-gauge sheetmetal to the new pieces providing a ledge that the new floor panels will attach to.
  • Weld in the floor panels.
  • Fill in any remaining gaps by welding more 18-gauge from the new panels to solid surrounding metal.
  • Use seam sealer inside and out and close off all the joints.
  • Prime and paint inside and out.

Tuesday, February 8, 2011

Frustration Mounting


Yesterday afternoon Victoria reported to me that Glinda was running like junk. After dinner, I took her for a short test drive and couldn’t find anything amiss. Not wanting to leave any stone unturned, I backed her down the driveway and up to the open garage door. After pulling off the spare tire and air cleaner, I peeked down each carb while blipping throttle (with the engine off, of course). I was looking for the healthy little squirt of fuel, and it was there in the passenger-side carb, but not in the driver-side. Hmm, a bad accelerator pump or empty fuel bowl? Victoria’s description more likely pointed to the latter. I pulled the top off that carb and found there to be plenty of gas inside. Still could be a clog somewhere, but I’ll deal with the accelerator pump first. I swapped a pump off a GUP carb from the shelf, and put the carb back together. Before connecting the linkage to the pump actuator, I tested the pump and it seemed to work fine. After completing the assembly, I blipped the throttle and now no squirt. Crap! I did some investigating and found that this pump would not work unless the actuator had full travel while a normal carb setup only actuates the pump over its last fifty percent or more of travel. Off the came the carb, and one of the racing carbs went on it its place. This one worked fine when it was on Glinda’s engine before. Sure enough, after it filled with fuel, a twist of the throttle rod elicited a nice squirt of gas. Yah, problem solved. After balancing the carbs, reinstalling the air cleaner and spare tire, it was test drive time. As I pulled out of the driveway, I knew right away the problem was NOT solved. Since it was now nearing 10 PM, I went inside and gave Victoria the bad news that she’d be driving the Suburban the next day.

So what IS the problem? Since she seemed to run fine when she was cold, I’m thinking it’s a bad coil – not a strong enough spark when it gets hot. Since she’s sat all day, I can double-check how well she runs cold before I do anything else this evening. I’ve got at least one GUP coil on the shelf, so a quick swap could fix the issue. It still could be fuel related – no gas in one of the carbs, but I doubt it. I’ll re-check each carb anyway. Another frustration that I’ve discovered is that the dwell is not steady. This really ticks me off since a newly rebuilt distributor should exhibit no dwell drift with rpm change. This could, then, be a sign the points are not working properly. I’ve got a new set coming from Clark’s and they’ll go in when they show up. In the meantime, I can try installing one of the Pertronix electronic units I’ve got. The nice thing about a Pertonix is they are unaffected by a loose distributor, so the dwell should be steady. Bear in mind, both of the ones I’ve got on the shelf failed when they were installed in Lucy. I’ve kept them around just for a time like this. Maybe there’s something about Lucy that is incompatible with the Pertronix.

I really wanted to be done messing around with Glinda, but she is being stubborn. Thank the Lord we’ve got a spare vehicle.

Monday, February 7, 2011

Forty-four To Go


Who doesn’t like to watch the odometer roll over to a big number? I get such a kick about watching 9999s roll into 0000s. Oh wait; modern cars and all their computer generated digital displays have taken away this pleasure.

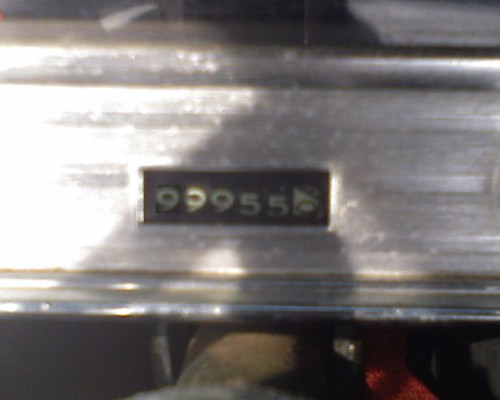
Today, as I climbed into Lucy (really more like fell into since she sits so low) I noted the current mileage and took a picture with the camera-phone. Now the trick is to make sure I’m watching 44 miles from now.

Car-time With Glinda and Ringo

Sunday afternoon was the weekend’s car-time. I started out addressing some small issues on Glinda. The right backup light socket has fallen out of its housing a few times since putting her back on the road. I bent the two metal tangs and popped the socket back into place. Everything’s nice and snug now. One evening last week, I watched Victoria drive away and noticed that Glinda’s right taillight was out. Thinking the bulb had a burnt element, I removed it from its socket and tested it – all was good. After cleaning the contacts and applying some bulb grease, I twisted it into place – still out and the bulb was a little loose feeling. The socket is a multi-piece affair -a metal shell inside the plastic housing with the spring contacts in the bottom of the housing. If the shell is not bottomed out in the housing, the contacts don’t touch. So pushing the shell down resulted in a reliable connection. Checking the oil level indicated it was on the add mark, so a quart of 30 wgt. Rotella went into the crankcase. On to interior issues. At my last trip to the FLAPS, I had purchased a couple bulbs to replace a burned out courtesy light and the dead one that illuminated the heater controls, so I installed them in their sockets and snapped the sockets into place. Finally, in response to Victoria noticing the right speaker didn’t seem to be as loud as the left one, I made an adjustment to the crossover control her speaker set has. Sounds more even now, but I asked her to confirm during her next drive.

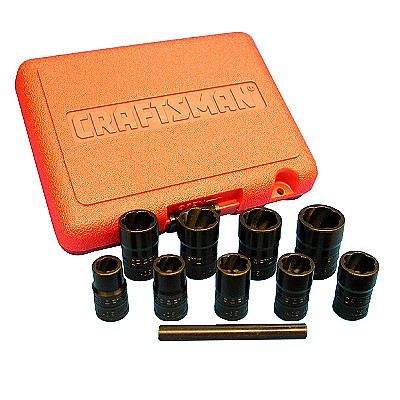
With Glinda squared away, I headed into the garage to turn my attention to Ringo’s re-roadification. Even though it appears I’ll be trading Betty for a running engine, I need to be ready with a backup in case bad compression breaks the deal. When disassembling the 95 HP engine (the best candidate for my back-up plan) out of the Old Betty, I had to grind off some of the head nuts. I was able to remove the all but one damaged stud. The stubborn one had resisted all attempts including vise gripping and repeated attempts with the rounded nut socket. Each attempt with the latter resulted in the stud shearing off at the face of the socket. After the last attempt, the stud was only protruding about a quarter of an inch. I had read about welding a nut to the stud and how the heat seemed to break things loose, so I rolled my wagon-full of MIG welder over to the engine stand. After thoroughly cleaning both the stud end and a decent nut, I dropped the nut over the stud, cranked up the voltage on the welder from its sheetmetal setting and welded the two together. Sadly, the weld would not penetrate the stud enough to get a good bond. Looks like I’ll be drilling this one out.

Knowing I’ll be making lots of metal dust in the next few weeks, I put garbage bags over the 95 HP engine block assembly and the block that came out of Ringo. The last trip to the FLAPS also yielded a loaner valve spring compressor, so I decided to begin the tear down of the 95 HP heads. Even if I don’t end up using this engine, having these heads cleaned up and ready to install will be a good idea. By the time I had the workbench cleared off and the exhaust manifolds removed, it was time to knock off for dinner.

This morning I placed an order with Clark’s for set of ignition points and a distributor gasket for Glinda and for Ringo I ordered two carburetor rebuild kits, a quart of POR-15, and a set of valve stem seals. Last week I ordered replacement rear floor pieces from Rock Auto. I wanted to support Clark’s and buy there perfect reproductions, but I couldn’t justify the additional $100. Since Ringo is far from a show car, inexact floorpans are not a problem.

Thursday, February 3, 2011

Glinda’s Got Curves


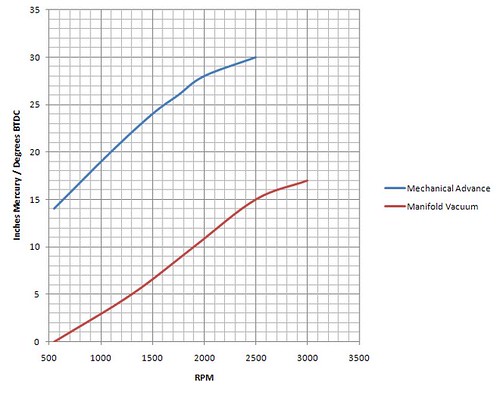
Measured with my dial-back timing light with the vacuum advance disconnected and plugged

500 RPM14 deg BTDC
1100 RPM20 deg BTDC
1500 RPM24 deg BTDC
1750 RPM26 deg BTDC
2000 RPM28 deg BTDC
2500 RPM30 deg BTDC


Measured at the vacuum advance port at the base of the right-side carburetor


1100 RPM0 in Hg
1700 RPM5 in Hg
2500 RPM15 in Hg
3000 RPM17 in Hg


2000 RPM Vacuum advance full in. (~11 in Hg)

In trying to improve Glinda’s gas mileage, I posted a request for help to both Virtual Vairs and the CorvairCenter Forum. I got the following list of things to check:

Is the vacuum advance hooked up and function? Yes.
Are we using Premium gas? Yes.
Are there any fuel leaks? I noticed some wetness on the top of the left side carb and that led me to discover the screws on the carb were not snug.
What’s the distributor’s part number? Don’t know, but I do know the advance curve now (see above)
Are the chokes opening all the way when the engine’s warm? Yes.
Do the choke pull-offs work properly? Yes.
Are the carbs balanced at idle and mid throttle? They were fairly close, but I re-balanced them last night
Are there any vacuum leaks? Can’t find any.
Is it a California car with a smog cam? No, it’s an East Coast car – don’t know about the cam’s part number.
What do the plugs look like? I haven’t pulled them lately, but previously they looked a little dark (running rich), but not too bad.
Are the air cleaner elements clean? Yes.
What jets are in the carburetor? Don’t know.
Does it bog down off the line? No.
Is Victoria a lead foot? Probably.

With the intent of answering as many of the questions as possible, I braved the chilling winds last night and spent some quality time with Victoria’s car. In addition to making the measurements, I balanced the carburetors, lowered the idle speed to 550 rpm, torqued the screws that hold the carb top to the base, and tightened the fanbelt.

The last task was required because last Friday evening, Glinda’s fanbelt came off its pulleys. Fortunately, it happened only a mile or so from where the lovely Loriann and I were enjoying some awesome live blues (Hard Swimmin’ Fish). I was able to install a new Clark’s belt (the failed one was not a Clark’s) in the parking lot and only missed a couple songs.

Back to last night. In balancing the carbs, I disconnected the left one from the linkage. With all the adjustments made, I neglected to install the keeper clip that retains the rod to the linkage. With everything put away, I shed my thermal coveralls, donned my coat and gloves, and took Glinda for a spin around the neighborhood. Immediately, I knew there was a problem. It felt like the engine was only running on three cylinders. I hung a U and pulled back into the driveway. By flashlight illumination, I saw the now disconnected carb, and fortunately found the keeper. As I reached down to grab the end of the dangling rod, I was shocked to be shocked. My hand had brushed against the #6 plug wire and some of the 10,000 volts grounded their way through my body.

I’d been racking my brain for quite a while trying to determine what has been the one constant through Glinda’s post-roadificaton life. How I missed the spark plug wires is beyond me. Now, thanks to my ineptitude on many levels, I now had something else to try to rid Glinda of her guzzling reputation.

Tuesday, February 1, 2011

Building a 140 4-carburetor Linkage Assembly

I’ve been in negotiations with a gentleman in Pennsylvania to trade Betty for a good, running engine to install in Ringo. As of this morning, it appears this deal will happen. While losing Betty is a blow to my dream of having a LM daily-driver track car, it is the most realistic thing to do given the current state of my TTT (see sidebar) as well as the new set of priorities I’ve recently settled on (more on that later). The upsides are I’ll get an engine that can go into Ringo with a minimum of cash outlay (probably just seals and gaskets) and I’ll free up more space in the driveway to better deal with the fleet.

So what does this have to do with the linkage mentioned in the title, and what about my new set of priorities? Priorities first. With the “temptation” of Betty gone, once Ringo's re-roadification is complete, I’ll be focusing my time and funds on some Lucy projects. Those include rust repair, swapping in the quick-steer arms I bought from Jonathan, rebuilding and installing the ’64 rear suspension I got out of the rusty 4-door, and installing a 4-carb setup.

It’s that last project that brings me to the crux of this posting. Ever since I got the 140 HP heads and exhaust manifolds, I’ve been searching for the missing pieces still required to complete the install. Those include an air cleaner x-pipe (plenum) and a 4-carb linkage assembly. The last time I was at the Corvair Ranch, Jeff agreed to sell me an x-pipe and then he loaned me a linkage setup from a ’65 4-carb engine that I can use to build my own 4-carb linkage assembly. The other night I took a close look at both this setup and the 2-carb one to see how difficult it would be to adapt the latter to work for four carbs.
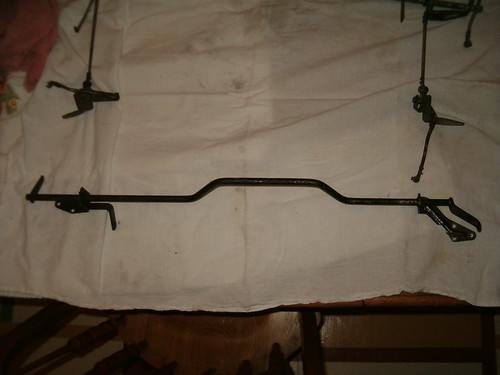
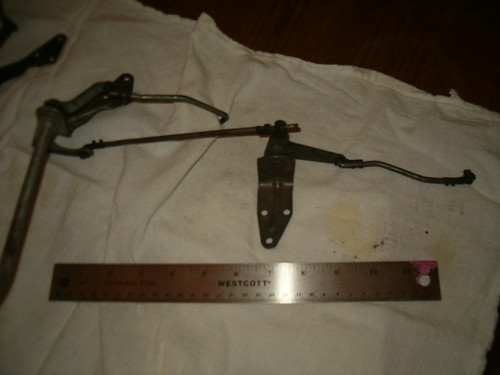
I found, fortunately, that the 2-carb linkage provides an excellent basis for the 4-carb. In fact, it appears all the 2-carb parts can be used as-is. There will be new parts required, and they are:

The rods shown in the following photo and the actuator piece they attach to.

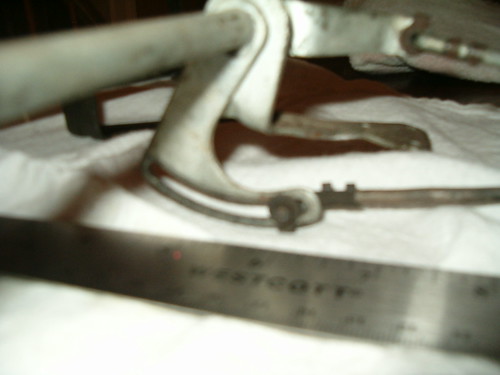
And this slotted plate (sorry for the blurry photo).

I’ve got some 2-carburetor linkages on the shelf that will provide parts, and I’m enlisting the help of Ariel’s boyfriend in making the new parts. I’ll post on this again when some headway is made.

There are more photos of this setup here.