Wednesday, August 31, 2011

Engine Electricals


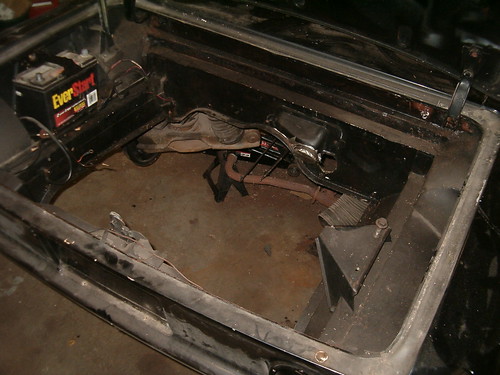
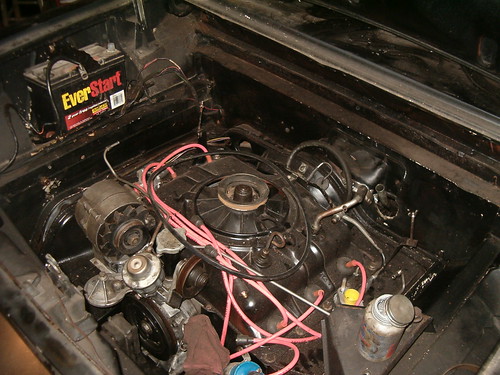
Yesterday evening I thought I’d start the Bondo work on Ringo’s right side. Waaaaay back, I dented the body under the right rear seat window backing him out of the garage. With the interior removed I had access to the backside of the dent. I’d already pounded out most of it, but it still needed some body filler. I opened my can of Bondo and found there was only enough left for one golfball size batch. That didn’t go very far, area-wise or time-wise. With a couple hours left before quittin’ time, I moved on to work on finishing hooking up the engine. I first found and installed both battery cables, and then went hunting for the LM wire harness donated by Old Betty. As I’d posted before, Ringo is being converted from generator electricity to alternator electricity. The voltage regulator is different for this setup as are some of the wire connections. I finally found the LM harness, but only after locating a spare EM engine mount with its rectangular plate still intact. Yes! Now I don’t need to hunt down a replacement for the one I’d lost.

Back to the harness. I stripped the sheathing off to the point I could separate what I needed from the mass of wires, connectors, and bulb sockets that this engine compartment harness contains. I then set about marking the wires that go to Ringo’s current regulator. The trick will be to properly mesh the two sets of wires so everything works including the GEN/FAN idiot light. With EM and LM manuals opened to the pertinent wiring diagrams I think I’ve got a solution. I also want to make sure I can go back to a generator if none of the alternators I have function properly, so I won’t be cutting any of the current wires just yet, but will splice into them. I’ll replace the unreliable splices once everything checks out.

Monday, August 29, 2011

Stop the Corrosion

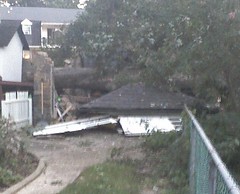
We had quite the exciting weekend dealing with hurricane Irene. Fortunately, we came through relatively unscathed while many around us were not so fortunate. I’ll relay one sad, Corvair related incident. The lovely Loriann and I used to live in a house on block over from our current domicile. It had a one car, stone-walled garage. During the three years we lived there, the garage was mainly the home to my LeMans, but I did replace the head on First One while she was parked inside those close confines. Yesterday evening, the lovely Loriann and I were walking the dog though the neighborhood and passed by our old place. We were shocked to see that a huge oak had toppled onto the roof of the garage completely destroying it. It didn’t appear there were any vehicles inside, and I shudder to think how I’d have felt had a tree fallen on my garage with one of the old cars inside.

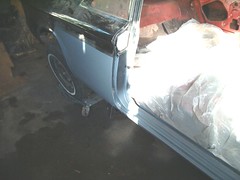
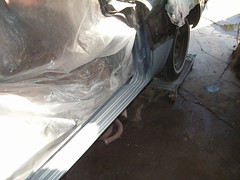
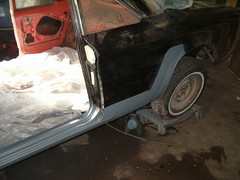
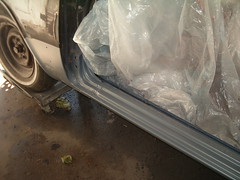
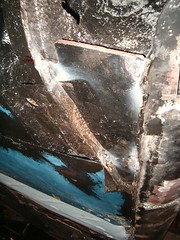
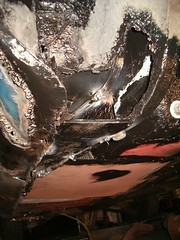
Prior to the walk, I spent a few hours in the garage. It was time to coat the bare metal on and around Ringo’s welded-on patches. First, I sanded the areas destined for epoxy primer giving some tooth to the existing paint and removing the light rust that had already set in. Next, I laid out a mix of plastic sheeting, old bed sheets, and discarded beach towels covering nearly everything but the areas to be primed. The last little bits of exposed bodywork were protected with taped on masking paper. This was followed by thorough wipe down using wax and grease remover. With the body ready to shoot, I filled my air cooler bucket with cold water, hooked up my paint-only air hose, and got out my smaller paint gun and painting supplies. After changing into a long sleeve shirt and pants, donning my painting skull-cap, and strapping on my respirator, I mixed the Summit Racing epoxy primer and catalyst to the 1:1 ratio and laid down a single, medium coat. With the 30 minute flash time to kill before I could open up the garage, I cleaned the gun and drank a celebratory beer.

The following photos illustrate the results of my afternoon of labor.

Friday, August 26, 2011

Almost Everything Went Perfectly


I spent another evening in the garage last night, and for the most part I’m happy about my accomplishments. In preparation for returning his freshened drivetrain to Ringo’s engine bay, I cleared and swept the floor, rolled Ringo away from the back wall, and placed his rear end on jackstands. I moved the drivetrain into position and jacked it up to engage the front engine mount bolts. It took a little finagling to get the transmission dipstick tube to go through the hole in the firewall, but in less time than I’d expected, the nuts and bolts were snugged down and the jacks were put away. There was a hiccup, however. The small rectangular plate that fits in the engine mount has gone missing. I need to find it or a replacement before I let Ringo ride off into the sunset.

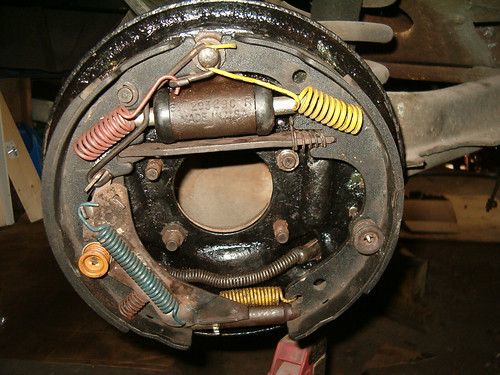
Next, I installed the axle assemblies using ample anti-sieze on the spline teeth and fastener threads. Finally, I fitted the rear brake hubs over the rebuilt brake assemblies. Again, another small hiccup when I found the right side drags even though the adjust screw was all the way in. There were quite a few batches of brake shoes that were made with liners too think, so this side must have a pair from that batch. I’ll find a different pair and all will be well.

With the Irene looking to run near us, I’ll be spending this evening preparing for the high winds and torrential rain predicted to start tomorrow afternoon. I’m afraid much of the free space in the garage is going to be filled with deck furniture, garbage cans, and gardening carts.

Wednesday, August 24, 2011

One Step Forward, One Step Back

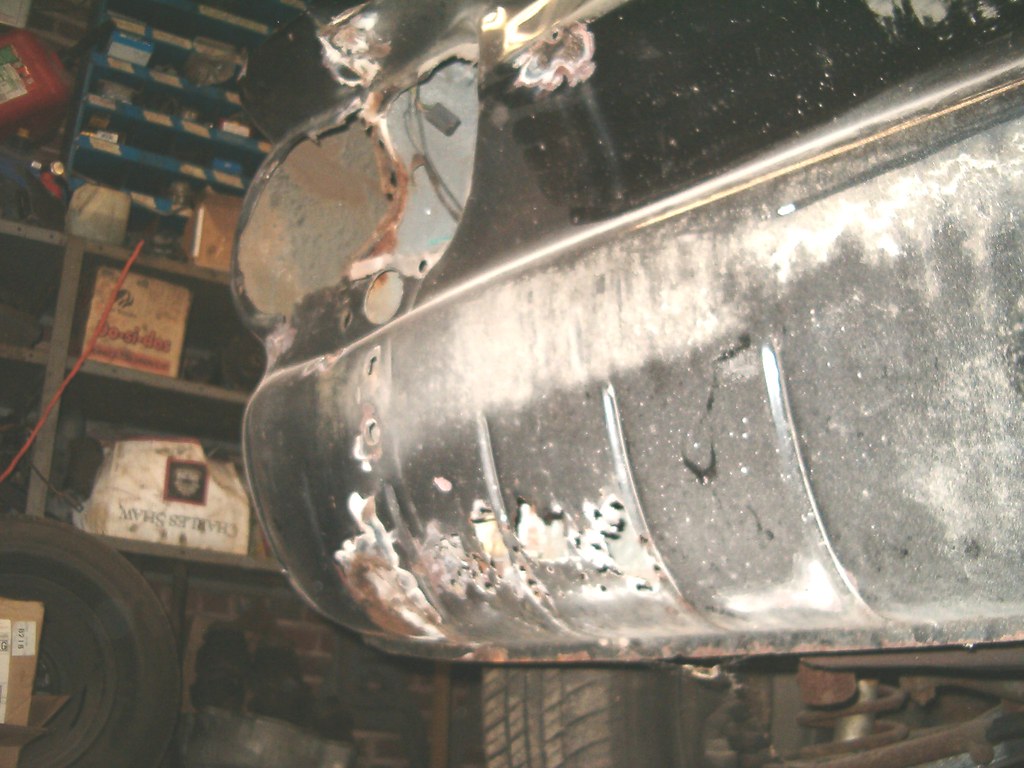
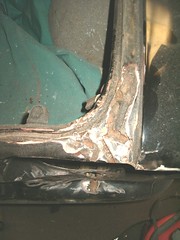
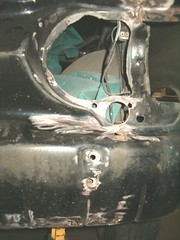
Last night I finished grinding the welds smooth and moved on to the next big thing. That was just going to be removing the headlight buckets, but sadly turned into a revelation of rust. I’ll let the poor pictures illustrate Ringo’s front end and his additional affliction. Since I’m sick of welding in patches, I’ll fix these with POR-15, Tie-Coat Primer, Epoxy Primer, and epoxy Bondo. I just need to make sure I coat the backsides of these panels. Getting to the backside of the lower valence ones is tough, since the volume is closed off by a plate. Guess I'll just have to cut an opening in the back plate. Guess I'll just leave it open so any water can easily drain out.

Tuesday, August 23, 2011

Just Grinding It Out


Another evening in the garage and another step or two closer to the end of Ringo’s re-roadification. The first project on last night’s list was welding the new jacking pads onto the body. This went pretty well, although I kept looking at the pressure gages on the welding air tank regulator since the tank’s pressure reads basically zero. As long as the line’s pressure is still at 15 psi, I can keep getting quality welds - well, at least welds that are of the quality I and my Craftsman MIG welder are capable of laying down. As you can see from the photo, I’m still good-to-go. Since most of the load for these pads is born by existing metal, the welds only had to keep the new parts from falling out. That meant that a few tacks per pad were all that was required.

The second heater plenum – the one that I’d patched the rust hole and painted – went in next. It didn’t fit quite flush since there’s now some interference with one of the major floor patches I’d installed. The opening, however, lined up for the most part, so the warmed air should make it to the windshield and the feet of Ringo’s passenger.

Finally it was time to grind. With a new flexible grinding disc mounted, I made a multitude of sparks; it must’ve looked like the Fourth of July in my garage. An hour or so and two more discs later, I knocked off for the night having smoothed out about 70% of the exterior welds. One more evening of grinding, and he’ll be ready for a couple coats of epoxy primer.

Monday, August 22, 2011

Turning a Corner?

After months of disassembly, patching, and prepping, I finally put some pieces back on to Ringo this past weekend. Much of Saturday morning was spent spreading POR-15 on Ringo’s underside sheetmetal, but that was after I rebuilt the rear brakes. I first lightly honed the wheel cylinder bores and installed new rubber parts after coating them with brake fluid. The whole job went fairly well except the parking brake cable wouldn’t stay out of the way. I ended up reassembling the cross-cable to the main front-to-back cable and that helped.

With the underside shiny black, it was time to quit for the day and go through the painful process of removing the spots from my arms, face, and hair. It takes lacquer thinner and lots of rubbing to get it off. With Victoria’s help I’m now not a walking billboard to the excellent adhesion qualities of POR-15.

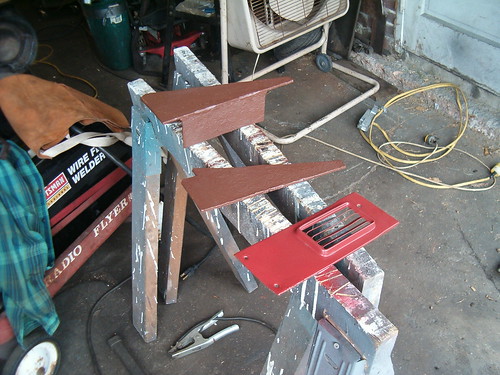
Yesterday, I was back at it and my main focus was finishing the underside work. Chevy welded in triangular shaped jacking pads just forward of the rear wheel openings, but Ringo’s are unusable as one has rusted away completely and the other has lost much of its strength due to the tin worm. Experience with maintaining the fleet has proven that there will be plenty of jacking opportunities in Ringo’s future, I decided to put back what the elements have taken away. I traced a template in the opening of the pad that’s still there and cut it out of pieces of 3/16ths thick steel. After ensuring the other side was the mirror image, I cut out the piece for the other side. My plan for the side that’s still got material left is to lay the replacement up against the original and weld the plate in place. The other side has nothing to hold the pad against, so I measure and cut two vertical supports and welded them to the new pad. They will bear against the solid portion of the body that’s roughly two-and-a-half inches above where the original pad used to be.

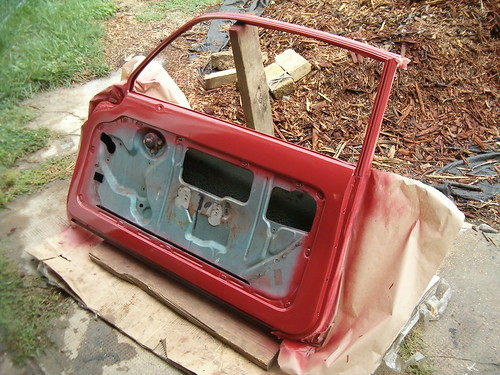
With those two pieces cleaned up, I coated them with Rusty Metal Primer and set them in the sun to dry. I then turned my attention to the replacement door that Ariel had primed a couple weeks back. I wet sanded the primer smooth, wiped down all surfaces, and masked off the areas that aren’t meant to get the interior color. Next, three coats of Colonial Red were laid down and the masking was pulled off. As nice as this looks, it makes me want to paint the rest of the interior, but there’s still so much left to do, I don’t want to add that task to the list.

Now for the turning the corner part; I actually installed some parts. I pulled both heating duct hoses through the rocker cavities and installed one of the rear heater plenums. The other side had some rust, so patched it with fiberglass cloth, primer, and a couple coats of gloss black. At this point, I also painted the new jacking pads.

The second momentous occasion was grinding on the rocker panel welds. This is the final step before spraying the epoxy primer, so interior installation can’t be that far away. I got the driver’s side done and part of the passenger side smoothed out before it was time to quit for the day.

Thursday, August 18, 2011

A Most Frustrating Evening

Ariel went back to school this morning. Since Ringo STILL wasn’t ready for the road, our first thought was she would take Lucy. With that in mind, I left work yesterday with the intention of changing the starter so Ariel wouldn’t get stranded. A couple months back, Lucy’s starter developed the bad habit of not working when it was hot. When I got home, I turned off the engine, and, after a short break, went to the garage to get out the ramps. With them approximately in place in the driveway, I walked back to the street to get Lucy. Of course she started right up, even with the hot engine, so I backed her down the driveway up to the ends of the ramps. Idling in neutral, I hopped out to make the final alignment of the ramps and before I could get back in the car, the engine died. This sometimes happens, but when I turned the key to start her back up, nothing happened. No click from the solenoid, nothing. Okay, I can now do some sleuthing to make sure it is the starter and not the ignition switch. I had Mikhaila come out and turn the key while I measured the voltage at the starter wire. While the starter sometime turned and sometime didn’t during our testing, the wire always got 12+ volts whenever she turned the key. Satisfied the problem was in the solenoid, I took Mikhaila’s place behind the steering wheel to start up the engine, but the solenoid was now being especially ornery and would not energize at all. No big deal, I’ll just roll down the slight incline of our driveway, pop out the clutch, and let gravity do the work. As Lucy neared the end of the driveway, I let out the clutch and she chugged without starting. With a car coming down the street, I rolled out of the way now stopped against the opposite curb. I had to push the car back up over the crown in the road, turn the wheel and get her aimed down the street. Once I got a good roll going, I let out the clutch again and this time the engine started. I backed up to and down the driveway. Not wanting to get out and risk the engine dying again, I aligned the car with the ramps as best I could from the driver’s seat and began backing up onto them. The right side was off-center enough that the ramp base flipped on its side, knocked that muffler loose, and bent a portion of the rear valence. I was able to pull forward, get out and realign the ramps, get back in without the engine dying, and finally get up the ramps when the dinner bell rang.

After dinner, I donned my grungies and began repairing the exhaust damage. Fortunately, the only thing I’d done was loosen the joint between the manifold and exhaust pipe. Of course, the two bolts of that flange had rusted to the point where removal without breakage was impossible. Now I had two broken bolts, but I was in luck since this side used through-bolts with nuts rather than threading into the manifold flange as GM had intended. The bolt pieces easily came out of the way, and after raiding my inventory of bolts, nuts, and washers, I had two sets of fasteners that would work. The jack held the muffler in place while I bolted the flange back together with plenty of anti-seize on the threads, not forgetting to drop washers and nuts a few times just to keep things maddening. Tightening the muffler support was the last task on the repair. I had now been working on the car for well over an hour and hadn’t even been able to start the job I’d set out to complete.

First though, I decided I wanted to check the level of gear oil in the tranny since it seems to have a slow drip. I jacked the front up to level the car, slid underneath, and undid the plug with the 9/16ths wrench. I was surprised but happy to find the level was still at the top. The plug went back in and I moved on.

The first step in removing the starter is to disconnect the heater duct and move it out of the way. In the past, I’ve forgotten the VERY important second step - disconnecting the battery - and that has caused some commotion as one would expect. In my clouded, frustrated condition, I almost did it again, but caught myself and undid the negative lead before causing sparks. The two bolts holding the starter to the bellhousing always seem to turn freely once loosened, and this time was, surprisingly, no exception. I snaked the heavy assembly around clutch linkage, fuel line, and suspension bits and had it out and onto the ground. A quick inspection indicated this was probably the original starter assembly, so no wonder it was giving me issues. I decided that, since the starter didn’t seem to have much play in its rotating parts, I’d just replace the solenoid with a GUP I found on the shelf. Getting off the old solenoid took some persuading by my impact screw remover, but it all came apart without any parts breaking. After the replacement solenoid was screwed into place, the threaded hole for the positive lead would not line up with the hole in the tab coming out of the starter. Irrr. I removed the two mounting screws, and after some more frustrating moments including dropping the washer and spending a few minutes finding it again, everything was successfully screwed into place. More snaking and bolting and it was ready to go. Oh wait, gotta’ reconnect the battery lead. Wrenches in hand, but no light, I ducked under the trunklid and quickly put the washers and nut on the bolt and tightened everything up by feel. When I opened the driver’s door to turn the key, the courtesy light didn’t come on. Crap. I’d neglected to include the cable terminal in the stackup of washers and nut. This time, with a light, I undid the fasteners, correctly stacked up the pieces and re-torqued the nut. The light went on this time and the starter worked great. It was nearing eleven by the time I put the tools in the garage, drove Lucy off the ramps and put them in the garage.

All that, and we’d decided that Ariel’s luggage had exceeded Lucy’s capacity and she would take the Suburban instead.

This morning, the starter functioned flawlessly even the couple times I tested it after arriving at my parking spot at work.

Friday, August 5, 2011

More Stops Than Goes

After Wednesday’s evening of successes, last night was not so productive. I went to put the rear brakes together the now-dry backing and I discovered that, when going from manual adjusting to self-adjusting, GM changed the backing plate removing a big chunk of metal that spaced the outer face of the plate from the differential. The self-adjusting setup uses a separate spacer. I went through my shelves of GUP and could only find one spacer. I placed my order this morning with Jeff at the Corvair Ranch for a used replacement, but I now have to wait for delivery.

Meanwhile, a quick inspection of the rear wheel cylinders made me decide to also order two rebuild kits from the Ranch as well. If I’m to do it, it may as well be right.

Thursday, August 4, 2011

Brake Work Headway

Last night was full of success when failure was a real possibility. First, I was able to get both u-joint yokes off with my jury-rigged hub puller. Second, I removed the rusted screws holding the two rear brake wheel cylinders without torquing off the heads. Third, I unscrewed the brake lines from the wheel cylinders without issues. In the past, these tasks have been fraught with frustration.

I actually started the evening by putting a coat of black paint on the backing plates, but it hadn’t cured enough for me to install on Ringo. Instead, I worked on improving the grounding of the heater fan motor. Ever since Ringo’s been back on the road, we’ve been unable to run the fan on high since it would promptly blow the fuse. I had suspected too high a resistance somewhere in the circuit, so I had previously installed a dedicated ground wire from the flange of the fan motor to the body ground. This didn’t fix the problem, so I bought a GUP motor from the Corvair Ranch. Given that the swap could only occur with the drivetrain out of the way, now seemed like the best time to attack. After disconnecting the supply wire, I removed the half-dozen screws holding the fan/motor assembly in place. A tedious trip to the wire wheel and the offending corrosion was removed. The screws also got a good brushing. I tested the resistance between the supply contact and some of the cleaned surfaces of the flange and got the desired zero ohm reading. The reinstall was done with bulb grease on all the screws to stem the rusting tide. When all was back in place, I re-measured the resistance from the power contact to the ground bolt for the battery and still got zero. Yay!

Wednesday, August 3, 2011

A Short Night in the Garage

After running to Lowes for primer and hub-puller hardware, I spent some time rigging up a sling support for Victoria’s sailboat so she could do a fiberglass patch over the cracks on the keel. By the time I finally headed into the garage, time had flown by, so all I got to do was put a coat of primer on the rear brake backing plates. This evening should afford me the opportunity to, hopefully, remove the u-joint yokes form the axles and proceed with putting the rear self-adjusting brake assemblies back together correctly.

Tuesday, August 2, 2011

And Now for Something Completely Different

I decided it made sense to resolve Ringo’s underbody issues before reinstalling the powertrain. First on the check list was making the self-adjusting brakes work properly. When GM built him, he came with manually adjustable brake systems. The next year Chevy changed the design to self-adjusting. When parting out the ’64 4-door, I removed all the brake components, including the backing plates and anchor bolts. I decided to retrofit Ringo with newer setup and installed the hardware which seemed to fit fine with the older backing plate, anchor bolt, and wheel cylinder setup. I found out, however, the diameter of the anchor bolt on the older version is smaller than the newer one; and it does make a difference, so I need to get the correct part put on. Replacing the anchor bolt on the rear brakes requires the newer backing plate also be installed since the hole in the old plate is too small for the larger diameter bolt. After rummaging through a few boxes, I found two GUP anchor bolts of the larger size. I could proceed. Then I brushed all the loose rust off the two rear backing plates I’d stored on the shelf in preparation for the paint job they would get before installation. At that point, I remembered that I was out of rusty metal primer. Irr. That task would have to wait until the next evening. Moving on, I put Ringo’s left rear on a jack-stand and removed the wheel. With the four bearing hub retaining nuts removed, I could slide the axle outboard and remove the u-joint exposing the bolt that retains the yoke to the end of the shaft. The yoke needed to come off since the plate had to slide over the shaft and its hole is too small to fit around the yoke. The bolt came off easily, and, after a liberal application of penetrating fluid, I attached my hub puller and used my 3/8” drive impact wrench to torque down the puller’s bolt. It was quickly apparent that I needed more torque, so I used my ½” drive wrench and proceeded to move the yoke about a half an inch before the threads on the puller failed. Fortunately, it was quitting time at that point, but not before I removed the right rear u-joint and gave the spline a good dose of penetrating fluid.

A trip to the hardware store for primer and high strength fasteners will have to occur before I can proceed with making the brakes work properly.

Monday, August 1, 2011

It Is Crunch Time

As of this weekend, I now have the urging from the lovely Loriann to spend every spare minute in the garage. “You need to move on,” was her basic comment. With that, it’s full speed ahead until Ringo’s back on the road.

Friday evening was spent with more engine assembly. I put the last piece of shrouding on and installed six new AC sparkplugs. While thinking about ignition, I found the distributor that came with the 95 HP engine, tore it down, inspected, cleaned, lubricated, and reassembled it using new points. Now laying next to it on Ringo’s hood (my staging platform) is a cleaned GUP rotor, cap, and a new gasket. I won’t install the distributor until after I’ve spun the oil pump priming the oil system and that’s not happening until the engine is back in Ringo’s bay.
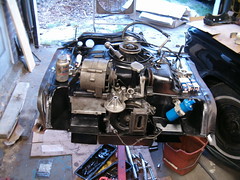
While hunting down the distributor, I discovered that the harmonic balancer on the end of Ringo’s previous engine was the one I’d bought after Ringo’s fire, so it was in MUCH better condition than the GUP I’d found on the shelf. So, out came the hub puller and air tools, and an hour later I had swapped out the better balancer for the good balancer and reinstalled the engine mount and rear cover plate.

The last task for that evening was cleaning and installing the pink sparkplug leads.

Saturday morning dawned hot and early, but I was determined to spend a long day in the garage. Since the engine is basically assembled with the handful of remaining bits staged, it was time to file away the extra engine parts. Currently, the dump-bound trailer has a bellhousing, matching engine block halves, and some rusty pieces of shrouding. Eleven pistons, six cylinders, four valve covers, two oil coolers, a couple fans with pulleys, a generator, starter, and a top engine cover, along with a few bags of hardware all found new homes on the already chock-full shelves. I just couldn’t bring myself to recycle any more metal since I have no idea what Mikhaila’s to-be-determined project will need.
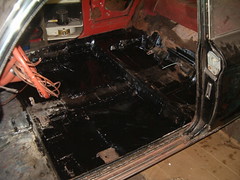
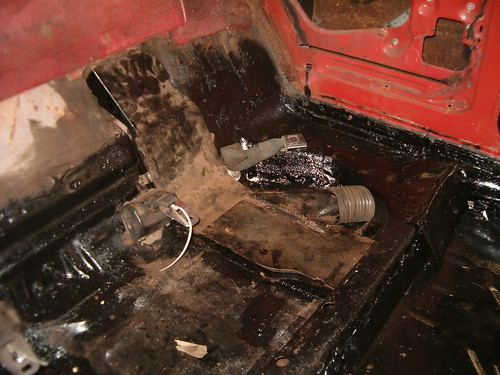
With the garage floor much less crowded, I turned my attention to Ringo’s interior. Yes, something other than engine work for a change. I knew there was only a little bit of CO2/Argon left in the tank, but I wanted to increase the welds holding the seat brackets, so I rolled the wagon up to the door opening, brushed off the mating surfaces, and made more molten metal. Satisfied I had laid a sufficient amount to prevent the seats from coming loose in case of the God-forbid collision; I vacuumed out all the dust and wiped down the surfaces to be painted. A coat of Rustoleum primer was applied to the new metal of the floor patches followed by a coat of shiny black. The portions of floor that were patched using pieces of old hood were given two coats of POR-15. Included in that were some fiberglass patches to close off a few gaps too large for welding. They’ll probably need a couple more coats of POR-15 to completely close off the mesh.

The smell of paint was still heavy in the air as I tackled the tricky task of getting the engine off the engine stand. Since I don’t have an engine hoist or a jack that will go high enough, getting an engine safely off the stand has always been a challenge. This time, I tried a slightly different approach and it worked out wonderfully. Of course, in my focus I neglected to take any photos of my ingenuity. First I place two concrete block side-by-side inline with the engine and far enough apart that the engine stand would roll out between. Across them lay two 2X6’s with the ATV jack sitting atop the stack. That gave me enough height to support the engine while I rolled the engine stand out of the way leaving the head plate still bolted to the bell housing. With 4X4’s now placed atop the 2X6s and outboard of the jack, I lowered the engine so the exhaust manifold retainers held up the engine on 4X4s. That allowed me to remove the ATV jack. Next, I put my transmission jack under the extension of the head plate assembly and the ATV jack under the rear engine cover. A slight lifting of the engine and the concrete blocks and wood pieces were slid out of way replaced by a pair of 4x4s under each exhaust manifold. Once the engine was resting on just the 4X4s, I repositioned the ATV jack under the oil pan, raised the engine, and spun the whole shebang around so I had access to the bellhousing end. I didn’t want to have the engine sit too long on the oil pan, so I lowered it back down on the 4X4s under the exhaust manifold and, after bolting the flex plate to the end of the crankcase, called it a day.

While all this was going on, Victoria and Ariel were off on a road trip to buy an older 16’ foot fiberglass sailboat from a guy in Connecticut. They returned late Saturday night, so the first thing I got to do after returning home from church was help Victoria drain the water from her new acquisition. Her hope is to get the boat in good enough shape to take with us on our upcoming vacation to Assateague Island. It needs a good cleaning and some fiberglass work, but looks pretty solid. So now we are the proud proprietors of old cars, an old pop-up trailer, and an old sailboat. Am I a glutton for punishment or what? Oh yeah, now I need to find a trailer hitch for a LM.

Not Corvair related, but adding to my automotive experience, I spent ALL of Sunday afternoon replacing the shock absorbers on our church’s 2001 Ford Econoline extended van. What a miserable job that was. Each of the four had its own problem. The worst was snapping off a mounting stud and having to drill it out replacing it with a Grade 8 bolt. Funny thing looking back on it was that three of them snapped the top stud off, but only AFTER I’d turned them about halfway off a thirty-second of a turn at a time. Why couldn’t they break right away?
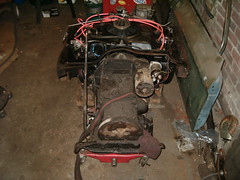
After a dinner break to fill my empty belly and rest my aching muscles, I headed out to the garage and, with Ariel’s help, got the transaxle (Powerglide and differential) loaded on the transmission jack. I rolled it up next to the engine, lined up the bolt holes and created a powertrain. This was a pretty momentous occasion and I celebrated with a little dance. With that out of the way, I proceeded to bolt the flex plate to the torque converter, install the access opening cover, reinstall the front shroud, and assemble the transmission vacuum line using new rubber hose. With the little hand nearing the eleven, it was way past time to call it a day.