Yesterday evening, I took Ariel back up to school and included with her baskets of now-clean laundry were a ½ inch wrench, latex gloves, a rag, a couple plastic shopping bags, a container filled with speedy dry, a Clark’s filter, and a jug of 30 weight Rotella motor oil. Upon arriving at her complex’s parking lot, I spread most of the speedy dry over the oily mess Lucy’s engine had made. I wrapped the bag around the offending filter, and after removing the oil filter bolt and carefully maneuvering the filter out of the engine compartment, I found the seal ring stuck to the filter adapter not to the filter where it belonged. I bolted on the replacement, topped off the crankcase, and had Ariel start the engine. The GEN/PRES light went off and stayed off, and the ground beneath Lucy’s engine didn’t get any oilier. Job accomplished, I packed up my stuff, hit the road and was back home by 9:30. Sadly, it was too late to deal with Ringo, so the next installment of Ringo’s Powerglide saga will have to wait.
On the car acquisition front, there are two bits of news for you, my loyal blog reader. First, Mikhaila, my youngest, and I have an appointment to go look at a ’64 Monza 4-door Monday evening. A friend of mine at work has one that’s been sitting in his father’s garage for many, many years. It’s got front end damage from a collision hence the reason it was parked. Since I’m not afraid of bodywork anymore and the price is right, we’re going to go check it out. If the rest of the car is as good as he described, and the body’s not tweaked (I’ll be bringing a tape measure), we’ll commit to the purchase.
Second, the guy that gave me the Cut-up 4-door succumbed to cancer about three months ago. Sadly, he passed WAY too early and left behind a VERY sad family. He also left behind a collection of cars, parts, and tools that his brother will be finding new homes for. While Phil was alive and battling, I told him I would help in any way possible with the liquidation of his Corvair stuff. The stuff includes a Lakewood wagon, a ’64 coupe, and two LM convertibles, and a lot of parts. Since the cancer took him so quickly I was never able to help him, but I’ve contacted his brother and we’re meeting later this month to review and discuss what to do with Phil’s Corvair stuff. Since Victoria has some money now that she’s joined the working world, there may be an opportunity for her to get the LM convertible she’s wanted.

Thursday, March 15, 2012

Wednesday, March 14, 2012
The Transmission Makes its Maiden Voyage
Well, I wish I could write that everything is perfect with Ringo, but as you’ll read in a bit, it’s not…yet.
I got home early yesterday afternoon, donned some grungies, and headed to the garage. The weather was beautiful so I had the garage door open. Sadly, that didn’t last long since the descending sun shone directly into my eyes as I crawled under Ringo to finish his drivetrain reinstallation. I had rummaged through a reject box at work and came up with an assortment of large diameter heat shrink tubing that would hopefully fit over the shifter cable flange and then shrink enough to seal over the leaky sheathing of the cable. Only the largest would fit, but fortunately it was a piece long enough. After slathering RTV at each end of the tubing, I applied the exhaust of my heat gun, but the tubing wouldn’t shrink down to the much smaller diameter of the sheathing. To try and make things leak resistant, I cut pieces of rubber tubing and used tiny hose clamps to close off each end. Next I removed the transmission oil pan and installed the shifter cable end into its receptacle in the Powerglide (PG). Everything looked good so I smeared a light coat of RTV sealer on one side of the pan gasket before placing it sealer side down on the pan’s flange. A light coat of grease was spread over the exposed face of the gasket followed by bolting the pan in place following the manual’s specified torquing. Wanting to let the sealer harden some before exposing it to fresh ATF, I moved on to reinstalling the filler/dipstick tube for the trans, speedometer cable end, axles, hot air hoses, and rear wheels. Then the fuel hose was re-clamped and the battery hooked up before lowering the rear down off the jackstands. After a dinner break, I poured in about a gallon of ATF, checking for leaks all the while and had Ariel turn the key to start the engine. Sadly, there was no response from the solenoid. I verified there was 12 volts at the purple wire when she turned the key, but still nothing at the starter. I hot-wired the purple wire directly to the battery’s positive and the engine sprang to life with no untoward noises emanating from the transmission. Again glancing under the car to check for leaks, I was greeted by the sight of dryness – YES! I had her snick the shifter to Drive and lo-and-behold the reassuring slight lunge of the car and drop in engine speed signaled that the PG had gone into gear. I then had her move the shifter back to Neutral and then to Reverse and all went according to the General’s plan. After running it for a while in both Drive and Reverse, I checked the fluid level and topped it off before sending Ariel and her car on their way for a drive around the neighborhood. She came back and reported that it seemed to stay in Low longer than she was used to. She never took it out on the main street since I hadn’t yet hooked up the ground wires, so the car was brake and taillight-less. I still needed to adjust the throttle linkage which directly impacts shift points and I added about a pint and a half of ATF, so I’m optimistic it will behave correctly the next time he’s on the road. The grungies were WAY too grungy to be placed on a seat, so that “next time” will have to wait a day or so.
I got home early yesterday afternoon, donned some grungies, and headed to the garage. The weather was beautiful so I had the garage door open. Sadly, that didn’t last long since the descending sun shone directly into my eyes as I crawled under Ringo to finish his drivetrain reinstallation. I had rummaged through a reject box at work and came up with an assortment of large diameter heat shrink tubing that would hopefully fit over the shifter cable flange and then shrink enough to seal over the leaky sheathing of the cable. Only the largest would fit, but fortunately it was a piece long enough. After slathering RTV at each end of the tubing, I applied the exhaust of my heat gun, but the tubing wouldn’t shrink down to the much smaller diameter of the sheathing. To try and make things leak resistant, I cut pieces of rubber tubing and used tiny hose clamps to close off each end. Next I removed the transmission oil pan and installed the shifter cable end into its receptacle in the Powerglide (PG). Everything looked good so I smeared a light coat of RTV sealer on one side of the pan gasket before placing it sealer side down on the pan’s flange. A light coat of grease was spread over the exposed face of the gasket followed by bolting the pan in place following the manual’s specified torquing. Wanting to let the sealer harden some before exposing it to fresh ATF, I moved on to reinstalling the filler/dipstick tube for the trans, speedometer cable end, axles, hot air hoses, and rear wheels. Then the fuel hose was re-clamped and the battery hooked up before lowering the rear down off the jackstands. After a dinner break, I poured in about a gallon of ATF, checking for leaks all the while and had Ariel turn the key to start the engine. Sadly, there was no response from the solenoid. I verified there was 12 volts at the purple wire when she turned the key, but still nothing at the starter. I hot-wired the purple wire directly to the battery’s positive and the engine sprang to life with no untoward noises emanating from the transmission. Again glancing under the car to check for leaks, I was greeted by the sight of dryness – YES! I had her snick the shifter to Drive and lo-and-behold the reassuring slight lunge of the car and drop in engine speed signaled that the PG had gone into gear. I then had her move the shifter back to Neutral and then to Reverse and all went according to the General’s plan. After running it for a while in both Drive and Reverse, I checked the fluid level and topped it off before sending Ariel and her car on their way for a drive around the neighborhood. She came back and reported that it seemed to stay in Low longer than she was used to. She never took it out on the main street since I hadn’t yet hooked up the ground wires, so the car was brake and taillight-less. I still needed to adjust the throttle linkage which directly impacts shift points and I added about a pint and a half of ATF, so I’m optimistic it will behave correctly the next time he’s on the road. The grungies were WAY too grungy to be placed on a seat, so that “next time” will have to wait a day or so.
Tuesday, March 13, 2012
It's ALWAYS Something
The lovely Loriann and I spent this last weekend sampling the sights, sounds, smells and tastes of Philadelphia. While enjoying dinner Saturday evening at our very favorite Thai restaurant, Loriann’s phone rang. It was Ariel. To make a long story, well just not so long, Lucy’s oil filter blew out as Ariel was pulling into her apartment parking lot. Once she saw the TEMP/PRES light go on, she immediately shut off the car and coasted into the nearest parking spot. She got out, walked around to the back of the car and almost slipped and fell in a big puddle of oil getting bigger by the second. She looked into the engine compartment and found the oil filter coated. She was planning on driving home the next evening, so Loriann and I changed our route home from Philly to swing through Millersville. After getting there, I verified that it was indeed the oil filter leaking badly at the housing interface. I’m wondering if the rubber seal from the previous filter got left in place when I last changed the oil and filter. I’m SO thankful the blow-out happened within feet of her parking lot rather than on the highway on her drive home. TYL!
Guessing that was a sign that I REALLY need to get Ariel’s car on the road, I took yesterday off and worked all day on Ringo. First up was re-rebuilding the transmission (this time with the proper gasket/seal kit). There were no issues other than I discovered I was missing the small spring behind the primer plunger. It must have popped out when I disassembled the trans originally and ended up who-knows-where. As long as Ringo’s current one still had the part, I was okay. After going as far as I could without the spring, I lowered the drivetrain and rolled it out onto the floor. A few minutes later, I had the cover off the old Powerglide and the spring in hand. To satisfy my curiosity, I pulled off the front pump of the malfunctioning PG. Lo and behold, a chunk of something metallic was sitting in the bottom of the cavity. I removed all the other subassemblies I could, but didn’t find what had broken. Back to the rebuilding, I installed the spring, plunger, and front cover and then moved on to rebuilding the valve body with new gaskets. The hardest part of that task was reinstalling the e-clip. Finally, everything was bolted back to the PG including the oil pan. I’d left off the gasket since I wanted to look inside the transmission while engaging the shift cable. Only four bolts held the bad PG to the differential and they came off easily. Rolling the transmission jack away from the drivetrain freed the PG and I replaced the bad with the good. I engaged the shafts as I rolled the rebuilt transmission into place and torqued the four bolts. I rolled the complete drivetrain back under then engine compartment and then up into place. After installing the two bolts and two nuts that secure the powerpack, I hooked up the wires to the alternator and then looked at the clock. Since it was nearing ten and I was dead tired, it was time to quit before I did something stupid.
All that’s left is hooking up the gas line and shifter cable, patching the leaky shift cable with heat shrink, reinstalling the rear axles, and bolting on the trans pan and filling it with ATF. I should be able to drop Ringo off the jackstands early this evening if I leave work at 4.
Guessing that was a sign that I REALLY need to get Ariel’s car on the road, I took yesterday off and worked all day on Ringo. First up was re-rebuilding the transmission (this time with the proper gasket/seal kit). There were no issues other than I discovered I was missing the small spring behind the primer plunger. It must have popped out when I disassembled the trans originally and ended up who-knows-where. As long as Ringo’s current one still had the part, I was okay. After going as far as I could without the spring, I lowered the drivetrain and rolled it out onto the floor. A few minutes later, I had the cover off the old Powerglide and the spring in hand. To satisfy my curiosity, I pulled off the front pump of the malfunctioning PG. Lo and behold, a chunk of something metallic was sitting in the bottom of the cavity. I removed all the other subassemblies I could, but didn’t find what had broken. Back to the rebuilding, I installed the spring, plunger, and front cover and then moved on to rebuilding the valve body with new gaskets. The hardest part of that task was reinstalling the e-clip. Finally, everything was bolted back to the PG including the oil pan. I’d left off the gasket since I wanted to look inside the transmission while engaging the shift cable. Only four bolts held the bad PG to the differential and they came off easily. Rolling the transmission jack away from the drivetrain freed the PG and I replaced the bad with the good. I engaged the shafts as I rolled the rebuilt transmission into place and torqued the four bolts. I rolled the complete drivetrain back under then engine compartment and then up into place. After installing the two bolts and two nuts that secure the powerpack, I hooked up the wires to the alternator and then looked at the clock. Since it was nearing ten and I was dead tired, it was time to quit before I did something stupid.
All that’s left is hooking up the gas line and shifter cable, patching the leaky shift cable with heat shrink, reinstalling the rear axles, and bolting on the trans pan and filling it with ATF. I should be able to drop Ringo off the jackstands early this evening if I leave work at 4.
Thursday, March 8, 2012
Ringo’s Drivetrain is Ready to Drop
In anticipation of having the replacement Powerglide rebuilt within the next week, I put Ringo’s rear up on jackstands last night and disconnected everything necessary to remove a Corvair drivetrain (wires, heater hoses, linkages, perimeter seal retainers, vacuum line, e-brake spring, and axles). I found a large puddle under his rear which I attribute to leaks in the current blankety-blank transmission.
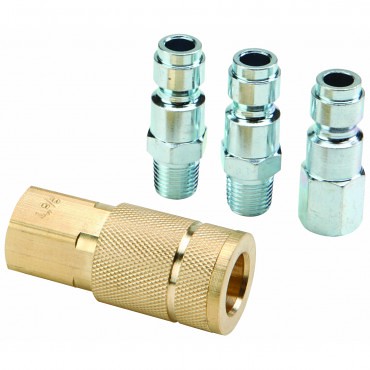
Prior to starting the evening’s work on Ringo, I dealt with some air compressor connection issues. The previous owner of the compressor had refitted the outlet with a 3/8ths T coupler, but he threw-in the nice, long hose that mated with it. My problem was I wanted to fit my automatic oil in between the compressors fitting and the inlet to the hose. In the box of tools and fittings the PO had included with the deal, I found some fittings, but in trying them they all seemed to leak. I need to do more investigating on this, but in the meantime, I just manually oiled the tool I wanted to use and continued to implement the hose and coupler setup he’d provided.
Tuesday, March 6, 2012
Lessons in Powerglide Rebuilding

Over the last few days, I’ve learned quite a bit about the GM Powerglide automatic transmission (PG).
First, the version used in Corvairs has smaller components than the PG used in their other cars and trucks. Second, the phrase, “penny wise, pound foolish” can be applied to my decision to save thirty dollars and buy the rebuild kit from a non-Corvair vendor. Third, it’s important to ensure all replacement parts are correct before proceeding with a rebuild. These three lessons became painfully clear when I discovered many of the gaskets and seals in the kit I’d purchased from a Finditparts.com (the one their website said would fit all PGs including those used on Corvairs) were not the right size for Ringo’s replacement transmission. The first seal I tried to install was too large for the groove it needed to fit in so I used the correct seal from an old partial rebuild kit that had arrived at my garage in Glinda’s trunk. Continuing on, I was in good shape until I went to install the paper gasket between the front pump body and the front pump cover. It was about an eighth of an inch too large in diameter. Sadly, the partial kit was missing this piece. At this point I had the choice to just buy the right gasket from Clark’s and button everything up or take everything apart, return the kit to the Finditparts.com, buy the correct kit from Clark’s and reassemble AGAIN the PG. Not knowing whether any of the half-dozen seals I’d used from the wrong kit were incorrect, I decided to go with the second choice. Yesterday morning I placed a call to Finditparts.com for a return authorization (which they granted without issue) and then ordered the correct kit from Clark’s. It should be here by the weekend. In the meantime, my garage time will be spent separating Ringo from his drivetrain.
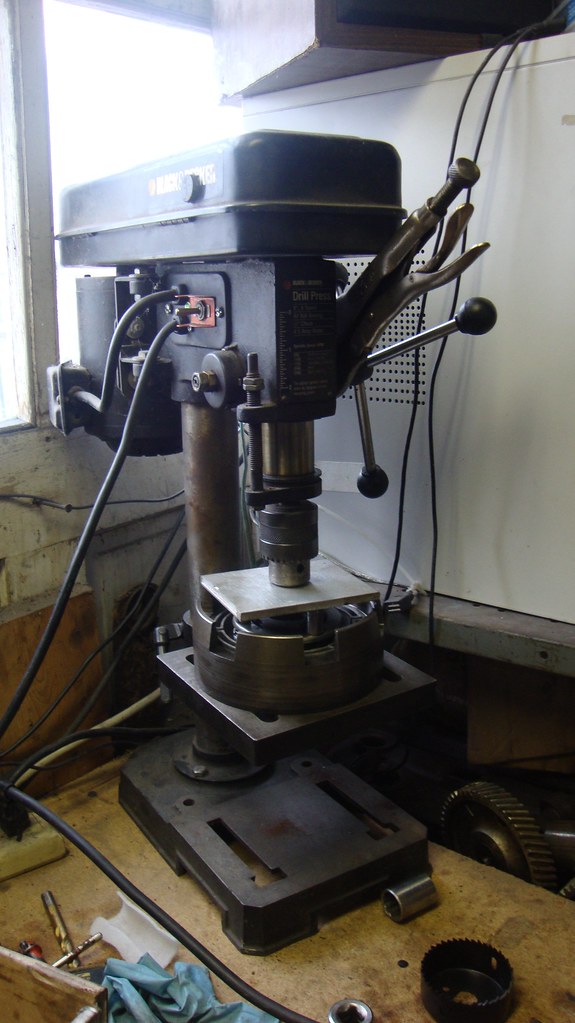 Other highlights and lessons learned from the weekend of tranny overhauling included:
-Do NOT try to use large c-clamps to compress the springs in a clutch. Instead use a press; even if it’s a jury-rigged drill press, it’ll do the job.
-It takes three different pieces of documentation to fully understand how a PG goes back together (1961 manual, 1965 manual, and a hardcopy of GM’s instructional filmstrip).
-Even with three different pieces of documentation, take copious photos. I referred back to the ones I took during disassembly a few times.
-More than a shower is required to rid one’s hands of the distinctive aroma caused by a cocktail of ATF, solvent, and heavy duty hand cleaner.
Monday, March 5, 2012
I’ve Got Air Again
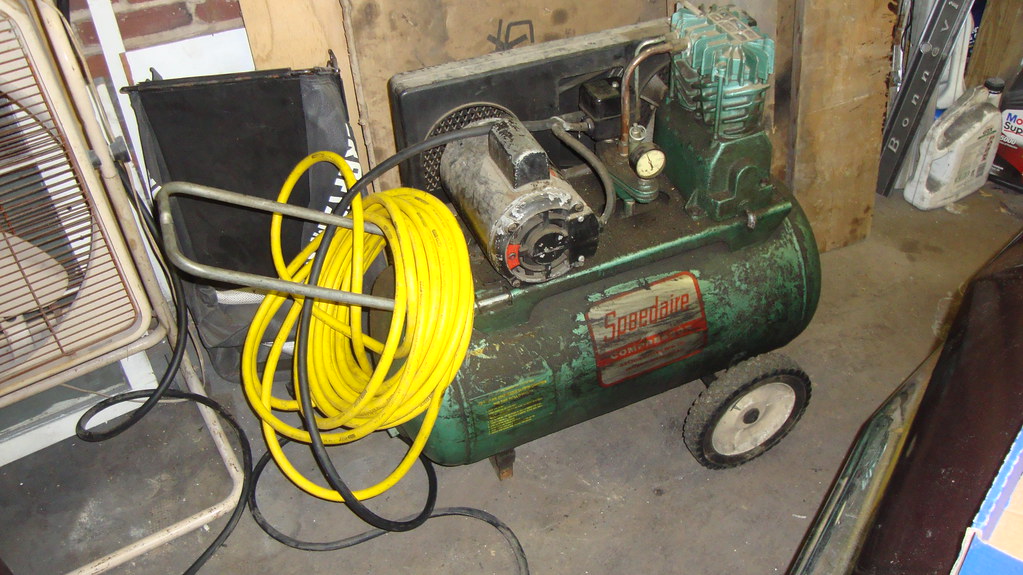
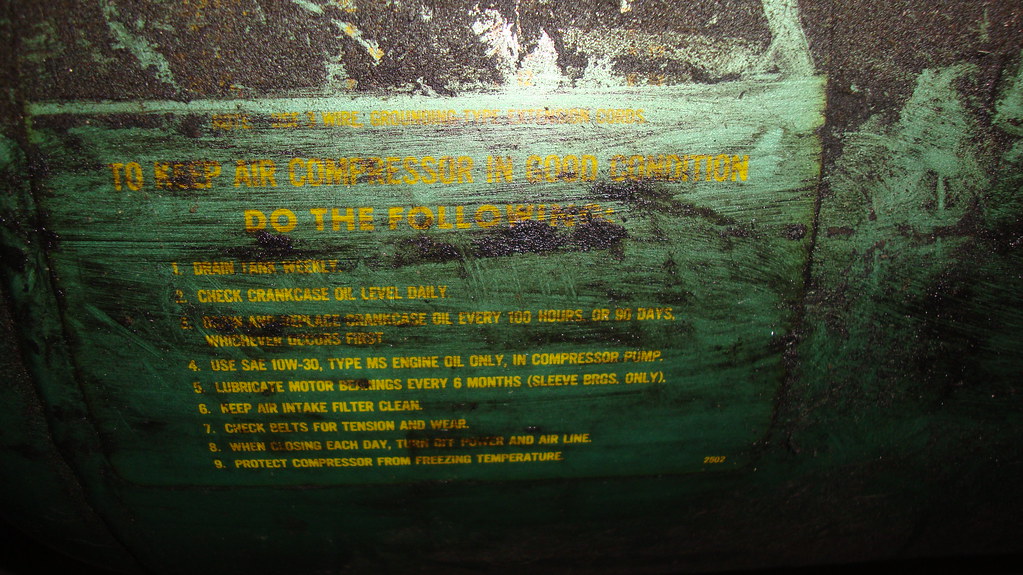
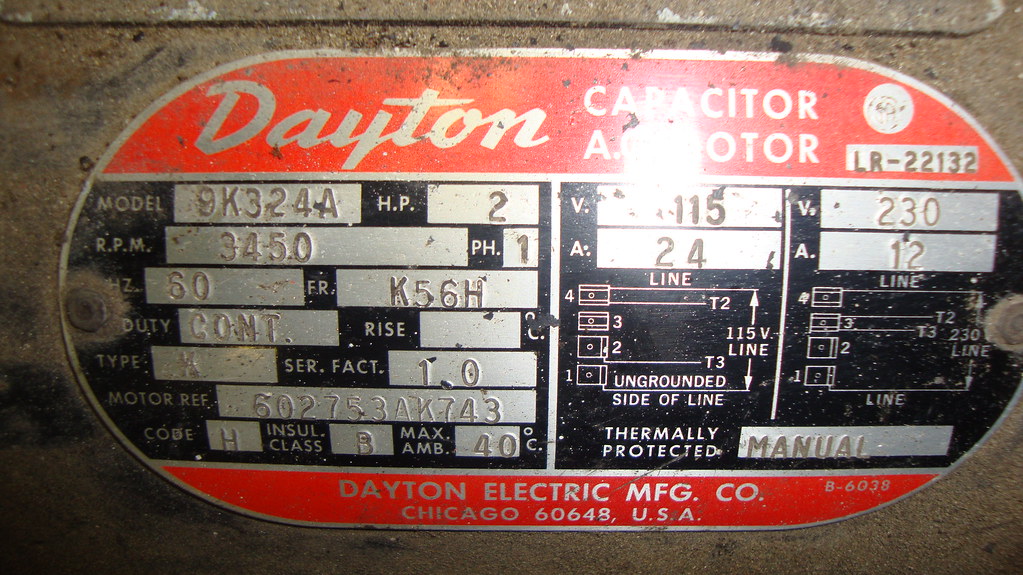
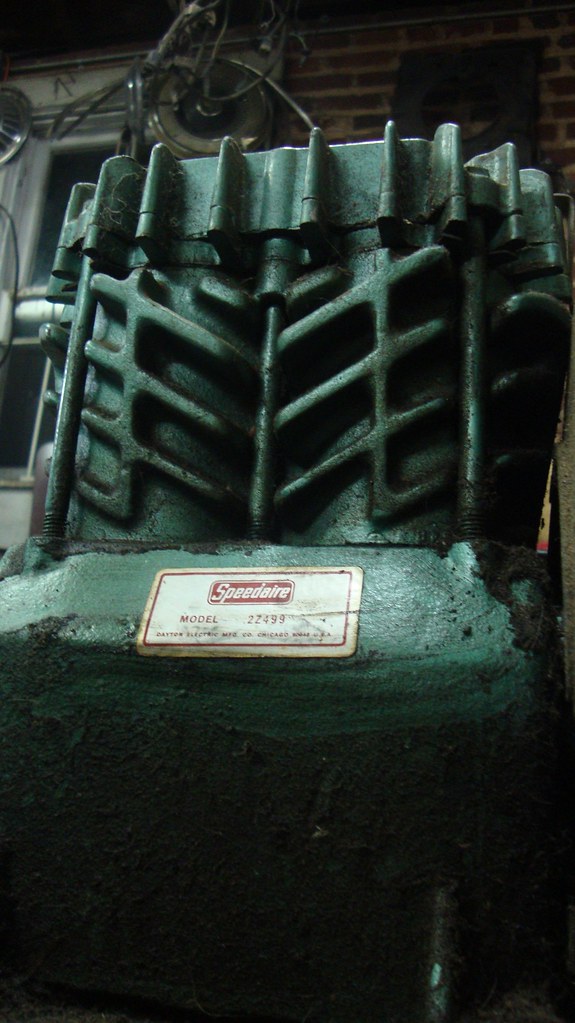 Saturday I stopped by home of a friend who’s moving to Chicago and doing some serious downsizing. While he’s keeping his beautiful LaSalle and Buick, he’s parting with most of his larger tools. I got a nice deal on the 25 gallon 2HP compressor pictured above and some air tools (1/2 impact wrench, 3/8 ratchet wrench, air hammer with numerous attachments) and fittings. Frank had the motor wired up for 230V, but my outlets in the garage are 115V, so on my way home, I stopped by Home Depot and bought a larger gauge cord and plug. After a half-hour of wiring work, I gathered a fire extinguisher and plugged it in. No sparks and the nice thump, thump, thump of a well-running compressor. It is MUCH quieter than the one stolen.
Wanting to ensure my purchase will be with me for a good, long while, I then finished the installation of the motion sensing light over the garage door. Between that deterrent and the locks I’ve placed on the doors and the boards in the windows I should not be a target for burglars again.


Thursday, March 1, 2012
Glinda Trifecta
While I was away for a long weekend visiting my parents in California, two packages arrived with parts for Glinda. Tuesday evening I was out in the driveway installing the GUP speedometer cable from the Corvair Ranch and the GNP pitman arm bushing from Clark’s. A few minutes after I jacked up (and properly supported) the front end, I began to smell gas. Thinking it was from a leaky hose, I searched all around the gas tank, but found no telltale wetness. I worked my way towards the rear of the car, but didn’t find the leak until I opened the engine lid and discovered a significant stream flowing from the fuel pump. My first thought was that the notoriously poorly made fuel pump was leaking from its gasket sandwich, so I snugged down the bolts that clamp the sandwich. No change. So, assuming the gasket was bad, I pulled my wrenches out of their drawer and began to remove the pump to replace it with the known good one to be donated by Ringo. Thankfully, I didn’t get very far in the removal since the first fitting I put the wrench to was very loose. Simply torquing the fitting down staunched the flow of fuel. I love an easy fix.
Back to the speedo cable R&R. The task went easily with the interior end of the cable coming loose from the back of the speedo with just the turn of my fingers. The hardest part of the job was slipping the grommet off the old cable and forcing it over the fitting and onto the replacement. I’d done it before, and was able to stretch open the hole enough to do it again.
On to the bushing. I poured some of my rust-busting homemade penetrant onto the threads of the nut and bolt and carefully spun off the nut. I did NOT want to break this bolt since I had no replacement for this special tapered piece of hardware. A few bangs with my new separator fork (thank you Bill) and the bolt was safely on the ground and the old bushing rubber was free to be removed. With the damaged rubber out of the way, the new nylon bushing (with grease on it) slid into place and the joint was made whole again with bolt and castle nut torqued until I could install the cotter pin.
Back to the speedo cable R&R. The task went easily with the interior end of the cable coming loose from the back of the speedo with just the turn of my fingers. The hardest part of the job was slipping the grommet off the old cable and forcing it over the fitting and onto the replacement. I’d done it before, and was able to stretch open the hole enough to do it again.
On to the bushing. I poured some of my rust-busting homemade penetrant onto the threads of the nut and bolt and carefully spun off the nut. I did NOT want to break this bolt since I had no replacement for this special tapered piece of hardware. A few bangs with my new separator fork (thank you Bill) and the bolt was safely on the ground and the old bushing rubber was free to be removed. With the damaged rubber out of the way, the new nylon bushing (with grease on it) slid into place and the joint was made whole again with bolt and castle nut torqued until I could install the cotter pin.
Subscribe to:
Posts (Atom)