Friday, October 29, 2010

Brakin’ and Chasin’ and Polishin’ Too

Yesterday I had to slam on the brakes to prevent Lucy from running into a cube van driven by an oblivious moron who, driving 20 mph slower than the flow on I-195, decided to make a hard right into my lane directly in front of me. While the brakes whoa’d us down swiftly enough to prevent contact, the front ones shuttered and emitted a very nasty screeching sound. Must be time for a brake job.

So last night I put her front end up on jackstands and pulled the right front wheel and brake hub. Sure enough, the liners had worn down to the rivets. Fortunately, there were no grooves in the hub, just a circumferential scratch. Also fortunately, I had a new set of shoes on the shelf. Less than an hour later both fronts had been renewed and she was off the stands.

Since I was already dirty, I decided to do some Glinda tasks. I started by mounting my cone-shaped polishing head on my die-grinder and smoothing combustion chamber surfaces on the pulled head. Below are the typical results (click for hi-res). I still want to go back and grind some of the tiny bumps and imperfections. Also pictured is the cause of all this work – the burnt #6 head gasket (click for hi-res).


Bored with buffing, I dug out my tap-and-die set and chased the 3/8-24UNF threads on the top set of studs and nuts. These are the ones that sit out and typically get pretty rusty. When I was through each nut easily spun on and off of each stud. One less thing to fuss with during reassembly. Which, by the way, I hope goes on tomorrow. I’m still waiting on the new head gaskets, but if need be, I can bum a set off local Corvair guru Gary.

CPotD #172 (Blue on Blue Rampside)


It’s been a while since I featured a Rampside as a CPotD, so I went looking for a blue one for today. Google hooked me up with a nice one that was on BringaTrailer.com last year. Five grand would get you a rust-free, VERY stock appearing, California specimen. It’s fun reading the comments that were left under this listing. My favorite is, “The Corvair was one of GM’s most misunderstood cars.” How true!

Thursday, October 28, 2010

A Chance Meeting / Grinding While Waiting (Updated)

As I was sitting at a stop sign while driving Lucy home from work yesterday, a van coming from the opposite direction stopped next to me and the driver yelled out his open window, “Who works on your car for you?”
“I do all my own work,” I replied.
“I’ve got a Corvair and I can’t keep a belt on it,” he complained. “Can you help me?”
“Sure,” I said. “Stop by my house and I’ll take a look at it.”
“You live next to the mayor, right?”
“Yep”
By that time traffic was getting pretty annoyed with us, so we went our separate ways after exchanging names. I hope he stops by.
____________________________________________________

I was hoping the new head gaskets I’d ordered would have arrived by yesterday, but Mr. Postman didn’t leave a package for Glinda. Before I can reinstall the head, it needed to be cleaned up anyway, so last night I got out the die grinder, mounted a brass wire brush, and cleaned off the carbon and oil. I left the old gaskets in place to protect the sealing surfaces. Next, using my new-to-the-garage PC, I searched the CorvairCenter forum for threads about grinding in the combustion chamber. I found this one that discussed removing the bump between the valves. Since the majority recommended removing it, I exchanged the brush attachment for a small grinding stone and smoothed out the circled surface from each chamber.

I’d read (and it makes sense) that polishing the surfaces of the combustion chamber removes the roughness that causes hot spots. It’s these hot spots that tend to cause pre-detonation (pinging). I had pulled down my polishing kit when the gals arrived back home, so I took that as a good point to stop for the evening.

I’m now searching for photos showing what a nicely ground Corvair combustion chamber should look like.

The poster on the CC forum messaged me with the address of the posting I was looking for. Beautiful work. Check it out.

Wednesday, October 27, 2010

CPotD #171 (Wacky in Blue)


Serendipitously, there’s a current thread on the CorvairCenter forum called, “Custom Corvair pictures.” It was rather easy to find a blue-hued example of wackiness for today’s CPotD. Another crampside, or shortened rampside, this one uniquely sports single wheel openings for each side to envelope both front and rear wheels. Interesting to say the least.

Glinda Gets Four Hours of my Time

Last evening I headed out to the garage to begin the project of replacing the engine head gaskets on Glinda’s 2-4-6 side. First, however, I took a few minutes to coat the rusted areas under the dash and air grill with Rusty Metal Primer. I’ll topcoat it tonight, then install a patch and seal the seams tomorrow evening.

Back to the engine. I was convinced, after my audible sleuthing, that the puff-puff-puff sound was coming from the #6 cylinder. Per the recommendation of both Jeff (of Corvair Center fame) and Gary (THE local Corvair guru), I checked for a loose spark plug over the weekend. Finding all the plugs snug on that side, I resigned myself to replacing the 2-4-6 head gaskets. After laying out a piece of cardboard to collect the removed components, I removed fanbelt, carbs, fuel pump with gas lines, throttle linkage, and vacuum balance tube. At that point, a conversation I’d had with one of my car buddies at work, Larry, came to mind. “Why don’t you do a compression check,” he’d asked me. To confirm my diagnosis, I pulled all the spark plugs. As I applied torque to remove the #3 plug, I discovered it was not screwed in tight. CRAP! Had I just pulled off all that stuff only to NOW find all I’d needed to do was tighten a spark plug. Just as a check, I did do a compression check on all the cylinders. I found that the suspect cylinder only got up to 130 psi, while the other five all measured between 150 and 160. Not sure if that difference was enough to indicate a failed head gasket, I cleaned, re-gapped, and installed the plugs along with just enough components to get the engine running again. The engine started right up, and sadly, so did the puff-puff-puff. Oh well, I was prepared for that.

Back off came the just-reinstalled items followed by the alternator, oil cooler, fan, shrouds that were attached to the head, and then the valve cover. Next the rocker arms, pushrods, and guides were removed. This exposing the rest of the hardware holding the head in place. Removing these always carries the risk of unscrewing the long head studs from their holes in the block – an undesirable occurrence since this joint is supposed to be locked. The lower six fasteners are the rocker studs with integral hex and an internal thread to mate with the long studs coming from the block. The internal threaded hole mostly protects the end of the studs, so I was relieved, but not surprised, when the impact wrench removed all six without a single stud loosening. The upper nuts allow full exposure of the stud ends to the rust-making environment, so the risk is much higher. I took two precautions before I applied the impact wrench. First, a couple nights ago, I liberally coated the threads and nuts with a rust penetrant (50-50 mixture of Acetone and Trans Fluid). Second, using vice grips, I clamped each stud while removing the associated nut. Everything came off without incident. TYL.

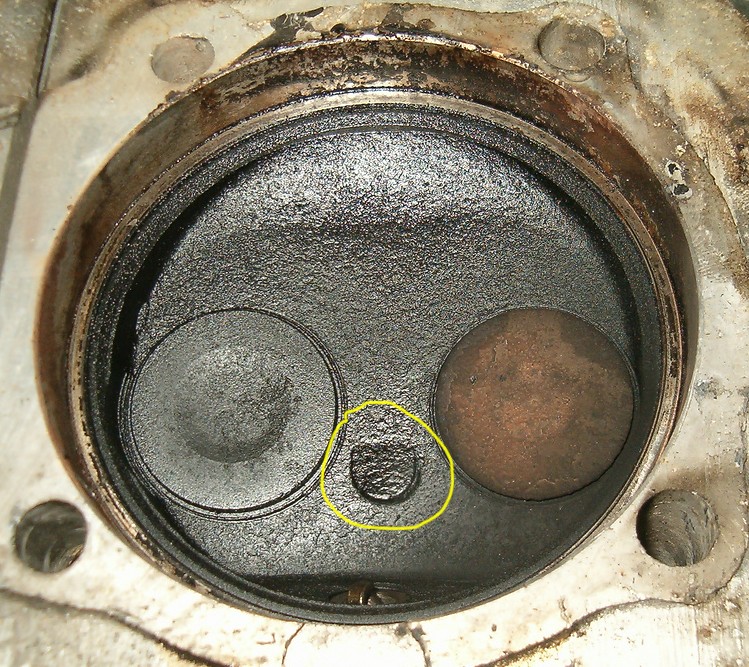
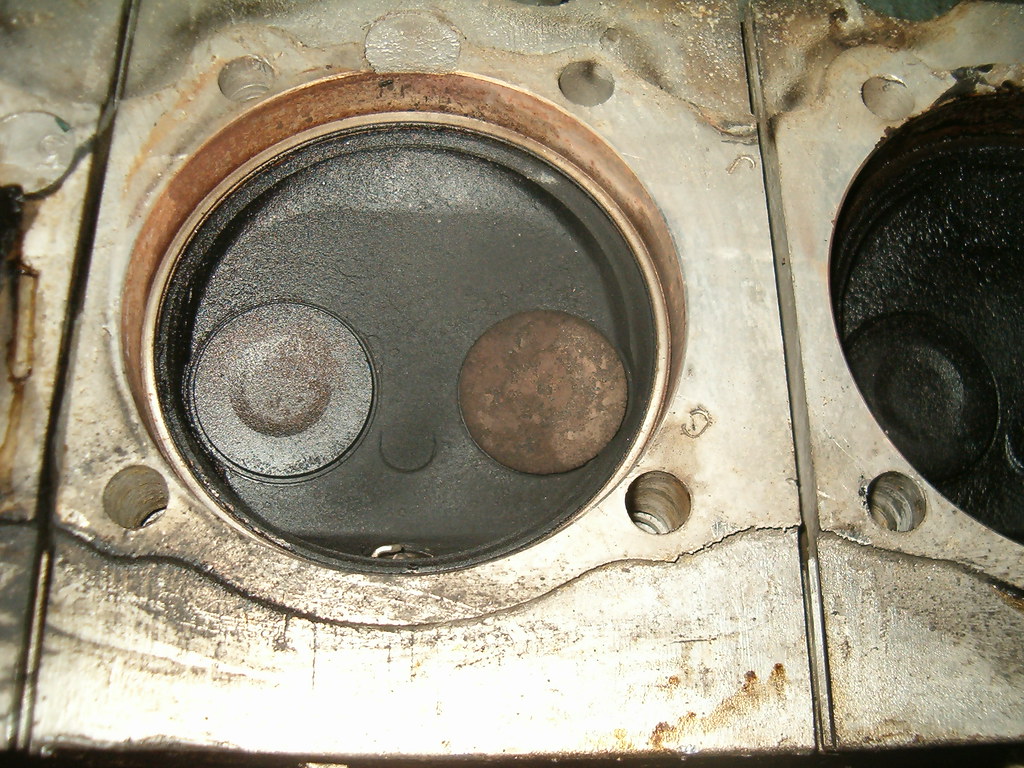
Yanking on the head to pull it off yielded no progress at this point. After thoroughly re-checking I hadn't missed a bolt, I went ahead and took out the six push rod drain tubes. They were difficult to remove, but once they were out, the head would wiggle around freely to extract. As I slowly pulled the head away from the block, I noticed the cylinders were coming off with it – NOT GOOD. Using a hammer and cold chisel, I tapped them back against the block. Of course, the head went back in too. Finally, after a few repetitions of pulling, tapping, pulling, tapping, the cylinders came free of the head and the head came off. Now I could survey the state of the joints. Sure enough, the state of #6 confirmed a leaky gasket. See the pictures below. At that point it was nearing 11 and getting close to my bedtime, so I knocked off for the night.

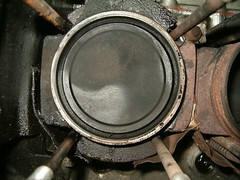
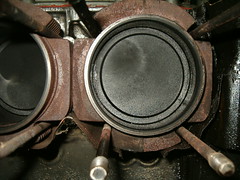
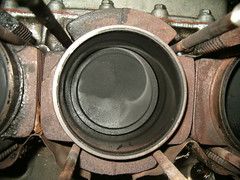
Combustion chambers 6 - 4 - 2 (click for hi-res):

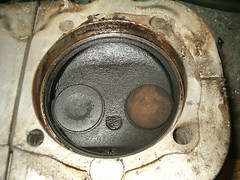
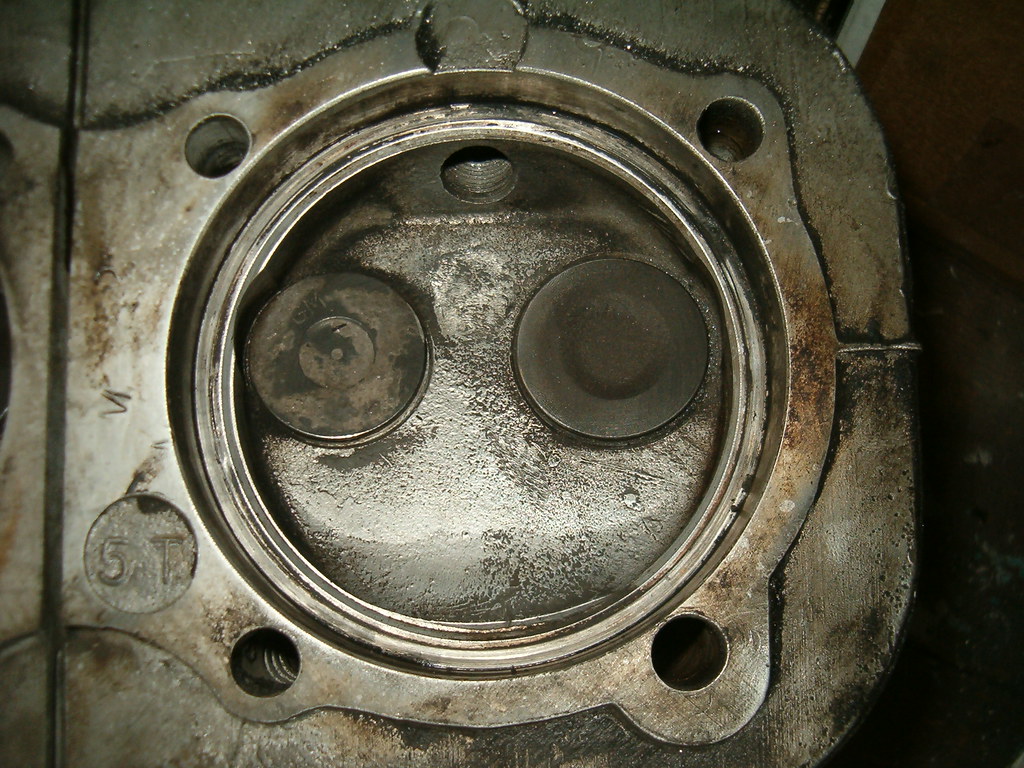
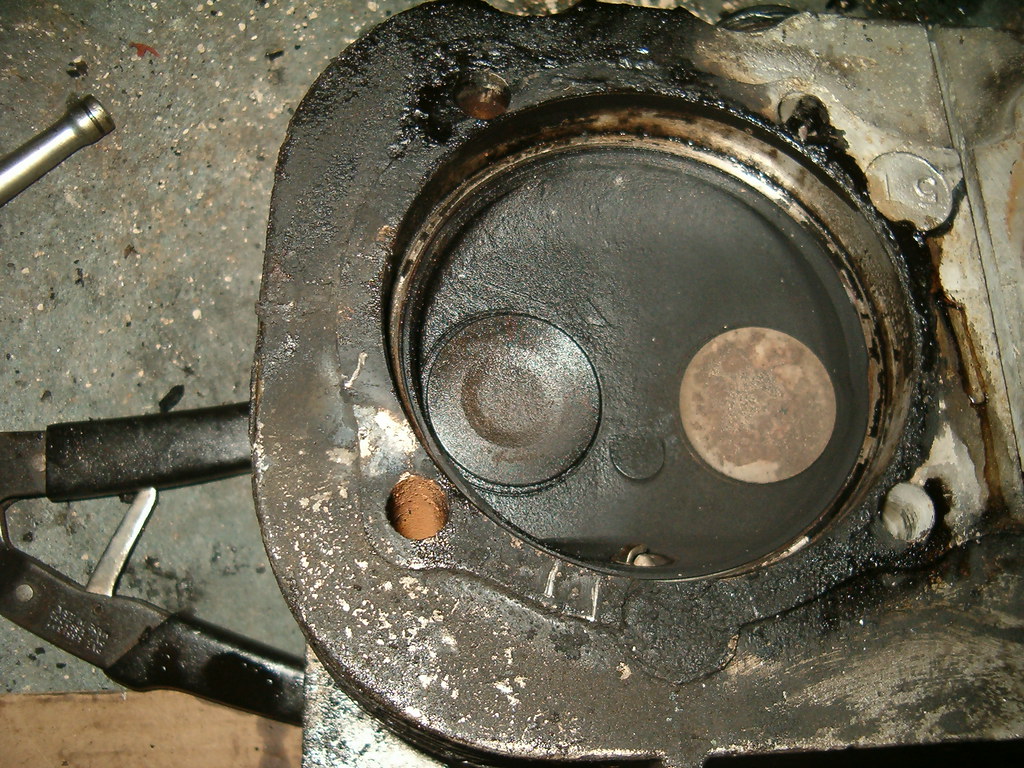
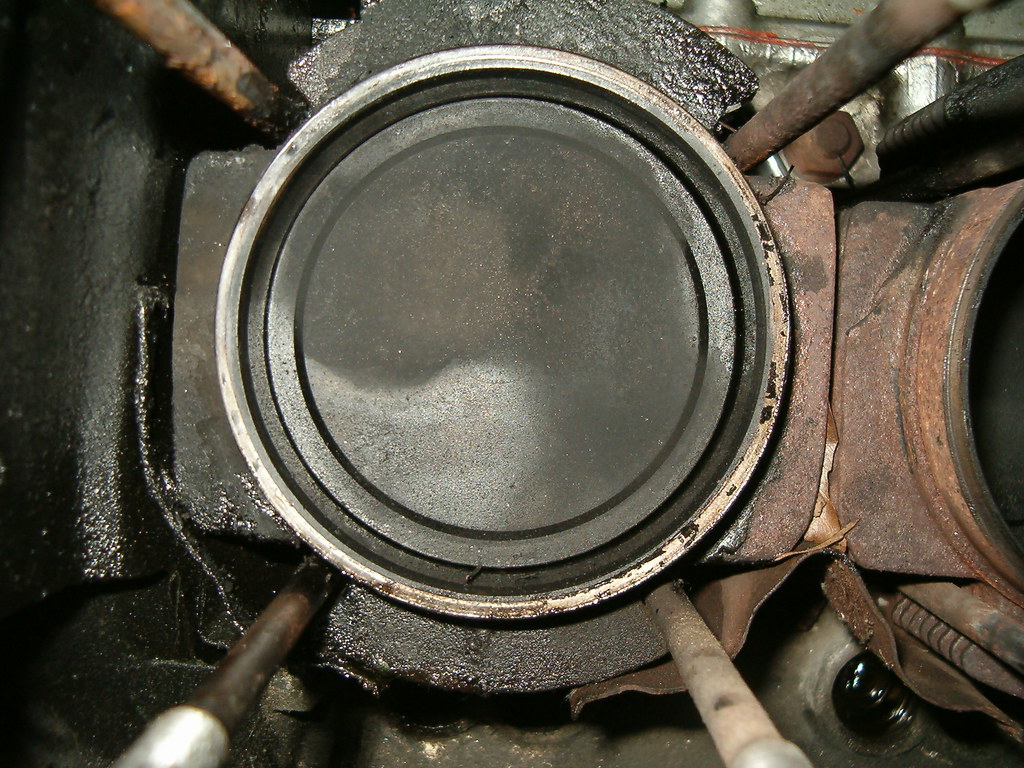
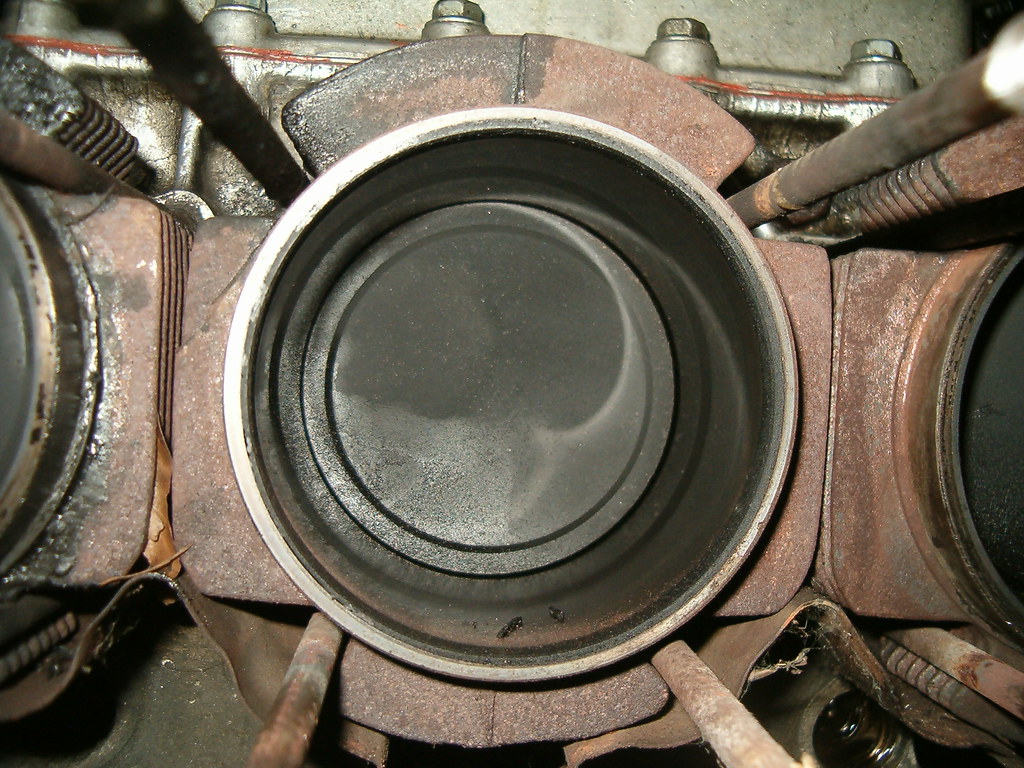
Cylinder/piston faces 6 - 4 - 2 (click for hi-res):

Tuesday, October 26, 2010

CPotD #170 (Blue and Blue)


Today’s CPotD was recently posted on the FastVair mail list. It’s of Mike Levine’s superfast Corv-8 racecar. Having had my share of off-course excursions, I know how Mike felt when he found his car stuck in the gravel. It's a quick way to get the blues, and you're driven to run a blue streak, but then you're so relieved when you find that all the suspension bits and pieces are still attached and the steering wheel is still pointed in the right direction.

Monday, October 25, 2010

Glinda's Weekend

Not to be completely ignored, Victoria and I did spend some time on her car trying to find and fix the source(s) of the leaks that left the front footwells flooded when I drove the car last. We removed the air grill from in front of the windshield. Then Victoria strategically placed herself on the front floor with light and towel in hands while I carefully placed the end of the running hose as far to the left of the cavity as possible. My intent was to start outboard and move in. After a few seconds, she saw water running into the car from a spot above the air vent. Out came the hose and out came the vent assembly. A little probing turned up a rusted out area of sheetmetal wall that will have to be cleaned up, primed, painted, and plugged. Next we moved to the driver’s side. It took a little longer, but we found two leaks through a body seam where the factory applied sealer had failed. Using a screwdriver we cleaned out all occurrences of sealer which I’ll replace with good Silicone RTV. At that point Victoria had a babysitting job to go to, so we moved the car back to the street while I worked on Lucy.

Later in the weekend, I put Glinda back in the garage since the forecast for a chance of rain today and tomorrow mean she needs to be under cover. No more flooding of the new carpet allowed.