Showing posts with label paint. Show all posts

Friday, November 18, 2016

So Much To Do, So What Do I Do?

There’s a guy here in Maryland who recently posted on Facebook that he’s looking for a daily-driver Corvair. Given all the work ahead of me with Scarlett and, probably, Luna, I’ve been toying with the idea of trading Glinda for something more modern – like a mid-90s MX-6. So, after some thought I messaged him that I’d sell Glinda for $2200. He says he’s interested, but nothing’s happened.

If Glinda didn’t need so many little issues dealt with, I wouldn’t even consider giving her up, but she does, so I am. In addition to the items on the To-Do list (see sidebar), here’s a mostly complete list in no particular order.

Install the Cobalt rear seat

Clean and reinstall the carpet
Fix the courtesy light
Repair and install the GUP driver’s door panel

Replace the rear bumper

Install the GUP steering box
Splice the broken oil pressure gauge tube and replace the ferrule at the rear of the gauge
Remove the heater fan and clean and lube the motor
Replace the package tray cardboard with something that will accommodate speakers
Install a good mount for the racing harness shoulder belts
Bolt down the fourth hole of the each Cobalt front bucket seat
Weld in a new trunk bottom

Rebuild the blinker switch
Plug the smog hole and AT dipstick hole in the engine bay

Replace the gauge panel with a GUP I’ve got from a manual shift car (need to choose 500 or Corsa style)
Replace the hood with a GUP I’ve got

Eradicate rust: rear shock towers, multiple body locations


Paint the car orange

Kinda’ daunting given all my other commitments (put big sad face here). She runs really well right now, so I do love to drive her.

Wednesday, August 3, 2016

Some Tweaks Required

This morning I chose Glinda to by my whip-of-the-day. It took a bit of musical cars last night to make her available. After dinner yesterday the lovely Loriann, Mikhaila, and I drove the truck over to the nearest, still open, tire shop with the wheels and tires that needed swapping. The manager told me he couldn’t do the swap because the tires were tool old (date mark of 2006), but he did let his technician (I think that’s what they’re called now), pop the tires off the bead - I can do the rest of the job.

When we got home, I needed to move the awesome Challenger (it’s appropriate the lovely Loriann drives an awesome Challenger), and Glinda out of the driveway and garage respectively. That opened a slot for Ringo to go into the driveway because he can’t sit on the street risking a ticket for not moving for 24 hrs.; followed by the truck because I didn’t want to roll the tires so far; followed by the awesome Challenger because we won’t park that car on the street.

The first annoyance I noticed when moving Glinda is the take-up for the clutch is now way too high. Not so much that the clutch is slipping, but still annoying. I’ll adjust that when I get an evening. The second annoyance is another seam in the headliner has fallen apart. I’m giving up on sewing it myself and will have to support my Corvair parts supplier to the tune of $105. The third annoyance is the door panel is still peeling away. The fourth annoyance is the fitting at the back of the oil pressure gauge still leaks and I will have to get another ferrule and install it correctly. The fifth annoyance is the steering is still too loose and I will need to get to the Ranch and pick up that replacement steering box. The sixth annoyance is the Cobalt seats are still not installed. The final annoyance is the car’s body and it’s rust and missing 500 emblem. Even in the face of all these annoyances, I still REALLY love driving this car. I wish it was nicer looking (read no rust and a new coat of orange paint).

To address some of the issues, I gave Jeff a call at the Corvair Ranch. He’s still got the steering box, he’s got plenty of door panels for me to pick through, and he’s got some good used emblems I can choose one from. I told him I had a bunch of parts I needed to bring up to him, and he promised we could work out some sort of deal.

Friday, September 25, 2015

Okay, I’ll Break The Silence

By my lack of posts over the last few weeks, one can surmise not much is going on with the fleet. Glinda is still reliably motoring down the road getting her 17.5 mpg as my mostly daily-driver. The guy that modified the racing carburetors for me has agreed to exchange the bases of these apparently faulty ones for new modified ones at no charge, but I still need to tear down the ones I’ve got and ship them off to him before new bases will be sent to me. Today I scored two nearly new bucket seats out of Chevy Cobalt. I’d been watching for these during my sporadic visits to Crazy Ray’s and today I found them. The serendipitous part of this find was that someone had recently removed them from the car and just left them sitting on the ground. It was like I’d called ahead and ordered them. While these seats are not as form-fitting as the racing seats I’ve got, they are much more comfortable and far more practical for a daily-driver. Now I’ll sell the two racing seats and hopefully make back most of the $65 I just spent. Permanently installing these two buckets is already on this winter’s to-do list.


Ringo has gotten some attention too. I’ve sanded the Bondo and applied a few coats of sandable primer. I’ve remounted the right rear wheel and attempted to start the car. Even though the batter shows a good voltage, he won’t crank. I need to clean the terminals before he can be fired up. Last Sunday I hosted an informal gathering of Corvairs. I’d been e-mailing and talking with two new owners and invited them to stop by Sunday after lunch. I also sent out a group e-mail to all the Baltimore club members as well as a Facebook invite. The two new owners showed up (one brought along his enthusiastic wife) and one of the Baltimore owners joined us. We had a great time looking over cars, talking about Corvairs, and getting to know each other.

This gathering (even with its lack of Baltimorean attendance) has prompted me to organize a driving tour for next month. I’ve mapped out a convoluted route on country roads between a Maryland cidery (just south of Frederick), and three northern Virginia wineries. In addition to inviting the Baltimore folks, I’m going to put out the word to the Northern Virginia Corvair Club to see if some of them want to join in.

Monday, August 24, 2015

I Love the Smell of Ignition in the Morning

Late last week Glinda became undriveable. The tach needle was jumping around and the engine wouldn’t idle only staying running if I kept the rpms above 2500. I limped her home thinking the issue was with the dying ignition switch. I surmised that the contacts inside the switch were failing and the engine was not getting enough electricity to run properly. The replacement GUP switch from the Corvair Ranch showed up in Saturday’s mail, and I installed it that night. Upon first firing up the engine, it was still running rough – crap, not the switch. I hopped out to look at the engine, but it died before I could get the lid open. I wiggled all the electrical connections that may be causing the issue – nothing appeared amiss. I hopped back behind the wheel and turned the key. A single backfire and the engine was running smoothly again. I took her for a spin around the neighborhood and everything seemed normal.

Yesterday morning I turned my attention to Ringo. I finished sanding the Bondo, blew off all the dust, wiped down the area with cleaner, masked off and shot the entire area with three coats of red sandable primer. I’ll let it cure for a day or so before wet-sanding the primer in preparation for some coats of Black Cherry Pearl.


This morning I grabbed the keys to Glinda, buckled up behind her steering wheel, and turned the key. Her engine reluctantly fired into a stumbling idle – crap. I let the engine warm up a little with my foot finessing the throttle, but to no avail. To determine if it was a carb blockage, I pulled off the air cleaner and peered down the venturis while blipping the throttle – healthy squirts of fuel indicated the issue was ignition. I confirmed that when I fetched the timing light, hooked it up, and cranked the engine – no spark. Off came the distributor cap, rotor, and dust shield exposing the points. Using the remote starter (jumper wire from the purple wire connector to the positive on the battery), I watched the points move, but saw no spark. I was at a fork in the road – either replace the points with an unknown GUP or reinstall the electronic ignition module and coil. I opted for the later. Fifteen minutes or so later, I had everything in place and hooked up. The momentous turn of the key was immediately followed by a smoothly running engine. I let it warm up as I put some of the tools away and then plugged the vacuum line, adjusted the idle speed to around 500 rpm, and checked the timing. It was reading a little above 16 BTDC, so I loosened the distributor’s hold-down nut, bumped it a bit to get to get it to around 15 BTCD, and then tightened the nut. After reconnecting the vacuum advance tube, I set the idle speed to 800 rpm, and shut off the engine. I put away the rest of the tools, washed my hands, and inspected my work clothes to make sure I hadn’t leaned against something untoward (must be why I wear black slacks a lot of the time). When I finally pulled away from the curb, I’d only lost an hour of my day. The drive to work was wonderful with Glinda’s engine pulling strongly in all gears well above 4000 rpm – yes, that’s over 80 mph. Bonus, I can cross an item off the To-Do list.

Monday, August 17, 2015

It's Been Way Too Long

Wow, nearly a month since I last posted. Pretty sad. Anyway, what’s been happening? Well, Mikhaila and I are pretty close to dropping Scarlett off the jackstands, Ringo’s had some work done, and Glinda’s been a reliable daily driver.

More specifically, Scarlett has a re-sealed Powerglide, a Safety-taped shifter cable, two borrowed carbs from Ringo (since I’m sure they work), a solid brake pedal, a coated and installed gas tank, a new in-line fuel filter (by the left rear wheel), hooked up throttle linkage, front seat belts, and all four tires bolted on. In addition to coming off the jackstands, all she needs to get out of the garage under her own power is some gas in the tank, ATF in the transmission, and some ignition system adjustment.

I closed off the opening created by the shredding tire with a membrane tape carpenters use to seal around house windows. It has a strong adhesive backing, is plenty tough, and comes in a roll that’s four inches wide. I also applied Bondo to the treated rust-through around the right rear wheel well. I’ve decided that I will spend my car time this winter working on Glinda. With Mikhaila off to college, Scarlett will vacate the garage and Glinda will take her place. My current list of prioritized projects is:
  • Treat body rust appropriately
  • Get replacements for the racing carburetors and install
  • Paint and install the correct dash (no transmission shifter)
  • Replace the ignition switch
  • Tighten up the front steering (maybe replace the box with a quick-steer unit)
  • Weld in floor patches
  • Weld in the trunk bottom
  • Relocate battery
  • Dye the gray racing seat black to match
  • Install both racing seats in place of the front bench
If the kitchen project goes well, I may even prep and paint the car. I’m torn between Summit Racing’s Teal Green Metallic and Bright Aqua Pearl. Then again I may go crazy and shoot the car with Orange Pearl.
 
Regarding Glinda’s ongoing carburetor saga, she’s still showing far better mileage with the stock carbs, so I’m on the verge of sending the modified ones back for replacement. The next fill-up and spark plug inspection will tell the tale.

Tuesday, May 26, 2015

A Eureka Moment


Thanks to a Facebook contributor, it appears I now have the solution to Glinda’s poor running and horrible gas mileage.

A little background. Back when I sent the original '68 carburetors down to a carb guru to have the jets relocated for racing, he discovered that he could not modify them because of all the smog changes GM made. He, instead, traded me some '66 carb bases with the modifications. He sent them back to me without any of the interior parts since that was the way he’d received the ‘68s. I rebuilt the bases using the ’68 parts.

Sadly for me, there’s an important difference between the '65-’67 and the ’68s I’d disassembled. GM put a small needle valve in bottom of the carb base that I did not know about (not in earlier or later carbs). Without this valve, fuel runs too freely into the well that feeds the venture, thus the 14 MPG. Running way too rich had fouled the plugs with soot, explaining why, with the near-flooding, performance was so poor. A phone call to Jeff at the Corvair Ranch, and a couple GUP needles are on their way to me.

Prior to this discovery, I’d thought there had to be a leak in one of the fuel lines – probably the pressurized return line. That belief prompted me to put Glinda up in the air so I could remove the tunnel covers and inspect everything from the bottom-side. Everything was dry even with the engine running. While I was lying on the ground revving the engine, I could easily see the black smoke associated with an engine running rich. That’s what provoked me to take a video (click her to see, but turn down the volume), post it to Facebook, and seek the help of the Corvair community.

I also pulled the spark plugs and cleaned all the soot from them. Finally, I re-set the floats to ’66 carburetor spec values for level and drop. Once the needles are installed and the carbs are bolted back together, this engine should run like a top.

Another task I was able to get to yesterday were creating two extended J-bolts to retain the raised air cleaner. As shown below, I’ve been using zip-ties since adding the PVC spacers. Not anymore. The welder permanently joined two nuts so the stock J-bolt screws into one end and a 3 inch long piece of threaded rod goes into the other end. A nice benefit to this new setup is the J-bolt is now captured. I’ve lost at least one of the stock J-bolts after removing the air cleaner and placing it on the ground. Once loosened, the extended nut on one side and wing-nut on the other will keep the J-bolt permanently part of the air cleaner.

After cleaning the garage, I then took a few minutes to get out the buffer and see if anything could be done with Glinda’s oxidized paint. I tackled the passenger side of the hood figuring I had nothing to lose. After a few minutes of buffing, the pad had a green tint to it as it should. I then got out the Turtle Wax and applied it per the directions. The one side of the hood looks nicer, but there’s no way I’d say it’s shiny.

Wednesday, April 30, 2014

More Photos of Scarlett


Since Mikhaila has moved on, TwoTone will be forever TwoTone to us. I’m now pushing her to give our newest addition a name, but I’m sure she’ll take her sweet time (which is fine). So, for now, I’ll be real imaginative and call her RedVert (update: we've settled on Scarlett).

Last night I went out to the garage and took a few more photos, a couple of which are shown here. Click on this link to view the updated Flickr album.

“What colors do you want the interior?” I asked Mikhaila Sunday.
“I don’t care,” was her immediate reply.
“What about the new top?”
“Don’t care.”

Ok then. We won’t be changing anything that looks presentable. With that in mind, I did a little sleuthing to find out how Chevy originally outfitted this car. Scarlett’s body tag revealed the following information.


Data: 09C (Third week of September 1963)
Style: 64-0967 (1964-Monza Convertible)
Body: WR1647 (Willow Run - 1,647th Monza convertible built there)
Trim: 758-1 (Fawn vinyl seats, white convertible top)
Paint: 922-F (Ember Red, Fawn interior paint)
Acc: W2M5V (Tinted windshield, Powerglide transmission, custom deluxe seatbelts without retractors {RPO A37})

Since I really like the red with the fawn, I’m hoping the seats clean up to reveal the hue of beige and not the glare of white.


We may diverge from original by replacing the old, failing, non-original, black top with a beige one from Clark’s Corvair Parts. I couldn’t find a suitable photo on the web of a red Corvair with a beige top, so this Mercedes will have to do.

Tuesday, December 3, 2013

We Have a Color Scheme


While Mikhaila is still pondering what her car’s final name will be, she has decided upon a color scheme:
  • Exterior (except for roof): Fathom Green
  • Roof: Ermine White
  • Interior upholstery: White
  • Carpet: Gray
  • Interior Painted surfaces: Fathom Green (flattened to a semi-gloss)


By the way, Glinda is still leaving a puddle of ATF at each parking spot I place her in. This is quite disappointing, and maybe the magic elixir from Lucas takes a few days or so to effect a change. Regarding her gas mileage – it doesn’t look too promising.

Ringo has been out of the news lately – and that’s a VERY, VERY good thing. TYL!

Monday, November 25, 2013

Time and Money Spent on TwoTone

My time with the fleet actually started Friday night with Glinda, but Saturday afternoon was mostly consumed by working with Mikhaila on her car, TwoTone.

The Glinda work consisted of using her engine to determine which subassembly of TwoTone’s rebuilt carburetors is bad. As I posted last week, one carburetor assembly appeared to function properly, while the other wouldn’t work right when bolted to the Glinda’s left head. So, on Friday I created a table like the following (yeah, I am an engineer):

Wouldn’t Work Seemed to Work
Bad Top Good Top
Bad Cluster Good Cluster
Bad Bottom Good Bottom

With the assumption that only one portion of the bad carb was causing the malfunctioning, I swapped both the Bad Top and Bad Cluster onto the mounted Good Bottom. While the engine started and ran fairly smoothly, the right side would not heat up telling me it wasn’t getting the proper flow of fuel. Off came the Bad Top and back on went the Good Top. This time the engine ran nicely and soon after the restart, the choke opened up all the way. With the engine fully warmed up and shut off, I hooked up my length of clear tubing with some water in it to the vacuum ports on the two carbs. With the engine running again and the left carb disconnected from the throttle shaft, I turned that carb’s idle screw in until the water was static in the tube. I then turned the small linkage rod until its end lined up with the hole in the throttle shaft. The new carb was now balanced with Glinda’s old carb. Before quitting for the night, I disassembled the presumed bad top and dropped it into the carb cleaner for a good soak. Referring back to my table, the two carbs now looked like this:

Installed & Working Unproven & Soaking
Good Top Bad Top
Bad Cluster Good Cluster
Good Bottom Bad Bottom

Saturday afternoon, both Mikhaila and I had finished our house chores and we headed to the warmed-up garage (I’d gone out about an hour earlier and fired up two of the kerosene heaters). She started by spraying gloss black Rustoleum on the front brake backing plates while I emptied out a bin to collect TwoTone’s removed parts. We then worked together to empty out the salon (interior space) of all the loose pieces I’d stored there. We found some new parts that will be used in the roadification. Next, we moved on to removing the seats. All the fasteners but one were cooperative. I slathered the stubborn nut with the magic elixir of 50/50 acetone/transmission fluid. We’ll let that one sit a while. The final actions for the day were removing sill plates, vent grills and covers, and the seatbelts. Once that last nut is loose, we’ll finish exposing all the floor and Mikhaila can have fun with the wire brush getting rid of any loose rust.


Speaking of rust, I can’t say it too many times - disassembling this car has been quite a treat compared to previous projects. As mentioned before, only one threaded joint out of a couple dozen was seized. We’re quite fortunate to have landed another barn find (Heidi was the other one and more accurately they were garage finds).


Finally, this morning I got on the phone with Clark’s and placed an order for POR-15 for coating TwoTone's floor, a bunch of carpet, paint, and upholstery samples (more on that later) and three wheel cylinders (there was a brand new right front cylinder assembly amongst the parts we pulled out of the salon). Not wanting to pay the nearly $100 for a rebuilt master cylinder, I hopped on Amazon and bought an aftermarket dual master cylinder for $33. I’ve decided I’ll do the conversion to dual from single (1964s only came with a single master cylinder). I’ll need to buy some fittings and a couple short brake lines, but I’ll do that once I have the master in hand. The running expense tally on the sidebar has taken a hit. Won’t be long before we’ve topped a grand.

I mentioned samples – it looks like Mikhaila has a color scheme for this car. She shared with me that she likes a darker green for the body with a white top. For the interior she’s thinking white seats and door panels, black carpet, and a flatter version of the exterior green for the exposed interior metal (dash, doors outside the panels, etc.). I pulled up a photo of a 1960 Corvair in Jade Green, and she liked it so one of the samples I ordered was for that color. The other was for a Fathom Green from 1969. Much darker, but not nearly as 50s as she mentioned she was going for.

Monday, September 9, 2013

I HATE Rust!

Wednesday I decided I needed to deal with the rust bubbles on Glinda's right front fender, so I pulled out my drill, inserted a wire brush, and went through paint and Bondo before ridding the metal of rust. A couple coats of rusty metal primer ended that day. Thursday afternoon I needed to finish the project since I had a couple scheduled to come by Friday evening.tonight to consider buying one of the two 'vairs I'm selling. I left work around 4 and by 6 I had two coats of Bondo spread and sanded. While sanding I decided to get ambitious and fix the keying scratches that had been put in the passenger front and rear fenders. With all those spots prepped, I pulled out and set up my airbrush, mixed a small batch of primer and loaded the bottle for some driveway paint shooting. To check setting I started by aiming the gun at a piece of cardboard and pushed the trigger. Nothing came out. I knew I'd cleaned it after I used it on the '64 a few months back, but the orifice from the paint bottle was definitely clogged and I couldn't get a wire to clear it out. With the primer clock ticking, I quickly grabbed my smallest paint gun, plumbed it, filled the cup, and adjusted the gun by spraying the aforementioned cardboard. With the air setting quite low, I was able to keep a tight, small pattern. I laid down three coats of primer before dinner. After an hour's break, I sanded and cleaned everything thoroughly before shooting three coats of color. I left the house before it was really light this morning, but in the dawn's light it didn't look too bad. Chasing rust on these daily-drivers is a real pain in the butt.

Here is the finished product.


Monday, May 20, 2013

She’s Gone

Another appropriate title to this post would be, “I Could’ve Sold Her Twice”. Last Thursday I received a message on the CorvairCenter forum from a prospective Lucy buyer. He was responding to my post about which car I should bring to Sunday’s Corvair Ranch Open House. While he would not be able to attend the event, he told me he was “98% sure” he wanted the car.

Late that same day, my phone vibrated with a text message from a VA area code asking me if there were “any known problems on the red corvair.” I didn’t see the text until the next morning, but I immediately responded with a long message that basically told the interested party that she was good-to-go, with the only rust-though being a couple areas under the trunk lid. After a few back-and-forths, the sender asked for my address and told me he and his buddy would be at my house in two hours. True to his word (amazingly), two younger guys pulled up at my curb as promised and began giving Lucy a thorough inspection. I let them look a while before I moseyed on down the driveway and said hello. They were real excited about what they saw (thank You Lord) and Lucy luckily fired right up and they took her for a test drive. They were gone a while (got slightly lost), but once they returned, they asked what my lowest price was. $2300 was what I told them and $2300 was exactly what they were hoping for. SOLD! Now I can pay Victoria for Glinda and begin in earnest the work to trackify (see sidebar) that car (more on this later).

It took a while to gather all the stuff that was included (lug wrench, extra lug nuts, spare fanbelt, chrome trim, Monza badges, etc.), but I was finally able to let them go. With their departure, I could sit down with the family for dinner, and they asked me how I was doing. “There’s a small hole in my heart,” I joked. After dinner I checked my e-mail, and found another message from the first prospective buyer. “My wife thinks it would be a fine 50th b-day present…we’ll work out a deal.” I felt so bad having to tell this guy I’d just sold his birthday present. Fortunately, he took the news quite well, responding with a, “It wasn’t meant to be.” During this time, I was working on Heidi trying to get rid of the two bubbled paint spots above the rear wheel arches. I carefully wire brushed the bubbles away and used my new spot sandblaster to remove all the rust. This was followed by a generous application of rusty metal primer to keep any future corrosion at bay. Friday night I applied a few layers of filler and let it fully cure until the next morning when I sanded the repairs smooth, cleaned the areas, and then used my new airbrush to shoot a bunch of light layers of urethane primer. I was trying to get the repairs done in time to take her to the aforementioned open house, but a b-day dinner for the lovely Loriann took precedence over that plan, and the final painting and clear-coating didn’t occur until yesterday afternoon. It was so nice not having to match the paint since I had quite a bit of the silver left over. The finished product turned out pretty good if I say so myself. A little sanding once the clearcoat is fully cured and it will be difficult (I hope) to see the repairs.
 

Regarding the trackification of Glinda, my priorities are making sure her suspension is up to snuff and that includes cutting a coil out of each front spring, installing new shocks at least on the front, swapping in the quick-steer arms I bought from my ‘vair-buddy Jonathan a few years ago, and getting a good four-wheel alignment. I really, really want to do a 4-speed swap, but I’m not sure I’m going to have the time (or funds). I was hoping to pull the needed parts from a carcass up at the Corvair Ranch, but my last conversation with Jeff indicated he wasn’t too hopeful that he had a prospective donor. Bummer. If worse comes to worst, I can drive her on the track as an automatic, but it won’t be nearly as fun. I was thinking I’d need to buy wheels (?) and new tires (???) since the current 185/80-13s are not track-worthy, but it occurred to me that Luna is just sitting in the portable garage on four very nice tires. I’m sure Victoria won’t mind if I take a millimeter or two of tread off of each one. I’ll be relying on the stock lap and shoulder belts to keep me in place during this summer’s convention track day and autocross. Getting her carbs modified with relocated jets and a good tune-up will, I’m sure, take up the couple months I have until Gingerman Raceway event.

Monday, February 18, 2013

Isn't It Ironic?

Last Thursday, I spent a short evening in the garage applying primer to all the exposed metal of Lucy’s floor. The welds, the portions of the patches where I ground off the paint all got a slathering of the brown stuff. It’s ironic that Rustoleum’s Rusty Metal Primer is rust colored.

Wednesday, February 13, 2013

No Odd Spots

Yesterday evening, under the guise of changing the oil and filter in the lovely Loriann’s daily-driver, I donned grungies and headed out to the garage. After completing the simple task as promised, I did my prep work for the last application of POR-15. I went to each rust hole left in Lucy’s floor and cut out pieces of fiberglass cloth just large enough to span each opening. Before I removed the lid from the eternally (seemingly) staining liquid, I did something I’d seen smarter painters do. I pulled the wrist openings of the neoprene gloves over the cuffs of my sweatshirt and secured the junctions with bands of masking tape. The inevitable drips and dribbles of POR-15 would not find their way onto my skin. Then, finally, I was able to empty my last jar of POR-15 getting most of the contents on Lucy’s rusted externals and the aforementioned patches, while only a small percentage ended up on the cardboard I generously spread out to protect my new garage floor tiles. Once the coating hardens, I will go back with the Rustoleum primer and paint and add a few coats onto the porous patches hopefully making them impervious to water. I’ll also fully coat the outside surfaces of the metal patches with the same primer and paint to ward off any attacking tin worms.

Thursday, May 3, 2012

Repelled Water Repellant

I’m still doing battle with the backlight weatherstripping trying to keep out the rainwater. I thought I might have beaten it with last night’s application of silicone to the outside bottom corner, but a subsequent thunderstorm resulted in puddles on the inside of the car again. I’ll have to go at it with the blowing air and soapy water next.

The other Ringo repair I undertook last night was the replacement of the Pittman arm bushing bolt. I didn’t like the way the original one went on when I replaced the bushing, so the last time I was at the Corvair Ranch, I bought a GUP bolt with a new nut from Jeff. This one seemed to go together much better.

Meanwhile, Victoria kept up the enthusiastic work on Luna by applying a few coats of medium blue metallic paint over the previously primered rust spots. Next on Luna’s list is getting her up on jackstands and inspecting the brake system.

Thursday, December 15, 2011

Though Not a Snail’s Pace, It Still Seems Slow


Yesterday, after some prodding from the lovely Loriann, I left work early to begin re-refinishing Ringo’s driver door. I was still sickened by the sight of the scratches as I placed the door on the blanket-protected sawhorses out on the driveway. I had first rolled Ringo out of the garage in anticipation of shooting primer. My DA sander is really getting a workout on this project, and after about a half-hour of effort, the door was ready for cleaning and masking which took at least another half-hour. I chose to only expose the outer painted surface below the window so the jambs and the window frame were all enclosed. Finally, I was able to don my respirator, fill my big gun (the one with the 2mm tip opening) with primer, and start shooting. Three coats fifteen minutes apart and it was mealtime. After dinner and some shopping with Victoria, I headed back out to the now-cold again garage, lit the heaters, and finished reassembling the passenger door. The last task of the evening was adhering the plastic sheeting over the area where the right rear panel goes. This will be ready to trim and cover with the panel the next time I’m out in the garage (this evening).

Tuesday, December 6, 2011

Fourth Time’s a Charm

After the three failed attempts at laying down a decent paint job on Ringo’s passenger door, I finally succeeded last weekend. While the finish in not perfect - it couldn’t be or it wouldn’t match the rest of the car :-) - there are absolutely no fish-eyes. Since everything other than gun selection was the same, this only confirms my theory that thinner hidden in the gun was responsible for the previous issues. Using three different guns to shoot primer, color, and clear worked out great and will be the approach I use on any future paint jobs. I am very thankful that I only had to do battle with a single door rather than the entire car. Now, with the door’s exterior finished, I can finally move on to painting the inside of both doors and get them installed on the car.

To fill in the time between priming and painting, I assembled both headlight buckets onto the car using silicone for sealing instead of buying new gaskets. Unable to find all the fasteners (now where did I put that baggie of screws?), I could only install one pair of headlights. Once in, I was happy to see them both illuminated when I pulled the switch on the dash. I didn’t try the blinker, but I already know I’ve got some work to do on the column switch.

Tuesday, November 29, 2011

Assembly is a Beautiful Thing – Painting Not So Much

As outlined in my last post, I had high hopes and big plans for the long holiday weekend. How did I do? Pretty well, but a cheap paint gun held me back from checking off all the tasks I’d listed.

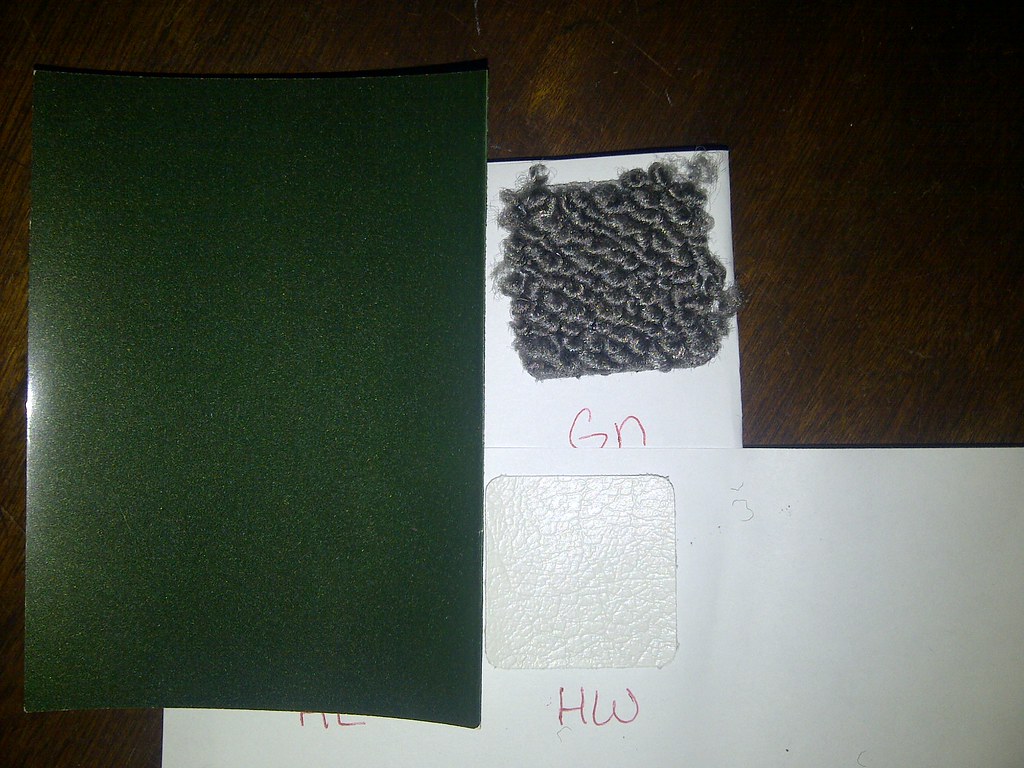
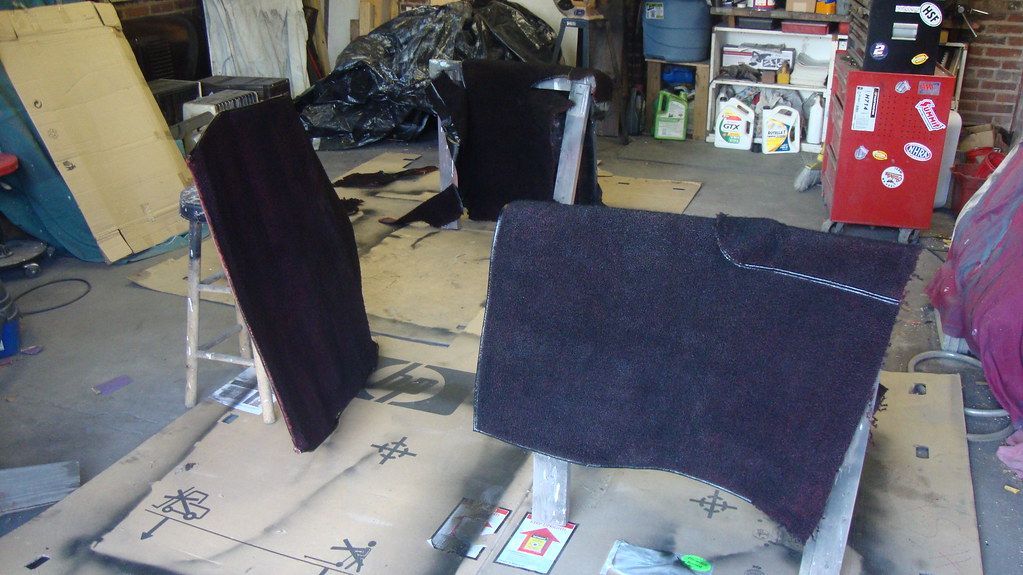
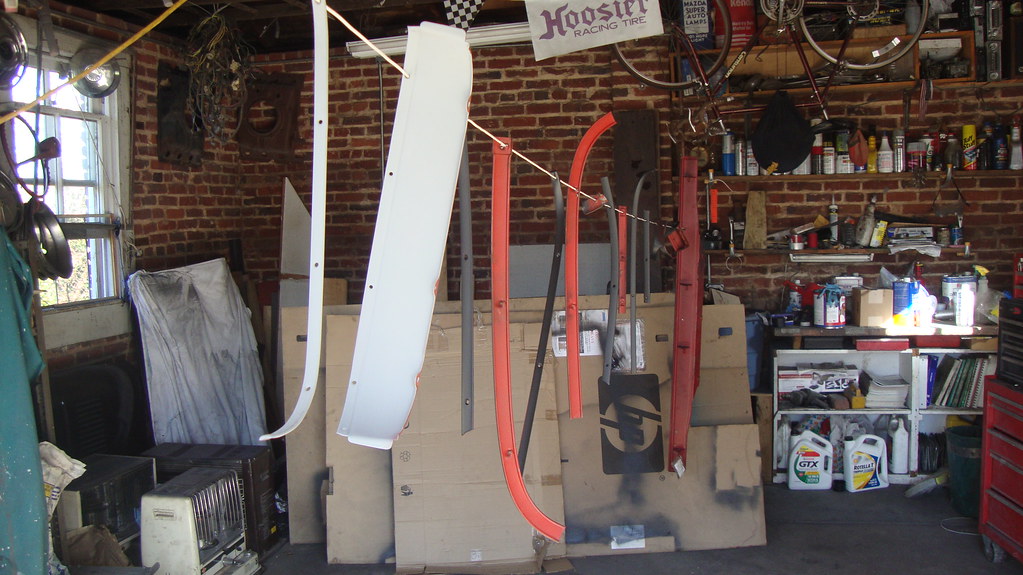
Thursday I rolled Ringo out of the garage and primed the last two sheetmetal parts by first hanging them on a wire strung across the garage. Then, I emptied five cans of vinyl dye onto the carpet pieces.
Next, out came the door and onto the sawhorses – deja vu is not a good feeling. Using my last sheet of hook-and-loop 80 grit sandpaper, I removed the fish-eyed paint from about half the door’s exterior surface before switching to 120 grit and hand-sanding. Soon after lunch, it was ready for primer so I hung it from the rafters, donned my painting apparel and mask, mixed a batch of urethane primer and gave the skin three good coats. After an hour of curing, I moved the door to the driveway and hung up all the interior bits of sheetmetal for the shooting of the satin black. A couple coats and they looked like new. The lovely Loriann convinced me that brushing the paint on the interior would look like crap, so I spent the time in between coats masking. With that finished, it was time to roll Ringo back into the garage and shoot the interior surfaces with the same rattle-can Rustoleum. All that went better than I’d expected and I was able to get three coats down on every exposed area of primed metal before dark. That was it for the day.

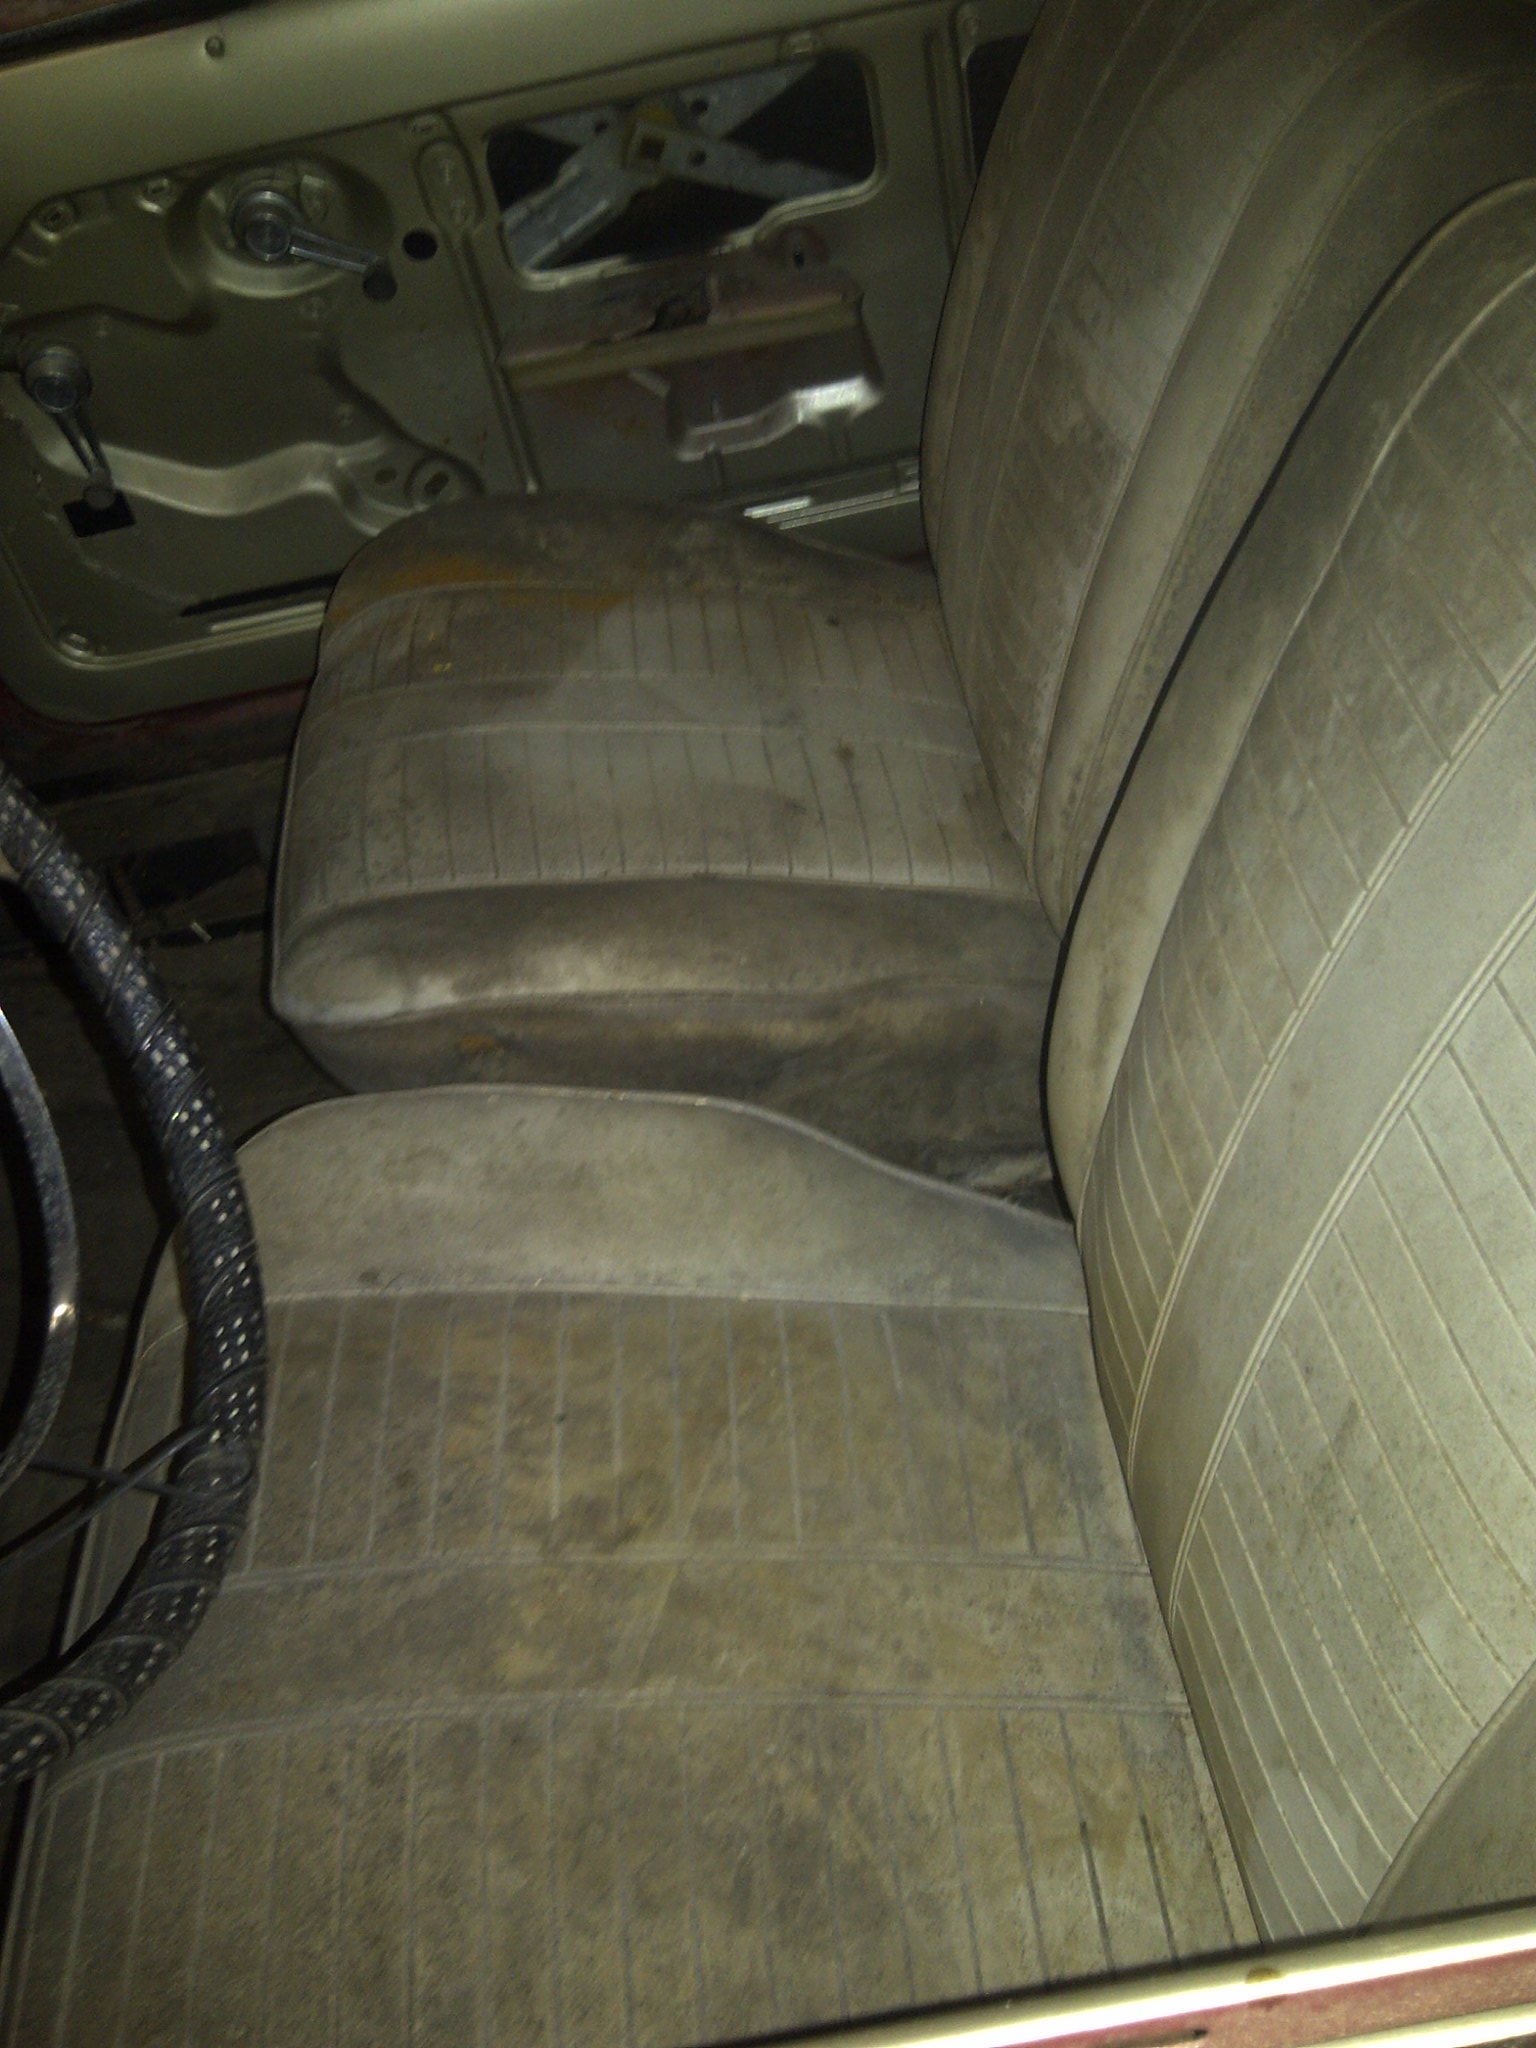
Friday I pulled off all masking and started some reassembly while I waited for the air temp to heat up. In went the nearly-black carpet pieces and the rear package area covers followed by the speakers to hold the latter pieces in place. 
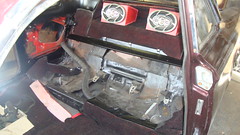
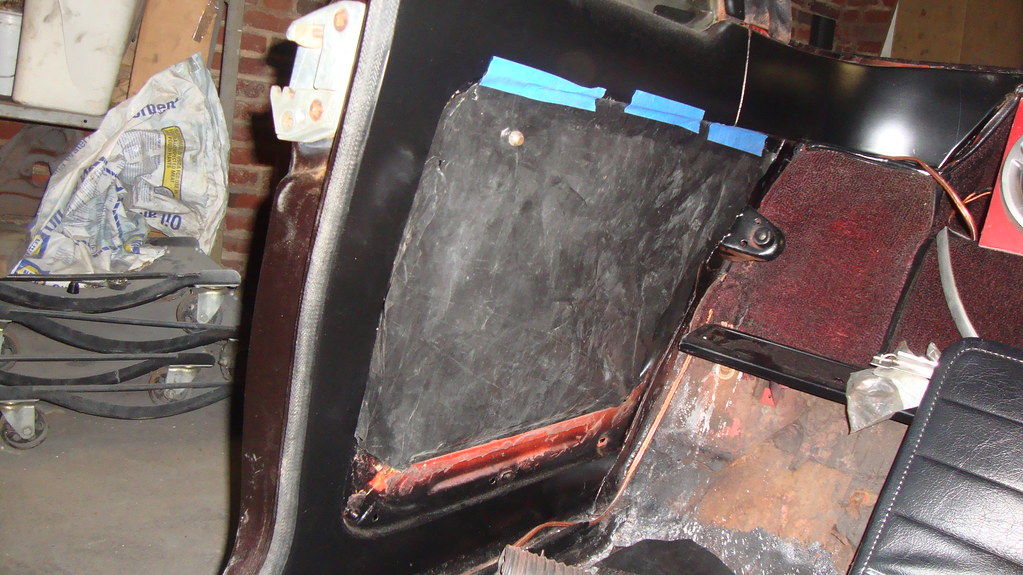
With the carpets in I was able to see a screw-up – I’d matched Lucy’s seatbelt mounting hole locations when drilling into Ringo’s floors, but sadly, the holes in the carpet did not match up with the new mouting holes. I’ll just make new holes in the carpet since I don’t want to deal with filling in holes in the sheetmetal flooring. Since the loose interior trim was fully dried, I proceeded to install all of them into their homes. 
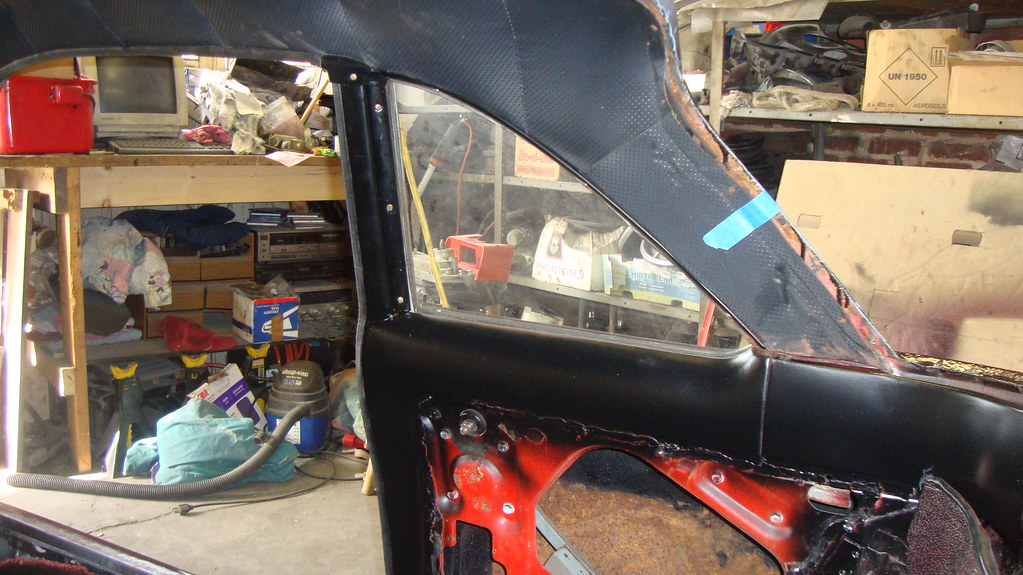
Next, it was time to deal with the door. Back on the sawhorses so I could smooth out the primer and rinse off the residue. Then back up into its hangin position before wiping it down completely with Wax and Grease Remover. Finally, I was able to mix a batch of Black Cherry Pearl to lay down some layers of paint. Having made as many precautions against fish-eyes as possible, I felt confident that I’d end up with a nearly perfect job, but I was sadly mistaken. The day before I had cleaned the primer out of my Harbor Freight gun, disassembled it, and blew out the passages as best I could with dry, compressed air. So, after test shots on cardboard and my anniversary engine lid anniversary engine lid that both looked fine, I laid down a light coat onto the door. I was shocked and mightily pissed to see an array of tiny gray dots forming on the door. Since there were already some fish-eyes in the rest of the paint job, I continued on resigned that the door would also sport the spots, but at least it was the passenger door. After four coats of paint, it actually wasn’t too noticeable. With the paint on, I cleaned the gun rigorously again disassembling and blowing out the passages before mixing and loading clear into the cup. While spraying the first coat of clear, the fish-eyes grew before my eyes and immediately I just stopped what I was doing, threw away the rest of the clear and decided I needed a new plan. It was apparent to me that I had been unable to get all the thinner out of the gun and some was mixing into the coatings as they were being sprayed.

Time for plan B. I’ve got three guns, so I’ll be using all of them the next (and darn well better be the last) time I do the door. My oldest, largest tipped gun will shoot the primer, I’ll be returning the Harbor Freight gun for a new replacement and that one will lay down the color coats, while my touch-up gun with its 1.8mm tip will do clearcoating duties. This way no thinner will ever get in any of the guns before they are used.

Not being in ANY mood to continue working on cars, I knocked off for the day.

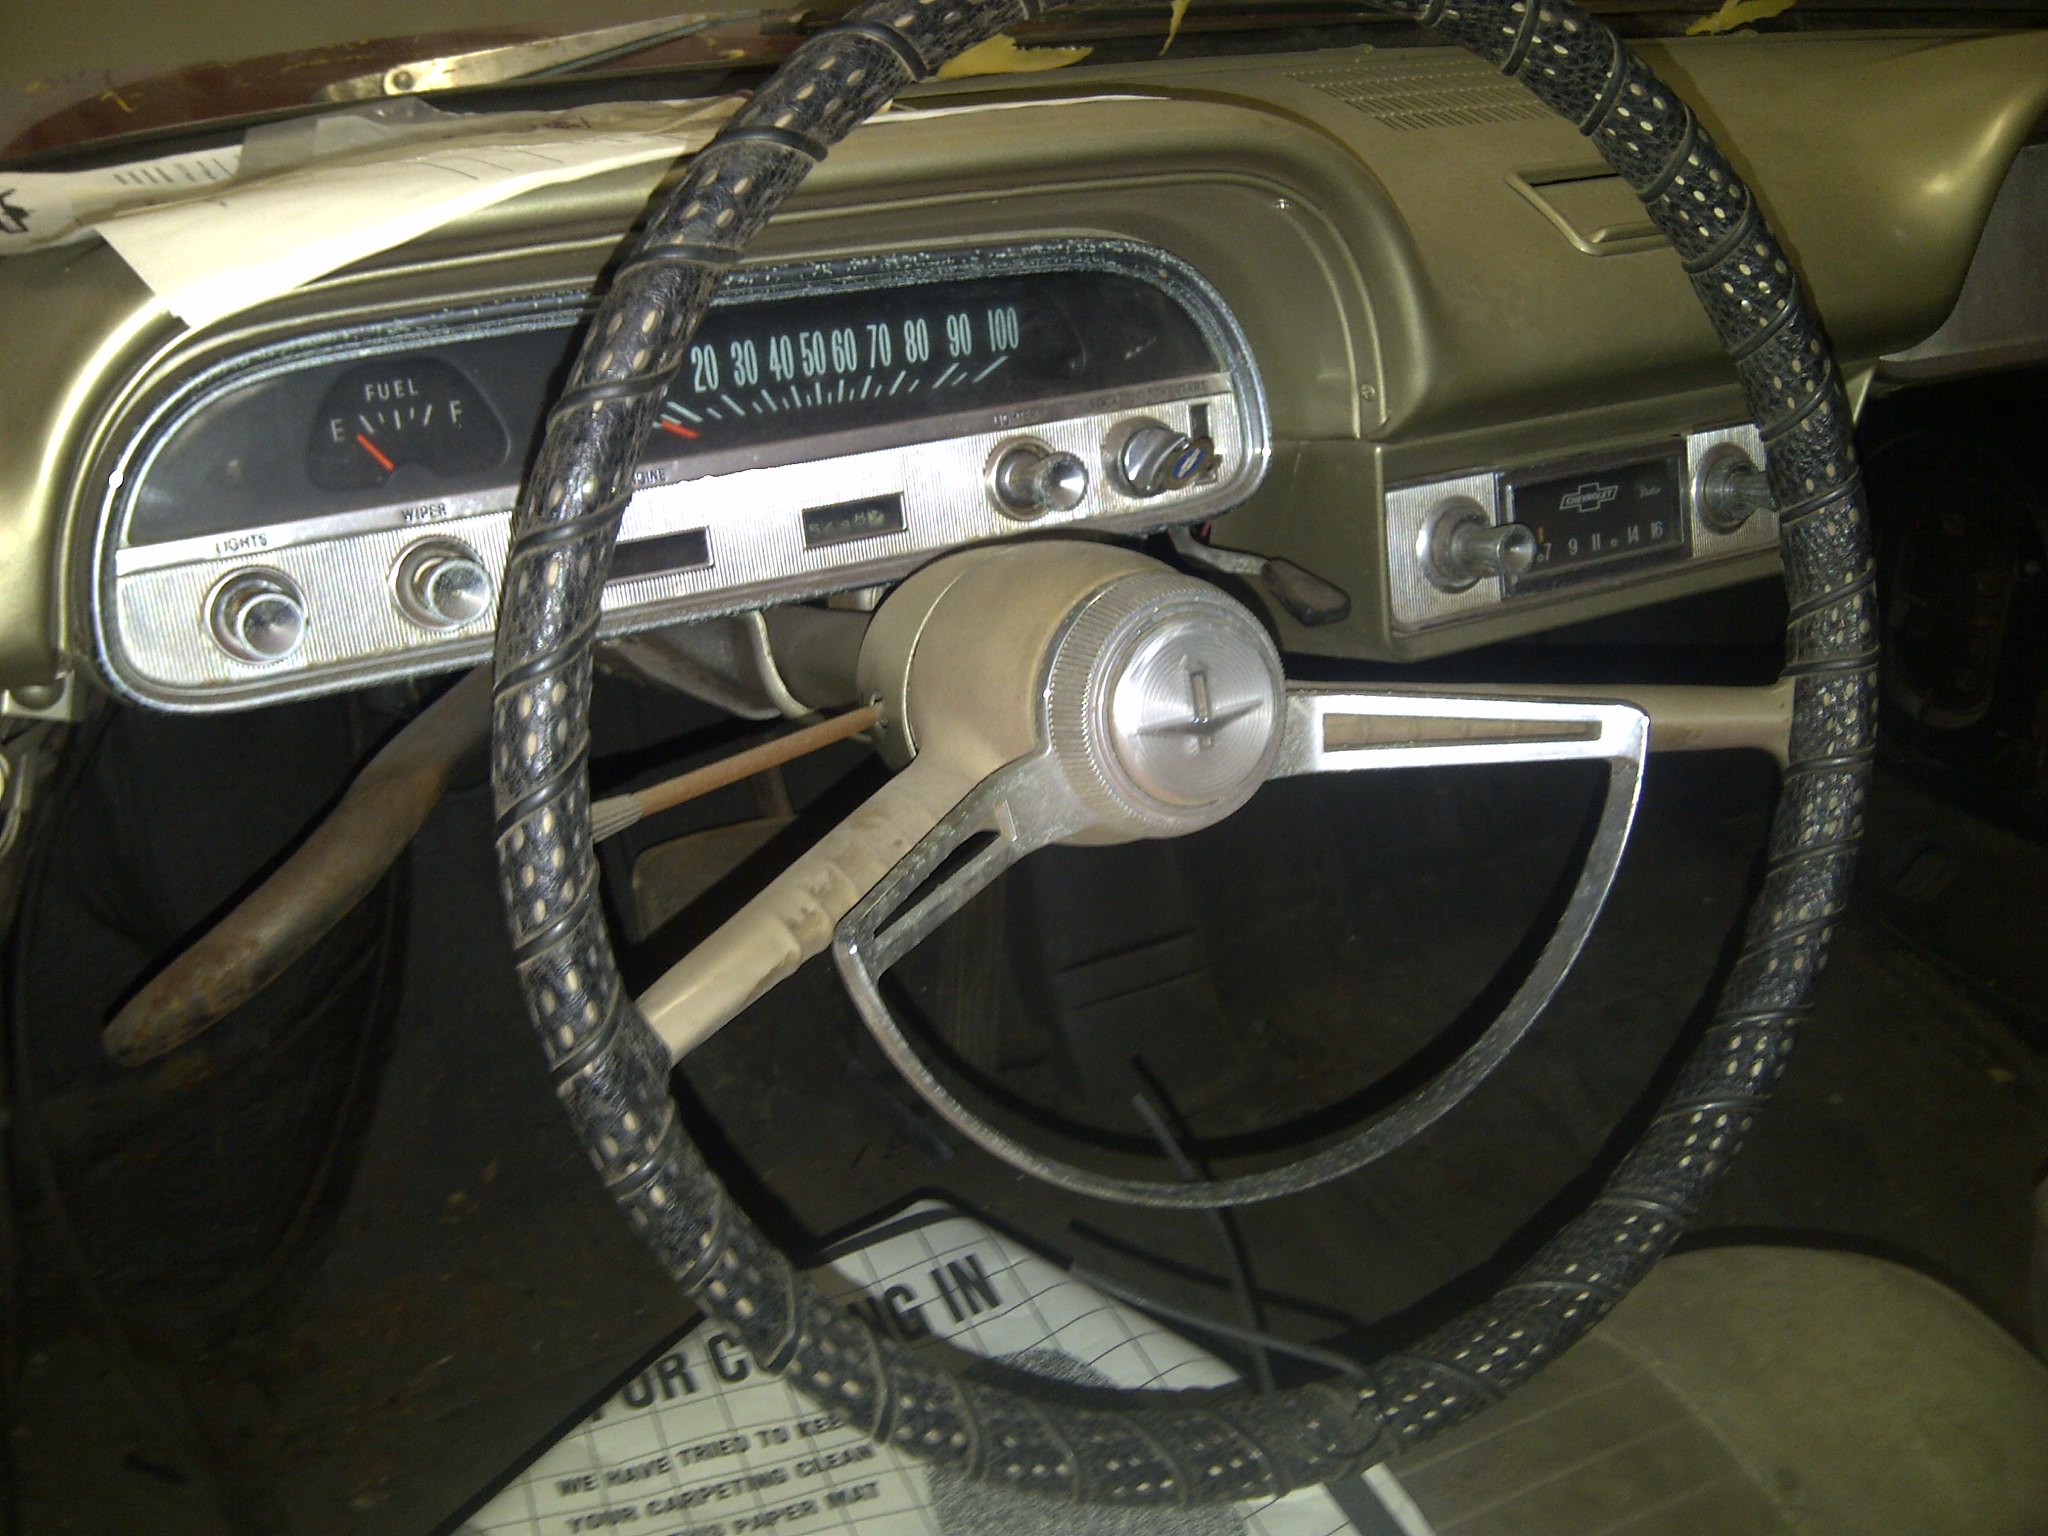
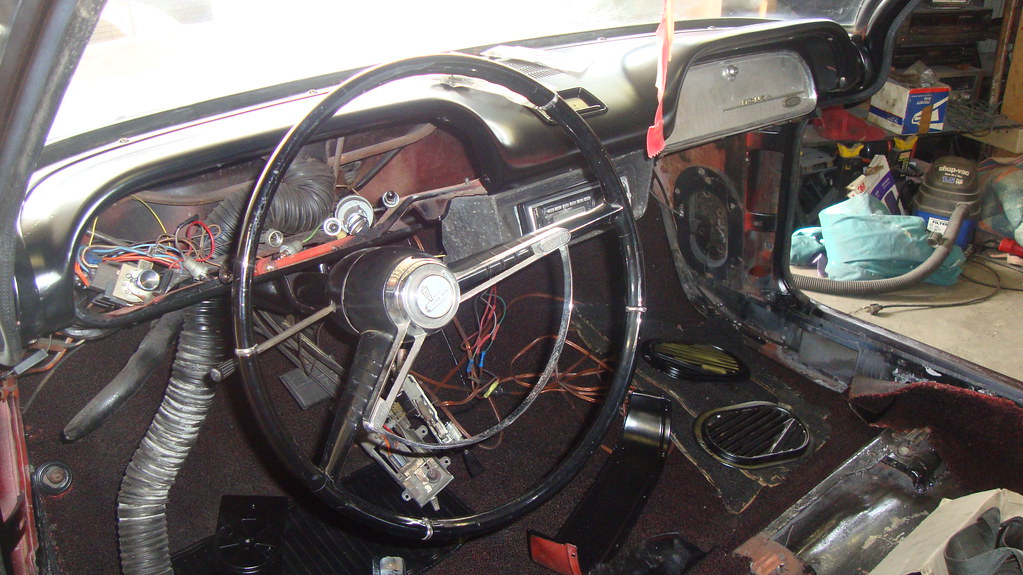
Saturday I swapped steering wheels and pinchweld trim with Lucy and installed taillight assembly. 
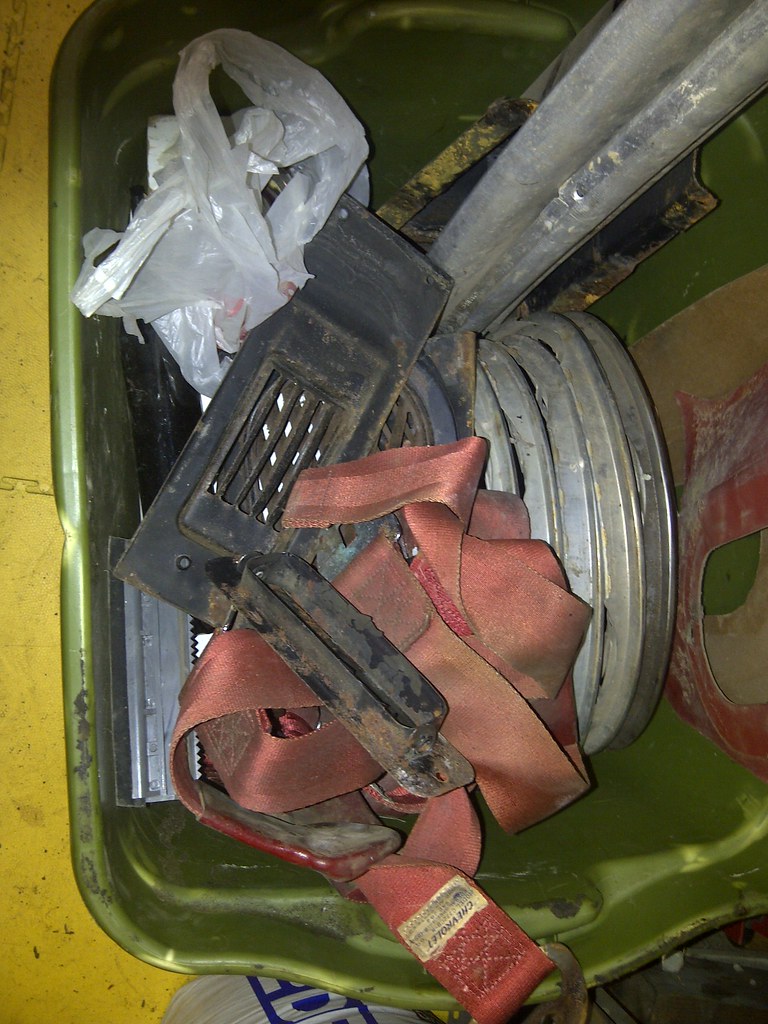
The latter activity was time consuming since I had to find the four sockets and lenses and all the hardware and then rewire them to the car since they were not cautiously removed a year ago. One of the repairs I had to undertake was the replacement of one of the contacts. Somehting I hadn’t done before, but it all went well. 
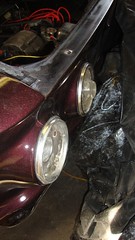
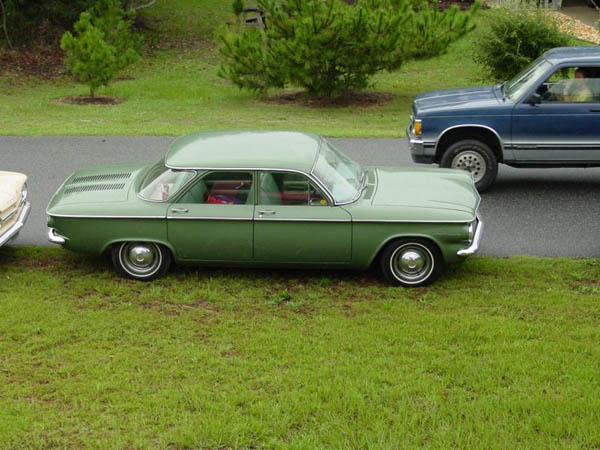
I still need to replace a couple lens gaskets with new ones and connect the ground wires when I install the shroud seal strips, but I’m calling that significant first step in the exterior reassembly complete. The last thing I did on the weekend was screw on the chrome trim pieces around the windows. This car is going to look awesome when I FINALLY get it all back together.

Wednesday, November 23, 2011

Perspective can be Painful

I’ve been cruising along here with only the normal negative influences of the TTT, so not that many demands have been placed on my time (or bank account) by the house or the other cars (thank You Lord). All that changed last week when a litany of issues began to invade my staid little life. First, the house’s hot water heater sprung a leak, then the lovely Loriann was sideswiped by an impatient idiot, and finally, Ariel contracted appendicitis and had the offending organ removed Monday night (thank God she was smart enough to have the intense abdominal pain checked out before said sack burst). All that has put a real wrench in my getting good Ringo-time.

Well, the replacement water heater has been installed and is functioning properly, the lovely Loriann and insurance companies will deal with getting the PT Cruiser’s mirror replaced, and Ariel is home recovering, so I’m ready to knock out some serious Ringo progress.

With the four day weekend only hours away and sunny, sixty-degree days on tap, I can plan the tasks I hope to complete by the end of Sunday. First will be to roll Ringo out of the garage and do battle with the passenger door for hopefully the last time. The initial skirmish will be sanding smooth the mess that’s currently on it, followed by cleaning and a few coats of high-build primer. I’ll need to be careful to not sand through the epoxy primer so I’m not required to shoot a protective coat or two of that stuff. While letting that cure, I’ll move on to spraying primer on the last pieces of loose interior (gage and glovebox domes) in preparation for their final coat of satin black. Next will be the dying of the carpet. Mikhaila just moved the box filled with cans of VHT’s black vinyl die to ensure they’re warmed up and ready to go. After that the primer should be dry enough on the loose interior bits for me to lay down a couple coats of rattle-can Rustoleum. Included in that paint work will be the inside surfaces of the two doors. Next, I’ll be sanding the interior surfaces I’d brush-primed the other night. With those ready for paint, I’ll need to make the hard decision about how I finish coat them. Given the major pain it would be to properly mask, I’m still very much inclined to paint the hard-to-reach areas with a brush and save the spray for the dash and maybe the areas under the rear side windows. We’ll see how ambitious I am. Finally, I’ll move on to putting the finish coats of color and clear on the outside of the passenger door. I’ve purchased a new in-line dessicant dryer, so I’m confident the fish-eyes will not be the issue they were before.

I’m excited about making some significant headway towards the light at the end of this roadification tunnel.

Thursday, November 17, 2011

Out With the Red

After last night’s vacuuming, wiping, and priming, Ringo’s interior is almost devoid of red. Some patches here and there will be covered by panels, carpet, and the back seat. There will, however, still be a bit of visible crimson if one peeks under the dash – a reminder of past times.

Tuesday, November 15, 2011

Prepping Ringo's Interior Metal

Last night I spent some time sanding all of Ringo’s interior red surfaces in preparation for priming. I’ve decided I’ll use Rustoleum rusty metal primer and apply it with a foam pad. My hope (and prayer) is that I’ll be able to lay it down smoothly enough to preclude any sanding before spraying the finish coats of satin black Rustoleum. My real hope (and REAL prayer) is that it goes down so nicely with the pad that I’ll be able to put on the finish coats with the pads as well. The masking required to prep for spraying is probably as bad as what I had to do before painting the outside. I truly don’t want to go through that again.