Showing posts with label interior. Show all posts

Friday, November 18, 2016

So Much To Do, So What Do I Do?

There’s a guy here in Maryland who recently posted on Facebook that he’s looking for a daily-driver Corvair. Given all the work ahead of me with Scarlett and, probably, Luna, I’ve been toying with the idea of trading Glinda for something more modern – like a mid-90s MX-6. So, after some thought I messaged him that I’d sell Glinda for $2200. He says he’s interested, but nothing’s happened.

If Glinda didn’t need so many little issues dealt with, I wouldn’t even consider giving her up, but she does, so I am. In addition to the items on the To-Do list (see sidebar), here’s a mostly complete list in no particular order.

Install the Cobalt rear seat

Clean and reinstall the carpet
Fix the courtesy light
Repair and install the GUP driver’s door panel

Replace the rear bumper

Install the GUP steering box
Splice the broken oil pressure gauge tube and replace the ferrule at the rear of the gauge
Remove the heater fan and clean and lube the motor
Replace the package tray cardboard with something that will accommodate speakers
Install a good mount for the racing harness shoulder belts
Bolt down the fourth hole of the each Cobalt front bucket seat
Weld in a new trunk bottom

Rebuild the blinker switch
Plug the smog hole and AT dipstick hole in the engine bay

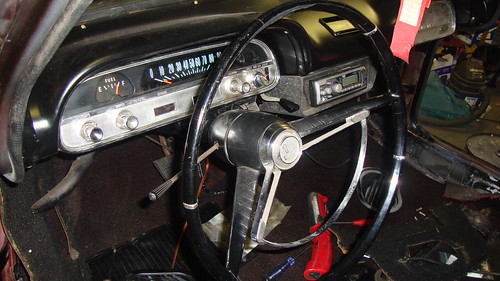
Replace the gauge panel with a GUP I’ve got from a manual shift car (need to choose 500 or Corsa style)
Replace the hood with a GUP I’ve got

Eradicate rust: rear shock towers, multiple body locations


Paint the car orange

Kinda’ daunting given all my other commitments (put big sad face here). She runs really well right now, so I do love to drive her.

Wednesday, September 21, 2016

Second Seat In

Yesterday, after dinner, I donned grungies and proceeded to do what had to be done to get the front passenger Cobalt seat installed in Glinda. I placed the seat in the car lining up the outboard rear mounting screw, and marked the locations of the four feet on the floor. The angle grinder with a wire brush made quick work of removing all coatings from the areas to be welded to, while the bench grinder’s wire wheel cleaned up the four pieces of square tube. The angle grinder, now with a cutoff wheel installed shorted the feet so they’d fit into the tube pieces. After rolling the MIG welder out to the car, I welded the four pieces of tubing to the floor. For some reason the welding was not a nice as the driver’s side even after adjusting the feed rate a few times. I remembered that I’d put the heat setting on C, but I’d forgotten what had worked for the speed before. It also could’ve been that the connection to ground was farther away than last time. So while it didn’t look as good, the weld was still complete enough to provide good anchors. Once the four tubes were attached and the welds had cooled, I covered all the exposed steel with primer and let things dry while I turned my attention to the clutch again.

This time I decided to actually follow directions when setting the locations for the two clevises (or is that clevii?). After putting Glinda up on the ramps, I slid under the rear and disassembled both clutch linkage pivots. I tugged on the cable with roughly 15 pounds of muscle and spun the first clevis down the thread until the pin lined up with the hole in the fork (z-bar). All this with the fork set as close to 7/8ths of an inch from the cross-member as I could measure. With the fork engaged with the clevis, I then pulled all the slack out of clutch and spun the second clevis until the pin lined up with the corresponding hole in the other end of the z-bar. The final instruction was to, “Back off (3) Adjusting Rod three turns and assemble to lever with (2) Clip.” When something’s underlined, I tend to think it’s important. Well, I backed it off three from being inline and now the clutch grabs as soon as it’s off the floor. I think three should be two. Since the rear was up on the ramps, I

Having given the primer some time to dry, I decided I could install seatbelts and the front passenger seat. The seat bolted right in, so now I've got the ability to transport a passenger.

Before calling it a night, I started Scarlett’s engine to see if my vacuum blocking had fixed the right side’s cool running. The engine fired right up and there’s now a significant amount of vacuum at the right carb’s air horn and no hissing when I put my hand on top. However, the choke still didn’t move much from cold, but I can attest to the exhaust manifold putting out the heat. Not sure what the deal is – maybe the thermostat is bad. I’m thinking of investing in a new tool – an infrared gun to compare right and left sides. Also, thinking I’ll swap right with left carbs to see if the problem stays with the side or follows the carb.

Wednesday, September 14, 2016

I Like Welding ... or How To Put a Bucket Seat in a LM 500


With my semi-daily-driver Ringo soon to be parked in someone else’s garage, I needed to get Glinda roadworthy again. Currently, she’s occupying the driveway with her interior in disarray. Before last night the only front seat that would quickly bolt in was sitting in one of the Corvair Ranch’s buildings, so something had to be done, and quickly, to get the Cobalt bucket seat bolted in a space where no bucket had gone before.

I tried to find a good photo online of the front foot of the Cobalt’s seat track, but was unsuccessful, so the following, poor enlargement with red highlighting will suffice to enlighten what I needed to deal with. Coincidentally, this configuration is somewhat like an EM with hooks on the front of each track that go under a __|~~~~|__ shaped bracket bolted to the floor.

In preparation for installing these seats, I bought a piece of 1” square steel tube from Home Depot. My plan was to weld inch-an-a-quarter long sections of the tube (cut with the a disc in the angle grinder) to the floor and slide the feet into the open end. Since the foot was taller than the ¾” opening of the tube, I cut down the feet to fit. This also slightly lowered the seat in the car. LM 500s with their front bench seat only came with threaded mounting holes in the floor for the outboard ends of the seat – no inboard holes. I lined up the rear mounting hole of the new seat’s track with the outer threaded hole in Glinda’s floor and, fortunately, the center of the seat matches up with the center of the steering wheel – TYL. Using masking tape, I marked where the two tube pieces needed to be welded to the floor and then removed the seat. Out came the wire wheel and off came the paint in the areas where the welds would be. The sections of square tube made a visit to my bench grinder’s wire wheel to remove any external coatings that would impair the weld. I placed the first section on the floor holding it in place with a block magnet, connected the ground cable of my MIG welder to the nearby center seatbelt fitting that’s bolted to the body, and proceeded to lay down a bead of molten metal. The welder was set for melding sheetmetal, so I bumped up the heat and feed since the tube was significantly thicker than the car’s skin. While the first line was not that pretty, the next two looked pretty good (see below – you be the judge). I welded in the third and fourth sections replicating the spacing I’d measured from the actual seat. The moment of truth came when I hefted the seat back in, slide the front of the tracks into the ends of the square tubes and happily saw the outer rear hole line up perfectly with the threaded hole in the floor.

I haven’t figured out what I’m going to do with the rear inboard hole yet since it sits partially on top of the tunnel. I’m leaning towards welding in a piece of 5/16ths threaded rod. All in all, a good night in the driveway.

Tuesday, August 30, 2016

The Inevitable Rust Repair Commences


The last opportunity to go time trialing is quickly coming up. The NECC moved its end-of-summer event to the twenty-fifth of September. While I’m not sure how I’ll swing it financially, I need to get the car track-ready or it’s all a moot point. What are the track-ready tasks? Put in the bucket seats, adjust the clutch linkage, and get modified carburetors (jets relocated to prevent cutout on long turns) are the two major ones. I can probably get away with just that. Other nice things would be to get the trunk welded and relocate the battery, but I don’t see that happening with the short time I have left coupled with the house and car projects that are currently on my plate.

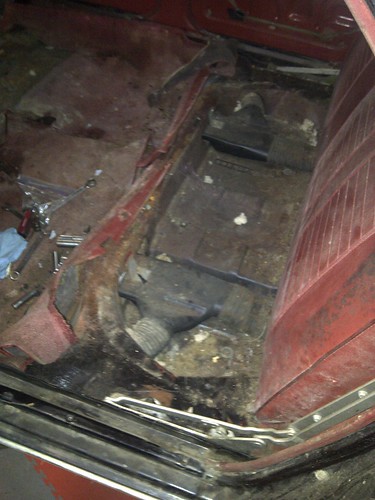
To start the ball rolling, I spent some time in the driveway with Glinda this weekend. Friday evening I pulled out the front bench seat and the front section of carpeting. Doing this necessitated removing the gas pedal. With the carpet gone, a rusty mess was exposed. After I went after all the loose stuff with a wire wheel, I could see fully what work I had ahead of me. Not too bad. For the most parts isolated to the front passenger footwell area.

With a cutoff disc on the grinder, I removed the rotted steel being careful not to cut through any fuel lines (been there once, don’t want to go back again) or into the channels under the floor that weren’t rusty (GM spent the money to have them galvanized). Next, I put the flapper wheel on the grinder and cleaned up all the edges where the patches will go as well as surfaces of the channel where I’ll be plug-welding the patches. The plan is to butt-weld the patches at the perimeters which requires the patch to perfectly follow the contour of each opening. That’s the next part of the job – making patterns from paper, transferring the outline to sheetmetal, and cutting out the patches. That’s for another day.

Tuesday, August 9, 2016

Full Speed Ahead, Scarlett


As the sun shone through the garage windows Saturday morning, Mikhaila and I could tell it was going to be another hot, humid day – finally time to dig out the garage-only A/C unit from the basement. It’s marked garage-only since the fan doesn’t start without some help and never gets up to the spinning speed it should, but it’s still makes cold air, so into the window it went.

The second order of the workday was to make Scarlet rollable again, and that meant dealing with wheels and tires. We pried the damaged tires off Ringos rims and the good tires off Glinda’s green wheels. The good tires, whitewalls out) then went on the black four-lugs and were filled with air until they their beads popped into place (much to Mikhaila’s surprise). Once we pumped them high enough (40 psi), the bubbling at the bead stopped and they were ready to go on Ringo. First the rear, then the front, we freed up Scarlett’s smaller tires and made Ringo sit flat again. Scarlett got her 185-75R13s back and we rolled her into the garage and quickly shut the door to keep as much cooler air in as possible.

I’d decided we needed to do the minimum required to quickly get this car roadworthy for Mikhaila, so we focused on getting the engine ready to run. The seals on an EM are 3” or so wide pieces of leather-like rubber. Originally, they are stapled to the top sheetmetal shrouds. While this is the preferred way of attaching replacements, riveting is MUCH easier, so that’s the route we took. With a GUP front shroud (good, pliable seal still in place), we only needed to deal with the two side ones. After marking drill locations, I had Mikhaila put in holes using the drill press. With me holding the shroud and the seal, she then poked holes in the seal using an awl followed by the rivets and the shrouds were ready for installation. First, though, we needed to remove the old front shroud, and that necessitated disconnecting the battery cable and throttle linkage that pass through a hold in the shroud. Of course, that little task wasn’t so simple since we had to remove the left rear wheel to get access to the solenoid. We then snaked all three top shrouds into place as well as the engine’s top cover and bolted them all into place. Finally, working under the car and with the wheel already out of the way, we installed the outer seal retainer to the driver side. We tried to do the passenger side, but the muffler and wheel made it too difficult, so, since it was past dinner time, we quit for the day.

Sunday, Mikhaila had to work, so I did a couple quick Glinda tasks – adjusted the clutch and sewed the headliner. Yes, the same headliner I just finished writing that I’d be replacing. Well, I’m such a cheapskate and the needle and thread were handy so I just stitched the gap closed.

Wednesday, August 3, 2016

Some Tweaks Required

This morning I chose Glinda to by my whip-of-the-day. It took a bit of musical cars last night to make her available. After dinner yesterday the lovely Loriann, Mikhaila, and I drove the truck over to the nearest, still open, tire shop with the wheels and tires that needed swapping. The manager told me he couldn’t do the swap because the tires were tool old (date mark of 2006), but he did let his technician (I think that’s what they’re called now), pop the tires off the bead - I can do the rest of the job.

When we got home, I needed to move the awesome Challenger (it’s appropriate the lovely Loriann drives an awesome Challenger), and Glinda out of the driveway and garage respectively. That opened a slot for Ringo to go into the driveway because he can’t sit on the street risking a ticket for not moving for 24 hrs.; followed by the truck because I didn’t want to roll the tires so far; followed by the awesome Challenger because we won’t park that car on the street.

The first annoyance I noticed when moving Glinda is the take-up for the clutch is now way too high. Not so much that the clutch is slipping, but still annoying. I’ll adjust that when I get an evening. The second annoyance is another seam in the headliner has fallen apart. I’m giving up on sewing it myself and will have to support my Corvair parts supplier to the tune of $105. The third annoyance is the door panel is still peeling away. The fourth annoyance is the fitting at the back of the oil pressure gauge still leaks and I will have to get another ferrule and install it correctly. The fifth annoyance is the steering is still too loose and I will need to get to the Ranch and pick up that replacement steering box. The sixth annoyance is the Cobalt seats are still not installed. The final annoyance is the car’s body and it’s rust and missing 500 emblem. Even in the face of all these annoyances, I still REALLY love driving this car. I wish it was nicer looking (read no rust and a new coat of orange paint).

To address some of the issues, I gave Jeff a call at the Corvair Ranch. He’s still got the steering box, he’s got plenty of door panels for me to pick through, and he’s got some good used emblems I can choose one from. I told him I had a bunch of parts I needed to bring up to him, and he promised we could work out some sort of deal.

Tuesday, October 20, 2015

Three Steps Closer to a For Sale Sign

This weekend I was actually able to spend a lot of time working on cars (some Corvairs even) while still completing the major house project I had committed to. Saturday I spent a couple hours redoing Ringo’s rear brakes. This was one of those projects where one thing led to another which led to another. First, as I was disassembling the right rear to install the GUP e-brake cable, I noticed the shoe linings were in pretty rough, cracked shape, so I went to the box of GUP EM brake parts and pulled out two forward and two rear shoes to use. Once I got the right side put back together I moved over to the left. There I found the liners in even worse shape (had it been that long since I’d changed them?). Anyway, I put the parts back together including lubricating and turning down nearly all the way the adjusting wheel. Next, putting the hub on was much more difficult than it should have been. I made a closer inspection to ensure nothing was amiss with my work and I found the rear shoe wouldn’t retract completely to the post. Close inspection showed the one piston was seized in the wheel cylinder. A few persuasive taps with a hammer and the piston retracted and seemed freed up. I completed the brake reassembly, mounted the tires, and dropped his rear off the jackstands. After firing up the engine using the hotwire under the hood, I let the engine warm up thoroughly while I put away tools. Next, I backed him up onto the ramps so I could properly adjust the emergency brake cable length. Once that was done to my satisfaction, I drove him back down, and moved on to the more pressing project of the day – the new kitchen.

The next afternoon I’d promised my buddy, Jonathan, I’d come over to see if we could, together, solve his Corsa’s starting woes. Of late, the engine won’t consistently crank when the key was turned – the starter would spin, but the pinion of the Bendix drive wasn’t always engaging the ring -gear on the pressure plate. Additionally, the last time he’d tried to crank the engine, the solenoid got stuck in the start position and the starter just spun away. The only way to stop it was to disconnect power to the starter. We did a bit of checking of the wiring and everything seemed to be in good stead (12 volts to the purple wire when the key is in the Start position, power to the engine with the key in the On position, etc.). After those checks and reconnecting all the leads, lo-and-behold the starter stopped its incorrect spinning and responded to the turn of the key again. We hadn’t, however, fixed the inconsistent cranking. The engine would only turn on every fifth or so turn of the key, and once it did start cranking it wouldn’t even make it a full revolution before the pinion would pop out of engagement and the starter would uselessly spin freely. Jonathan removed the starter and we connected it directly to the car’s battery and watched the Bendix as I shorted the S terminal to 12V. Strangely, the pinion would pop out upon the starter being energized, but it would not stay in the full out position. After a second or two it would begin to slowly draw back into it’s at rest position even though the starter motor was still spinning away. Hmmm. Bad starter perhaps? He’s going to go get another rebuilt one and we’ll keep our fingers crossed.

After returning home, still wearing grungies, I went back to work on Ringo and replaced the balky ignition switch (seemed to be the theme for the day).

The last task for him was to replace the front seat belts. The ones he'd been sporting since Ariel and I put him on the road came out of my LeMans and allowing them to disappear with his sale would no do. The shelf contained a number of replacements, but I chose a set of new (although probably circa 1975), brown ones from Pep Boy's. I'd bought these at part's auction a few years back.

Now Ringo sits at the curb awaiting a round-the-neighborhood test drive and transmission fill before a few days of daily-driving. Once I'm sure the bugs are worked out, the Craigslist ad goes up.

Tuesday, October 21, 2014

Wonderful Weekend of Work

It ended be a very car-full weekend for me. Along with changing the oil and filter in the truck and the lovely Loriann’s daily-driver, I got to spend more than three hours of quality time with Mikhaila working on her car Saturday. I had her clean the engine’s sheetmetal pieces; remove the rusted muffler hanger and disassemble it to prep the bracket for painting; clean a set of sparkplugs, gap, and hand-tighten them into the heads; and finish cleaning the seats.

While she was laboring away, I did the minimum repairs necessary to get Ringo roadworthy. I need to take the lovely Loriann’s car off the road to replace a front wheel bearing, so a Corvair must be pressed into daily-driver service. Since Glinda was still many hours of reassembly away from being drivable, Ringo was the best candidate. There were two issues that were keeping him in the driveway – a broken muffler strap and a seized carburetor shaft. I removed his left carb and thoroughly soaked the throttle shaft with penetrating fluid, working the shaft back-and-forth until it moved freely and completely. With the carb bolted back to the head, I went hunting for the replacement strap I’d bought from the Corvair Ranch a couple months back. I could’ve sworn it was in a small box of parts, but after fifteen minutes of fruitless hunting for the package, I decided to check my shelf of GUPs and GNPs, and there it was – in the cubby marked Exhaust. Go figure. I’d actually put it away. A few minutes of fiddling and Ringo’s exhaust system is now properly restrained. Since his starter has been very reluctant of late to function properly, it was quite a surprise when a turn of the ignition key resulted in a spinning engine. It fired up almost immediately and settled into a clanking-filled idle (a lifter bled down). After about fifteen minutes of idling, the noise went away and I took him for a test drive around the neighborhood. It took a few stops before the rust was rubbed off the drums and the brakes stopped grabbing and squeaking. It’s strange to see an EM parked in front of the house – it’s been a very long time.

Sunday it was Glinda’s turn. As I left off in last weekend’s antics, I needed to install a helicoil before reassembly could commence. I cut the new threads using the supplied tap and followed that up with the helicoil twisted in to the prescribed depth. The last step in the repair was knocking off the tang which I accomplished with make-shift punch.

Next, the drivetrain halves (engine & transaxle) had to come together. Amazingly, after installing the input shaft onto the engine, I got the transaxle to slide into place without any problem. The bolts that hold the halves together were then installed and the drivetrain was pushed into position and lifted into place. I had to remove the center rear seal retainer to get the edge of the oil filter housing to clear. It took some jockeying up and down and back and forth, but by lunch I had the back of the engine attached to the rear motor mount.

Next was the front of the drivetrain. The three bolts that hold the transmission to the crossmember went in nicely. I held my breath as I carefully torqued the one bolt into the newly repaired hole, but it pulled the joint together just fine. With the jacks out of the way I moved on to reinstalling the u-joint caps on the differential hubs. Remembering to use the ratcheting strap to pull the wheels together, this task was quickly completed followed by bolting up the brackets at inner ends of the strut rods. That job went quicker than expected, so in not time I was realigning the shifter coupling with the transmission shift shaft. Once centered, I installed the pin, washers, and cotter pin. Next on the list were the throttle linkage pieces. I found the new rubber grommet that I’d bought and popped it into the hole in the transmission pivot plate before poking the ends in and retaining them with the little c-clips (my caution was rewarded by me not having any pop off into oblivion. The clutch linkage assembly was supposed to follow, but, after getting the engine side of the linkage attached, I discovered the pedal end had popped out of place and wasn’t connected to the pedal anymore. That was a show stopped since I’ll have to pullback the carpet, remove the cover, find the end amongst cables and brake lines, and then put back in place. There needs to be a retainer that holds this stupid thing in place if tension is taken off it.

Sliding out from under the car for the umpteenth time, I spent the last half-hour before dinner putting things right in the engine compartment. That included reseating the engine seal; connecting the ground strap, ground cable, and oil pressure switch; putting the fanbelt back on; and installing the air cleaner. All that’s left on the topside is to connect the battery.

Wednesday, May 28, 2014

Gone, but Not Forgotten


I told the lovely Loriann, there’s a space in my driveway and a hole in my heart. I’m always saddened when I sell a car; Saturday was no different when TwoTone was hauled away. I can take comfort in the knowledge that the new owner, a really nice guy and his teenage son, will probably have her back on the road faster than Mikhaila and I would have. ‘Vair buddy, John’s, free ’64 coupe sealed the deal. They’ll be converting TwoTone to a 4-speed. It’ll be too cool.

What else is happening with the fleet?

There’s no change, sadly, with the ongoing battle with Ringo’s driver’s door. Even after adjusting the door, it’s back to needing to be slammed. Irrr. It’s nice to report, though, that Ariel’s only needed to use the ignition bypass once.

I spent some time on Glinda last weekend. Saturday afternoon I decided to install the new clutch and brake pedal assembly. When I first started planning to do this swap, I researched what I’d need to do, and had been led to believe that the large support bracket was different to accommodate the clutch, so I bought a used version along with the pedals and pertinent parts. Over the last few weeks I’d cleaned up the used parts, primed them, and shot them with a couple coats of Rustoleum gloss black. With them ready to go, I crawled under the dash to determine the best path of attack. It didn’t take long for me to figure out the bracket that was in the car looked exactly like the one I’d bought. Okay, the hardest part of the job didn’t need to be done. Yay. The existing brake pedal came out once I’d popped off the clips that held the two shafts (pivot and master cylinder rod) in place, slid the shafts out, and dropped the pedal straight down. Getting the new, longer clutch pedal shaft into its pivot hole required me to remove the defroster duct; which required me to remove the glovebox; which required me to remove the new radio housing. With all that stuff out of the way, the clutch shaft slid into the hole, through the brake pedal, out the other side of the bracket. The clutch pedal slid over the end and was retained with a washer and nut. It took a while to convince the duct it needed to go back in, but it finally succumbed, and the rest of the reassembly went well. An adjustment to the brake pedal switch completed the pedal swap. The other task I undertook was repairing the failing vinyl on the driver’s seatback. I’d purchased a repair kit a while back. Step 1 was to glue a backing cloth to the backside of the vinyl surrounding the hole. Since it required a four hour cure, that was the end of Glinda work for the weekend.


Sunday was Luna day. Yes, the car that hasn’t moved in months got some attention. Victoria and I decided it was time to tackle installing the convertible top. With the sun beating down on us, we fought with the attaching the rear window piece to the trim sticks for a couple hours. Finally, we had to give up since the baking black vinyl and cloth were getting too hot to handle. While we made some good headway, it would have been nicer to finish the job. Well, they’ll be other weekends. While she (Luna) was out in the driveway I fixed the tie-rod problem I’d discovered when we did a lube job soon after bringing her home. A previous mechanic had adjusted the joint in such a way as to bind the balljoints. I needed to turn one end relative to the adjusting sleeve, but that entailed some doing. First, I needed to loosen the two clamp nuts from there associated bolts. This was done with great trepidation since these guys are known to just torque right off due to being seized. Well, God was looking down on me since both came off cleanly with only penetrating fluid and careful wrenching. The threaded connection of the tie-rod end into the sleeve took the aggressive application of flame to get it to the point where, with me standing on the end of a pipe wrench, I could get it to move. It only took a few degrees of rotation to free the tie-rod centering it in its travel. After cleaning the bolts on the wire wheel and generously applying anti-seize, I reassembled the clamps, dropped the car off the jackstands, and called it a day.

Wednesday, April 30, 2014

More Photos of Scarlett


Since Mikhaila has moved on, TwoTone will be forever TwoTone to us. I’m now pushing her to give our newest addition a name, but I’m sure she’ll take her sweet time (which is fine). So, for now, I’ll be real imaginative and call her RedVert (update: we've settled on Scarlett).

Last night I went out to the garage and took a few more photos, a couple of which are shown here. Click on this link to view the updated Flickr album.

“What colors do you want the interior?” I asked Mikhaila Sunday.
“I don’t care,” was her immediate reply.
“What about the new top?”
“Don’t care.”

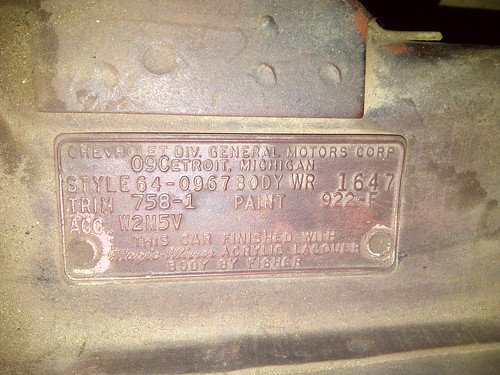
Ok then. We won’t be changing anything that looks presentable. With that in mind, I did a little sleuthing to find out how Chevy originally outfitted this car. Scarlett’s body tag revealed the following information.


Data: 09C (Third week of September 1963)
Style: 64-0967 (1964-Monza Convertible)
Body: WR1647 (Willow Run - 1,647th Monza convertible built there)
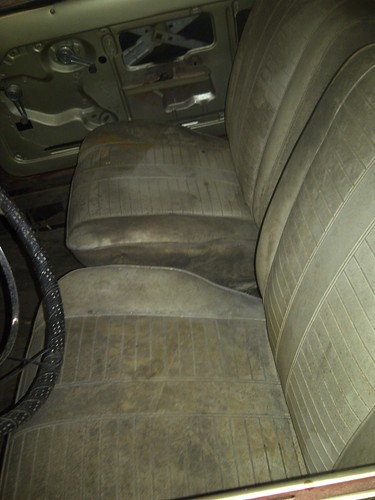
Trim: 758-1 (Fawn vinyl seats, white convertible top)
Paint: 922-F (Ember Red, Fawn interior paint)
Acc: W2M5V (Tinted windshield, Powerglide transmission, custom deluxe seatbelts without retractors {RPO A37})

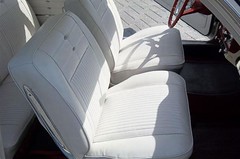
Since I really like the red with the fawn, I’m hoping the seats clean up to reveal the hue of beige and not the glare of white.


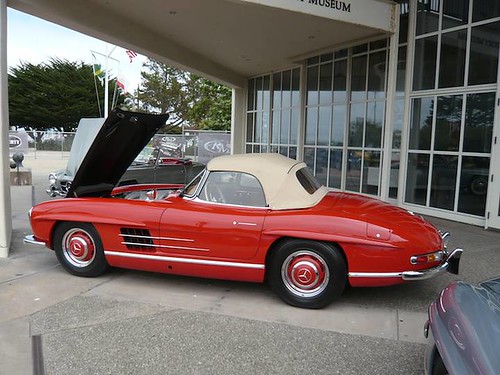
We may diverge from original by replacing the old, failing, non-original, black top with a beige one from Clark’s Corvair Parts. I couldn’t find a suitable photo on the web of a red Corvair with a beige top, so this Mercedes will have to do.

Thursday, March 27, 2014

A Little Progress is Still Progress

I spent a lot of this past weekend on the road with Victoria shopping for a replacement for her recently totaled Mazda5 (not her fault for those keeping score). It was quite enjoyable sampling the best deals on Acadias in the Baltimore-Washington area even if I was just a passenger. I did, however, squeeze in some car time.

Friday evening, due to some automotive logistic issues, the lovely Loriann, much to her chagrin, had to drive Ringo. Upon her return to the house, she immediately informed me that the driver’s door would not latch. I was able to get the door to finally latch, but it obviously needed some attention. The next morning I rolled him into the driveway and proceeded to readjust the door in its opening. I needed a second body to tighten bolts while I moved the door around, so the lovely Loriann, being the only one at home, was asked to help. She braved the mess that is Ringo’s interior (thank you Ariel) and, after a few tries, we were able to get the door into a position where it would close without SLAMMING. In the midst of all that, I was reminded of the looseness of his armrest, so I fixed that by finding a larger thread bolt, rounding off the points of the bolt-head, and grinding a slot for the screwdriver. I was then able to tighten both fasteners and the armrest doesn’t dangle with a risk of being ripped off. Finally, I used a few small shiny screws and re-anchored the flopping interior door panels. Ariel was pleased.

Whenever I’ve had the chance (which is highly infrequently) I’ve been working towards completing Glinda’s 4-speed swap. Lately I’ve been replacing the flywheel rivets with 25mm bolts, washers, and nuts. This project is almost finished as is refinishing the clutch/brake pedal pieces. They are currently primed awaiting a coat or two of black paint to hold back the rust.

Tuesday, December 3, 2013

We Have a Color Scheme


While Mikhaila is still pondering what her car’s final name will be, she has decided upon a color scheme:
  • Exterior (except for roof): Fathom Green
  • Roof: Ermine White
  • Interior upholstery: White
  • Carpet: Gray
  • Interior Painted surfaces: Fathom Green (flattened to a semi-gloss)


By the way, Glinda is still leaving a puddle of ATF at each parking spot I place her in. This is quite disappointing, and maybe the magic elixir from Lucas takes a few days or so to effect a change. Regarding her gas mileage – it doesn’t look too promising.

Ringo has been out of the news lately – and that’s a VERY, VERY good thing. TYL!

Monday, November 25, 2013

Time and Money Spent on TwoTone

My time with the fleet actually started Friday night with Glinda, but Saturday afternoon was mostly consumed by working with Mikhaila on her car, TwoTone.

The Glinda work consisted of using her engine to determine which subassembly of TwoTone’s rebuilt carburetors is bad. As I posted last week, one carburetor assembly appeared to function properly, while the other wouldn’t work right when bolted to the Glinda’s left head. So, on Friday I created a table like the following (yeah, I am an engineer):

Wouldn’t Work Seemed to Work
Bad Top Good Top
Bad Cluster Good Cluster
Bad Bottom Good Bottom

With the assumption that only one portion of the bad carb was causing the malfunctioning, I swapped both the Bad Top and Bad Cluster onto the mounted Good Bottom. While the engine started and ran fairly smoothly, the right side would not heat up telling me it wasn’t getting the proper flow of fuel. Off came the Bad Top and back on went the Good Top. This time the engine ran nicely and soon after the restart, the choke opened up all the way. With the engine fully warmed up and shut off, I hooked up my length of clear tubing with some water in it to the vacuum ports on the two carbs. With the engine running again and the left carb disconnected from the throttle shaft, I turned that carb’s idle screw in until the water was static in the tube. I then turned the small linkage rod until its end lined up with the hole in the throttle shaft. The new carb was now balanced with Glinda’s old carb. Before quitting for the night, I disassembled the presumed bad top and dropped it into the carb cleaner for a good soak. Referring back to my table, the two carbs now looked like this:

Installed & Working Unproven & Soaking
Good Top Bad Top
Bad Cluster Good Cluster
Good Bottom Bad Bottom

Saturday afternoon, both Mikhaila and I had finished our house chores and we headed to the warmed-up garage (I’d gone out about an hour earlier and fired up two of the kerosene heaters). She started by spraying gloss black Rustoleum on the front brake backing plates while I emptied out a bin to collect TwoTone’s removed parts. We then worked together to empty out the salon (interior space) of all the loose pieces I’d stored there. We found some new parts that will be used in the roadification. Next, we moved on to removing the seats. All the fasteners but one were cooperative. I slathered the stubborn nut with the magic elixir of 50/50 acetone/transmission fluid. We’ll let that one sit a while. The final actions for the day were removing sill plates, vent grills and covers, and the seatbelts. Once that last nut is loose, we’ll finish exposing all the floor and Mikhaila can have fun with the wire brush getting rid of any loose rust.


Speaking of rust, I can’t say it too many times - disassembling this car has been quite a treat compared to previous projects. As mentioned before, only one threaded joint out of a couple dozen was seized. We’re quite fortunate to have landed another barn find (Heidi was the other one and more accurately they were garage finds).


Finally, this morning I got on the phone with Clark’s and placed an order for POR-15 for coating TwoTone's floor, a bunch of carpet, paint, and upholstery samples (more on that later) and three wheel cylinders (there was a brand new right front cylinder assembly amongst the parts we pulled out of the salon). Not wanting to pay the nearly $100 for a rebuilt master cylinder, I hopped on Amazon and bought an aftermarket dual master cylinder for $33. I’ve decided I’ll do the conversion to dual from single (1964s only came with a single master cylinder). I’ll need to buy some fittings and a couple short brake lines, but I’ll do that once I have the master in hand. The running expense tally on the sidebar has taken a hit. Won’t be long before we’ve topped a grand.

I mentioned samples – it looks like Mikhaila has a color scheme for this car. She shared with me that she likes a darker green for the body with a white top. For the interior she’s thinking white seats and door panels, black carpet, and a flatter version of the exterior green for the exposed interior metal (dash, doors outside the panels, etc.). I pulled up a photo of a 1960 Corvair in Jade Green, and she liked it so one of the samples I ordered was for that color. The other was for a Fathom Green from 1969. Much darker, but not nearly as 50s as she mentioned she was going for.

Monday, September 30, 2013

A Big Dent

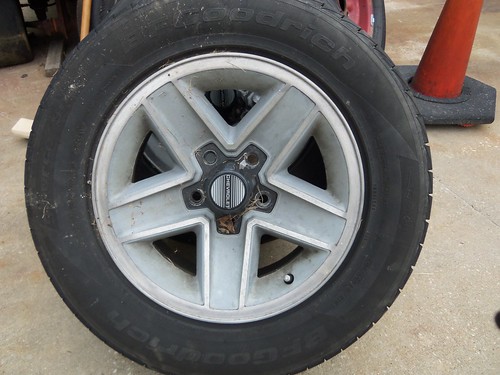
I’m talking about the parts sale yesterday, thankfully, not one of the fleet. At least a couple dozen buyers showed up yesterday and scarfed up a bunch of Rich’s stash. With proceeds over $6000 and low prices, that’s a lot of parts going to a lot of happy Corvair folks. I bought two sets of wheels, an IROC –Z set with tires for Glinda

and a set of 14” Torque Thrust wheels for my LeMans.

I also selected a gasket set to re-seal TwoTone’s engine, a Hurst shifter and LM manual shift dash for Glinda’s transformation, a complete LM engine block (all cleaned up and read for assembly) to replace the 140 block that’s still greasy and has broken bolts stuck in it, an interesting custom dual exhaust pipe with a crossover for Glinda, a set of brand new VelveTouch brake shoes for the next time she and I hit the track, and a GUP Powerglide shift cable for Ringo. I’m reviewing the parts list and photos to see if there’s anything left that I’m still interested in. At the same time, I’m struggling with where I put all this new stuff.

Speaking of Ringo, I answered a local e-mail offering a free bucket seat to the first person willing to drive to Laurel, MD to claim. I immediately replied since Ringo could really use a new driver’s seat that had enough life left in to to allow Ariel to see over the steering wheel. That seat is now sitting on Luna's engine lid waiting for me to have a day where I can do a seat cover swap with Ringo's sad seat.

I did get a few hours of garage/driveway time this weekend. Friday night, I disassembled Glinda’s front suspension enough to extract the two lower control arms. Saturday, after helping with the sale setup (which included loading all my buys into the bed of my truck), I stopped by guru Gary’s house and borrowed his balljoint R&R tool. When I got home, I drug Mikhaila out to the garage where she applied the rest of the primer coat to TwoTone’s gas tank while I did battle with pressing out the old balljoints and pressing in the new. When we were both done, she and I disassembled TwoTone’s left front brake assembly, disconnected the incoming hard brake line from the old flex line, and tapped out the innards of the wheel cylinder. Just by virtue of us being able to tear down the cylinder assembly, I’m confident the bore will be in usable shape after a good honing.

After dinner, she was too tired to continue, so I went back out to complete Glinda’s suspension renew and had the last bolt in place and the rubber of the new-to-her front wheels on the ground by 10:30. Only a few issues: 1. it appears my grease gun doesn’t have the gumption to pump grease into the new joints - I’ll buy a new one this evening; 2. the right front tire was flat – hopefully it’s just from sitting for a few months; and 3. I’m just not sure about how I’ll like Glinda’s stance and look with the new-to-her IROC wheels and tires. The front tires are lower profile 205/50-15s while the rears are 225/60-15. With the fronts being about two-and-a-half inches smaller in diameter, I decided to leave Glinda’s front springs alone rather than executing my original plan of cutting off another half a coil - I figured the difference in tire diameter would drop her front enough to level out her current up-facing rake. That may still be, but the look I need to get used to (or not) is front tires that look tiny in the large wheelwell. I’ll drive her with the new set up for a while and see if it grows on me. I still have the option of swapping the stock steelies and tires back on. Photos forthcoming once she’s completely re-shod.

Friday, July 26, 2013

Ringo Leaving His Mark

When I returned from the convention, I was greeted by a large puddle emanating from Ringo’s rear end. My initial reaction was, since he had sat facing downhill, his previously patched shifter cable was failing even worse than before. It took about a quart of transmission fluid to top off the reservoir. I moved him so he was now parked facing uphill. The next day, however, there was another puddle. Irrrr. Wednesday evening I backed him up onto the ramps to investigate the leak source and saw fluid coming from the patch on the cable, but also from the front of the tranny near the pan-to-housing joint. I tightened all the bolts holding the pan on since they were barely tight. Then, I placed a drain pan underneath and left it for the night. Last night, I found a significant amount of fluid in the drain pan. I investigated more thoroughly and discovered the bolts I could reach at the front of the transmission (the lower front-facing ones that retain the front pump cover) were loose. Now, I am positive I torqued these bolts to the factory specs when I rebuilt this transmission. I guess I should’ve put some thread-locker on them. Fortunately, I could get a socket on these three bolts, so I snugged them down and crossed my fingers. When I checked for leaks an hour or so later, the cardboard I’d placed under the transaxle was dry. Now, either I staunched the flow or there wasn’t any fluid left in the reservoir. I’ll check again this evening and will, regardless, pull him out of the garage and park him on the street over a dry piece of asphalt.

I only bought one part while wandering the aisles of Clark’s setup at the convention. Ariel had been complaining that the current cracked driver's armrest pad was leaving dark stains on her elbow, so I bought a new to the tune of twenty-six dollars. Once installed I’m sure it’s gonna’ be one of those replace-one-interior-part-and-everything-else-looks-even-crappier-so-I’ve-got-to-replace-everything kind of thing. Well, that’ll just be one of those things we’ll need to live with although I know Ariel would also REALLY appreciate a new driver’s seat so she’s not sitting with her butt almost touching the floor having to peer through the steering wheel.

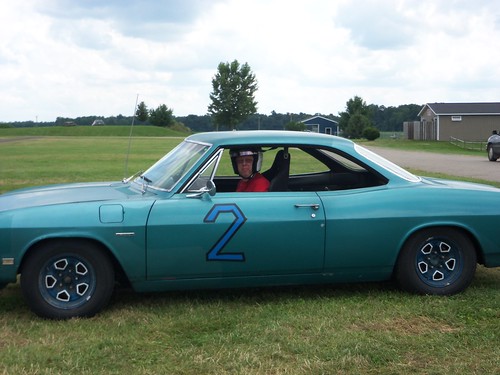
Last evening I also gave Glinda some attention. I swapped out the racing seat for her front bench. It took some fiddling to get the screws to go cleanly through the holes in the carpet and get started in the nuts welded to the floor, but I was finally successful. The seatbelts were also reinstalled. Now, for the first time in a VERY long time, Glinda was able to be pressed into daily-driver duty and did so this morning. Sadly, the bogging when flooring the go pedal still exists, and now the tranny is low on fluid so I've got to take it easy on the turns. I’ve left the awesome taped-on 2 in place because I’m sure it makes her faster.

Thursday, June 6, 2013

It’s a Nice, Comfy Seat

I made the drive out west last night and got a great deal on a very nice and comfortable racing seat. I have no idea how close the mounting holes are to Glinda’s mating bolt holes, but adapting the feet, if necessary, looks to be pretty easy – just weld on some plates. In fact, I may have to do that anyway just to raise the seat since it looks like it sits pretty low. I do want to be able to see above the steering wheel. Also, with the quick-steer arms installed, the steering effort’s gonna’ increase and I’ll need to make sure the thin-rimmed steering wheel is optimally located.

Friday, December 2, 2011

Easier the Second Time


But I truly did not want to have to do anything twice with Ringo’s roadification. That’s not quite working out for me with the multiple attempts at painting the passenger door and then, last night, when moving the instrument panel housing I’d just replaced, the odometer lens fell onto the floor. Crap! I spent the next forty-five minutes removing, disassembling, reassembling, and reinstalling the instrument panel. It really went rather easily, but was still a waste of my precious time. While the panel was out, I went searching for the missing black wire for the cigarette light – and came up empty. I’m positive the socket had 12 volts before, so I need to do some more hunting.

Once I had the panel back in and tested, I connected the radio to the speakers and tested that – it still works!.

Thursday, December 1, 2011

If Only All Work Can Be Done Lying on My Back

Back in 2007, I swapped Ringo’s entire gage cluster with a GUP I’d bought on eBay. The fascia on the cluster did not match the ’61 style, so last night I went through my GUP collection until I found Ringo’s original cluster housing. I then transferred the speedometer/odometer assembly and lens into that housing, attached the freshly painted hood, and, after lowering the steering wheel column, screwed the whole thing into its home. With all the cables, switches, and bulbs in disarray behind the dash, I spent the next hour plus on my back routing, plugging, and retaining until everything was properly placed except for a missing lead – the cigarette lighter’s black wire has gone missing. I’m sure it will turn up and I’ll get full functionality.

Tuesday, November 29, 2011

Assembly is a Beautiful Thing – Painting Not So Much

As outlined in my last post, I had high hopes and big plans for the long holiday weekend. How did I do? Pretty well, but a cheap paint gun held me back from checking off all the tasks I’d listed.

Thursday I rolled Ringo out of the garage and primed the last two sheetmetal parts by first hanging them on a wire strung across the garage. Then, I emptied five cans of vinyl dye onto the carpet pieces.
Next, out came the door and onto the sawhorses – deja vu is not a good feeling. Using my last sheet of hook-and-loop 80 grit sandpaper, I removed the fish-eyed paint from about half the door’s exterior surface before switching to 120 grit and hand-sanding. Soon after lunch, it was ready for primer so I hung it from the rafters, donned my painting apparel and mask, mixed a batch of urethane primer and gave the skin three good coats. After an hour of curing, I moved the door to the driveway and hung up all the interior bits of sheetmetal for the shooting of the satin black. A couple coats and they looked like new. The lovely Loriann convinced me that brushing the paint on the interior would look like crap, so I spent the time in between coats masking. With that finished, it was time to roll Ringo back into the garage and shoot the interior surfaces with the same rattle-can Rustoleum. All that went better than I’d expected and I was able to get three coats down on every exposed area of primed metal before dark. That was it for the day.
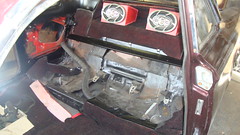
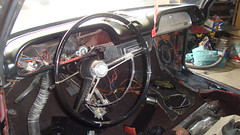
Friday I pulled off all masking and started some reassembly while I waited for the air temp to heat up. In went the nearly-black carpet pieces and the rear package area covers followed by the speakers to hold the latter pieces in place. With the carpets in I was able to see a screw-up – I’d matched Lucy’s seatbelt mounting hole locations when drilling into Ringo’s floors, but sadly, the holes in the carpet did not match up with the new mouting holes. I’ll just make new holes in the carpet since I don’t want to deal with filling in holes in the sheetmetal flooring. Since the loose interior trim was fully dried, I proceeded to install all of them into their homes. Next, it was time to deal with the door. Back on the sawhorses so I could smooth out the primer and rinse off the residue. Then back up into its hangin position before wiping it down completely with Wax and Grease Remover. Finally, I was able to mix a batch of Black Cherry Pearl to lay down some layers of paint. Having made as many precautions against fish-eyes as possible, I felt confident that I’d end up with a nearly perfect job, but I was sadly mistaken. The day before I had cleaned the primer out of my Harbor Freight gun, disassembled it, and blew out the passages as best I could with dry, compressed air. So, after test shots on cardboard and my anniversary engine lid anniversary engine lid that both looked fine, I laid down a light coat onto the door. I was shocked and mightily pissed to see an array of tiny gray dots forming on the door. Since there were already some fish-eyes in the rest of the paint job, I continued on resigned that the door would also sport the spots, but at least it was the passenger door. After four coats of paint, it actually wasn’t too noticeable. With the paint on, I cleaned the gun rigorously again disassembling and blowing out the passages before mixing and loading clear into the cup. While spraying the first coat of clear, the fish-eyes grew before my eyes and immediately I just stopped what I was doing, threw away the rest of the clear and decided I needed a new plan. It was apparent to me that I had been unable to get all the thinner out of the gun and some was mixing into the coatings as they were being sprayed.
Time for plan B. I’ve got three guns, so I’ll be using all of them the next (and darn well better be the last) time I do the door. My oldest, largest tipped gun will shoot the primer, I’ll be returning the Harbor Freight gun for a new replacement and that one will lay down the color coats, while my touch-up gun with its 1.8mm tip will do clearcoating duties. This way no thinner will ever get in any of the guns before they are used.

Not being in ANY mood to continue working on cars, I knocked off for the day.

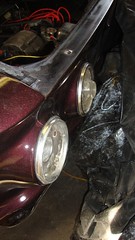
Saturday I swapped steering wheels and pinchweld trim with Lucy and installed taillight assembly. The latter activity was time consuming since I had to find the four sockets and lenses and all the hardware and then rewire them to the car since they were not cautiously removed a year ago. One of the repairs I had to undertake was the replacement of one of the contacts. Somehting I hadn’t done before, but it all went well. I still need to replace a couple lens gaskets with new ones and connect the ground wires when I install the shroud seal strips, but I’m calling that significant first step in the exterior reassembly complete. The last thing I did on the weekend was screw on the chrome trim pieces around the windows. This car is going to look awesome when I FINALLY get it all back together.
Friday, November 19, 2010

CPotD #183 (I’m Digging this Keen Upholstery)


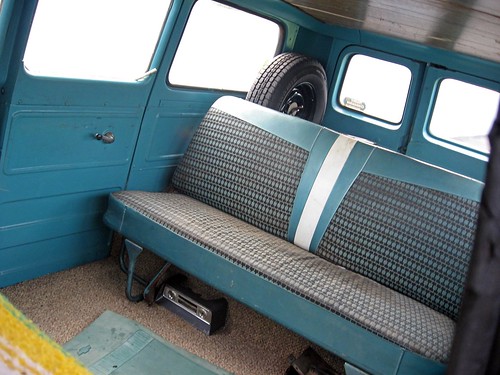
Ah, the 60s. What a creative decade. I wonder how deep the designer of this interior had to dig to find the cloth for the seats in today’s CPotD. The rear seat, like the rest of this 1961 Greenbrier Sportwagon, looks like it’s been well used, but also well cared for. That’s the way I like ‘em.

Flickr user Ate Up With Motor posted a set of photos of what looks to be a California original. While the legendary black license plate is missing, the plate frame says Wagon City in Inglewood, a used car dealership in the Los Angeles area.