
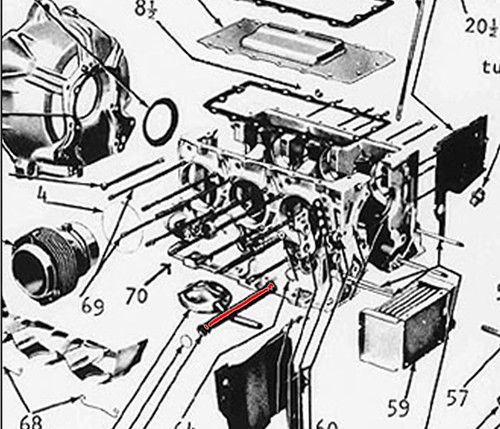
With that fun-and-games over, I moved back into the garage to bolt more bits to Ringo’s engine. I finished reassembling the second head and mounted it to the engine. It was at this point, I realized I’d jumped past an important step – I’d bolted the pushrod guides in place on the first head denying me the access needed to install the pushrod oil drain tubes (one of six parts per side highlighted in red below). Fortunately, I hadn’t torqued down the bolts on the second head, so I proceeded on that side. When the last nut was torqued, I spun the engine on the stand and, a pair at a time, removed the rocker arm studs and guides, installed the tubes, and reinstalled the guides and studs. Noone likes to do things twice, me included.
I didn’t get back out to the garage until Saturday afternoon, but I made good of those three plus hours. I bolted on the oil pan with the new gasket light coated on both sides with sealer. I followed the torquing instruction of the manual, but I’m not happy with the final results. The gasket looks quite squeezed with just the 85 in-lbs of torque. Oh well, fingers will be crossed when I pour in the oil. Next, I reassembled the lifters soaking each in 30 weight. Then, working one at a time, I squirted assembly lube on a cam lobe, slid in the still-oily lifter, dropped in a clean pushrod with each end having been dipped in assembly lube, captured the assembly with a clean and greased rocker arm and pivot ball held in place by the locking nut. After finishing the six on left side, I rotated the engine until I was sure it was at Top Dead Center with both #2 lifters off their cams (i.e. top of the compression stroke). That’s the position required to tighten some of the lock nuts to set the proper preload on the lifters. The procedure is to turn the nut until all the play is out of the push rod, then give the nut another three-quarters of a turn. Note there are differing opinions/instructions on how much more to turn the nut, but three-quarters is somewhere in the middle of all the recommendations. Next, on went the rocker cover with a new gasket. Then, I spun the engine on the stand and went through the same steps on the right side.
Seemed like a good place to stop, so I did. Only a few more items need to be bolted on before we’ll take the engine off the stand, set it on the ATV jack, and attach all the sheetmetal and the transaxle before lifting into the car. I’m getting close!
No comments:
Post a Comment