Showing posts with label bodywork. Show all posts

Monday, March 19, 2018

Almost Back in the Saddle Again


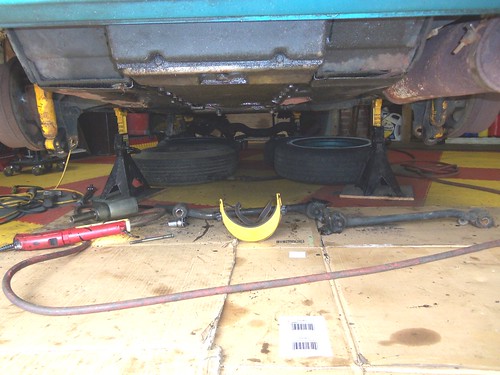
As I announced in my 3-3-18 post on my LeMans blog, I’ve decided to bump up the priority of Mikhaila’s Corvair (named Scarlett) so that she can have it to drive sooner (within a few months) rather than later (within a few years). This means that this blog will be reactivated to follow our progress on replacing the wrecked front end of her Monza convertible. I should state here that, for the first time, one of my children has more cars than I do. In addition to the aforementioned Corvair convertible, Mikhaila also has her daily-driver MX-3 and the Golf GTI we’re working to put on the road. Speaking of the latter, this past weekend she and I got the new clutch installed, the transmission put back into place, and everything reinstalled and hooked back up. Yay team. We did all this in very close confines (see above layout). Once I confirm the clutch take-up is where it should be, I’ll drop it off the jackstands and drive it out of the garage. That’ll allow us to move to the next task, replacing the heater core. For that, though, I’ll drive the LeMans out of the garage and put the GTI in its place. There’s no way I can strip out the interior and dash in its current confines – it’ll take the entire garage.


During the, hopefully, short time the LeMans is outside, it’ll be under a tarp with most of the loose parts pieces piled in a corner of the garage.

Once the GTI has its heat restored, it’ll leave the garage and Scarlett will take its place. Could be a busy Spring – I sure hope so.

Wednesday, January 4, 2017

UPDATE: Luna has sold and is gone. Recurring Theme (i.e. Luna’s also for sale)

UPDATED 1/10/17: Added more photos to the bottom of the post.
UPDATED 1/9/17: Added video links.

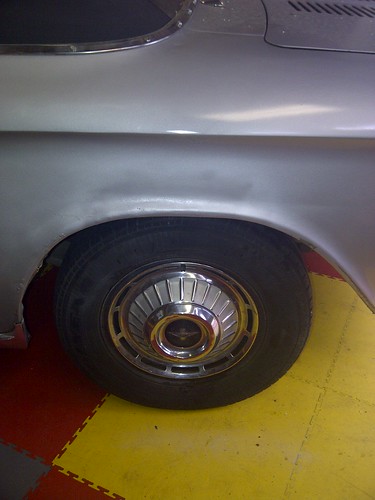
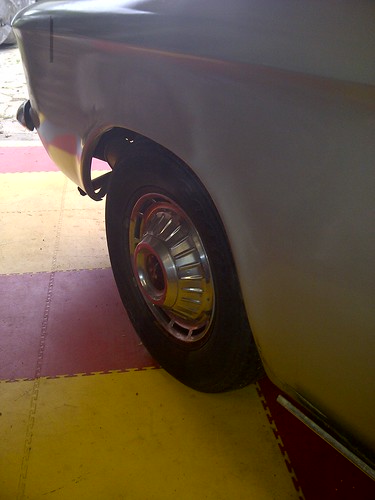
Last week Victoria told me I should sell Luna for her. She has accepted the fact that her life is too busy to spend the time required to roadify the car. I feel badly for her because she really likes the car, but I can’t work on it without her. Add to that her supposedly reliable, modern car sucked all the spare car time she had during the first half of last year, and she’s in no mood to give up what little free time she has on another car. I put a listing on Facebook and Craigslist and have received the following notable responses: trade for a motorcycle (had to say no), low-ball offer, “I’m still looking and will get back to you,” and an appointment for someone to come by Saturday to look at her. Currently, her battery is dead, but I plan on jump-starting her Saturday morning and adjusting the carbs so she at least runs and drives for any prospective buyer. I toyed with the idea of welding in the patch panels in the rockers and the front fender, but there are too many other priorities in my life right now.


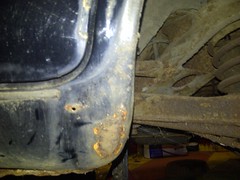
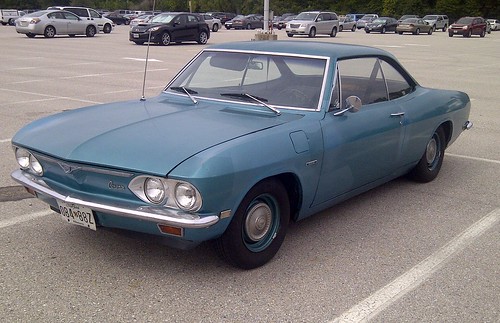
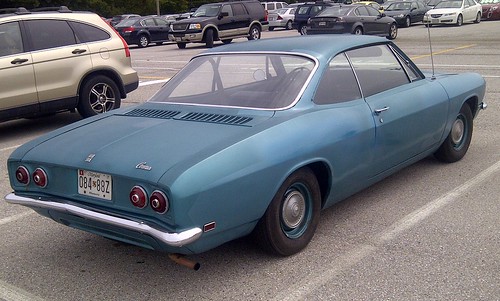
With that said, here’s the pertinent info on Luna. She has a 110HP engine with a Powerglide automatic transmission. Currently, the engine doesn’t run since she needs a battery and a tuning of the newly rebuilt carburetors. She has new tires and a new top, but the top’s installation isn’t perfect - needs some adjustments. There are rust issues in the rocker panel, right front fender, and passenger door, but replacement panels and door are included. The odometer reads 24k miles, but I’m sure it’s 124k. The top is manually operated, but goes up and down easily. We’re asking $2000 for the car with the extra parts. More photos at the bottom of this post. Here's a video of the engine running. Here's a video of me driving the car around our neighborhood.


As I mentioned in my last post, I am selling the parts needed to build a 140 HP engine. Here are a couple photos of the major parts included (note buyer gets two blocks to choose from). Also included is a bin of internal parts including the lifters, rods, pistons, oil pan, fasteners, etc.

I’ve not had any offers on Glinda as of yet, but I’m still hopeful a buyer will come along soon.
As part of my Corvair Reduction Plan, I’ve taken another load of GUPs up to the Corvair Ranch. In return Jeff presented me with a front end of another ’64 to use to repair Scarlett. This cleansing has allowed me to take down the storage shelves in the garage making more room for working. Unfortunately, after pushing Scarlett against one wall, there’s still a large part of floorspace is being taken up by aforementioned front clip. Hopefully, this weekend I can cut it down to something that’s closer to what I need and recycle the rest.


Here are more photos of Luna.


Monday, November 21, 2016

Windy

My two daughters that still own Corvairs joined me in the driveway Saturday to work on their respective convertibles. About 3 PM, the nice-and-sunny turned into windy-and-more-windy - a cold front swept into our driveway and almost swept away the portable garage and Scarlett’s tarp. In the midst of the gale, the girls soldiered on with their tasks.

Mikhaila was removing broken bits from Scarlett’s left front and cataloguing all the pieces we’ll need to replace. When she finished that, she undid the two bolts holding the trunk-lid latch in place and the turnk was open. She emptied it out and we then worked together to try and push some of the mashed metal back out. I’m not thinking I’ll get away with not replacing large sections of sheetmetal, but I do want to make it easier to cut out the bad and make patches and only with the body in some semblance of straight can that happen. We used the tire jack and an assortment of blocks of wood to push on the front panel. It worked somewhat, but we’ve got a ways to go. After she’d turned into a Popsicle, I released her to go inside and thaw out.

Victoria’s goal was to get Luna running again. She started by installing a pair of recently rebuilt ’68 vintage carburetors including reinstalling the linkage pieces and hooking up the fuel lines. Next, she dropped in and hooked up the battery. Finally, before turning the key, she injected fuel into each carb’s bowl using a syringe. Sadly, when she turned the key, we discovered the battery had gone dead. This is the one that was in Glinda and had gone bad, but I’d recharged it and it seemed to be holding the charge. I was wrong. The plan now is to pull the battery out of Glinda and use it to get Luna running and into the garage.

Friday, November 18, 2016

So Much To Do, So What Do I Do?

There’s a guy here in Maryland who recently posted on Facebook that he’s looking for a daily-driver Corvair. Given all the work ahead of me with Scarlett and, probably, Luna, I’ve been toying with the idea of trading Glinda for something more modern – like a mid-90s MX-6. So, after some thought I messaged him that I’d sell Glinda for $2200. He says he’s interested, but nothing’s happened.

If Glinda didn’t need so many little issues dealt with, I wouldn’t even consider giving her up, but she does, so I am. In addition to the items on the To-Do list (see sidebar), here’s a mostly complete list in no particular order.

Install the Cobalt rear seat

Clean and reinstall the carpet
Fix the courtesy light
Repair and install the GUP driver’s door panel

Replace the rear bumper

Install the GUP steering box
Splice the broken oil pressure gauge tube and replace the ferrule at the rear of the gauge
Remove the heater fan and clean and lube the motor
Replace the package tray cardboard with something that will accommodate speakers
Install a good mount for the racing harness shoulder belts
Bolt down the fourth hole of the each Cobalt front bucket seat
Weld in a new trunk bottom

Rebuild the blinker switch
Plug the smog hole and AT dipstick hole in the engine bay

Replace the gauge panel with a GUP I’ve got from a manual shift car (need to choose 500 or Corsa style)
Replace the hood with a GUP I’ve got

Eradicate rust: rear shock towers, multiple body locations


Paint the car orange

Kinda’ daunting given all my other commitments (put big sad face here). She runs really well right now, so I do love to drive her.

Thursday, November 3, 2016

Scarlett’s Gonna’ Get Safer

I started this blog post on Tuesday the 27th. Due to a busy schedule I never got farther than the first paragraph. Sadly, the title of this post and the initial paragraph were a bad omen. Here’s that paragraph.

I have been extremely fortunate that none of my daughters (or myself for that matter) have been injured while driving our Corvairs. Glinda has been the only ‘vair we’ve owned that had shoulder belts. Well, that’s gonna’ change. Today, I bought a pair of front bucket seats out of a Chrysler Sebring convertible. I want to make sure that Mikhaila doesn’t hit the steering (or anything else) if she has an accident.

Now jump ahead to last Thursday when, on slick pavement, Mikhaila lost control of Scarlett and drove her into a guardrail. Mikhaila is pretty banged up, but thankfully nothing that won’t heal in a few weeks. Impacts of note were: the right knee to the heater controls resulting in a flap of skin that should have gotten a few stitches, but she refused; her chest and under her chin collided with the steering wheel and left some nasty bruises and painful breathing, but fortunately negative x-rays; and a bump on the back of the head where a speaker flew up and whacked.

Scarlett did not come through the incident nearly as well as Mikhaila. Amazingly, the bumper is basically still in its stock location and the front wheels still point in the same direction, so I was able to hitch the towbar to her front end once I pulled some of the fender away from the right front tire. The flat-tow home from the tow-yard was, thankfully, uneventful.

So, what are we to do? I’ve not been in the mood to evaluate all the damage, but at the very least she’ll need a new front panel (Clark’s doesn’t sell a replacement) and valence ($126 from Clark’s), as well as a right front fender from at least the center of the wheel forward ($110 from Clark’s) and a trunk bottom ($113). A visit to the Corvair Ranch will be required to get a used front panel, wheel-well, and a replacement bumper. Since the steering and alignment seem to be working properly, I’m thinking the damage is just to body panels. Mikhaila and I have a lot of cutting and welding and bodywork in our future before the car is ready for the road again.

And those Sebring seats? They will go in before Mikhaila gets behind the wheel again.

Tuesday, August 30, 2016

The Inevitable Rust Repair Commences


The last opportunity to go time trialing is quickly coming up. The NECC moved its end-of-summer event to the twenty-fifth of September. While I’m not sure how I’ll swing it financially, I need to get the car track-ready or it’s all a moot point. What are the track-ready tasks? Put in the bucket seats, adjust the clutch linkage, and get modified carburetors (jets relocated to prevent cutout on long turns) are the two major ones. I can probably get away with just that. Other nice things would be to get the trunk welded and relocate the battery, but I don’t see that happening with the short time I have left coupled with the house and car projects that are currently on my plate.

To start the ball rolling, I spent some time in the driveway with Glinda this weekend. Friday evening I pulled out the front bench seat and the front section of carpeting. Doing this necessitated removing the gas pedal. With the carpet gone, a rusty mess was exposed. After I went after all the loose stuff with a wire wheel, I could see fully what work I had ahead of me. Not too bad. For the most parts isolated to the front passenger footwell area.

With a cutoff disc on the grinder, I removed the rotted steel being careful not to cut through any fuel lines (been there once, don’t want to go back again) or into the channels under the floor that weren’t rusty (GM spent the money to have them galvanized). Next, I put the flapper wheel on the grinder and cleaned up all the edges where the patches will go as well as surfaces of the channel where I’ll be plug-welding the patches. The plan is to butt-weld the patches at the perimeters which requires the patch to perfectly follow the contour of each opening. That’s the next part of the job – making patterns from paper, transferring the outline to sheetmetal, and cutting out the patches. That’s for another day.

Wednesday, August 3, 2016

Some Tweaks Required

This morning I chose Glinda to by my whip-of-the-day. It took a bit of musical cars last night to make her available. After dinner yesterday the lovely Loriann, Mikhaila, and I drove the truck over to the nearest, still open, tire shop with the wheels and tires that needed swapping. The manager told me he couldn’t do the swap because the tires were tool old (date mark of 2006), but he did let his technician (I think that’s what they’re called now), pop the tires off the bead - I can do the rest of the job.

When we got home, I needed to move the awesome Challenger (it’s appropriate the lovely Loriann drives an awesome Challenger), and Glinda out of the driveway and garage respectively. That opened a slot for Ringo to go into the driveway because he can’t sit on the street risking a ticket for not moving for 24 hrs.; followed by the truck because I didn’t want to roll the tires so far; followed by the awesome Challenger because we won’t park that car on the street.

The first annoyance I noticed when moving Glinda is the take-up for the clutch is now way too high. Not so much that the clutch is slipping, but still annoying. I’ll adjust that when I get an evening. The second annoyance is another seam in the headliner has fallen apart. I’m giving up on sewing it myself and will have to support my Corvair parts supplier to the tune of $105. The third annoyance is the door panel is still peeling away. The fourth annoyance is the fitting at the back of the oil pressure gauge still leaks and I will have to get another ferrule and install it correctly. The fifth annoyance is the steering is still too loose and I will need to get to the Ranch and pick up that replacement steering box. The sixth annoyance is the Cobalt seats are still not installed. The final annoyance is the car’s body and it’s rust and missing 500 emblem. Even in the face of all these annoyances, I still REALLY love driving this car. I wish it was nicer looking (read no rust and a new coat of orange paint).

To address some of the issues, I gave Jeff a call at the Corvair Ranch. He’s still got the steering box, he’s got plenty of door panels for me to pick through, and he’s got some good used emblems I can choose one from. I told him I had a bunch of parts I needed to bring up to him, and he promised we could work out some sort of deal.

Monday, August 24, 2015

I Love the Smell of Ignition in the Morning

Late last week Glinda became undriveable. The tach needle was jumping around and the engine wouldn’t idle only staying running if I kept the rpms above 2500. I limped her home thinking the issue was with the dying ignition switch. I surmised that the contacts inside the switch were failing and the engine was not getting enough electricity to run properly. The replacement GUP switch from the Corvair Ranch showed up in Saturday’s mail, and I installed it that night. Upon first firing up the engine, it was still running rough – crap, not the switch. I hopped out to look at the engine, but it died before I could get the lid open. I wiggled all the electrical connections that may be causing the issue – nothing appeared amiss. I hopped back behind the wheel and turned the key. A single backfire and the engine was running smoothly again. I took her for a spin around the neighborhood and everything seemed normal.

Yesterday morning I turned my attention to Ringo. I finished sanding the Bondo, blew off all the dust, wiped down the area with cleaner, masked off and shot the entire area with three coats of red sandable primer. I’ll let it cure for a day or so before wet-sanding the primer in preparation for some coats of Black Cherry Pearl.


This morning I grabbed the keys to Glinda, buckled up behind her steering wheel, and turned the key. Her engine reluctantly fired into a stumbling idle – crap. I let the engine warm up a little with my foot finessing the throttle, but to no avail. To determine if it was a carb blockage, I pulled off the air cleaner and peered down the venturis while blipping the throttle – healthy squirts of fuel indicated the issue was ignition. I confirmed that when I fetched the timing light, hooked it up, and cranked the engine – no spark. Off came the distributor cap, rotor, and dust shield exposing the points. Using the remote starter (jumper wire from the purple wire connector to the positive on the battery), I watched the points move, but saw no spark. I was at a fork in the road – either replace the points with an unknown GUP or reinstall the electronic ignition module and coil. I opted for the later. Fifteen minutes or so later, I had everything in place and hooked up. The momentous turn of the key was immediately followed by a smoothly running engine. I let it warm up as I put some of the tools away and then plugged the vacuum line, adjusted the idle speed to around 500 rpm, and checked the timing. It was reading a little above 16 BTDC, so I loosened the distributor’s hold-down nut, bumped it a bit to get to get it to around 15 BTCD, and then tightened the nut. After reconnecting the vacuum advance tube, I set the idle speed to 800 rpm, and shut off the engine. I put away the rest of the tools, washed my hands, and inspected my work clothes to make sure I hadn’t leaned against something untoward (must be why I wear black slacks a lot of the time). When I finally pulled away from the curb, I’d only lost an hour of my day. The drive to work was wonderful with Glinda’s engine pulling strongly in all gears well above 4000 rpm – yes, that’s over 80 mph. Bonus, I can cross an item off the To-Do list.

Monday, July 6, 2015

Three Cars, Three Updates

Glinda: No Racer No More

A couple weeks ago I hopped into Glinda for a quick evening drive. I started her up, and pulled away from the curb. Since it had been raining, I turned the wiper knob to clear the windshield, but nothing happened - at least nothing wiper-wise. Some other things DID happen though. The radio shut off, the tach needle went to zero, and so did the voltmeter. I immediately turned off the wiper switch and everything went back to working. Since I didn’t want to get stuck somewhere, I pulled her back to the curb, with the intent of dealing with the problem later. The following morning, before turning on the car, I pushed in the wiper switch rather than turned it as a test – the wipers worked as normal. I turned them off, and, thinking the previous evening’s gremlin had moved on, I started the car and drove away. A few moments later, I checked Glinda gauges and found the voltage sitting at 10.8 rather than the normal 14+. Not having a spare vehicle available to me this morning, I continued on to work minimizing my use of electrical stuff. By the time I pulled into my parking spot at work, the gauge was now reading about 10.2. I shut off the car, and then turned the key to the ON position – the gauge needle was now pointing at slightly above 12. The drive home, however, was business as usual. The voltmeter needle pointed back to where I was used to seeing and all seemed fine.

The lovely Loriann and I decided that Mikhaila needed a car to drive while waiting for us to finish Scarlett. Glinda drew the short straw. To facilitate Glinda’s new duties, Mikhaila and I swapped out the racing seat and harness for the stock bench and belts, and we put back the skinny tires in place of the wide racing wheels. I rode with Mikhaila giving out instructions as she wheeled the car around the neighborhood. She did quite well getting used to the heavier steering and relearning the manual transmission skills she’d not had to put into practice for months.

Yesterday, after recording another tank-full of atrocious gas mileage, I gave up on the modified carburetors and swapped on Scarlett’s pair. With the recently rebuilt carbs hooked up and some gas poured down each throat, the engine reluctantly fired. After a few moments, gas started squirting out of the vent holes of the right carb. Off went the engine and off came that carb top, but not until I checked the accelerator pumps – no squirts in either carb. Inspecting the removed top assembly, I found that the wire needle retainer was preventing the needle from easily seating itself. So, I removed and re-set the float levels to ’65 setting (1-1/16” full up and 1-1/2” for full drop). I then dug out some new accelerator pump cups and a couple GUP pump assemblies from my stash. I found that the two assemblies both had pliant cups that worked perfectly in their associated bores, so one went on in place of the right top’s non-functioning one. After reinstalling that side, I pulled the left top assembly off made the same changes. Next, I needed to again clean all the filthy, fouled spark plugs (this is getting old). With everything installed and connected back up, jumping 12 volts to the purple wire contact got the engine running right away. No gushing gas and blips of the throttle were met with immediate rpm responses from the engine. I climbed in, belted up, and took her for a spin around the neighborhood. She ran better than she had in months – coincidentally the same number of months the racing carburetors had been on the engine.

Needless to say, I was quite happy as I backed her up to the garage opening. I got out my length of clear tubing, shot some water in, hooked both ends up to the appropriate vacuum ports, and balanced the carbs. With the air cleaner back on, I adjusted the idle fuel screws per the manual before setting the idle speed to 800 and shutting the engine lid convinced all woes with that car were now behind me. That euphoria lasted less than twenty-four hours ended by a single text from Mikhaila: “Glinda keeps stalling and the gas gauge went from full this morning to half full when I ran an errand.” CRAP! I thought I’d get to work on the house this evening, but NO!

Scarlett Brakes Won’t Bleed

During the last week Mikhaila and I have had a couple productive sessions in the garage. Scarlett now has all her new brake lines in place as well as her exhaust system completely hooked up. With the last brake line fitting tightened, she and I spent at least an hour and went through over a pint of brake fluid trying to get a solid pedal. With all the components of the system being new, there was a lot of air that had to be bled out. After running out of fluid, we were still getting air with each opening of a bleeder valve. Part way through the task, I got smart and adjusted the pedal rod making it longer so it would push the pistons in the new dual master cylinder deeper. This seemed to get more fluid pushed out with each stroke. I hope we’re right around the corner from an air-free system.

The muffler hanger arrived in the mail Saturday morning, so we bolted it to the engine. A new strap held the GUP muffler in place and a new 2” muffler clamp solidified the exhaust pipe to muffler joint. The engine is ready to start up other than the fact that 1) I took the carbs for Glinda, and 2) I put battery back in Ringo (see more below).

Mikhaila also took advantage of the seats being out and more thoroughly scrubbed the years of dirt from each of the front bucket seats. We also stripped the old rear window material from the three trim sticks in preparation of a new top getting installed (a ways off from happening).

Ringo Readies for Upcoming Sale


Yesterday, I pulled the tarp off Ringo with the intent of deciding what I would do to this car before I put it on the market. Instead, I jumped right into the fray by swapping back in the battery he’d so graciously loaned to Scarlett. A bit of gas poured into each carburetor and a few revolutions of the engine by the starter and the engine was running smoothly like he’d been on the road a week ago not a year ago. Next on the checklist was bodywork made necessary by the destructive right rear tire. I bent and pounded the sheetmetal behind the wheel into some semblance of its original shape. Grabbing the grinder fitted with the wire brush attachment, I attacked the mess along the front edge of the wheel-well as well as the inside of the wheel-well (is that too many wells?). I also brushed away the flaking paint and surface rust on straightened out section. Next, I pulled a jar of rusty metal primer and brushed over all the exposed steel.

I remembered that the last time I’d seen Ariel drive away in this car, one of the rear taillights wasn’t working. It took some cleaning and bulb replacement, but after a half-hour or so I had all essential lights operating properly.

With all this progress, I decided I’d move him out into the middle of the driveway so I could access the stuck driver’s door. I climbed behind the wheel, put my foot on the brake pedal, and it went all the way to the floor. I climbed back out, popped the trunklid, spun off the master cylinder cap, and stared down into an empty master cylinder reservoir. Hoping against all hope I filled the reservoir with fresh fluid and crossed my fingers. Maybe, I though, the seals will magically rejuvenate themselves after a good soaking with DOT 3.

This morning though, I went ahead and made the call to the Corvair Ranch and ordered a rebuild kit. I also asked Jeff to send me a Powerglide re-seal kit, two carburetor rebuild kits (so I rebuild the two EM carbs on the shelf to put on Scarlett’s engine), and a muffler strap for Glinda.

Monday, June 23, 2014

Ringo’s In Rough Shape

Sadly, the tire un-treading incident has left Ringo in a bad way. I’ll take and post some photos in the near future, but the list of bent and busted sheet-metal include: wheel well (some actually torn out and missing, lower back edge of rear fender, wheel opening trim, spare tire shelf, and muffler hanger. These, by themselves, don’t render Ringo un-roadworthy, but added to the other items of issue (driver’s door won’t open, starter won’t energize reliably), and he needs some serious attention before I can let Ariel drive him again. So, for now, he’s taking up driveway space.

Saturday, on the suggestion of a Facebook friend, I drug a bag of tools out to the curb to inspect Glinda’s carburetors. I pulled the lids off both carbs and compared the float fuel levels. The one on the right was noticeably higher (by at least a quarter of an inch), so I removed the pin that holds the float so I could see if the float had some fuel in it. It was dry. While reassembling the float to the lid, I clumsily dropped the small spring onto the pavement. As it fell, I carefully watched its trajectory, but, hitting my foot, it bounced under the car and promptly disappeared from the face of the planet. I crawled around and searched for five minutes, but to no avail – the tiny, gray piece of metal was nowhere to be found. It’s not the end of the world, I thought, since I’m sure I can pull another one from my can of carb parts. Another five minutes was wasted pawing through linkages, clips, floats, springs, and screws without spying a single helper spring. Argh.

At this point I now had an unusable carburetor. Knowing that Ringo’s carbs worked fine, I decided to pull his right-side one and use it in place of the one I’d just screwed up. I started her up to let her get warm and have the carb chokes open. In the meantime, I installed one of the carbs Mikhaila and I had rebuilt for TwoTone onto Ringo’s open intake flange. Back to Glinda, I shut off the engine, connected my clear plastic tubing (with a couple tablespoons of oil in it) to the vacuum ports, and restarted the engine. Three turns of the left carb’s adjustable linkage and the two side were back in balance.

Now I just need to fill the tank with gas and drive her for a bit to see if I’ve affected fuel mileage.

Thursday, March 27, 2014

A Little Progress is Still Progress

I spent a lot of this past weekend on the road with Victoria shopping for a replacement for her recently totaled Mazda5 (not her fault for those keeping score). It was quite enjoyable sampling the best deals on Acadias in the Baltimore-Washington area even if I was just a passenger. I did, however, squeeze in some car time.

Friday evening, due to some automotive logistic issues, the lovely Loriann, much to her chagrin, had to drive Ringo. Upon her return to the house, she immediately informed me that the driver’s door would not latch. I was able to get the door to finally latch, but it obviously needed some attention. The next morning I rolled him into the driveway and proceeded to readjust the door in its opening. I needed a second body to tighten bolts while I moved the door around, so the lovely Loriann, being the only one at home, was asked to help. She braved the mess that is Ringo’s interior (thank you Ariel) and, after a few tries, we were able to get the door into a position where it would close without SLAMMING. In the midst of all that, I was reminded of the looseness of his armrest, so I fixed that by finding a larger thread bolt, rounding off the points of the bolt-head, and grinding a slot for the screwdriver. I was then able to tighten both fasteners and the armrest doesn’t dangle with a risk of being ripped off. Finally, I used a few small shiny screws and re-anchored the flopping interior door panels. Ariel was pleased.

Whenever I’ve had the chance (which is highly infrequently) I’ve been working towards completing Glinda’s 4-speed swap. Lately I’ve been replacing the flywheel rivets with 25mm bolts, washers, and nuts. This project is almost finished as is refinishing the clutch/brake pedal pieces. They are currently primed awaiting a coat or two of black paint to hold back the rust.

Monday, February 17, 2014

Spinning Wheel

It’s always a unique experience waking an engine after decades of dormancy. The last time I’ve done this was when Ariel and I were working on Redvair (http://corvairfleet.blogspot.com/2009/12/cpotd-18-eternal-optimist.html). This time TwoTone’s powerplant joined the land of the living after at least twenty years of inactivity. It all happened as follows:

Yesterday afternoon it only took about fifteen minutes for the heaters to get the garage warm enough that I could comfortably remove the stocking cap from my hair-challenged noggin. First task of the afternoon was to install the borrowed starter/solenoid which went in easily including attaching the battery cable and the Start and Run wires. After turning off the heaters, I touched the purple Start wire to the battery’s positive terminal, but got nothing but sparks. I swapped in another battery cable and was rewarded with a spinning engine once the starter wire was energized. I let the engine spin a little before it was apparent it wasn’t going to start. I’d forgotten to set the point gap, but once that was set, and the static timing checked, I gave the starter the juice again and the engine caught and smoke filled the garage. Success! I let the engine run just above idle for the few second it took to burn all the gas from the carburetor bowls. Doors and windows were then opened to dissipate the fog that had enveloped the rear of the garage. I escaped to the backyard catch some fresh air and snagged the gas can from the garden shed – yay, it contained some fuel. Back into the garage to remove the other rear wheel so I could test the tranny. With TwoTone’s rear securely raised on jackstands, I then refilled the carbs and refired the engine. The smoke was less, but the valve clattering didn’t seem to be any quieter. After it ran out of gas, I put the shifter in Drive, refilled the carbs, and energized the starter. This time, instead of staring at the engine, I gave a quick glance at the rear wheels. The right rear hub was happily spinning clockwise – the correct direction. I repeated the fill-shift-start procedure this time testing Reverse, and the right rear’s rotation had reversed. Success.

After escaping the exhaust-filled garage to let it air out for a few minutes, I returned and pulled all the spark plugs and then proceeded to do a compression check on all six cylinders. All but #2 came in at 160 to 180 psi. #2 could only move the gauge up to 92. I think that it would improve with some more running. I’m going to call the drivetrain a runner.

With that experiment complete, I pulled the borrowed the starter and reinstalled a placeholder. Off the jackstands and then off with the loaner carbs. Other than pushing her out of the garage once the snow melts, I think we’re done with TwoTone.

However (and it’s a huge however), I’m toying with the idea of trying to push out the front dent. The metal seems to all be there and it’s un-torn, so who knows what kind of result I could get. I figure it’s worth a try and then the car would be more saleable.

Friday, January 24, 2014

I Surrender

As I posted last time another weekend passed without any work getting done on TwoTone. Some of this is the weather’s fault (two darn cold), some is mine (too many projects), and some is Mikhaila’s (too overwhelmed). As we removed all the exterior trim, it was quite discouraging to find more sections of the body that’ll need replacing. Then I found a previous repair on the left front that’ll need some attention to go with the already estimated fifty hours plus to cut off the collision-damaged left front corner and replace it with the spare front piece. That front piece, by the way, is not in the greatest shape. Replacing rusty, bent metal with rusty, bent metal is not my idea of moving forward.

So, for the last few weeks I’ve been pondering the possibility of finding a better starting point for Mikhaila and I. Another EM 4-door requiring far less of my time than TwoTone. I think I’ve found one and I’m hoping Mikhaila and I can travel the couple hours to check it out tomorrow. We’ll see – could be a very interesting weekend.

Once we find a replacement, I’ll try to sell TwoTone as-is with spare front end. If I get no interest, I’ll probably tow her up to the Corvair Ranch and get some credit from Jeff. Most, if not all, of the new parts I’ve purchased would be used on whatever new project car we get. That's the beauty of Corvairs - much of what's EM is interchangeable from '61 to '64.

Monday, December 2, 2013

Long Weekends are Wonderful


Two solid outings in the garage over the past four days and Mikhaila and I have got TwoTone nearly stripped down to the state where we can start bodywork. All that work and I can count on one hand the number of broken fasteners (one bumper bolt, one seat stud, one gas door screw, and one heater vent screw). At this point: the interior is empty except for the gauge set and the headliner; the trunk is empty except for the wiper motor, and the exterior is bare except for the door handles. Sadly, rusted-out areas were revealed as the trim came off – especially the rocker panel area at the front of the rear wheel opening. The floor has a couple holes about an inch-and-a-half in diameter. Both these areas will need to be cut out and new metal welded in. This, in addition to replacing the bashed-in left front corner, appears to be all the welding required.


Another sad discovery we made while clearing out the interior was that the brake lines had all been cut. I’m not sure why someone thought it a necessary act, but it will cost me some time and money to replace what looked to be solid, rust-free tubes.

On the Glinda front, I re-reassembled the “bad” carburetor from TwoTone and installed it in place of the left carburetor (let’s call this one an original). The engine would not run right, so I’m writing that carburetor off completely and will obtain a rebuildable replacement from Vince (Rich’s unsold stash). The original went back on and a test drive around the neighborhood proved to me she’d probably get me to and from work. So, today I pressed her back into daily-driving duty. My first stop of the morning was the gas station where I put in about $40 of 93 octane. I texted Fuelly.com the mileage and amount it took to fill the tank and immediately received a text back telling me that the last tank-full elicited a whopping 11 miles per gallon. My hope is putting the new carbs on will return the mileage back to the 18-19 range I was seeing before I put on the carbs with the relocated jets. To add insult to injury the leak from the rear of the transmission is getting worse. I happened to have some Lucas transmission treatment on the shelf, so I poured a pint down the fill tube and we’ll see what happens.

Monday, September 9, 2013

I HATE Rust!

Wednesday I decided I needed to deal with the rust bubbles on Glinda's right front fender, so I pulled out my drill, inserted a wire brush, and went through paint and Bondo before ridding the metal of rust. A couple coats of rusty metal primer ended that day. Thursday afternoon I needed to finish the project since I had a couple scheduled to come by Friday evening.tonight to consider buying one of the two 'vairs I'm selling. I left work around 4 and by 6 I had two coats of Bondo spread and sanded. While sanding I decided to get ambitious and fix the keying scratches that had been put in the passenger front and rear fenders. With all those spots prepped, I pulled out and set up my airbrush, mixed a small batch of primer and loaded the bottle for some driveway paint shooting. To check setting I started by aiming the gun at a piece of cardboard and pushed the trigger. Nothing came out. I knew I'd cleaned it after I used it on the '64 a few months back, but the orifice from the paint bottle was definitely clogged and I couldn't get a wire to clear it out. With the primer clock ticking, I quickly grabbed my smallest paint gun, plumbed it, filled the cup, and adjusted the gun by spraying the aforementioned cardboard. With the air setting quite low, I was able to keep a tight, small pattern. I laid down three coats of primer before dinner. After an hour's break, I sanded and cleaned everything thoroughly before shooting three coats of color. I left the house before it was really light this morning, but in the dawn's light it didn't look too bad. Chasing rust on these daily-drivers is a real pain in the butt.

Here is the finished product.


Wednesday, June 19, 2013

Progress is Good

I got to spend some time in the garage last night. Started by working on the backlight opening. First I cut patches from fiberglass cloth, and after masking off the channel, I popped open the can of POR-15 and poured a half-cup’s worth into a cleaned-out cat food can. Then I carefully applied the coating over the entire channel focusing on the rusted metal areas. Another coat of POR-15 held the patches in place, and a third coat on the patches finished them off for the evening. In between the second and third coats, I drug Mikhaila out to help me flush the brake lines of old fluid replacing it with hi-temp synthetic fluid. She did a masterful job pumping the brake pedal. After the third coat went on the channel, I wire-brushed the main portion of the front crossmember, vacuumed away the dust, and used the POR-15 that was left in the cat food can to keep rust away from this vulnerable part.

Monday, June 17, 2013

A Vairy Nice Father’s Day Weekend


When last I posted, I’d just broken the nuts off both rear strut rods where they bolt at the rear wheels. A few minutes yesterday attacking the remaining bolts with the 4” cutoff wheel on my grinder and the rods were lying on the garage floor. Unlike the oil-destroyed inners, the outer bushings look to be in decent condition, so, rather than buy entire new rods, I’m following a helpful post on the CorvarCenter forum and bought a couple replacement bushings. Gary (the local Corvair guru) offered to sell me a couple replacement bolts to replace those I just cut up.

I also got the stabilizer rods and shock absorbers removed, and was fortunate enough not to break any more fasteners.

With the suspension all out, I tackled the backlight opening. It took a couple hours, but I got the channel completely cleaned out and ready for some coats of POR-15. I’ve decided I don’t have the time to fix the rust correctly (cutting out and welding in patches), so I’ll be coating with POR-15 and patching with fiberglass cloth laid in. Fortunately, there are only a few rust-throughs, so this fix should be sufficient to keep the window in and the water out.

After working on Glinda, I was treated to a delicious Father’s Day dinner followed by card opening. The girls gave me two cards since they couldn’t decide between two funny ones. Each card contained a coupon, one for a six pack of the beer of my choice each month for the next six months. The other coupon was for a set of racing stripes for Glinda. I’m quite excited about that and have already started perusing the web for the perfect scheme. I’m leaning towards this design. You've got to use your imagination to change the colors to turquoise body and white (or maybe gray or maybe silver) stripes.

Monday, June 3, 2013

Now I Really Need to Get On the Stick

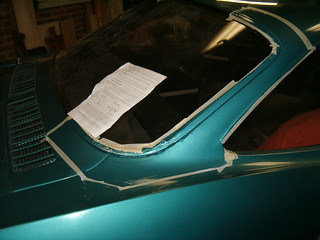
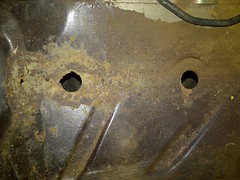
I spent part of Saturday afternoon working on Glinda. I drove her into the garage guiding her front end up onto the ramps to give me good access to all the front suspension fasteners. Using an eye dropper applicator, I liberally applied the proven 50-50 mix of ATF and acetone to as many threads as I could get to before rolling the car down off the ramps. Then, I dug out all the silicone and hardened original adhesive that filled the channel surrounding the backlight. With all that out of the way it didn’t take too much of an effort to cut through the remaining adhesive with my nifty windshield removal tool. With the glass out of the opening, I was reminded of the filler work I’d had to do a few years back. Back then I hadn’t wanted to remove the glass so I’d carefully brushed off the loose rust, treated the remaining rotten steel, and artistically sculpted bondo to fill in the missing metal. That work was followed by a few coats of primer and paint to hide my handiwork (as pictured to the right). I now get to make the repair correctly – with sheetmetal patches MIG welded into cleaned out holes. Holes that will be carefully cleaned up to remove all rot. All this work is additional to my current plans of trackification, hence the title of this blog. By the way, I love mixing the aviation origin of the phrase with a car blog.
Speaking of trackification, Friday evening I had a very nice conversation with one of the more respected Corvair racers, Dave Edsinger. Dave had me share with him my plans for the car and what I’ve already done. Fortunately, none of the handful of new suspension parts I’ve purchased will have to go back. Furthermore, he gave me a lot of help towards getting Glinda set up to be an awesome streetable track car. Some of the changes he recommended for the front end included getting heavy-duty springs and cutting a coil off, shortening the control arm bushing spacer to increase the stiffness of that joint, and installing the quick-steer arms I’ve got. For the rear, he urged me to buy some 250# stock car springs and ensure the bushings in strut rods, control arms, and stabilizer links are all in good. For both ends, he gave me alignment values he’s found work best and encouraged me to find some good shocks (“even in they’re used”). The new front end bushings should all be her this week, so I may need to make a trip up to the Corvair Ranch Saturday morning to get Jeff’s mechanic to press off the old and press on the new. That means I need to get Glinda’s front end disassembled this week.

Like the title says – it's time to get on the stick.

Monday, May 20, 2013

She’s Gone

Another appropriate title to this post would be, “I Could’ve Sold Her Twice”. Last Thursday I received a message on the CorvairCenter forum from a prospective Lucy buyer. He was responding to my post about which car I should bring to Sunday’s Corvair Ranch Open House. While he would not be able to attend the event, he told me he was “98% sure” he wanted the car.

Late that same day, my phone vibrated with a text message from a VA area code asking me if there were “any known problems on the red corvair.” I didn’t see the text until the next morning, but I immediately responded with a long message that basically told the interested party that she was good-to-go, with the only rust-though being a couple areas under the trunk lid. After a few back-and-forths, the sender asked for my address and told me he and his buddy would be at my house in two hours. True to his word (amazingly), two younger guys pulled up at my curb as promised and began giving Lucy a thorough inspection. I let them look a while before I moseyed on down the driveway and said hello. They were real excited about what they saw (thank You Lord) and Lucy luckily fired right up and they took her for a test drive. They were gone a while (got slightly lost), but once they returned, they asked what my lowest price was. $2300 was what I told them and $2300 was exactly what they were hoping for. SOLD! Now I can pay Victoria for Glinda and begin in earnest the work to trackify (see sidebar) that car (more on this later).

It took a while to gather all the stuff that was included (lug wrench, extra lug nuts, spare fanbelt, chrome trim, Monza badges, etc.), but I was finally able to let them go. With their departure, I could sit down with the family for dinner, and they asked me how I was doing. “There’s a small hole in my heart,” I joked. After dinner I checked my e-mail, and found another message from the first prospective buyer. “My wife thinks it would be a fine 50th b-day present…we’ll work out a deal.” I felt so bad having to tell this guy I’d just sold his birthday present. Fortunately, he took the news quite well, responding with a, “It wasn’t meant to be.” During this time, I was working on Heidi trying to get rid of the two bubbled paint spots above the rear wheel arches. I carefully wire brushed the bubbles away and used my new spot sandblaster to remove all the rust. This was followed by a generous application of rusty metal primer to keep any future corrosion at bay. Friday night I applied a few layers of filler and let it fully cure until the next morning when I sanded the repairs smooth, cleaned the areas, and then used my new airbrush to shoot a bunch of light layers of urethane primer. I was trying to get the repairs done in time to take her to the aforementioned open house, but a b-day dinner for the lovely Loriann took precedence over that plan, and the final painting and clear-coating didn’t occur until yesterday afternoon. It was so nice not having to match the paint since I had quite a bit of the silver left over. The finished product turned out pretty good if I say so myself. A little sanding once the clearcoat is fully cured and it will be difficult (I hope) to see the repairs.
 

Regarding the trackification of Glinda, my priorities are making sure her suspension is up to snuff and that includes cutting a coil out of each front spring, installing new shocks at least on the front, swapping in the quick-steer arms I bought from my ‘vair-buddy Jonathan a few years ago, and getting a good four-wheel alignment. I really, really want to do a 4-speed swap, but I’m not sure I’m going to have the time (or funds). I was hoping to pull the needed parts from a carcass up at the Corvair Ranch, but my last conversation with Jeff indicated he wasn’t too hopeful that he had a prospective donor. Bummer. If worse comes to worst, I can drive her on the track as an automatic, but it won’t be nearly as fun. I was thinking I’d need to buy wheels (?) and new tires (???) since the current 185/80-13s are not track-worthy, but it occurred to me that Luna is just sitting in the portable garage on four very nice tires. I’m sure Victoria won’t mind if I take a millimeter or two of tread off of each one. I’ll be relying on the stock lap and shoulder belts to keep me in place during this summer’s convention track day and autocross. Getting her carbs modified with relocated jets and a good tune-up will, I’m sure, take up the couple months I have until Gingerman Raceway event.