Thursday, March 31, 2011

Carburetor Capers


First, I got in touch with the prospective buyer of Lucy, and he said his wife wouldn’t let him buy an old car. So Lucy's in my competent (wink, wink) care for the foreseeable future. This whole little experience does give me pause. Maybe I should sell her and move on to something else – a different Corvair of course.

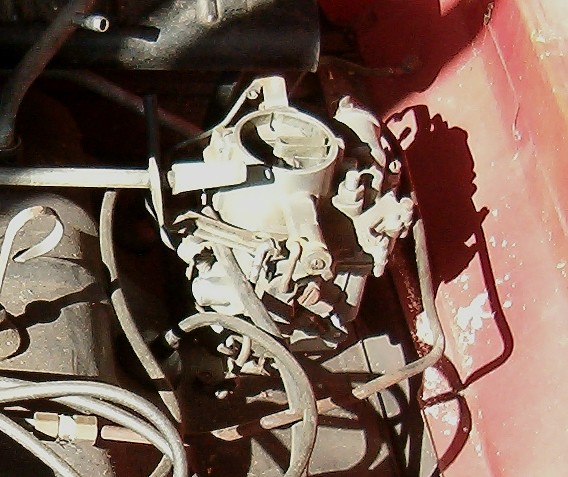
When I got home from work Tuesday, I went back to work on Lucy’s vacuum leak. The whole drive home I was hearing a whistling noise from behind me, and since I was carrying no musical passengers it must’ve been the engine. After removing the air cleaners, I stuck my fingers around the base of the right carburetor and could affect the sound. I removed that carb and the plastic insulator that fits between it and the base on the head. I closely inspected the insulator and found it had a crack through in the area where I felt the leak was at. After fishing a GUP insulator out of my box of carburetor GUPs, I reassembled the carb and attempted to start up the car. The car had sat about an hour at this point and that’s when the starter had failed before. At that point dinner was nearing so I acted like everything would be fine enough for me to balance the carbs the next opportunity I had and took all the tools back to the garage except for the clear hose and a screwdriver. I hope my optimism isn’t dashed.

Last night, since the wet weather was not conducive to carburetor adjustment, I spent a couple hours working at my carburetor collection. I wanted to find the two carburetors with the best-fitting throttle shafts. I found a couple that seemed promising, but were in the midst of disassembly with butterfly screws broken off, so I drilled those out and completed their disassembly. Then, one of the carbs I’d swap on to Lucy when trying to get her engine to idle is one I’d pulled off Ringo a while back. When installed on Lucy, it showed signs of flooding – gas dripping into the venturi after shutting off the engine, so I investigated the needle and seat. When supposedly closed, they did not put up much resistance to my blowing, so I replaced them with a new set I’d recently received from the Corvair Ranch. Now it’s, “open it, air blows; close it, air stops.” That’s the way it’s supposed to be. I found a carb marked LM, that, while the shaft would barely turn since the assembly was quite grotty, seemed to have a nice, close fit. I disassembled it completely and put the metal pieces in the gallon carburetor cleaner can for an overnight soak. Tonight I’ll be back in the garage to remove and rinse off the soaking parts. This may be the best candidate for the next rebuild. I’m trying to get a good pair that I can install on Ringo when his engine’s ready.

Tuesday, March 29, 2011

A Little Scratch Will Do You

Last night I went hunting for a vacuum leak. It took me a while, but I think I’ve found the source - a scratch across the carb mounting surface of the head. I used some high-temp RTV and bolted everything back together and let it sit overnight. This morning I was able to sync the carbs and get the idle down to about 700 rpm without the engine dying, but I still think I hear hissing around where I sealed the crack. I drove the car to work and there’s still something amiss (a slight miss at full throttle), but, for the most part it goes down the road without issue. It currently has one race carb and one original carb. I’d like to swap out the race one for the second original.

Monday, March 28, 2011

I Used to Love Roller Coasters

Saturday evening was our church’s annual spaghetti dinner and since I was helping prepare food, I’d driven Lucy to the event early snagging a prime parking spot near the front door. Later, during the mealtime, one of the diners stuck his head in the door and asked for me. He was a guest of a church member, so I’d never met him before. He’d been asking around trying to find who owned the red Corvair, and someone had finally directed him to me. We chatted for a few minutes about the couple of ‘vairs he’d owned many years ago, then he asked me if I had one to sell. My first response was no, but then I thought, what the heck, if he offers me enough, I’ll sell him Lucy. So I told him that, for the right price, I’d sell the red one. He asked me what the right price was, to which I did some VERY quick mental math before blurting out, “Five-thousand dollars?” His reply was, “Okay, I can bring you cash tomorrow. Do you want to sell?” I told him I needed to sleep on it, but would call him in the morning. He gave me his business card before blending back into the crowd.

Well, I slept on it, and I decided to sell. While I love driving Lucy and I love the way I’ve got her looking, there are so many other Corvairs out there I’d like to own before retiring to a sailboat with the lovely Loriann. After church, I called the number on the card and was connected to his voicemail. I left a message before heading out to the driveway. There were some items on Lucy I didn’t want to part with, so I swapped the LeMans’ seatbelts from the backseat with a couple sets of red ones I’d pulled out of an early-80s GM vehicle. For that job, I enlisted Mikhaila to hold the wrench inside the car while I undid the nuts on the underside. It took no time at all to get the replacements installed, and they don’t look too out of place. The red on the black vinyl actually looks pretty good. Then I removed the last two belts to my harnesses – the crotch belts. With those swapped out, I vacuumed the entire inside, wiped down the vinyl with Armor-all, and re-glued the Velcro along the lower edge of the backlight. The Velcro holds the piece of carpet over the package tray area.

With all that complete, the last task was swapping out the racing carburetor for Ringo’s original one. A few months back, when the TEMP/PRESS light was coming on, I fixed the problem by replacing the right side carb with one of the carburetors I’ve had modified for racing. After investigating that carb, I felt the problem was a bad hose to the choke pulloff valve. With that replaced, I pulled the racing carb and installed the old one back on yesterday. After starting the engine, I noticed the right side did not appear to warm up while idling. Pulling plug wires on the right side plugs didn’t result in the desired drop in rpm, so it appeared there was still an issue with that carb. To make a long story short, I tried many different combinations of carbs and I can’t get the engine to idle. This evening I’ll be back out there again searching for what I feel is a vacuum leak.

Throughout the afternoon, the prosepective buyer never returned my call, hence the roller coaster of: I’m gonna’ sell Lucy, Lucy's giving me problems, will the guy call me back, etc. Another strange thing was that throughout this past weekend, I received more compliments about how nice Lucy looked than I’d ever remembered. Hmm. What’s going on?

So what will I do if I sell Lucy? I'll save that for another post.

Thursday, March 24, 2011

Pictures Worth a Thousand Words

Started off last evening taking photos of my latest Ringo accomplishments. Below are two photos of the right-side cylinder head without valves and valve-springs.


Next are some photos of the passenger side’s exterior where I’ve cut away the rotted sheetmetal. After I finish brushing off the loose, rusty metal and vacuum up the mess, it’ll be ready for a good coat of POR-15. The last photo was taken after brushing was completed - right before I called it a night.


Tuesday, March 22, 2011

Head Disassembly Complete

With my path forward for Ringo and Lucy’s engines in limbo, I’ve been holding on to the valve spring compressor I “rented” from Advance Auto a few weeks back. Last weekend I decided I could use the $60 back on my credit card, so it’s going to be returned within the next couple of days. That meant that last night, I needed to disassemble the heads that were on Ringo’s removed engine (a ’64 vintage 110 HP). It only took about forty-five minutes, and while I did struggle with getting some of the retainers out, the tool is now wiped down and ready to return.

I found that there’s slop in these valve guides as well. I could probably use them as-is in an emergency, so I’ll clean them up, lap the valves, and reassemble for that rainy day.

Monday, March 21, 2011

My Sunday Afternoon With Ringo

First church, then lunch, and a few house chores, and then I was free to go out to the garage and weld. After assuring myself I had a fully charged extinguisher close at hand, I donned my welding garb and began making plug welds along the bottom edge of the long rocker panel patch. After filling all but a couple holes, I ran out of welding wire. So much for momentum. Any more welding has to wait until I make another trip to Harbor Freight.


On to the passenger side. I measured the Clark’s rocker panel patch to remind myself where I needed to cut (on top of the rocker, a 1/2 inch inboard from the bend), and then laid out a length of masking tape to serve as my guide. After replacing the wire wheel in my right angle grinder with a new cutoff disc, I removed the rotted rocker pieces all the way forward to the front wheel opening and all the way rearward to five inches past the door opening. I then grabbed the eBay-bought fender patch (see section C in the image) and held it up in front of the spot where it’s supposed to fit. It’s too wide. In for it to fit properly, I get to slice a thin vertical section out of it. Another case of getting what you pay for. With my last cut on the fender safely below the upper edge of the patch, I ended my afternoon so I could eat dinner with the family.

Issues Appear and Disappear

Friday morning, about eight miles into my commute, the TEMP/PRESS light flickered on, then off, then went on to stay. This occurred as I was doing 70 mph down the interstate. I put the transmission in neutral and coasted for thirty seconds or so and the light went back off. I gingerly drove the last mile to my parking spot, and shut down the engine. Before walking into work, I popped the engine lid looking for smoke or at least the aroma of something burnt. TTL nothing seemed or smells amiss. I’d recently checked the oil level and it was well above ADD, so it looks like the right side is running lean again. The drive home through city streets was lightless, as was this morning’s commute where I kept the needle below 60.

The carburetor I removed when last this temp issue had plagued me has been rebuilt with o-rings that should seal the gap between the worn throttle shaft and the two bores in the carb’s body. I’ll swap this carb back into its previous home atop the right cylinder head (the one with the temp switch) and we’ll see what happens.

Then, Saturday, Victoria informed me Glinda was idling rather roughly. She would run down the road just fine, but when sitting at a stop, there was more than the usual shaking coming from the car’s rear. This information coincided with a gas up that indicated Glinda’s mileage keeps improving. This time its up to nearly 18 mpg. With that positive indicator coupled with smooth running and no dying at stops led me to put off any further investigations until after the fully booked weekend.

This morning Victoria texted me that Glinda ran fine. Another issue resolves itself.

Thursday, March 17, 2011

Momentum is a Beautiful Thing


Evening two of my three-in-a-row went well. I photographed the front fender opening and patch (see above) and finished forming the long patch that will be plug welded to the lower flange of the curved rocker panel patch and then plug welded to the remaining interior vertical wall of the rocker. After trimming away excess metal from the patch, I drilled 5/16ths holes every three inches or so for the plug welds. I held the patch in place with vise grips while I marked the locations of each plug weld. With the patch out of the way and the wire wheel on the right angle grinder, I removed any coatings from the areas where weld metal would be touching. That included the perimeter of the two fender patches. With all that finished I sprayed the backs of the vertical rocker panel patch and the rear fender patch with galvanizing primer before turning off the lights.

Tonight I’ll be welding – with a charged extinguisher handy.

Wednesday, March 16, 2011

Whittling Away

After a couple more sessions in the garage, I’m finally feeling like work on Ringo is heading in the right direction. Sunday afternoon, I cut out and welded in the rocker panel patch in the driver’s front fender. Then, using the cutout piece as a template, I traced an outline on Betty’s scrapped hood and cut out the odd-shaped patch to fill in the leftover opening in the fender. After a bit of time on the grinding wheel, it fit the opening perfectly. Time on the wire wheel resulted in the surface rust removed from the backside and metal exposed on the patch’s perimeter. This will ensure a clean, quality weld. The last task for the afternoon was to prime the back of the patch.

The lovely Loriann and the patient Ariel have become a little frustrated with my lack of progress on Ringo. I explained my desire to keep family time in balance with work and play (car stuff). In response, my wonderful wife urged me to spend three evenings a week in the garage. We settled on Tuesday, Wednesday, and Thursday.

Last night I spent two hours fashioning two more patches for Ringo’s driver’s side. The first of the two was to fit on the rear fender just ahead of the wheel opening. Like the previous patch, I used the piece that had been cut from that area as a template. However, since so much had rusted out, the edge along the opening was non-existent on the old piece. That meant I had to leave plenty of extra and then carefully grind away little bits until the part properly fit the opening. With that patch wire brushed, I moved on to the long vertical patch for the inside surface of the rocker panel. This one was easy – a four inch wide by thirty-three inch long rectangle would form the basis, so that what I cut out of the scrap hood. The edges were deburred and the backside was brushed clean before priming both it and the previous patch with rust-converter. This evening, I’ll notch the long patch to fit around some of Ringo’s structure that hadn’t rusted away.

Monday, March 14, 2011

Shop Safety Cannot Be Ignored

I had a scary situation last week in the garage that I’m sharing in the hope that others who read this will learn from my mistake. When preparing Ringo for welding, I removed the seats and rear carpet and pulled back the front carpet away from the driver’s door opening. I stopped at just pulling back rather than removing the front carpet since it was glued down and the gas pedal also held it in place. And since the floor was in good shape, I wasn’t going to weld in any patches there.

Part of my preparation for welding the rocker panel patch was to locate Ringo’s fire extinguisher. After checking to make sure the charge needle was in the green, I placed it on my workbench a few steps from where I was working. Then, to protect the carpet from sparks, I spread some rags over the exposed portions. I proceeded to don my welding garb and began making molten metal. The commensurate sparks flew, but I was very focused on the work at hand to give them much attention. After twenty minutes or so I noticed it was getting warm in the garage. I attributed it to the heaters I had going, but I decided to lose the sweatshirt I was wearing. At that point, I pulled off the welding hood and found out why it was getting so warm. The rags I had placed over the carpet were on fire. With my welding gloves still on, I gathered the flaming cloths and tossed them on the floor to stamp out the fire only to find that more than just the rags were burning – the backing on the carpet was also going up in flames. I quickly grabbed the extinguisher and put out both sets of flames.

After opening the garage doors, turning off the heaters, and turning up the overhead fan, I let the garage empty itself of the extinguisher powder fog before surveying the damage. I was very lucky (TYL) to find the only damage to the carpet was the burned padding and the slightly melted high-beam button grommet. I’d been afraid that I was going to have to shell out $$$ for a new carpet. I was EXTREMELY thankful that a little voice inside my head had reminded me to find the extinguisher and place it somewhere handy. Again a big TYL!

With all my years of working on cars, this is the first fire I’ve had to contend with. Yes Ringo had his engine compartment blaze a few years back, but that had been extinguished before I'd arrived. It was that incident that prompted me to make sure every old car I’ve got on the road carries an extinguisher. I highly urge all you readers to heed my warning – buy fire extinguishers, place them in a near and safe location when working on your vehicle, and periodically ensure they are properly charged.

Friday, March 11, 2011

Welder Working Wonderfully


The issue with my welder was the wire was hung up on the spool. Once I opened the cover and saw how taut the wire was between the spool and the feeder, I knew what the issue was. I unspooled a few feet of wire and then loosely rewound it on to the spool. That fixed it. I made a few more tweaks to the Watt and Speed dials and then proceeded to complete the welds on the upper surfaces of the rocker panel patch.

The next step will be to cut another patch from one of the used rocker panel pieces that I bought at the auction and weld it in.

Thursday, March 10, 2011

Birthday Present Highs and Welding Woes Lows


I spent another lunch hour at Crazy Ray’s yesterday. The night before, the lovely Loriann had agreed that I could make the racing seats my birthday present from her. That prompted me to pack coveralls, gloves, and tools in the Suburban for the next day’s expedition.

It was a colder day than Tuesday, so I was glad that my coveralls were thermally lined. After paying my entrance fee, I made a bee-line for the already removed passenger seat. It only took a few seconds of seat time for me to be sure this would be a very comfortable seat for my daily drives and infrequent track trips. A closer inspection revealed that one of the posts connecting the base to the seat had a broken weld. I can fix that – I’ve got a welder, so that blemish was not a deal-breaker.

I moved on to the car and a few minutes of wrenching and the driver seat was loose. Since the Nissan’s neighbor was sitting rather close to the driver’s door, it took some finagling to work the seat out of the vehicle. Once free, I was able to give it a close examination. It too had a broken weld, and, sadly, some wear in the seatback cover near where my left hip would rest. The latter gave me pause about going forth with my purchase. I decided to fully cruise all the imports in the yard and make sure these were the best for me. It took some time, but I determined that: 1) these were the only racing seats, and 2) they were in much better condition than nearly all the other seats I’d looked at. Feeling much better, I lugged the seats to the cashier and closed the deal.

Now the trick is finding a place to keep the seats while I’m finishing Ringo. I don’t think the family will find the back of the Suburban an acceptable storage spot.

Then, last evening, I was out in the garage working on Ringo. I carefully trimmed one of the rocker panel patches to fit a large portion of what I’d cut away. With it fitting like a glove, I brushed off the surfaces to be welded and held the patch in place using panel clamps. I tweaked the settings on my MIG welder laying down test-beads on a piece of scrap and then started tacking the patch to the body. The first few tacks went down quite nicely with the welder making its requisite buzzing noise. Then things started to change. One of the welds burned through the metal, so slightly turned down watt setting. Then the buzzing was gone and I was only getting little dots of weld. For the next twenty minutes I made adjustments to the welder settings and tried to lay good beads on my scrap piece, but never got acceptable results. It seemed like the wire was not feeding out as fast as it should. At that point, it was after 9 PM, so I decided to knock off for the night.

Afterwards, while in the shower (doesn’t everyone get inspired while showering?), it occurred to me that I’d tightened the strap that held the gas bottle to the welder. Could it be I'd tightened it so much the cover on the welder was pressing against the wire spool? This would certainly affect the welder’s ability to consistently feed out the wire. Something to check this evening – hopefully the fix is that easy.

Tuesday, March 8, 2011

Are These Seats in Lucy's Future?

I went for a stroll through Crazy Ray’s on my lunch hour today. I was actually looking for something specific – something not Corvair related – something for the tow vehicle. The Suburban’s left rear (barn) door latch release broke a few weeks back, and I’ve been waiting for the weather to warm up before heading over to my local favorite auto salvage establishment. After entering the yard, I headed toward the truck section at the rear. Of course my path was via the Corvair behind the fence I’d blogged about a while back – it’s still there. And since I’m always on the lookout for ‘vair-related stuff, I peered into some of the sportier cars that I was walking by. I stopped in my tracks when I spied a racing seat in a Nissan 300ZX - just the driver’s seat. I investigated its condition and was surprised to find the cover in good, un-ripped shape. The tilt lever worked too. As I was dressed in work slacks, I chose not to plant my butt on the dirty cover, but I’d bet it would fit my frame like a glove. Only a couple bolts held it in place, and the fact that I was not equipped with anything larger than a 10mm wrench meant the seat was not coming home with me. I snapped a few photos and moved on. Soon after, I’d located a Suburban of the right vintage and was elated to find its latch still available and still functional. This had been too easy. Oh wait – a holdup. Rather than a nice upholstered door panel, this one came equipped with an access door held in place with four Phillip’s head screws. Sadly, I had not predicted this, so my flathead screwdriver had to do the job. With it on an angle, I was able to get the screws out. The latch came out easily once I’d removed the four nuts and the disconnected the two rods. Since I still had plenty of time before I needed to be back at work, and not wanting to waste the trip and the $1 admission charge, I wandered back through the foreign car section looking to see if I could find any Corvair wheel candidates. I was specifically looking for Japanese rear-wheel-drive cars with the four-bolt lug pattern. A few rose later, I found an 80s Nissan 280ZX with all its wheels. I took pictures of all four wheels and moved on. It was then I found the mate to the racing seat. It was sitting all by itself a row and a dozen cars over from the car it’d come from. Strange. I’d have been okay only getting the driver’s seat, but having the pair would be even better. That is, if the seat back tilted far enough forward to let passengers into the back seat. I checked it out, and it seemed to be in as good a shape as the other one. Exhausting the foreign car aisles without finding any more suitable wheels, I headed over to the GM area. There I found a mid-70s Firebird with Rally IIs and a mid-70s Cutlass with Super Stock wheels. Both sets would fit a LM Corvair. I’ve posted these finds on the CorvairCenter forum as well as Virtual Vairs mail list to help out the hobby. After paying for my part, I climbed behind Lucy’s wheel and turned the key. The idiot lights came on like normal, but that’s all that happened. No solenoid click, no whir of the starter. To rule out the ignition switch, I made sure the transmission was in neutral and the emergency brake was on. Then I used my iPod cable and shorted the purple wire that goes to the solenoid to the hot lead on the voltage regulator. I got a spark, but no response from the solenoid or starter. At that point, a guy came walking up and offered to help. He recommended I bang on the starter with my lug wrench while he turned the key. Sounded like a good plan, so I pulled the wrench out of the trunk and began to lie down on the ground. As I was reaching under the car, the guy turned the key and lo-and-behold the engine turned and started. I thanked him for his magic touch and uneventfully made it back to work.

Monday, March 7, 2011

POR-15 is Stubborn Stuff


The above photo of my fingers is testament to the staying power of POR-15. I spent yesterday afternoon and evening in the garage making some headway on Ringo’s bodywork. I focused on the driver’s side rocker panel areas, and cut away more rusted metal and wired brushed away paint and bondo to the point where I think I can cut patches and weld. But prior to attaching the new metal, I needed to coat the exposed inner surfaces. Out came the quart of POR-15. Knowing that a quart was WAY too much for the job at hand, I poured off three 8 oz canning jars and capped them tightly with a gasket of plastic wrap. That left me with 8 oz. to apply. After coating the sheetmetal around where I’ll first be welding, I set my attention to the doors. The driver door is being reused, but I wanted to POR-15 the inside surfaces as best I could. The passenger door is the one I recently bought and it had some surface rust on the bottom and forward faces. After removing the hinges with my impact screwdriver, I brushed the loose stuff and those surfaces got a coat of POR-15 followed by a coat of POR Tie-Coat Primer while the inside got just the one coat of POR-15. Even though I was wearing gloves, working around sharp edges of metal are bound to cause a few holes through the nitrile. I was able to get most of the stubborn stuff off my skin, but not all.

Today Ariel primed the inner surfaces of the rocker panel patches and the fender patch. Soon I’ll back out there and cut the patches to fit and weld them on.

Thursday, March 3, 2011

Finally


Could this be the beginning of a serious push to finish Ringo? I hope so. Last evening I spent a couple hours in the garage removing the doors and cutting away some of the driver’s side rocker panel. Before removing the hinge bolts on the driver’s side (the door that’s getting reused), I drilled through both hinges from inside the body so I could be assured of reinstalling the door in exactly the same place when it’s time.

I’ve decided to use as much of the Clark’s rocker panel panels as possible. That meant, as you might be able to determine from the photos, the cut would be right where the sill plate screw holes are. Nice indicator. I laid out a piece of masking tape, marked some places ½ inch in from the edge, and then laid out another piece of tape with the edge aligned with the marks. That was my guide as used a cutoff wheel on my grinder to make the cut. Prior to making the cut, I made a measurement across the door opening that I’ll verify before welding in patches. This will ensure no twisting of the body. I’m also trying to keep what’s left of the vertical portion of the rocker in place to prevent movement. Next step is to the cut away the rest of the rustiness in that area, and then POR-15 what’s left.

Wednesday, March 2, 2011

My Dream Car Garage

A few times I’ve posted a list of dream cars on some forum; most recently in response to a CorvairCenter thread. Here's my latest list.
AlfaLeMansGhibliCorsaSuburbanFiesta

1) Cold-weather daily-driver: 1962 Alfa Romeo Sprint Zagato. I need a smaller, closed car with good handling. No radio required since the sound of any Alfa engine is music to a car-lover’s ears.
2) Nice-weather daily-driver: 1965 Pontiac LeMans convertible. I had to include the car I’ve been hauling around the country since the mid-80s. Someday, she’ll get the restoration she deserves.
3) Road-trip: 1972 Maserati Ghibli Spyder. I chose this Italian exotic for a number of reasons. It's Italian. It's a convertible. It's from an era that’s pre-computer. It's not a Ferrari or Lamborghini.
4) Track: 1966 Corsa. The ultimate factory Corvair. I could’ve opted for the Yenko Stinger version, but I’d drive one of those like I was afraid of wrecking it.
5) Towing: 1972 3-door Suburban. My favorite vintage of trucks, and the oddness of only three doors is too cool.
6) Family: 1957 Oldsmobile Fiesta. The fabulous 50s needed representing. Every family needs a wagon. The uniqueness of a 4-door hardtop wagon is irresistible.

Other than the LeMans and possibly the Corsa, I fully expect to go my entire life without ever owning, let alone being behind the wheel of, any of these beauties. Thank goodness I can find happiness and satisfaction in what is really important – faith, family, health, and friends.