Showing posts with label electrical. Show all posts

Friday, November 18, 2016

So Much To Do, So What Do I Do?

There’s a guy here in Maryland who recently posted on Facebook that he’s looking for a daily-driver Corvair. Given all the work ahead of me with Scarlett and, probably, Luna, I’ve been toying with the idea of trading Glinda for something more modern – like a mid-90s MX-6. So, after some thought I messaged him that I’d sell Glinda for $2200. He says he’s interested, but nothing’s happened.

If Glinda didn’t need so many little issues dealt with, I wouldn’t even consider giving her up, but she does, so I am. In addition to the items on the To-Do list (see sidebar), here’s a mostly complete list in no particular order.

Install the Cobalt rear seat

Clean and reinstall the carpet
Fix the courtesy light
Repair and install the GUP driver’s door panel

Replace the rear bumper

Install the GUP steering box
Splice the broken oil pressure gauge tube and replace the ferrule at the rear of the gauge
Remove the heater fan and clean and lube the motor
Replace the package tray cardboard with something that will accommodate speakers
Install a good mount for the racing harness shoulder belts
Bolt down the fourth hole of the each Cobalt front bucket seat
Weld in a new trunk bottom

Rebuild the blinker switch
Plug the smog hole and AT dipstick hole in the engine bay

Replace the gauge panel with a GUP I’ve got from a manual shift car (need to choose 500 or Corsa style)
Replace the hood with a GUP I’ve got

Eradicate rust: rear shock towers, multiple body locations


Paint the car orange

Kinda’ daunting given all my other commitments (put big sad face here). She runs really well right now, so I do love to drive her.

Monday, October 10, 2016

An Empty Stall Is Good News


After the successful roadtrip of last week, Mikhaila and I had our eyes on the prize this weekend – putting Scarlett right enough for daily-driver duties. The two main items to address were the sticky throttle and the dim brakelight. We dealt with the former by removing the two screws holding the throttle pedal pivot to the floor, sliding the bound bushing off the rod, sanding the rust off the rod and greasing it, sliding the bushing back over the rod, and reinstalling the pivot to the floor. We dealt with the latter, by reattaching the ground wire to the back of the socket and binding it with electrical tape and a zip-tie.

With those two items resolved, and some time left in the garage before dinner, I dug out the cavity coating kit I'd bought months ago. After shaking the can for one minute, Mikhaila, now wearing safety glasses and gloves per the instructions, gave the inside of the rocker panels a healthy coating working both from the heater door back and forward and from the hole under the back seat. We then moved on to the upside-down steering wheel. In my mind, a misaligned steering is a sign the front wheels are also out of alignment. Using the string method, we determined that the front wheels have roughly .8 degrees total toe-out. The car is supposed to have roughly .6 degrees total toe-in. Some adjustments will be necessary, but, by that time, dinner was upon us, so we had to quit.

With the promise she’d stay within a 5 mile radius of the house and limit her route to surface streets, Mikhaila and Scarlett hit the road to visit friends. When they came back home, they parked on the street thus affording me the opportunity to take the above photograph.

Big news regarding Glinda. I think (hope and pray) I’ve solved the starter issue. Thanks to Jeff at the Corvair Ranch for the parts, I rebuilt her starter with a new Bendix, a very GUP solenoid fork, and a new felt washer. I also cleaned the commutator, checked the brushes (plenty of life left), and lubricate appropriate surfaces with synthetic grease. Once it was all reassembled, I rolled it under the car, and I followed armed wrenches, light, phone, and a mirror. Prior to reinstalling the starter, I wanted to shoot some photos of the ring gear teeth to make sure they were in good order. From what I can tell (see photos below) everything looks to be in pretty good condition. With the starter bolted in and the wiring hooked up, I gave the key a twist and the starter spun the engine just like it was designed to. I gave it about six times to misbehave, but it worked right each time. Glinda is back into daily-driver service.

Thursday, August 11, 2016

Reversible Sharing

Last night, in support of getting Scarlett on the road ASAP, I made the hard decision to pull perfectly good parts off Ringo and install them on Scarlett. The other option was to rely on recently rebuilt carburetors and a suspect fuel pump, and buy a battery. Since I expected it to only take a few minutes to remove the requisite Ringo parts, I went the cannibalization route. I figured if someone wanted to test-drive Ringo in the next few days, I’d swap everything back – not too big a deal.

While Mikhaila installed the final engine seal retainer on the passenger side, I remove Ringo’s fan belt, loosened the fuel pump retention bolt, spun off the four nuts holding the carbs to his heads, and disconnected the throttle and choke linkages. With Mikhaila helping, we pulled the carbs, fuel pump, and fuel lines as one assembly and dropped it onto Scarlett’s engine. Mikhaila went to free the battery while I began tightening bolts and fittings. Once all that was in place, I realized we hadn’t installed the choke linkage into the thermostat ends. We got it done, but it would have been MUCH easier prior to putting the fuel in the way. Mikhaila bolted down the carbs and then busied herself cleaning chrome while I finished hooking up and adjusting linkages. Ringo’s battery was then yanked from its home and dropped into Scarlett’s engine compartment. After cleaning the terminals, we established electrical power to the car. Next needed part? A vacuum balance tube. I searched the washtub of Scarlett parts – nothing. I searched the shelves and walls and I was able to turn up four tubes, but they were all for LMs. Cool that one of them was from the 140HP engine from the Phil collection. I briefly thought about pulling Ringo’s, but the thought of finagling the tube out didn’t thrill me since it violated the easy-off easy-back-on rule I’d applied to this cannibalization episode.

When I shared my frustration at not have the right piece amongst my stash, Mikhaila pulled out a pen and a used part box to start a list. I guess she figured if we were missing one part, there’d be more. I scanned the engine compartment to see what else I was forgetting to install and came up needing the two brackets that position the bottom air cleaner cans over the engine (circled in red in the image below – taken from the excellent source corvanatics.com. A little explanation here since the Corvair enthusiasts among you readers will recognize that this style air cleaner (two separate elements) is not correct for a ’64 engine. I had given Mikhaila a choice as to which air cleaner style she wanted (correct ’64-‘69 style with a single, larger element or ’61-’63 dual element style). She chose the dual style, so many months ago I made sure I had the cans, lids, and crossover for that. Sadly, I’d forgotten the two brackets. Another deep search of the shelves turned up nothing, so those went on the list. I was, however, able to unearth all the parts necessary for the LM style, so that’s what we’ll go with until the correct brackets are obtained from the Corvair Ranch.

The next scan of the engine reminded me we needed to plug the large hole on the front right of the top engine cover. GM’s design had a hose go between the pressurized volume under the cover and the heater box to provide air to mix in the heater box. That AIR knob under the dash controls the door that lets or restricts this flow. Since stealing any cooling air from an air-cooled engine is not a good idea, many folks remove the hose and block off the exposed opening, and we did that exact thing. Without explanation I cryptically directed her to go to our recycle bin and bring back an aluminum can. She was then instructed to cut the can leaving only the unrolled flat side piece. Using the adapter as a template, she crudely cut out the sheet to fit, we poked holes where the three attachment screws went coated the mounting perimeter of the sheet and adapter with RTV and screwed the parts in place over the hole.

The final act of our evening in the garage was testing the lights. With the key in the ON position, I flicked the blinker lever to the right and left with each position providing the resultant blinking of the front and rear lights. The shifter lever was moved to the R position and one of the two backup lights illuminated. I think I know the issue with the balky passenger side – grounding, and we’ll deal with that soon.

Once back inside I grabbed my phone and sent my buddy, Gary, a quick e-mail to see if he had a balance tube he'd be willing to part with. This morning's response was positive, so I'll be paying him a visit next Monday evening.

Friday, November 13, 2015

Is It Nearly Thanksgiving Already?


Where does the time go? Two weekends away make for very short weeks. Ringo has been patiently waiting for his turn at daily-driver-ship. This morning that opportunity came and he rewarded my trust with an event-less drive. He’s now been placed in permanent rotation – at least until he finds a new owner. There are still a couple issues I’d like to resolve in the near future. First, the TEMP/PRES light does not illuminate (I’m hoping it’s just a bad bulb). Second, the recently replaced ignition still doesn’t reliably energize the starter. In fact, the last few times I’ve had to use the hotwire in the engine compartment to get the engine going. Fortunately that works every time. I’m not sure if it’s the solenoid since it works if it sees voltage directly from the battery. I measure the voltage at the purple wire connector and got more than 12 volts with no load. I guess I should try and measure voltage when I’m attempting to energize the starter and see if there’s an issue with the replacement ignition switch showing a high resistance.

Glinda is still performing satisfactorily. I put 10 gallons of gas into the tank yesterday and fuelly.com indicated she’d gotten 18 mpg since the last fill up. No long distance trips, hence the drop in mileage from 19+.

Thursday, July 23, 2015

A Little Electrical

Last evening Mikhaila and I worked on her current daily-driver, Glinda, addressing issues that have nagged this car for many months. First, we tried fixing the current right rear taillight socket, but to no avail. We ended up replacing it with one from my mass of harnesses hanging from a garage rafter. Next, we put a new blade terminal on the end of the ground wire for the left rear side marker. Mikhaila took care of replacing the failed front blinker bulb. Finally, we moved on to adjusting the front headlights. Sadly, the first one we went to adjust broke as I turned the screw. Not having a replacement, we jammed a piece of wood between the bumper and the bottom of that headlight ring which will keep the bulb from flopping. The other side adjusted just fine.

Monday, July 6, 2015

Three Cars, Three Updates

Glinda: No Racer No More

A couple weeks ago I hopped into Glinda for a quick evening drive. I started her up, and pulled away from the curb. Since it had been raining, I turned the wiper knob to clear the windshield, but nothing happened - at least nothing wiper-wise. Some other things DID happen though. The radio shut off, the tach needle went to zero, and so did the voltmeter. I immediately turned off the wiper switch and everything went back to working. Since I didn’t want to get stuck somewhere, I pulled her back to the curb, with the intent of dealing with the problem later. The following morning, before turning on the car, I pushed in the wiper switch rather than turned it as a test – the wipers worked as normal. I turned them off, and, thinking the previous evening’s gremlin had moved on, I started the car and drove away. A few moments later, I checked Glinda gauges and found the voltage sitting at 10.8 rather than the normal 14+. Not having a spare vehicle available to me this morning, I continued on to work minimizing my use of electrical stuff. By the time I pulled into my parking spot at work, the gauge was now reading about 10.2. I shut off the car, and then turned the key to the ON position – the gauge needle was now pointing at slightly above 12. The drive home, however, was business as usual. The voltmeter needle pointed back to where I was used to seeing and all seemed fine.

The lovely Loriann and I decided that Mikhaila needed a car to drive while waiting for us to finish Scarlett. Glinda drew the short straw. To facilitate Glinda’s new duties, Mikhaila and I swapped out the racing seat and harness for the stock bench and belts, and we put back the skinny tires in place of the wide racing wheels. I rode with Mikhaila giving out instructions as she wheeled the car around the neighborhood. She did quite well getting used to the heavier steering and relearning the manual transmission skills she’d not had to put into practice for months.

Yesterday, after recording another tank-full of atrocious gas mileage, I gave up on the modified carburetors and swapped on Scarlett’s pair. With the recently rebuilt carbs hooked up and some gas poured down each throat, the engine reluctantly fired. After a few moments, gas started squirting out of the vent holes of the right carb. Off went the engine and off came that carb top, but not until I checked the accelerator pumps – no squirts in either carb. Inspecting the removed top assembly, I found that the wire needle retainer was preventing the needle from easily seating itself. So, I removed and re-set the float levels to ’65 setting (1-1/16” full up and 1-1/2” for full drop). I then dug out some new accelerator pump cups and a couple GUP pump assemblies from my stash. I found that the two assemblies both had pliant cups that worked perfectly in their associated bores, so one went on in place of the right top’s non-functioning one. After reinstalling that side, I pulled the left top assembly off made the same changes. Next, I needed to again clean all the filthy, fouled spark plugs (this is getting old). With everything installed and connected back up, jumping 12 volts to the purple wire contact got the engine running right away. No gushing gas and blips of the throttle were met with immediate rpm responses from the engine. I climbed in, belted up, and took her for a spin around the neighborhood. She ran better than she had in months – coincidentally the same number of months the racing carburetors had been on the engine.

Needless to say, I was quite happy as I backed her up to the garage opening. I got out my length of clear tubing, shot some water in, hooked both ends up to the appropriate vacuum ports, and balanced the carbs. With the air cleaner back on, I adjusted the idle fuel screws per the manual before setting the idle speed to 800 and shutting the engine lid convinced all woes with that car were now behind me. That euphoria lasted less than twenty-four hours ended by a single text from Mikhaila: “Glinda keeps stalling and the gas gauge went from full this morning to half full when I ran an errand.” CRAP! I thought I’d get to work on the house this evening, but NO!

Scarlett Brakes Won’t Bleed

During the last week Mikhaila and I have had a couple productive sessions in the garage. Scarlett now has all her new brake lines in place as well as her exhaust system completely hooked up. With the last brake line fitting tightened, she and I spent at least an hour and went through over a pint of brake fluid trying to get a solid pedal. With all the components of the system being new, there was a lot of air that had to be bled out. After running out of fluid, we were still getting air with each opening of a bleeder valve. Part way through the task, I got smart and adjusted the pedal rod making it longer so it would push the pistons in the new dual master cylinder deeper. This seemed to get more fluid pushed out with each stroke. I hope we’re right around the corner from an air-free system.

The muffler hanger arrived in the mail Saturday morning, so we bolted it to the engine. A new strap held the GUP muffler in place and a new 2” muffler clamp solidified the exhaust pipe to muffler joint. The engine is ready to start up other than the fact that 1) I took the carbs for Glinda, and 2) I put battery back in Ringo (see more below).

Mikhaila also took advantage of the seats being out and more thoroughly scrubbed the years of dirt from each of the front bucket seats. We also stripped the old rear window material from the three trim sticks in preparation of a new top getting installed (a ways off from happening).

Ringo Readies for Upcoming Sale


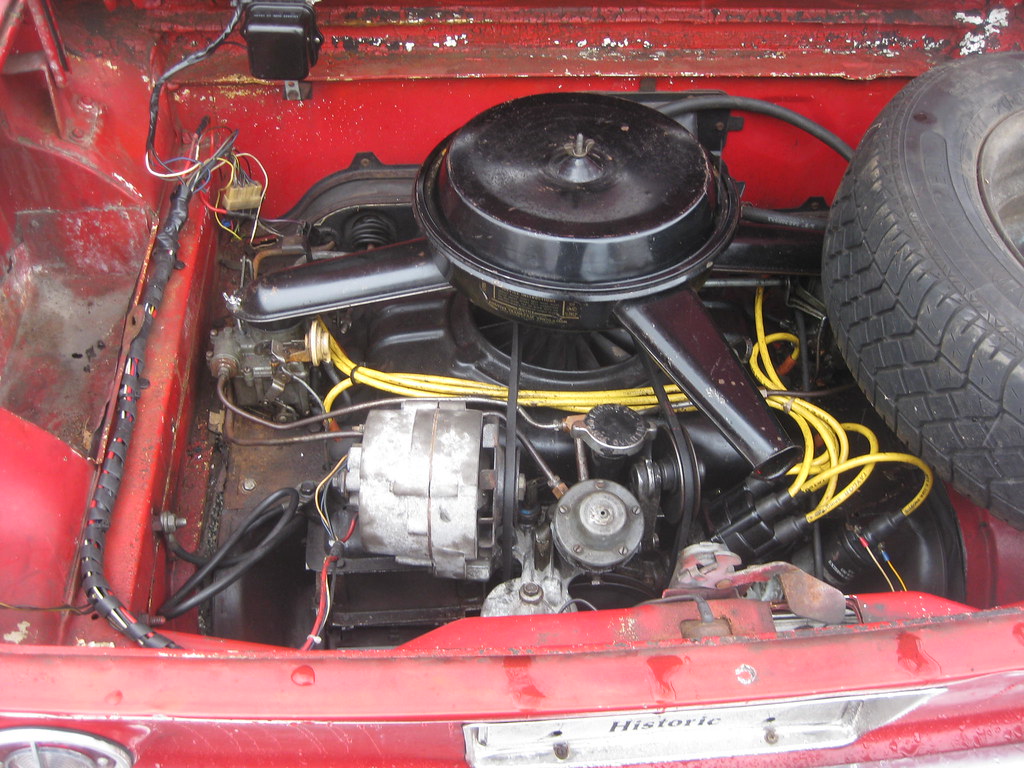
Yesterday, I pulled the tarp off Ringo with the intent of deciding what I would do to this car before I put it on the market. Instead, I jumped right into the fray by swapping back in the battery he’d so graciously loaned to Scarlett. A bit of gas poured into each carburetor and a few revolutions of the engine by the starter and the engine was running smoothly like he’d been on the road a week ago not a year ago. 
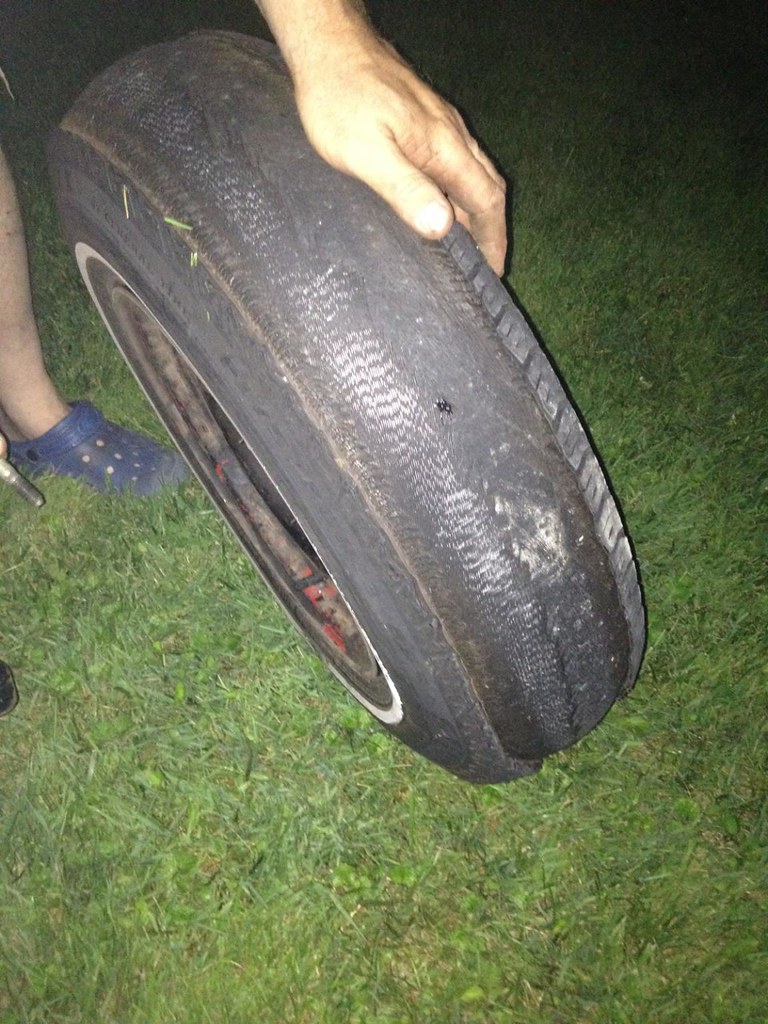
Next on the checklist was bodywork made necessary by the destructive right rear tire. I bent and pounded the sheetmetal behind the wheel into some semblance of its original shape. Grabbing the grinder fitted with the wire brush attachment, I attacked the mess along the front edge of the wheel-well as well as the inside of the wheel-well (is that too many wells?). I also brushed away the flaking paint and surface rust on straightened out section. Next, I pulled a jar of rusty metal primer and brushed over all the exposed steel.

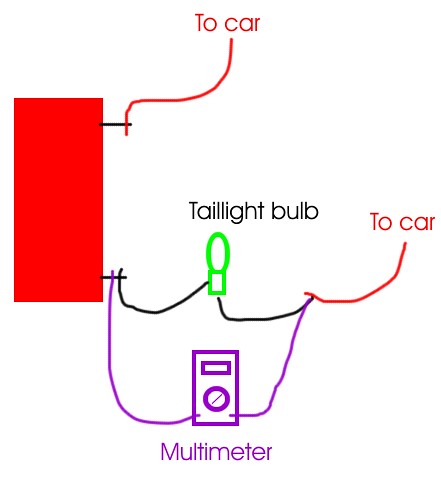
I remembered that the last time I’d seen Ariel drive away in this car, one of the rear taillights wasn’t working. It took some cleaning and bulb replacement, but after a half-hour or so I had all essential lights operating properly.

With all this progress, I decided I’d move him out into the middle of the driveway so I could access the stuck driver’s door. I climbed behind the wheel, put my foot on the brake pedal, and it went all the way to the floor. I climbed back out, popped the trunklid, spun off the master cylinder cap, and stared down into an empty master cylinder reservoir. Hoping against all hope I filled the reservoir with fresh fluid and crossed my fingers. Maybe, I though, the seals will magically rejuvenate themselves after a good soaking with DOT 3.

This morning though, I went ahead and made the call to the Corvair Ranch and ordered a rebuild kit. I also asked Jeff to send me a Powerglide re-seal kit, two carburetor rebuild kits (so I rebuild the two EM carbs on the shelf to put on Scarlett’s engine), and a muffler strap for Glinda.

Monday, May 4, 2015

These are the Times that Try My Soul

Going backwards is not fun, but that’s what’s been happening. When last I blogged, Glinda was nearing roadworthiness, and by the end of Friday night I’d hooked up the rest of the underside linkages and hoses, and drove her down off the ramps. After a spin around the neighborhood, I was confident I’d fixed the two major issues of clunking/catching clutch and stumbling engine. I even went ahead and put the electronic ignition stuff back in before calling it a night.

Saturday morning Mikhaila and I spent a frustrating couple of hours testing, removing, rebuilding, and reinstalling Scarlett’s blinker switch assembly. While we were successful in our endeavor, it was a shame we spent all her garage time on one small task. Next on the list is bolting on the exhaust and starting up the engine. Maybe we’ll make that momentous milestone some evening this week rather than wait until the weekend.

After she went in the house, I crossed another item off the to-do list when I undid the oil gauge line at the back of the gauge, pushed the tiny ferrule back up the nylon tubing, cut off a half-inch from the end, and reattached the fitting to the gauge. After firing up and revving the engine, I was satisfied that I had a drip-less connection, so I cleaned the oil spot from front carpet. I then removed the non-functioning backup lights (the switch on the transmission was never hooked up), and replaced them with factory blank plates. These were only offered on ’65 Model 500s, but I somehow ended up with them.


One sad thing happened when I went to turn the car on that afternoon – the spring in the ignition switch broke. I now need to manually turn the key from the Start to the On position once the engine is running. Not a big deal, but it’s just one more thing that needs to be dealt with. Irr #1.

Sunday morning I had a very enjoyable windows-down drive to and from church, winding out Glinda’s 110 at each shift and loving the sound and performance. I could hear a slight exhaust leak, so, after changing into grungies, I backed her up onto the ramps again. With the engine still running, I slid under the engine and began tightening nuts on the exhaust pipe flanges. Just about the time I got rid of the leaks, the engine’s rpm increased and then, almost immediately, stopped. I got out and cranked the engine only to now discover the fuel pump wasn’t getting gas to the carbs. Irrr #2. I pushed the car off the ramps and primed the carbs directly with gas out of a can – no luck, still no gas being moved by the pump. A quick R&R with a GUP off the shelf and the engine was running again.

Irr #3 (and it’s a big one) occurred yesterday evening when I was driving the car home from a church event. The clunk/catch came back. When I got home, I told the lovely Loriann that I’m through. The level of frustration I felt after all those hours on working the drivetrain ended up being for naught was too much. I am NOT going through it again. I’ve decided I will drive the car as-is and if something breaks, at least I’ll then know what was causing the problem. If nothing breaks, I’ll learn to live with the clunk/catch. Oh yeah, here's a photo of the relocated oil pressure gauge setup.

Tuesday, April 21, 2015

A Weekend of Work, But all Lights are Still Mighty Small

Those would be the lights at the end of the tunnels called Glinda and Scarlett.

Friday evening I backed Glinda up onto ramps and slid underneath to try and figure out what was causing the clicking linkage clicking. I disconnected the cable from the pivot arm being careful to keep tension on the cable so its other end didn’t come off the pedal arm inside the car (a zip-tie did the job). Next I removed the small cover that closes off the clutch volume inside the bellhousing. That gave me access to jiggle and push the clutch fork around. Lo and behold, I got a clip-related click when I pushed the fork inboard. Problem solved? Only putting everything back together and taking the car out on a test drive would verify. That’s what I did, and before I could complete my couple miles and stop-and-go, the clunk had returned. By the time the car was back on the ramps, the whole area under the car was too hot to handle, so I gave up for the night.

The other sad outcome of the test drive was the unsolved rough running. I’d thought (hoped) the problem had been a failed Pertronix electronic ignition, so I was confident (mis-guided) that putting the stock points plate back in would result in a free-revving 110. Pedal to the metal in first and second gear and the tach needle would never go above four thousand. It’s so sad (there’s that word again) that I can’t get the work on this car going in the right direction. Mikhaila and I spent a solid six hours in the garage last weekend trying to make some headway with her car. What did we have to show for it? Three crusty brake lines lying on the floor and a better understanding of Scarlett’s electrical issues.


As to the first, Saturday was brake day. I had high hopes we’d get the final brake pieces installed and the system bled of air. After bending and screwing in the last piece of brake line, I went around and made sure all bleed valves were tight. Sadly, when I got to the right front (with the new wheel cylinder), I found I could not get a wrench on the valve. It looks like I mistakenly used a LM cylinder. Irr. We dug Scarlett’s original cylinder out of the box of brake parts, punched out the old guts, cleaned it in the parts washer, honed the inside, blew it clean, and stuffed it with a GUP rebuild kit. The newly rebuilt cylinder then replaced the incorrect and we were good-to-go. We topped off the master cylinder and began the dance of Press-Press-Hold. She would press the brake pedal twice and hold it on the third pump while I cracked open the bleed valve to let out the air. After a few minutes of this, I looked under the car and saw significant amounts of brake fluid dripping onto the cardboard. Irr (there’s that word again). We both grabbed paper towels and wiped up the mess. We then removed the front underside tunnel covers and confirmed the back-to-front brake line was rotted through in a couple spots. The rear tunnel cover came off next followed by the humped cover under the dash. That gave us access to remove the entire line. As I lay under the rear of the car looking at the crusty left and right rear lines, it was easy to make the call and remove them too. I’ll get the replacement lines from Napa sometime this week for installation next Sunday.

The next day, we hooked up a 12 volt supply to the ends of the battery cables and began a thorough check out of Scarlett’s electrical systems. The connectors for the right rear taillight showed 12V with the headlight switch pulled, but the left side was dead. We moved to the front and found both headlight plugs were powerless. A quick check showed we’d never returned the dimmer switch after painting the floor. With one pulled from GUP stock, cleaned up, checked, and plugged in, we had 12V at both contacts of both plugs. Yay! We then plugged the connectors to send the juice to the headlights, pulled the switch, but were rewarded with all four beams staying dark. Dead bulbs – no problem. Sadly (there’s that word again), though a continuity check showed all bulbs were still fine. We spent the next hour or so swapping switches and cleaning contacts until we finally got all the bulbs to burn brightly. TYL. We moved on to the blinkers, and, the left side checked out as did the front right side, but there was no electricity making it back to the right rear plug. I’m thinking the issue is in the blinker switch assembly – a little cleaning and adjusting is called for. Finally, I had Mikhaila connect the two brake light wires (the ones that plug into the brake light switch), so we could check out that circuit. Result – right works, left doesn’t. Again, the blinker switch is probably the culprit.

Tuesday, March 3, 2015

The List Dwindles


Bundled for the cold, Mikhaila and I went out to the garage yesterday afternoon for a couple hours of quality Scarlett time. I’d purchased all the parts I thought would be necessary to get us to the brakes-are-done point, so we voraciously attacked that project. We bent the new front left brake line to match the old one and routed – Mikhaila on her back under the car and me jumping between right front wheelwell and under the dash. Next we bent and installed the left front followed by finding and popping in the grommets. Sadly, one has gone missing, but I’m hoping I’ve got a GUP sitting in box A4 (see previous post on inventorying). After bench-bleeding the new dual master cylinder, we bolted it to the firewall and moved on routing the last two brake lines. Since the threaded holes in the side of the master cylinder were larger than the stock lines, I’d bought adapters. The thickness of the rear adapter (for the front lines) forced us to re-bend the end of the existing brake line, and then, once it was lined up, we discovered I’d bought the wrong adapter. So, we moved on to the new line connecting the front port of the master cylinder to the existing brake line fitting under the dash. We carefully located and drilled a new hole, ran the grommet over the brake line and stuffed one end of the tube through the hole. After popping the grommet into place, bending a generous U in the tube, and screwing it into the adapter on the master cylinder, we climbed under the dash again and found the tube I’d bought wasn’t long enough to make the bends to connect to the rear line. Now I have two reasons to go back to Napa. Hitting that dead-end forced us to move on to other endeavors. I decided it was a good time to make a list of the minimum amount of work necessary to get the car on the road. We came up with the following list:
  • Buy brake line fittings, short brake line, and replacement lightbulbs.
  • Bend and install brake line and install the fitting.
  • Install seat
  • Bleed brakes
  • Buy spark plug leads
  • Take muffler and pipe to muffler shop
  • Install exhaust system and spark plug leads
  • Check fluids
  • Borrow battery
  • Start and run engine
  • Check transmission
  • Check compression
  • Scrape paint off windows
  • Check lights
The sooner we can get Scarlett on the road, the better for our attitudes.

With the garage finally warm and some time before dinner, we decided to continue working. The easiest task to cross off our list, we felt, was checking the lights. I grabbed my 12V transformer and we hooked it up to the battery cable ends. I had Mikhaila turn the key, but instead of seeing idiot lights illuminated on the dash, we saw and smelled smoked coming from the transformer. The + and – terminals are unmarked on the transformer, and when I’d recently put new leads on, I'd gotten them backwards. It was toast – literally. Taking that as a sign, we shut off the heaters, turned off the lights, and locked the door as we headed back to the house.

Tuesday, October 28, 2014

With Thanks to Mikhaila

Sunday should’ve been a work on the bathroom day, but thanks to Mikhaila’s father-daughter project, I went outside to work on cars instead.

She joined me around 1 in the afternoon to work on Scarlett. Since she’d twisted her ankle (Mikhaila, not Scarlett - cars don't have ankles although some have knees), I had to come up with activities that would limit her standing, so I started by taking out the seats, so she could brush, vacuum, and coat the inside floor with POR-15. I decided it would be a while before we’d be able to reinstall so the seats, so a good storage place had to be found. Since I’d planned on reinstalling Glinda’s bench seat, it came off Luna’s engine lid and Scarlett’s seat took its place.

We then pulled Ringo’s battery, dropped it into Scarlett’s engine bay, and hooked it up to the cables so we could determine the state of the electrical system. It was encouraging when the first thing we checked, the ignition switch, resulted in both idiot lights illuminating. The check-out went downhill from there. I had Mikhaila push down on the turn signal stalk – green light on dash, nothing at the front or rear connector, same thing on left turn signaling except no green arrow on the dash. Finally, pulling out the headlight knob provided no electricity to any of the outer connectors. The next step for this will be checking fuses (something we couldn’t do with wet POR-15 on the car floor.

Finally, we oiled the engine. First, though, we removed the distributor after carefully marking it’s location against the engine as well as the location of the rotor. That gave us access to the end of the pump shaft, which she spun clockwise with the drill-mounted special shaft. She kept this up as I slowly rotated the engine through two revolutions. With the distributor back in place, I had her pull the #1 plug and insert the compression tester fitting. Then, with the gauge attached, she energized the starter spinning the engine and causing the needle to rise. We checked all six with the following initial results: one @ 160 psi, three @ 150 psi, one @ 120 psi, and one @ 60 psi). By pumping a little oil in the low cylinder and retesting, we got the gauge needle to point to 80 instead of 60. That gives me some hope this low one will come up after we run the engine a bit. We’ll need to borrow a couple good carbs first but that’ll have to wait until next weekend.

Amongst working on Scarlett, I fiddled with Glinda trying to get her roadworthy again. I pulled back the carpet to find the end of the clutch cable and inserted it back in its place. I hooked up the clutch linkage, fuel lines (with a fresh filter), and battery, and tried to start the engine. The latter activity didn’t go so well as the engine just spun and spun and refused to fire. I pulled out the timing light to check for spark and found there was none. I hooked up the dwell-meter and found there was none. Arghh. After adjusting the dwell, the engine fired right up, but as I revved it, I watched the dwell-meter’s needle jump around – not good. Since this was occurring with the vacuum advance hooked up, I surmised the points’ plate had play in it. Knowing I had the electronic ignition to install which would solve this problem, I didn’t get too upset. On second thought, isn’t this a fairly new points’ plate?

At that point it was time to put the tools away, and call it a day. The only problem was I had a bench seat sitting in the driveway – a bench seat that wouldn’t fit in Glinda while the racing seat was still installed. I lugged the heavy seat into the garage and it’s now sitting on end blocking the path around the back of Scarlett.

Monday, July 14, 2014

Two-and-a-Half Hours to Fix a Switch

Actually, it only took a half-hour to fix switch, but it took two hours to finally decide that that was the problem, remove it, and then reinstall it after the rebuild. When both the gas gauge and the wiper stopped working, I jumped to the conclusion that GM’s construction of the switch uses a pot-metal (soft) housing retaining the plastic, copper, and steel of the switch’s internals, contacts, and connectors. The basic function of the switch is to connect combinations of blade connectors to the housing, and, thus, to ground. This completes different 12 volt circuits running through the wiper motor causing it to spin slow or fast. As I posted before, when I was installing the clutch pedal, I had to undo all the wire bundles under the dash. I surmise, then, that I yanked on the wires going to the switch, causing the contact-to-housing connection to fail. I ended up removing the switch from the dash, disassembling it, cleaning the contacts, coating them with di-electric grease, stacking all the pieces back into the housing, and then crimping the housing to the insulator making sure I caused the housing to touch the correct contacts within the switch.

With the switch back in place and the wipers wiping again, I turned my attention to the other dash-mounted failure – the gas gauge. I removed the screws retaining the heater controls and pulled it out of the way to give me access to the back side of the gauge. I then pulled off the connector, turned the key to ON, and measured the voltage at the tan wire – 12.4 V which just happens to be the reading on the voltmeter that’s bolted under the dash. Therefore, the sender is still connected to the gauge, but providing no resistance to the electron flow, indicating – to me – the float is on the bottom of the tank even though the tank is full of gas.

Given all the time I wasted on these two projects, I didn’t have time to do anything more on the car that evening.

Thursday, June 26, 2014

Ungrounded?

The lovely Loriann’s daily-driver had a breakdown the other day, so while I wait for parts, she’s driving the truck, and I’m behind the wheel of Glinda. Swapping the right-side carb from Ringo onto Glinda (replacing the one with a noticeably higher fuel level) has pretty much erased the quick-throttle bogging issue. With that problem solved, it’s been difficult not to use the loud pedal more exuberantly. With that, I’m not sure I’m doing my fuel mileage test any good.

It appears that I’ve messed up the grounding of the dashboard when I was installing the new clutch and brake pedals. I first noticed that the wiper switch wasn’t working, and then the fuel gauge is now stuck on E. Monday evening I tried finding the disconnected, wayward wire, but struck out. After some web research, I found the ground strap in an assembly diagram, so that’ll be my next inspection point.

Of course it could also be a coincidental failure of both items, but I deeply doubt it.

Tuesday, June 10, 2014

Could’ve Happened to Any Car


Yesterday evening I got a call from Ariel – yes, that kind of call. She was sitting on the side of the beltway since her car was “making terrible noises above 40 mph.” When the noises first started, she immediately pulled over, got out, and checked to make sure all the tires were okay (they appeared fine), and then checked the oil and transmission fluid (both above the ADD mark). At that point she then decided she wouldn’t drive Ringo any farther. Victoria just happened to be close by and getting off work at the time, so she was able to come pick her up. After dinner Ariel and I went back to the car with the truck and tow gear, and I looked everything over and nothing appeared amiss. Since the Baltimore beltway is no place to diagnose a car issue, we hitched Ringo up to the truck and began the trip home. About four miles after setting off, we started here some really nasty banging noises coming from behind us. I immediately pulled over and Ariel jumped out to see what was going on. She discovered the right rear tire was now missing most of its tread. We did a quick tire change (fortunately the spare was in good shape and had air) and were home twenty minutes later. I like the easy ones.

However, I wasn't to get off that easily. As she drove away, I noticed that Ringo's right taillight is not working (nor is his right brake light). I'm thinking the grounding wire has failed. I texted Ariel later in the evening that she needed to come by the house the next evening so I could fix that problem and keep her from getting a ticket.

Needless to say, that sucked up my evening, so I didn't get to do any fuel issue sleuthing on Glinda. Maybe tonight.

Tuesday, March 26, 2013

Make It Better to Make It Gone


I may have a prospective buyer for Lucy. He answered my Craigslist ad last week and we had a tentative appointment for him to stop by Sunday afternoon, but that ended up not happening (he did call me, so my faith in mankind is still intact). We rescheduled for Wednesday evening, but I'll leave Lucy parked on the curb while I drive something else to work tomorrow, so the guy can start his inspection prior to my arrival.

Much of this last weekend was consumed with non-car activities, but I was able to complete Lucy’s alternator swap Friday night. With my new Harbor Freight soldering iron, I finished splicing the LM alternator harness into the EM harness. After protecting the soldered joints with shrink tube, electrical tape, and plastic armor, I installed the new voltage regulator. Since it is smaller than a stock EM regulator, I had to fashion a couple adapters from strips of sheetmetal leftover from past radio installations. I was finally able to turn the key and see if the GEN-FAN light would go on and then go off once the engine was running. I first plugged my charging system monitor (voltmeter) into Lucy’s lighter socket so I could see how much electricity the alternator of unknown provenance was putting out – if anything. The light came on with the key in the ON position, so I knew I’d wired up the idiot light circuit correctly. The light went off once I got Lucy’s engine to fire. The monitor was showing a nice, steady reading of greater than 14 volts. Project successfully completed.


The only other car work that was accomplished occurred Sunday afternoon and was precipitated by a Saturday morning text message from Ariel, “My car wouldn’t start so I had to take your truck,” and, “the battery is dead I think.” Thinking the terminals were corroded, I gathered up my voltmeter, wrenches, wire brushes, and Ringo’s key and headed out to the curb. The meter read over 12 volts once I probed the battery’s two terminals, so I plopped my butt into the driver’s seat and turned the key. At first, the engine barely turned, but eventually it began spinning fast enough for the engine to start. I let it idle for a while noting the charging voltage was above 14. That told me the alternator and voltage regulator were doing their job. Confident I’d put enough juice into the battery to get another start out of it, I turned off the engine and thoroughly cleaned the positive and negative terminals and connectors, reattached everything, turned the key to START, and the engine returned to a nice, steady idle. Fifteen more minutes of idling and charging and I pronounced him good-to-go (with fingers crossed on both hands). By the way, he started right up this morning.

Monday, March 18, 2013

I Thought This Day Would Never Come


The day when I actually got to choose what fleet work I wanted to do instead of what fleet work had to be done. Ringo is back on the road and, other than a rough idle during warm-up, seems to be performing properly. I’m waiting on Glinda’s replacement speedometer cable, but she’s still running reliably as my current daily-driver. Heidi sits patiently waiting for better weather, but when I did press her into service a week ago, she went willingly down the road. Mikhaila’s still not quite ready to tackle working on Two-Tone, so that left me with Lucy.

To solve the engine dying problem, I first cut away the tape over the connection between two 10 gauge wires that carry the main 12 V from the voltage regulator into the main harness. They were corroded and looked like they’d been getting hot – an indicator of increased resistance. After wire brushing everything back to shiny metal, I coated the connectors’ surfaces with dielectric grease, plugged them back together, and then enclosed the connection in a piece of shrink-tubing. That was Saturday afternoon.

Yesterday afternoon I decided to do the generator to alternator swap on Lucy. I thought I had all the pieces - the trick was finding them. I located the LM correct adapter on the shelf, its new gasket amongst a collection of gaskets, and the correct LM engine compartment wire harness. I dug out six different alternators and selected the one that spun the quietest. After raiding the Corsa engine for some bolts, all I was missing was a voltage regulator. To swap the adapter, I had to, in addition to the generator, remove the fuel pump. Once all the new stuff was bolted in place and the fuel pump and fanbelt in place, I tackled the wiring. The new harness can’t just drop into place – it has to be spliced into the existing wiring. The smaller wires solder easy enough with shrink-tube going over the joints, but soldering the main 10 gauge wires together takes more than my 45 watt iron. I’ve never been able to get reliable heat out of my big gun (rated 140 W), and last night was more of the same – couldn’t even melt solder. I cleaned it up and will try to get Home Depot to exchange it for a new one.

Friday, March 15, 2013

Good News is Good - Really Good


Ariel misunderstood my text request yesterday, and once she was clear she confirmed the gas gauge needle did in fact go to the Full mark after she topped off the tank with 87 octane. Thank goodness that issue has been resolved. Definitely good news.

Some more good news is that it looks like Lucy’s fix will be fairly straightforward. As reported yesterday, the consensus of the wise on the web was a bad connection of the main 12 Volt circuit – probably the one in the engine compartment. Many recommended I just bypass the connector and solder the two ends together permanently. Once I got Lucy home last night, I took at look at the connector. Lo-and-behold a PO had already done this bypass, but I couldn’t tell how well. I noticed right away that the joint was warm to the touch, and as I wiggled the wires, I saw the GEN-FAN light dimming and then getting brighter. I’m going to remove the electrical tape and re-do this splice, so hopefully that will take care of this. While I’m at it, I’d really like to do the alternator swap. I have everything necessary. It’s just a matter of time.

Speaking of swaps, I recently placed an order with the Corvair Ranch for a GUP speedometer cable for Glinda. While I was on the phone with Jeff, I asked him if he could hunt down a EM 3-speed shifter base for me. According to one of my favorite sources, Bryan Blackwell’s site, “Early 3 speed shifters are faster ratio than 4 speeds, so a quick upgrade is to use a 3 speed unit.” If Jeff’s able to find one, he'll include it in the order, and I’ll give the mod a try. I'm real curious as to how much it will reduce the long throws required to row through Lucy’s gears.

Thursday, March 14, 2013

I've Got a Word for You - It's ARGH


Last night I finally got Ringo running and out of the garage – but not without him making it far more difficult than it needed to be. After installing the rest of the stuff to the top of the engine, I hooked up the battery, slid behind the steering wheel, and turned the key. Two weeks of evaporation had emptied the carburetor bowls, so starting the car took a few tries of pouring some gas down a carburetor and cranking the engine. Just as I thought the battery had no more to give, the engine started and settled into a decent idle. I figured I was home free. NOT.

As I was checking the belt travel on the running engine, I was blipping the throttle. During one of the blips, the throttle stuck at a higher rpm. It took some searching, but I found the cause – a broken linkage on the right carb was allowing the hi-idle cam to intermittently hang up in the ON position. After replacing the broken part with a GUP from my stash of spare carb parts, I thought I was home-free. NOT.

As I was re-checking the belt travel on the running engine, I discovered gas leaking from the fuel pump. It took a few turns of each screw, but I was able to stanch the flow of fuel. I then thought I was home-free. NOT.

As I was backing the car out of the garage I pulled the headlight switch, but the void in front of Ringo stayed unilluminated. I jumped out of the car and verified I had taillights, so I knew it wasn’t the headlight switch. It had to be the ever-troublesome hi-beam floor switch. I pulled back the carpet and jiggled the connector and, sure enough, the lights came on. After a few pull offs and push ons the contacts were clean enough and the lights stayed on and the floor switch functioned properly. I then thought I was home-free. Only time (and Ariel’s driving) would tell. NOT.

Ariel’s report to me this morning said the car runs fine, but after filling the gas tank, the needle only indicates 3/8ths tank. So the problem wasn’t the sender (even though I thought I’d verified it was using four different gauges). Irrrrr. I’ll go back to trying different gauges. I may have to break down and connect Ringo’s circuit up to Lucy to checkpull a known good gauge out of Lucy to check. Could all my supposed GUP fuel gauges be bad?

Speaking of Lucy, it broke down last night on Ariel’s late drive home from work. According to her, after cruising fine for about thirty minutes at highway speeds, the car had the simultaneous symptoms of engine down on power, headlights dimming, and GEN-FAN light illuminating brightly. After about a second everything went normal again, but the problem came back about ten seconds later only to disappear again almost immediately. This went on a couple more times until the engine died, the headlights stayed off, and the GEN-FAN stayed on. She coasted to the shoulder, tried getting the engine to refire, before giving up and calling Victoria to bring her a ride. This morning I drove the truck to Lucy’s location expecting to have to flat-tow her home, but (of course) she started right up and I was able to drive her to a safe parking spot about a half-mile away. I’ll go get her after work.

I posted the issue online and the consensus seems to be a bad connector between the battery/generator and the fuse block. There’s one in the engine compartment that’s notorious for corroding, so that’s where I’ll start. If that’s the fix, then I got off lucky this time.

Monday, February 18, 2013

I Guess There Can Be Worse Phone Calls


It’s so sad that when my cellphone vibrates and the display says it’s Ariel calling, a deflating sense of dread immediately overcomes me. Nine times out of ten it’s not bad news, but ten percent of the time it’s, “my car’s crapped out again.” The call from her Friday morning was one of those one-out-of-tens that really ruins my day. “Daddy, my car won’t start. It’s making that noise like the last time you had to tow him home.” Irr. It appears the starter I rebuilt with an old Bendix drive now needs a new Bendix.

Since the truck is still not ready for towing duty, I got to spend my lunch hour going to Harbor Freight and finally buying the 7-into- four plug adapter so I can plug the towing lights into the Silverado’s outlet. I also bought a couple hitches, now with a 4” drop one with a monster 6” drop. Since I wanted the ball at the same level it was with the Suburban, I measured the height on the Suburban before it went away, but used my worklight as the unit of measure and I didn’t have it with me Friday, so I too the guess-work out if and just got the two Harbor Freight had available. I tried to do a side-by-side in Photoshop and it appears the HUGE wheel openings on the truck make it look much taller than it really is. In other words, I thought the 4” would be enough.
When I got home, I used my worklight and found that the hitch I’d been using on the Suburban is less than two inches taller on the truck than it was on the Suburban, so both hitches will go back. I was going to get A’s car that night, but the snow, non-working towing lights, and a great desire to get Lucy back on the road all prevented that from happening. I did get my car done, but I was in the garage until after 1 AM. I first filled all the seams with sealer, then installed the rear seat back, carpet, speakers, sill plates, rear seat bottom, seat belts (after drilling new holes in the patches for two of the belts), and, finally, the front seats. I installed the two lower engine shrouds so Lucy’s salon will have heat and a GUP speedometer cable I'd bought from the Corvair Ranch. The last thing I did was top off the transmission with 90 weight gear lube.

Saturday morning the lovely Loriann and I went to watch to see Mikhaila’s cheerleading team compete. On the way we stopped at Harbor Freight, and, after returning the hitches, I bought a connector for the towing lights and a heat gun to shrink tubing. When I finally got home Saturday, I rewired the lights and then Ariel, Victoria, and I headed out to drag Ringo home. Ariel got to Ringo first, so I asked her to see if he’d start. Sure enough, my powers are strong enough that just being within fifteen feet of the problem, I was able to magically fix the problem. A turn of the key and he started right up. She drove him home without issue. Then, yesterday afternoon, it started right up for me to drive into the garage.

I’m going to replace the Bendix drive (ordered today). While I wait for that part, there are a number of niggling problems with that car I want to address. First, I wanted to clean up the wiring job I did when converting Ringo to electricity maker to an alternator. A few cuts, some soldering and shrinking tube, four zipties, and that project was completed. Second, I wanted to fix the non-functioning gas gauge. To troubleshoot if the sender is the problem, I made a bunch of resistance measurements at the sender’s contacts while emptying the tank. While the first measurement (with the tank about half full) was 14 ohms (about halfway on the 0-30 ohm designed range), all the subsequent measurements made as the tank was being drained were 11 ohms. I’m hoping (praying) that I just stuck the float on wrong and it’s hitting the side of the tank preventing it from dropping all the way down. I’ll remove the sender the next time I get out to the garage and see what resistance measurement I get across the range of arm travel. A new sender is $55 plus shipping, so I’m not buying a replacement unless I truly need it. Finally, I want the engine to stop eating fanbelts. Before turning car back over to Ariel, I’m going to replace the pulley wheels with the smoothest looking ones I can find on my shelves. I think the pitting on one or more of the wheels is wearing out the belts much too quickly.

This morning I'd intended to drive Lucy to work, but I knew a stop at the gas station was an immediate priority. I didn't even get to pull away from the curb, since I couldn't get the engine to fire. I think (hope) her only issues is an empty gas tank.

Monday, August 13, 2012

Didn’t Quite Get There

Victoria and I started work on her convertible Friday after dinner by carefully removing the current convertible top from Luna. We took pictures throughout the process and put the fasteners in marked bags to ensure we can get everything back where it belongs. We then removed the old, rotten pieces of tack strips (treated cardboard where the top-attaching staples go). With the top off and the frame clear of the junky stuff, Victoria wire brushed the rusty portions of the frame and coated those spots with Rustoleum primer before we quit for the evening..

Saturday morning I went out early, opened up the garage, and laid out drop cloths to prevent to mask off Luna’s interior and exterior from the frame. Victoria came out and rattle-canned 2-3 coats of satin black over the entire frame. In the afternoon, after the paint dried, she and I glued on new tack strip pieces. She then headed off to babysit that evening.

Yesterday, we were supposed to install the top, but instead she helped Ariel move back into her bedroom. This included taking down her waterbed and setting up her normal bed that she’d just brought back from the college apartment she’d recently moved out of. Then the two of them went off babysitting for the rest of the day while all I did was lubricate all the frame joints with liquid graphite. The top does go up and down much easier now.

I also pulled the charger off the battery and took a voltage reading – only 12.3 volts – not good. It should have read over 12.6. The engine started right up, however, and I backed it out of the garage so I could paint some storm windows from off the house. I let the engine idle for about ten minutes and measured the voltage across the terminals (charging voltage) and the meter read almost 14 volts. I also noticed the throttle was still a little stiff. I sprayed carb cleaner all around the linkages and shafts of each carburetor and that loosened things up significantly. I also disconnected the linkage to make sure the stiffness wasn’t somewhere between the pedal and the engine compartment – it wasn’t – so I reconnected it. After setting for most of the afternoon (the car, not me), I started the engine up and drove her back into the garage. A voltage measurement soon after shutdown indicated 12.6 volts, but this morning it was back down to 12.3. In hindsight, the amount of drain the CD player had put on the battery should not have been enough to cause it to go dead. Looks like the battery’s coming out and going to Sam’s for testing and, probably, replacement.

Friday, August 10, 2012

Luna’s Draining Issue


As previously reported here, Luna was finally made roadworthy and legal right before we left for our convention vacation. Ever since our return the weather has threatened thunderstorms, so Victoria hasn't had a chance to get her out on the road. Yesterday afternoon she had some errands to run, and it wasn't raining, so she decided to take Luna. She removed the tarp, put the top down, rolled down the windows, climbed behind the wheel, and turned the key. Guess what? Nothing happened. Dead battery.

I got home soon after, just after the sprinkles started, and Victoria and I pushed her car into the garage. I had her hook up the charger while I got out the equipment necessary to figure out what’s draining the battery, if anything. I disconnected the negative battery cable and wired a taillight bulb between the negative terminal and the negative cable end. Across this connection, as the above diagram shows, I hooked up my multimeter. If the drain is strong enough (like a short), the lightbulb will illuminate and the meter will read something around battery voltage. With lesser drains, the bulb might glow, and with tiny drains, the bulb won’t light up, but the meter will read a voltage above zero. With everything turned off, but one of the doors left open so the courtesy lights were on, the bulb started to dimly glow and the meter read about 0.8 Volts. As soon as I closed and the courtesy lights went off, the bulb went dark, but the meter still read something around 0.2 Volts. Okay, there’s something demanding electricity. I climbed back in the car, reached under the dash, and pulled the Dome/Tail/Stop light fuse thus killing that circuit. The meter display now showed 0.0. Okay, something in the circuit was the cause. I reinserted the fuse and heard some noises coming from under the front passenger seats. I peered under the seat and discovered a CD changer. I found the power wire to the changer, removed the in-line fuse, and, with the door closed, took another look at the meter – 0.0 V. Drain found, drain stopped.

Since I’m on the subject of tunes, I’ll share the interesting (to me) radio Luna currently has residing in her dash. It’s an AMC (yes, American Motors) AM/FM/CB unit that Victoria thinks is really cool, but sadly, isn’t working at the moment. There are speakers in the door that we initially assumed were connected to the radio, but now I’m thinking they’re actually connected to the aforementioned CD player.

Regarding the CD player, I did a little more looking around and found the controller for the player in the glovebox, but noticed the caddy was not in the changer. Not that it really matters since Victoria is way past using CDs. What she needs is an working jack for her iPod. Maybe I’ll be able to somehow add a 3mm jack and use the player as an amp to boost the volume into the door speakers. If not, then maybe I can get the radio to work and tap into the CB mic as the input. For the time being, though, she’ll need to be satisfied with the experience of top-down motoring and the increased assault on the senses that go along with it.

This weekend we’ll be taking on the task of installing the new convertible top. The “we’ll” will hopefully include the lovely Loriann, whose assistance in installing Heidi’s top a few years back was invaluable. Victoria also helped with that install, but all she remembers was getting hit in the head with something. I promised her I’d be more careful this time. Please say a prayer that we’re all still on speaking terms by weekend’s end.