

Last night the focus was electrical and exhaust. As I mentioned in a recent post, I want to keep Ringo’s original charging wiring intact in case I need to revert. That includes all the little spade terminals. The LM alternator-based wiring is rather straightforward. With the voltage regulator 4-wire connector as a hub, there’s a striped wire going to the dashlight, a pair of wires going to the Field/Armature connector at the alternator and a red wire connecting to the main 12 V leads at the junction (also know as the horrid little plastic thingy).
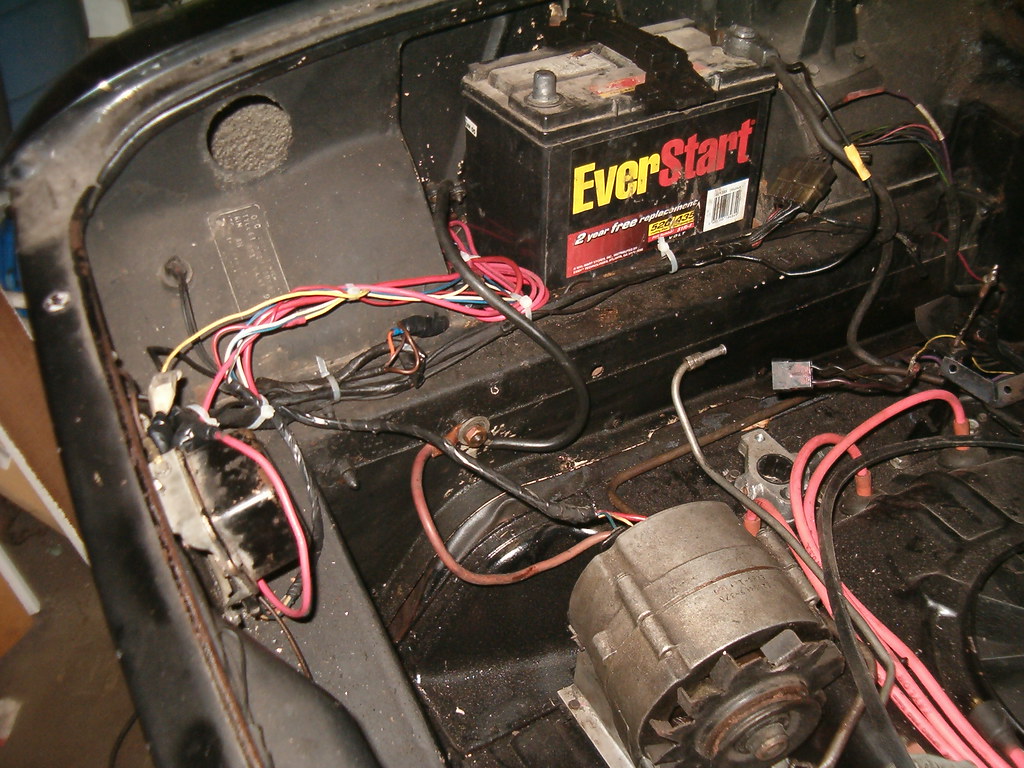
A little on that horrid little plastic thingy. It’s been a source of frustration for many LM owners. This small, red terminal resides in the engine compartment near the battery and its sole function is to provide a means to connect the positive wire that comes from the alternator to the smaller wire from the battery. Over time the plastic can break down and eventually fail causing either a massive short to the car body or an open circuit with a resulting dead battery and/or loss of current to the car’s electrical components. Either way, a bad thing. Now in their defense, the designers did need an easy and robust method of connecting high-current wires to each other, and this part probably worked flawlessly for the typical ten-year life of the car (yes, we’re talking the 60s here).
Back to last night’s activities. The existing EM wire harness has functionality of the junction built in at the B terminal of the voltage regulator. Since this terminal does not exist in the LM regulator, I used a screw, washer, and nut to connect a new red wire to the existing battery wire and the main wire that provides 12 volts to the entire car. The other end of this new red wire mated to the output wire from the alternator at the LM junction. I used the same screw-washer-nut scheme to connect the sensing wire from the LM harness to the existing sensing wire that goes to the dash idiot light. Finally, I carefully wrapped all the exposed conducting metal with a few layers of electrical tape and constrained all the wires with zip-ties. If all goes well, I will clean this assembly up by removing the ugly interfaces and soldering the wires together with shrink tubing for insulation. Will I keep the horrid little plastic thingy? I haven’t decided.
With the electrical in place including connecting the positive lead to the coil, I turned my attention to the exhaust. Of course, this too, could not be straightforward. EMs use a cylindrical muffler, while LMs used one with an oval cross-section. The exhaust pipe that Ringo had prior to teardown had a failed flange, but a usable round muffler. I have a GUP exhaust pipe with a LM muffler on the shelf (actually on the floor). However, the new mounting strap I got from the Corvair Ranch is for the round style so it’s too short to use with oval style. That meant I got to remove mufflers from exhaust pipes – NOT fun. Having fought this fight a few times in the past, I know the futility of trying to do this neatly. The only success I’ve had is grinding two longitudinal slices through the outer (muffler) pipe only up to the point where the clamp had been and then peeling back the outer muffler pipe until the inner exhaust pipe is free. I did this on the oval setup so I didn’t damage the exhaust pipe. Since the exhaust pipe on the round assembly was going to the recycler anyway, I just cut off the exhaust pipe outboard of the union, and wedged the inner pipe loose with a small chisel (read screwdriver) and a hammer. With the muffler loose, I wasn’t home free since the clamp had put a not-so-nice impression in the muffler pipe that precluded easily inserting the replacement exhaust pipe. Using my big channel-lock pliers and a small round bar, I pressed out enough of the impression that some banging satisfactorily brought pipe and muffler together.
Bolting the pipe/muffler assembly into place is not too big a deal, and I got the flanges secured without issue. Since it was nearing 11, adjusting and tightening the hanger will wait until tonight.
No comments:
Post a Comment